This article contains affiliate links
Generally speaking the best location for a patio is at the very rear of the home. Such a patio can become even more ideal if you have large, sliding, patio doors.
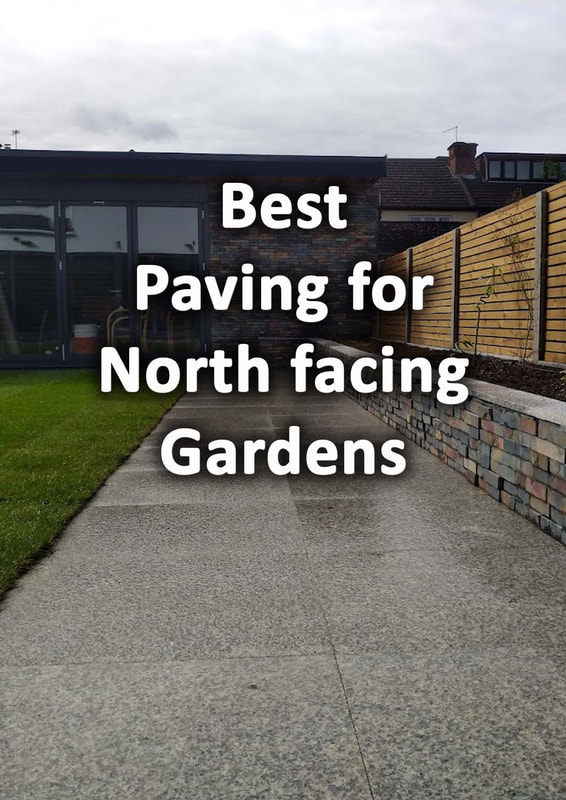
Such an arrangement allows a patio to become an extension of the home, maximising space! Having a patio which captures most of the mid day sun is always ideal, especially in cooler regions. Such, south facing patios benefit from a warm microclimate created when sunlight is captured against a building. This is why south facing sites are generally always the optimum orientation for back gardens. However, not every site is blessed with such perfect positioning on the earth’s axis. Consequently in this article I give some tips on making the best of a north facing site. I will also explain what is the best paving for a north facing garden. Take advantage of the rear boundary
The ultimate way to mitigate not having a south facing garden is to plan in reverse. Instead of creating the patio by your home place it along the rear boundary. This can be a fantastic way to take advantage of microclimate created by the sun. A large summer house or outdoor room can further enhance a patio area for a north facing garden. Improve your gardens drainage
The biggest threat to patios in north facing gardens is a lack of direct sunlight. This generally leads to soil with higher moisture content throughout the year. Such conditions can favour the establishment of algae which can turn paving green. Consequently, if you have a north facing garden with damp soil you may want to improve soil drainage. This can be achieved in a number of ways including ameliorating your soil and installing drainage channels. For more information read our article on how to drain your garden here. 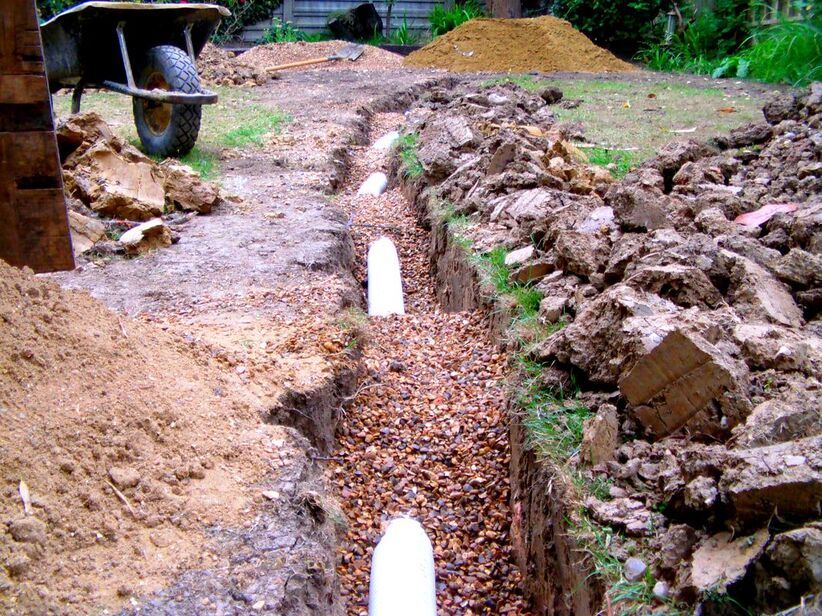
Paving for north facing gardensEnhance your north facing patio with colour
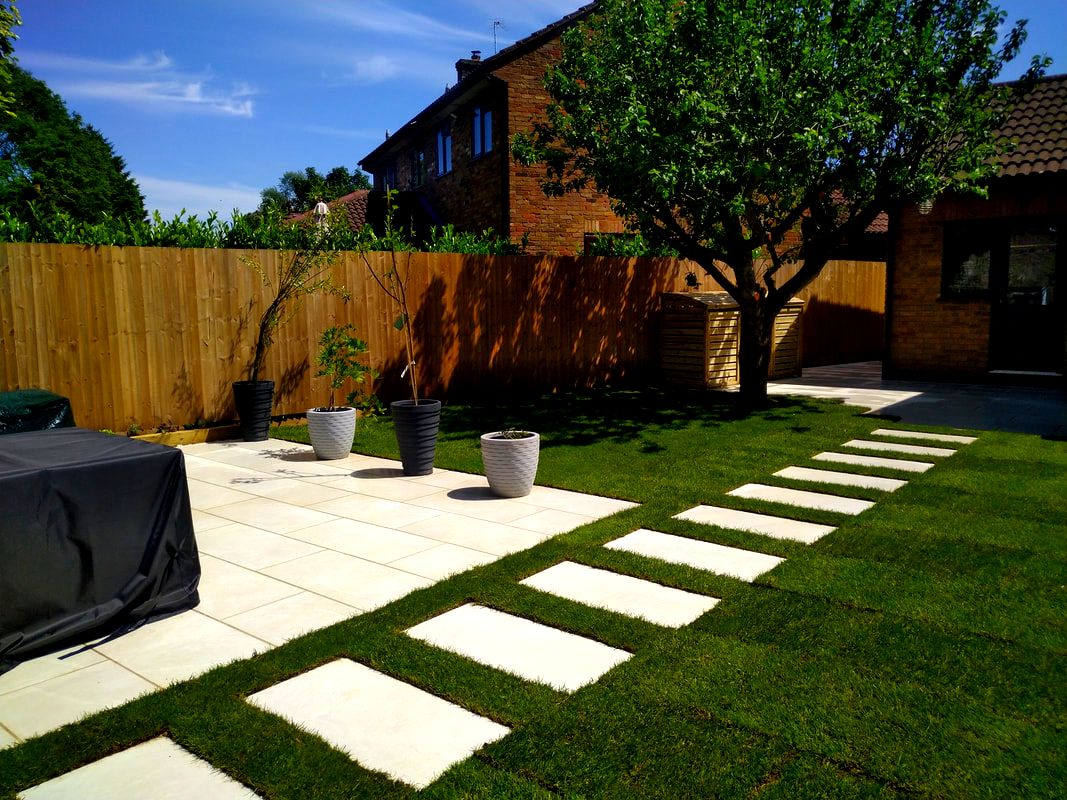
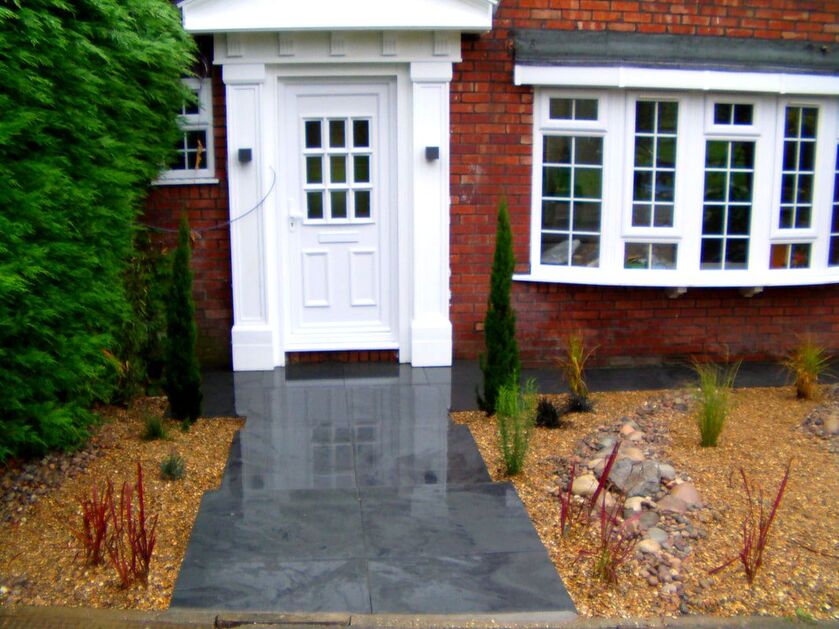
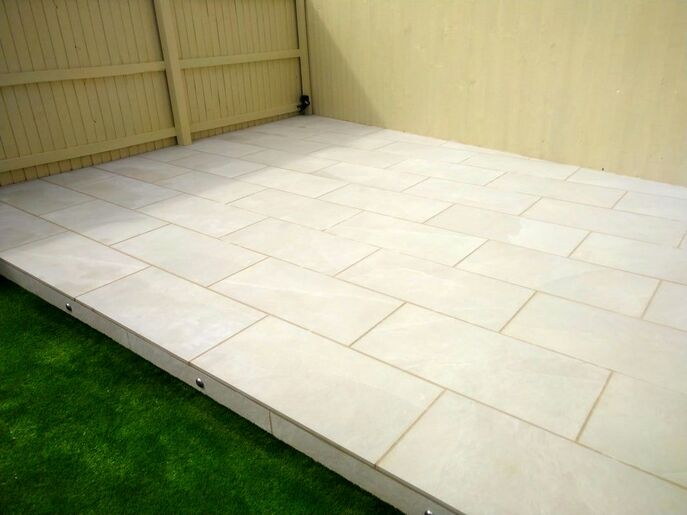
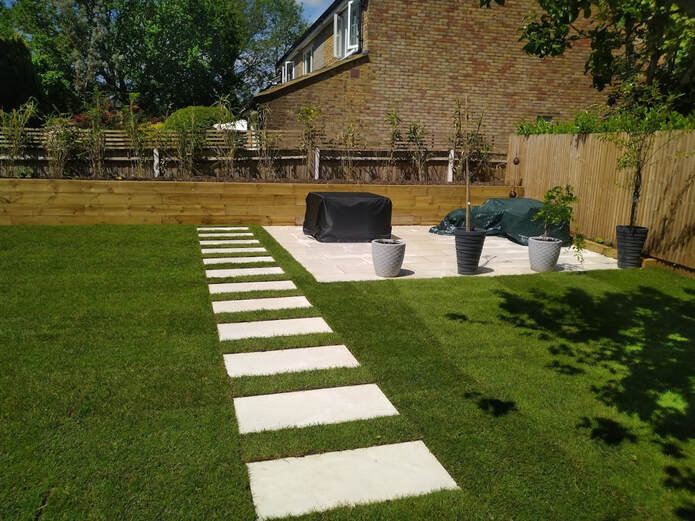
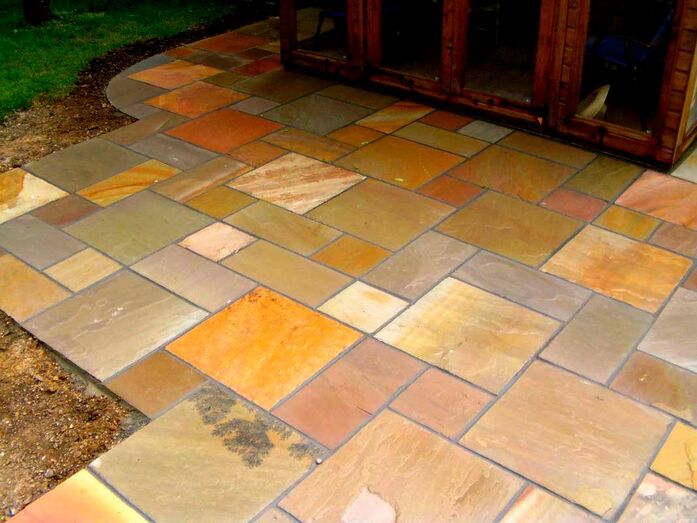
North facing gardens are generally much shadier than south facing sites. Therefore, when selecting paving it is always best to go with lighter colours. Not only will this make the patio look brighter it will help to reflect sunlight. This can make a north facing patio much more visually appealing and warmer. Choose paving with warm feeling colours such as shades of yellow, orange and pink. An ideal candidate for this would be Indian sandstone. 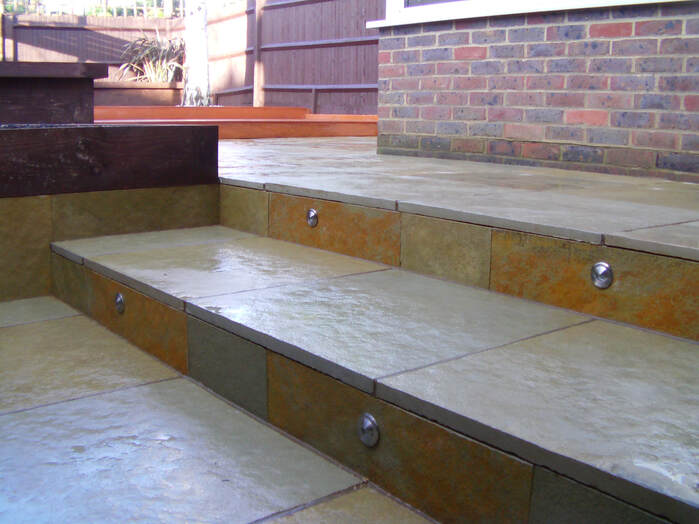
One of our landscaping projects with Indian sandstone steps: Northwood, Harrow
Dense impervious paving is best for north facing gardens
One of the main problems with north facing gardens is patios do not dry out as well. The lack of direct sunlight means patios are more likely to retain moisture. This can leave them vulnerable to the establishment of microscopic plants such as algae. Such circumstances can lead to dark and green discolouration which looks unsightly and can become slippery. Therefore, it is always best to use dense, natural stone, paving with low permeability for north facing gardens. You ideally want to use light coloured paving materials with very low absorbency levels. Therefore I find granite, slate and porcelain the best paving materials for north facing gardens. 
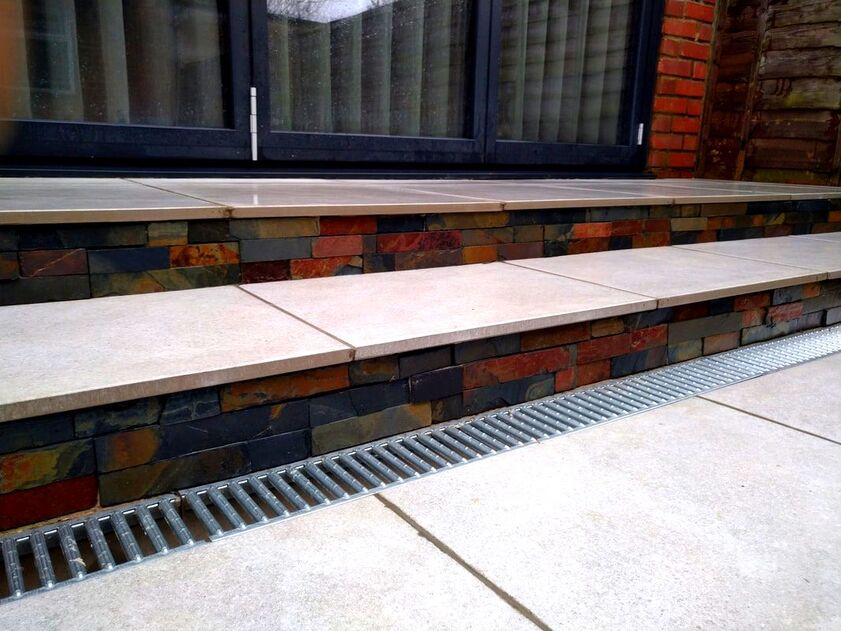
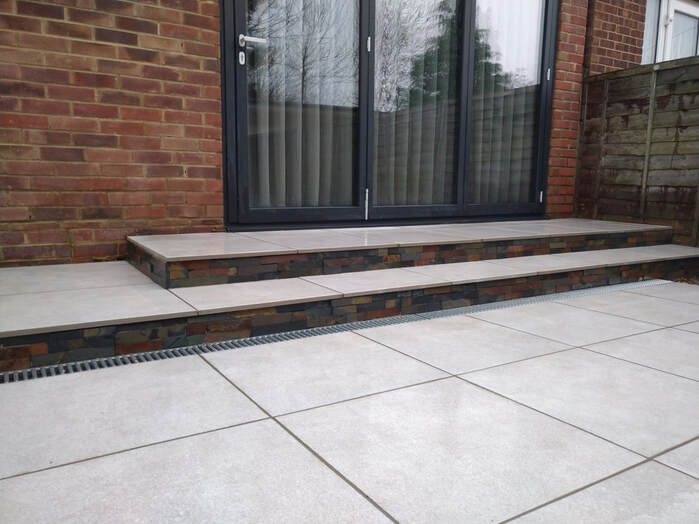
One of our porcelain paving projects in Aylesbury
Indian sandstone can be used for its warm colours and tones but it must be sealed! It is also important that you have an effective patio drainage strategy in place!
This is to prevent the paving becoming too wet during times of heavy rain. Be aware that manufactured paving with concrete aggregates is probably not suitable for north facing gardens. Eventually acid within the rain can penetrate and erode the paving’s surface. This leads to greater amounts of water absorption over time exacerbating microscopic plant life and algae establishment. Conclusion
Therefore, I conclude the best paving for north facing gardens; is light coloured, non-absorbent, natural stone. The best contenders are granite, slate and porcelain paving. Indian sandstone with warm colours is also suitable as long as the paving is well sealed to prevent moisture penetration. All north facing gardens should have an effective drainage strategy to keep paving as dry as possible.
'As an Amazon Associate I earn from qualifying purchases'
0 Comments
This article contains affiliate links
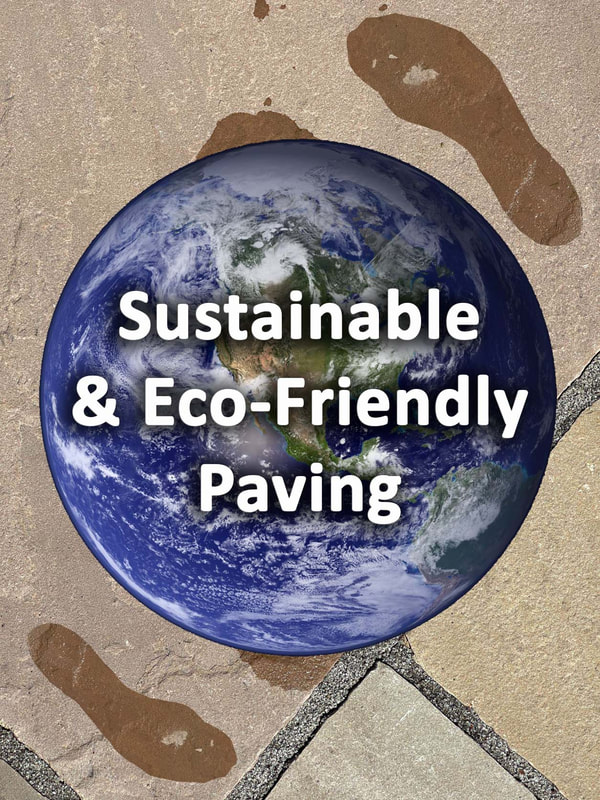
There is an enhanced desire today to be as sustainable and eco friendly as possible.
It has become increasingly obvious that our everyday living and consumption directly effects the environment. Even essential needs like heating and eating facilitate the destruction of habitats and increase pollution. Consequently, any changes to our living environments must be scrutinised on an ecological basis. This is even more so the case when paving over outside spaces. Very often, new paving will accelerate storm water runoff, exacerbate the 'heat island effect' and reduce biodiversity. All of which are extremely detrimental to both the local and wider environment. Therefore, in this article, I will explore which paving is the most eco friendly and sustainable. Understanding sustainability in paving
A typical problem I see in regard to sustainability is understanding what it actually means. The general population have been conditioned to believe sustainability is about the climate. This is fundamentally false; elements concerning sustainability can affect the climate but it is not sustainability itself. Sustainability is about an individual’s impact upon the wider environment and ecosystem. 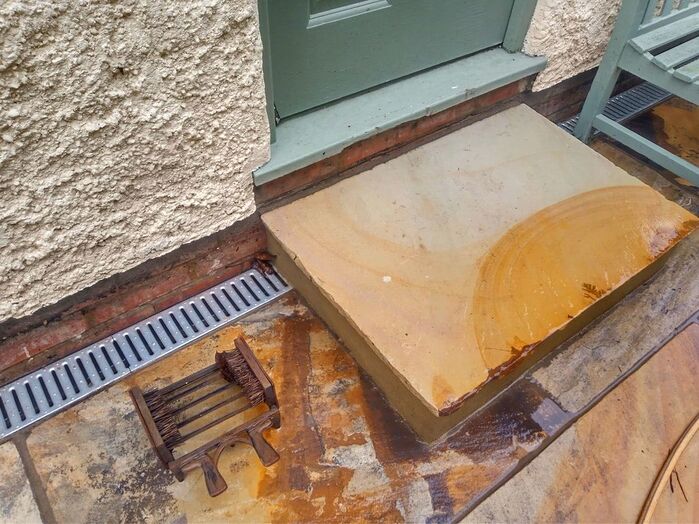
This can be understood more simplistically by a person’s ecological footprint. Fundamentally, the more energy, food and products you consume the more land you take up.
The more land you take up the less land there is for ecosystems and natural processes. In reality, there is no paving choice which will mitigate your own, personal, ecological impact in any given year. 
I think it is very important for everyone to understand this fundamental concept.
There are paving choices which are less polluting and have less impact on the planet, we will discuss these later. However, the most sustainable aspect of any paving will not necessarily be the paving itself. More often it will be the installation of that paving and the ecological attributes of the surrounding landscaping. What is the most sustainable paving?
The most sustainable paving will be sourced locally, enhance natural process, and be installed robustly to last the test of time. Paving products which colours and appearance do not fade over time will be more sustainable and eco-friendly. This rules out manufactured, concrete aggregate paving and block paving which aesthetics do eventually degrade. The latter paving types are also the most energy intensive and polluting to produce. 
Sustainable paving will be extremely durable encouraging reclamation and re-use if re-surfacing ever takes place.
This puts natural stone paving from a durable geology the most sustainable form of paving. Consequently I would put forward hardwearing natural stone such as; Slate, Granite, and dense Sandstones. As well as being aesthetically pleasing and durable, natural stones colours do not fade over time. Is paving environmentally friendly?
The problem with this question is it completely ignores a landscapes wider context. Generally, I would say no, paving is not sustainable! However, the bed we sleep in, the journey to work and last night’s dinner is also most likely not sustainable. What if ‘Impermeable paving’ was laid with falls so surface water could be channelled into an ecological drainage system? Storm water would travel through bios-wales irrigating your gardens borders and vegetable gardens. 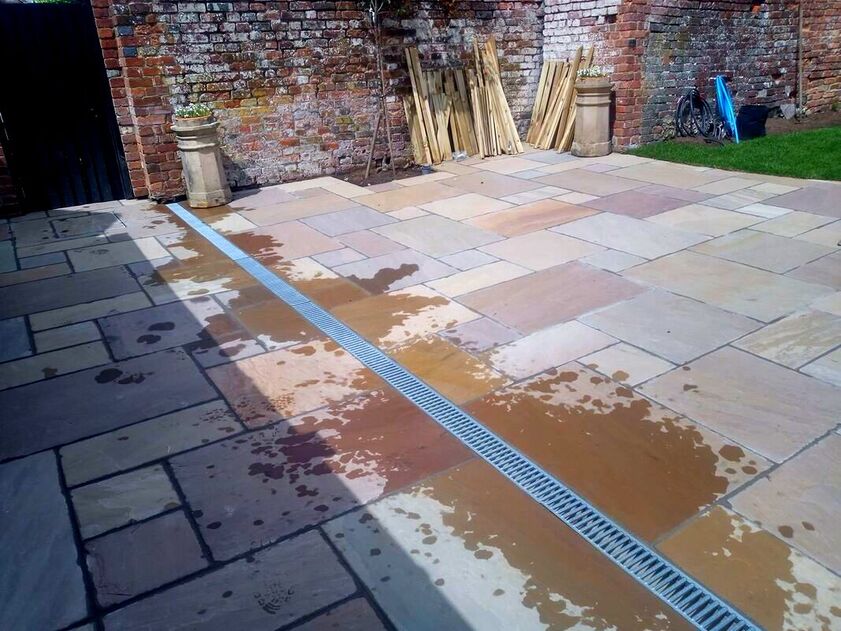
Any excess storm water could flow into a series of small wetland habitats and wildlife ponds.
These wetlands could then become heaving with vibrant ecology and biodiversity. Species such as frogs, newts and hedgehogs would now forage your vegetable plot at night for pests such as slugs! This would prevent you from needing to spray your plants with chemicals to keep away pests! Before you know it, your whole garden is the most sustainable and eco-friendly it has ever been! 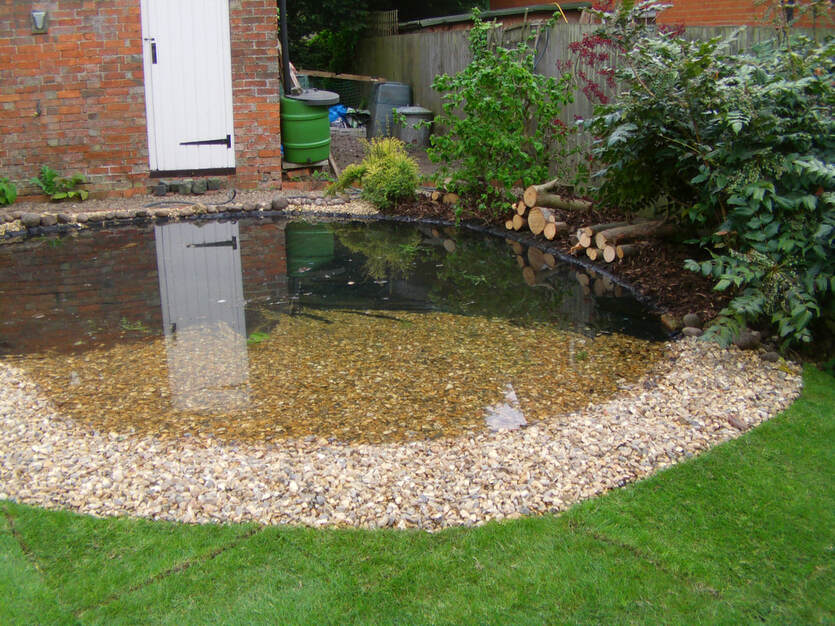
This was all because, you laid ‘impermeable paving’, which is apparently the most unsustainable and un-ecological paving option!
The point I am trying to make is, it is not the paving itself which dictates if it is eco-friendly or sustainable. It is the design, planning and installation of that paving which really matters. Using contextual materials
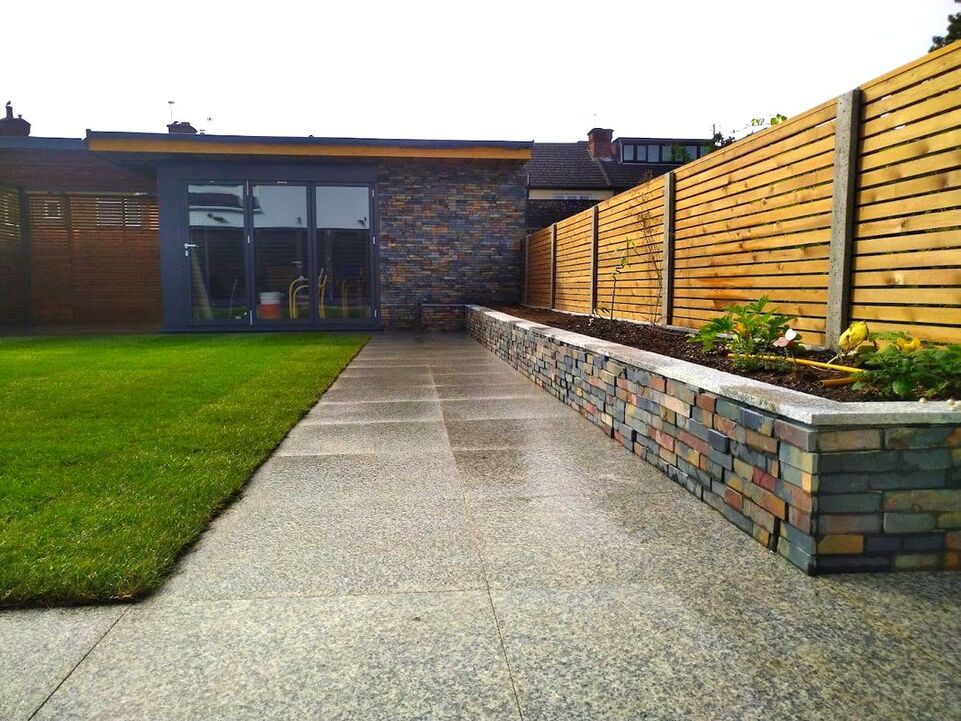
Before the age of cheap energy, mechanised technology and global supply chains building materials were typically contextual. Contextual materials are those which are naturally found and utilised locally. This can be appreciated in regions such as Wales where slate was extensively used for roofing and paving. 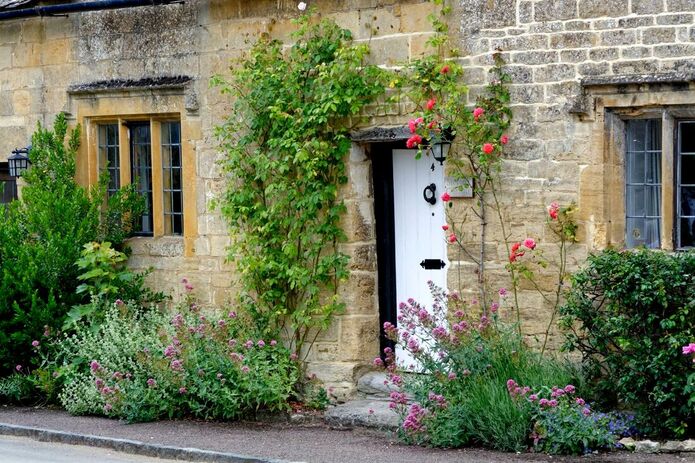
If you ever visit the Cotswolds you will notice all buildings are built with the local Cotswold stone.
This historical convenience of using contextual materials has also a real relevance for sustainability. Many landscape design projects use contextual materials to enhance a sustainable message. In such cases the eco-friendly message is often more relevant than any reduction in carbon footprint. Reclaiming and re-use
If paving is durable and retains its aesthetics there is no reason not to reclaim it and use it again. This is probably the best example of sustainable paving. Such an example can be seen with granite setts, no matter how many times they are laid they can be re-used. This is why I always say the most sustainable paving is very hardwearing natural stone. Even with natural paving which has broken into may pieces, this can always be laid as crazy paving. Broken up natural stone also makes very effective dry stone walls. Most of the time, manmade, concrete, paving will look tired and worn after around 15 years. This type of paving is never re-used and always ends up in landfill. 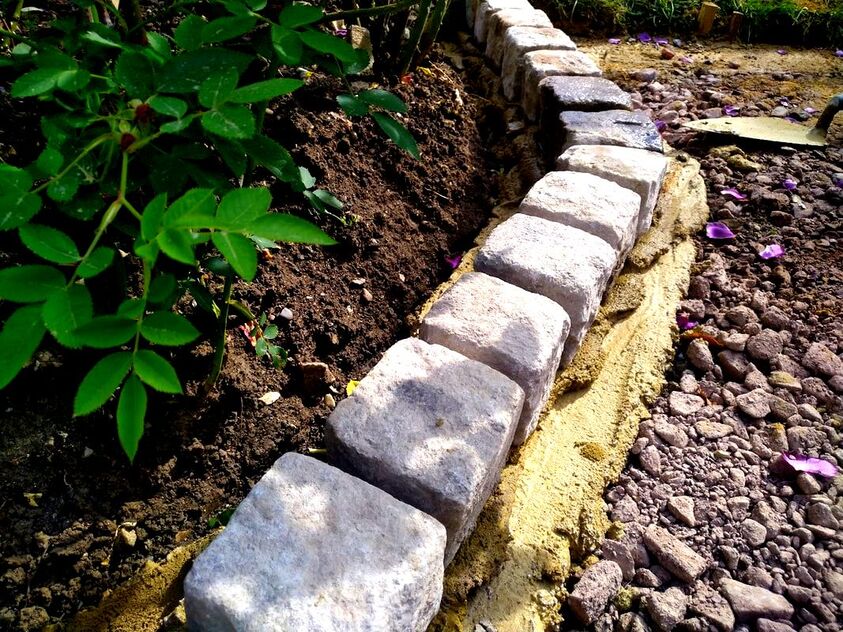
Natural stone paving
As I have reiterated, robust, natural stone is the most sustainable choice in the long run. However, there is no illusion to the fact that these natural stone quarries do harm the environment. Most affordable, natural stone products come from countries where labour is cheaper Good examples of these are Brazil and India where worker protection laws are slim to none. The fact that others work for poor pay in bad conditions is actually very unpalatable. Therefore, there is always an ethical consideration to also make when choosing paving. However, slithers of rock being cut and shipped across the globe to clad western suburbia isn’t very eco-friendly. 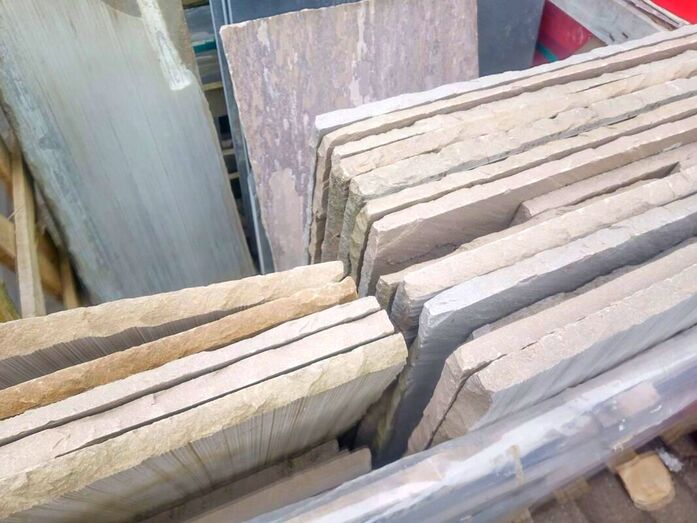
Concrete aggregate paving
Anyone who has had a concrete paving product long enough will know they always fade. I have never seen a patio that looks good using manufactured paving after around 15 years. The only products that come close are those which are meant to have grey tones. This is because concrete naturally has a grey colour. As colour dyes fade such paving always ends up a pasty grey colour . As time goes by acids within the rain penetrate the surface making it more porous. 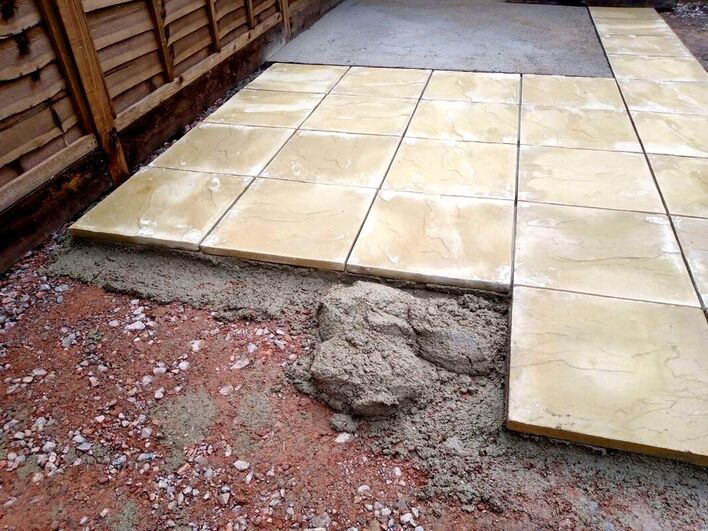
This leads to algae establishment and dark, ingrained, surface stains. The only manufactured paving which does a good job of lasting is granite aggregate pavers.
In terms of sustainability I have to emphasise the longevity of a paving’s aesthetics. This will determine whether it is enjoyed for a lifetime or continuously replaced. Not only does concrete paving fade over time the manufacturing process is also very energy intensive and polluting. Is permeable paving eco friendly?
It’s a fascination to me that sustainable and eco-friendly paving is assumed to be always permeable. In fact, many seem to think that permeable paving and sustainable paving are the same thing! This is simply incorrect and highlights an attitude which has led to stagnant progress on sustainable landscape development. Policy makers often specify ‘sustainable criteria’ for developments without actually understanding why. It seems all they have to do is specify ‘permeable paving’ and its job done. Wrong! This attitude simply highlights the missed opportunities many developments miss out on. 
Permeable paving is effective at slowing storm water runoff, reducing pollution and preventing flash flooding. However this does not actually mean it is sustainable or eco-friendly.
In fact, most products marketed as permeable paving are not actually permeable at all. Surfaces such as resin bound aggregate and permeable block pavers are still often laid upon impermeable sub-bases. Such a sub-base means the surface simply fills with water and then discharges the rest as run-off. This makes them much less effective in times of very heavy rain. I have always said it is much more sustainable to use impermeable paving and utilise the captured runoff ecologically. 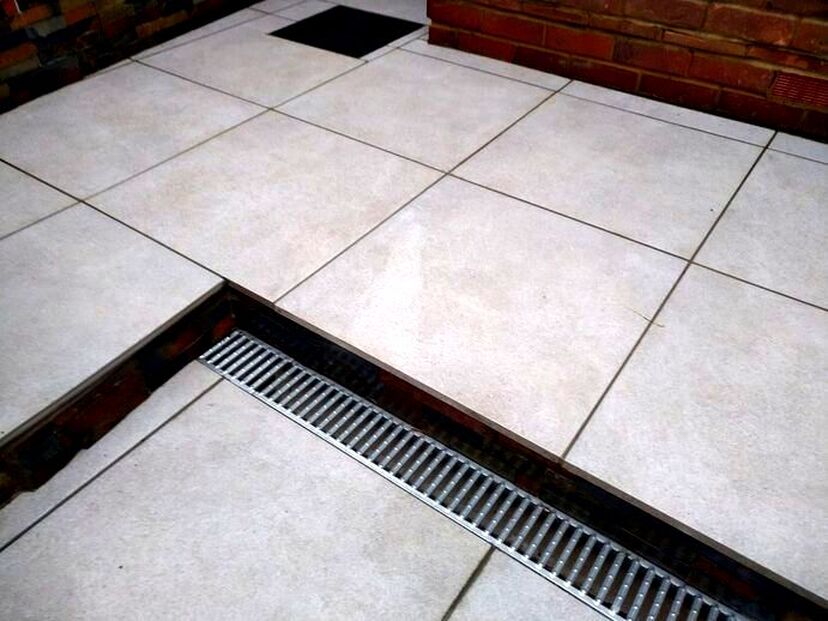
This can be achieved with drainage grills, acco chambers and drainage gulleys. Storm water can then be stored in large storage tanks and pumped up for irrigation during the summer.
In times of excessive rainfall overflow valves can direct water into seasonally flooded wetlands and wildlife ponds. Not only would this be more sustainable it would actually increase local biodiversity. Therefore, I recognise permeable paving has some sustainable benefit. However, I feel this is generally overrated and normally distracts from more exciting and sustainable, landscape opportunities. Sustainable paving is installed robustlyOne of the biggest features of a paving’s sustainability is its construction. If paving is laid upon a robust base on a solid mortar bed it should last 100 years. Paving which is laid to last will always score very high on the sustainability scale. This is even so for paving materials which may not be thought of as sustainable. A perfect example of this is my high school friend’s parent’s driveway. This crazy paving driveway was laid by his grandfather in 1963. He excavated the driveway down 300mm, laid a compacted sub-base and a 100mm layer of concrete. 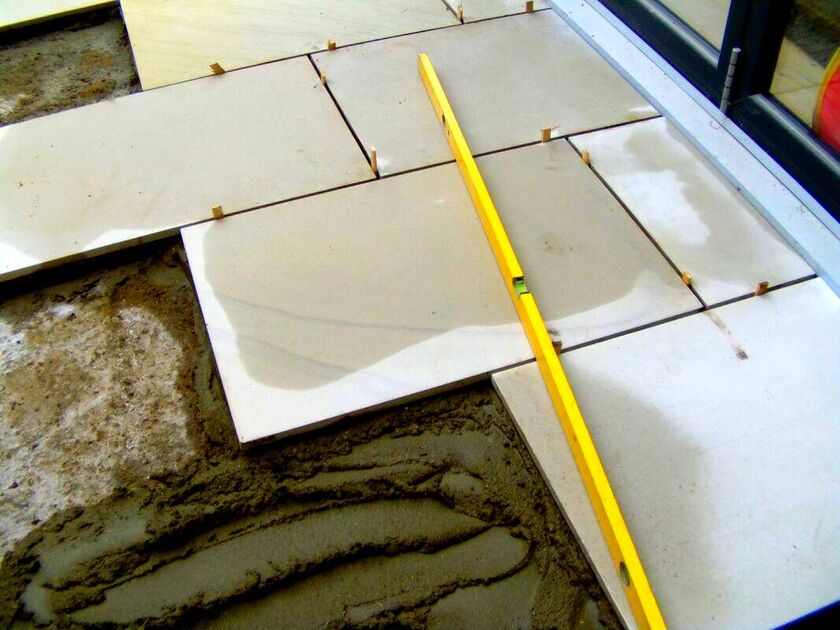
The crazy paving was then laid on a strong and consistent 40mm layer of mortar and jointed.
At the time of writing this driveway is still there and does not have a single crack in it. There is no doubt in my mind it would last another 60 years. Even though the driveway was built with less sustainable materials, it is sustainable because of its sound construction. The fact the average driveway today lasts around 30 years brings into question their sustainability. Having the most sustainable and locally sourced paving means nothing if it is not installed to last. Sustainable & Eco friendly alternatives to paving
If you are not convinced by paving’s potential to be sustainable and eco friendly you may want an alternative. Below I have listed three of the main sustainable alternatives to laying paving. Gravel
|


|
|
|

|
|

|
'As an Amazon Associate I earn from qualifying purchases'

this article contains affiliate links
Installing a new patio to your home should be period of excitement and expectation.
However, choosing the right contractor is really the key to obtaining the paving of your dreams. It can be troublesome to find a tradesperson whose priorities span way beyond just getting paid.
The best trade’s people are driven by the daily satisfaction of best practice and pristine finishes. Unfortunately, not all builders are driven by these inspirational fundamentals.
The truth is, if you want the best patio builder you can not go for the cheapest option. This is solely due to the economical laws of supply and demand.
Meticulous builders who are a joy to work with are always busy. However, careless, messy and difficult contractors are rarely busy, hence they cost less.
The difficulty is, knowing how to choose the best builder for a new patio? Who is worth paying to do the job probably and who is best left alone?
In this article I have identified 15 ways to choose a good builder or landscaper for a new patio.
1. A good reputation
In reality the best way to choose a great patio builder is by reputation. If you know people who have had a good experience with a contractor they are usually a good choice.
A good reputation can take many years to develop and will always guarantee a good flow of projects.
Therefore, recommendation from someone you know and trust normally yields a good result.
2. An established online presence
It has to be said that an online presence does not necessarily mean a contractor is good. However, an established online presence is a very good sign.
Many rogue contractors will change their name every couple of years. This is so they have no responsibility over their previous work.
If a contractor has an established online presence, it’s very likely they are trustworthy and experienced.

3. Good reviews
Good reviews are always an indication of an effective and transparent contractor.
If a patio builder has a prominent Google reviews page it is easy to browse through previous client’s comments.
When contractors hugely overshoot expectations that often warrants a good review. This also works in reverse and bad experiences will often ensure a bad review.
Positive, descriptive, reviews are typically a sign of genuine and positive experiences.
4. Has an established and registered company
Making sure a builder has an established or registered company is a good sign of best practice. The more legitimate and compliant a trader is the better.
Such compliance will often be matched by how they build their projects. Check that they have a registered company or associated trading registration number.
5. Seems interested in the project
Contractors that are good at what they do have an inbuilt enthusiasm for a new project. This will be obvious during any initial consultation.
Try to notice what the contractor focuses on while looking at the project. A good contractor will often have constructive questions and an investigative curiosity about the project.
This shows they are eager to undertake the work and fulfil your expectations.

6. Maintains good eye contact
Maintaining good eye contact is a naturally open and honest behaviour on a human level. If you are to work with someone during a project you need open communication. If a contractor does not want connect and make eye contact it is best not to hire them.
Maintaining good eye contact is a naturally open and honest behaviour on a human level. If you are to work with someone during a project you need open communication. If a contractor does not want connect and make eye contact it is best not to hire them.
7. Happy to answer questions
A good patio builder understands that new clients are not experts within their field. Therefore they should be accommodative and helpful when asked questions. If they are patronising or impatient with you at this stage it is best not to do business with them.
A good patio builder understands that new clients are not experts within their field. Therefore they should be accommodative and helpful when asked questions. If they are patronising or impatient with you at this stage it is best not to do business with them.

8. Displays good knowledge
A good patio builder will have encountered many different sites and scenarios countless of times.
This will normally provoke a series of questions and explanations from the tradesman. During a consultation it will become obvious if they have a thorough knowledge on the subject.
A good contractor will normally mention considerations you haven’t even thought of.
9. Make constructive suggestions
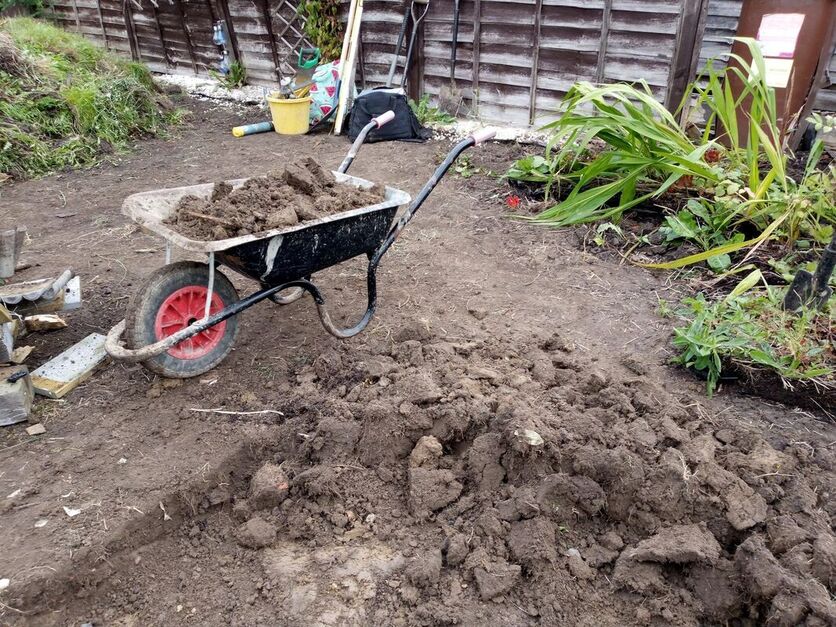
Experienced patio professionals will instantly understand the dynamics of a new project. This is even the case if your existing site is a boggy mess.
Very often competent contractors will start to make constructive suggestions from the start. This shows that they are enthusiastic and interested about the project.

10. Has a relevant qualification
Most of the time, a good patio builder will have a relevant qualification. This is not always an essential characteristic of a good contractor but does display commitment to the topic.
Most trades do have associated accreditations and qualifications. Therefore it is worth checking if they have relevant qualifications.
11. Are they presentable?
It takes a certain type of personality to create beautiful, well built spaces with an eye for detail.
This characteristic often goes far beyond someone’s work and filters into every corner of their lives.
If a contractor is poorly presented and scruffy it is very possible their work is the same. If you are fussy about details don’t choose a scruffy contractor to build your patio.
12. Do they have a portfolio?
Patio builders that are proud of their work will often take pictures to show people.
Therefore it is normal for good paving contractors to have a portfolio. Ask them if they have pictures of their work either in a collection or an online portfolio.
If they can talk you through past projects it shows a level of interest and care. This process may also provide you ideas for your project.
Why not browse some images of my paving projects below.
|

|
|

|
|

|
13. Do they write a blog?
Not all contractors will keep an online blog, however, it has been noted that the best normally do.
Blogs allow contractors to journal their work and allow for professional self reflection. Every project comes with elements which could have gone better and self criticisms.
A well kept blog is an indication of a contractor who is reflective and always striving for perfection.
14. Are there videos of their work?
The amount of technology at our fingertips today has revolutionised how we live our lives. Video is becoming an ever powerful way for trade’s people to promote their work.
This is a powerful way to market their skills and quality of work. If someone has taken time to promote themselves with video, it shows they are proud of their work.
It also shows they are willing to put their identity to what they do! Why not watch a quick video I created showing off my work to clients below.
A video of some of my projects
15. Do they provide descriptive quotations?
The best patio builders will provide a detailed works description with their quotation. This will help the client to understand exactly what they are paying for and eliminate any grey areas.
Such can act as a binding contract to what has been agreed between both parties. A descriptive quotation will also lock a contractor into adhering to correct building specifications.
Detailed work descriptions take time and effort but are best practice. Such a document shows they fully respect the financial commitment you are potentially making in them.
A well typed out, descriptive, quotation on headed paper is a sign of a competent contractor.
Our patio building services in Buckinghamshire
Buckinghamshire landscape gardeners are expert patio builders and hard landscapers.

One of our paving projects using Fossil mint paving: High Wycombe, Buckinghamshire
Thank you for reading our article on how to choose a builder for a new patio. If you are interested in our patio building services why not email us here. Below we will include some other paving articles you may find useful.

|

|

|
|
|
|
|
'As an Amazon associate I earn from qualifying purchases'
This article contains affiliate links
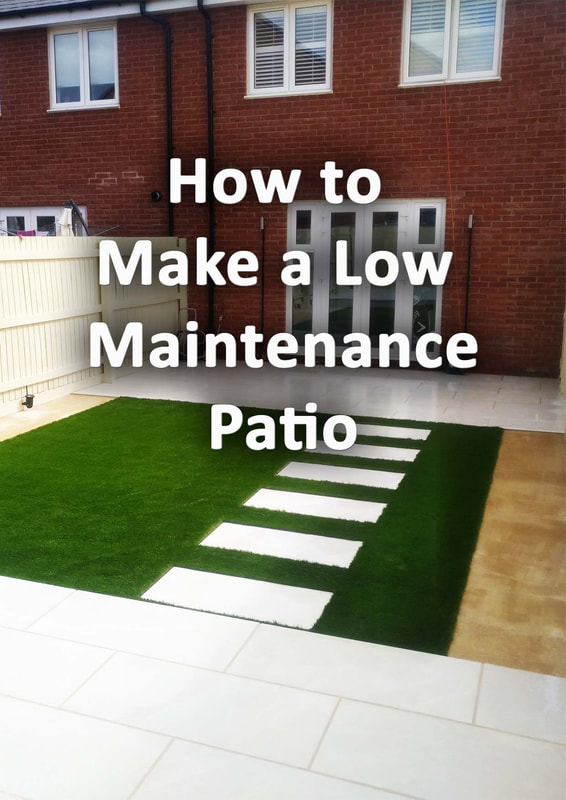
Patios are typically the most utilised part of any garden or outside space. They are the perfect places for outside dining and spending quality time with family and friends.
However, having a patio which causes you extra work and maintenance is not ideal. Some patios need to be seasonally cleaned, treated and weeded to keep them looking at their best.
As patios are expensive to install it is worth investigating how to make your patio low maintenance?
In this article I will explore every element and consideration of creating a low maintenance patio successfully.
1. Install a correct patio base
One of the biggest threats to having a low maintenance patio is installing the correct base.
Too often contractors offering cheap paving do not implement the correct construction methods. Patios require excavating to a minimum depth of 150mm.
This will allow for a minimum sub-base of 100mm of compacted mot type 1. Paving can then be laid on a solid mortar of around 30mm (20mm for paving).
If this minimum requirement is not met it is likely the patio will crack. This will lead to water penetration and weed establishment. Both of these are very detrimental to achieving a low maintenance patio.

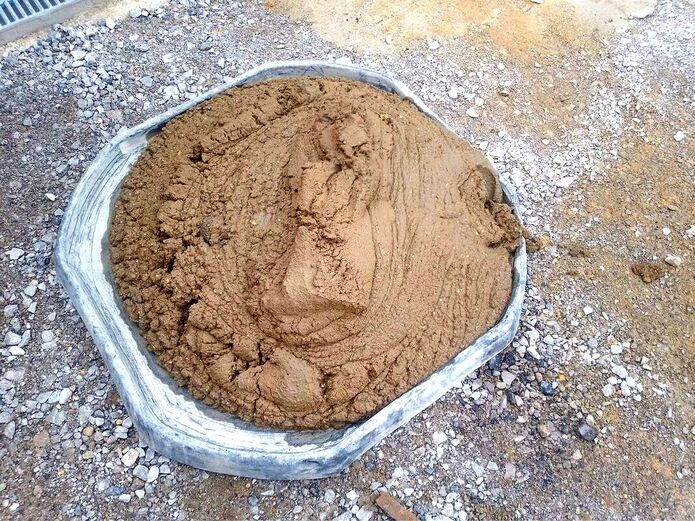
2. Do not lay paving on sand
A sure way to ensure your patio is not low maintenance is lay it straight on sand. Sand is not a suitable base for paving slabs.
Tree and shrub roots can easily travel through the sand layer distorting the paving’s level. Over time, dirt and topsoil slowly mixes with the compacted sand layer leading to weed establishment.
The only way to ensure a robust patio with no weeds is by laying paving on a solid mortar bed. This should be on top of a well compacted and solid sub-base.

3. Choose paving with a low absorbency
One of the most frustrating problems with patios is discolouration from microscopic plants.
This is typically caused by algae blooms which thrive in damp and shady conditions. The best way to avoid scrubbing and cleaning algae is to lay paving with a low absorbency level.
This typically includes dense, natural, stone such as granite or slate. Porcelain is also an effective paving choice to help avoid this problem.
Good quality sandstone can be used as long as a good quality sealant is applied.
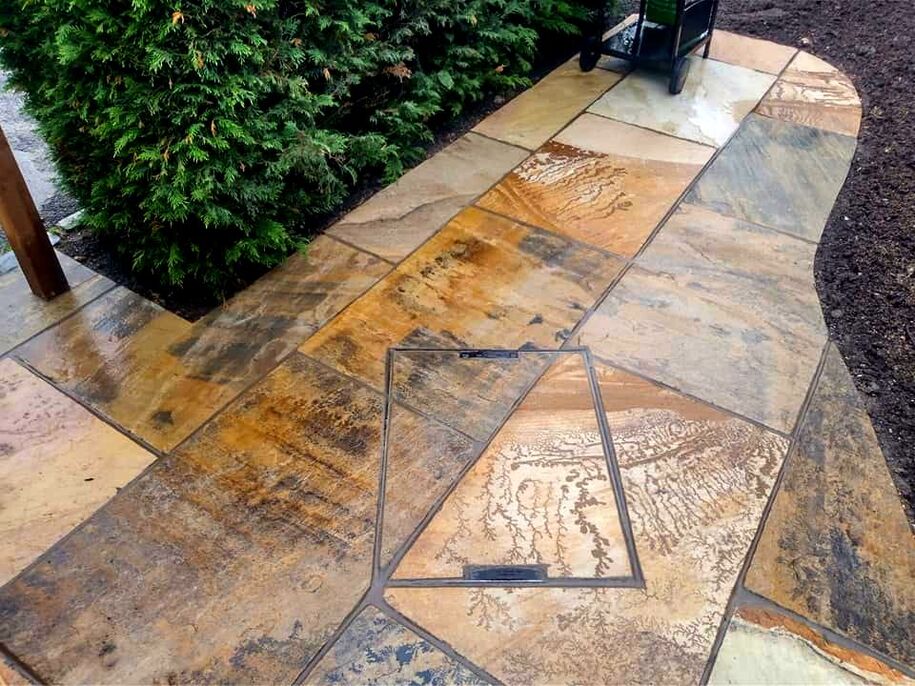
Our Brazilian Black slate path and steps : Harrow, London
4. Grout your paving properly
A very common issue which prevents a patio from being low maintenance is incorrect grouting.
Sweeping in dry mixes and half hearted patching up of joints is more hassle than it is worth. If you have crumbly grout or joints full of weeds you need to start again.
You will need to remove all grout and dirt from all of the joints and start over. Patios need to be grouted with a very strong semi dry mortar mix.
This needs to be compacted into the joints and worked to a sealed finish! Why not read our step by step article on how to re-grout a patio here.

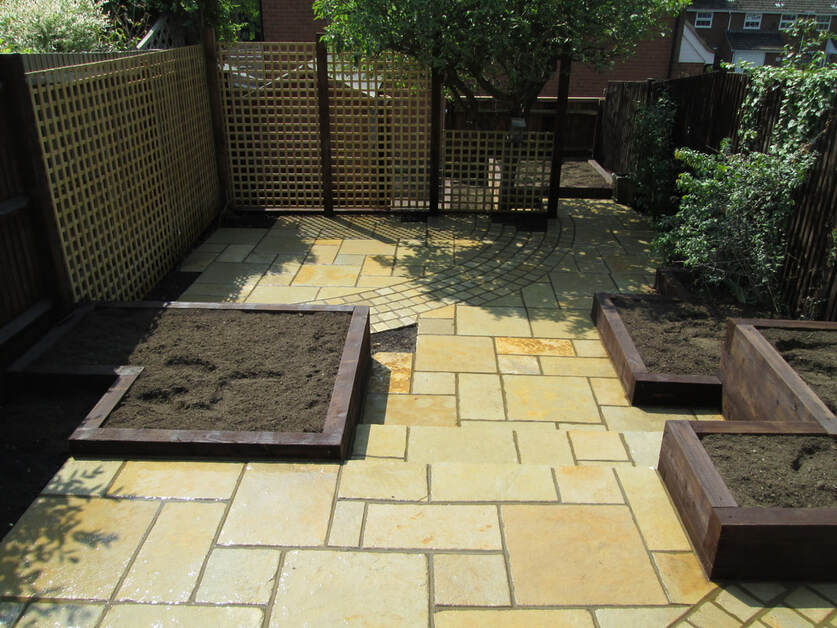
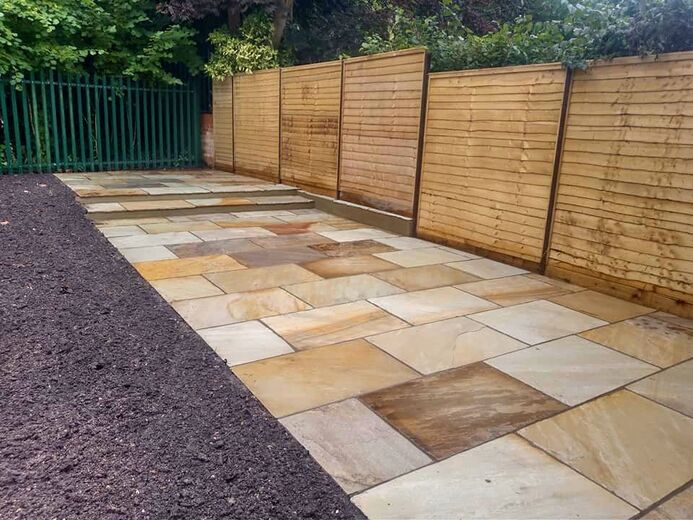
Our sandstone patio project with raised beds: Rickmansworth, Hertfordshire
5. Choose darker tones and textures
A common trap people fall into is installing very light coloured paving. The usual suspects are pale creams and even white paving slabs.
These pavers always look pristine in home magazines but very rarely look as good in real life. This is because the moment the paving is laid birds will pop, coffee will spill and life will happen.
Even when these pavers are heavily sealed they can still accumulate stains. Yes that also includes porcelain!
Even tannins inside dead, autumn, leaves can cause brown stains on the surface of porcelain and other sealed surfaces.
These can be cleaned off but it can take hot soapy water and a scrubbing brush. I don’t want to ruin aspirations but be aware, light paving is not always low maintenance.
Our Fossil Mint paving project: High Wycombe, Buckinghamshire
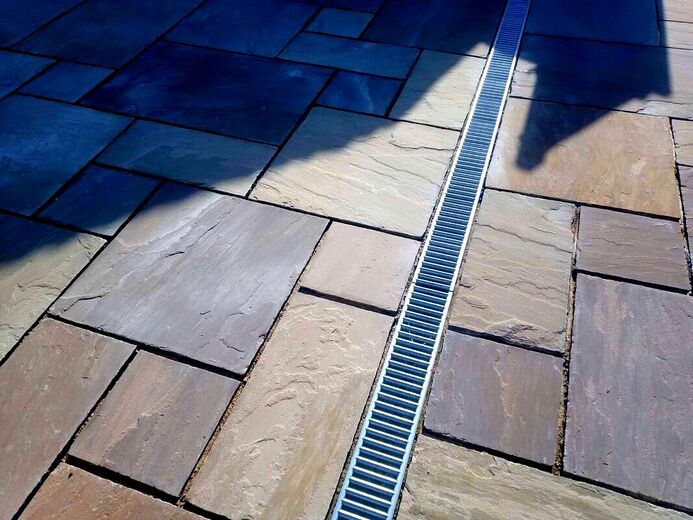
6. Implement an effective patio drainage strategy
Damp and poorly drained patios are always a recipe for problems. Patios that drain poorly can be prone to discolouration and residue build up.
This is particularly so for paving laid within damp and shady areas. Such conditions can encourage green sludge to form on the surface which will require seasonal cleaning.
When you plan your new patio make sure you have a patio drainage strategy in place. This means plan for where the extra rain water runoff will go.
The best option is level you’re paving so water travels away from the home. This can then be collected and directed into a drainage installation.
To read more about implementing patio drainage read our comprehensive article here.

Our Porcelain patio project with drainage grills: Belmont, Harrow
7. Position your paving in full sun
A great way to ensure your paving stays dry and bright is to position paving in full sun. This will reduce the risk of damp and algae blooms setting hold.
Obviously there is other many other advantages of a sunny patio! A sunny patio on the whole has much more chance of staying clean than a shady one.
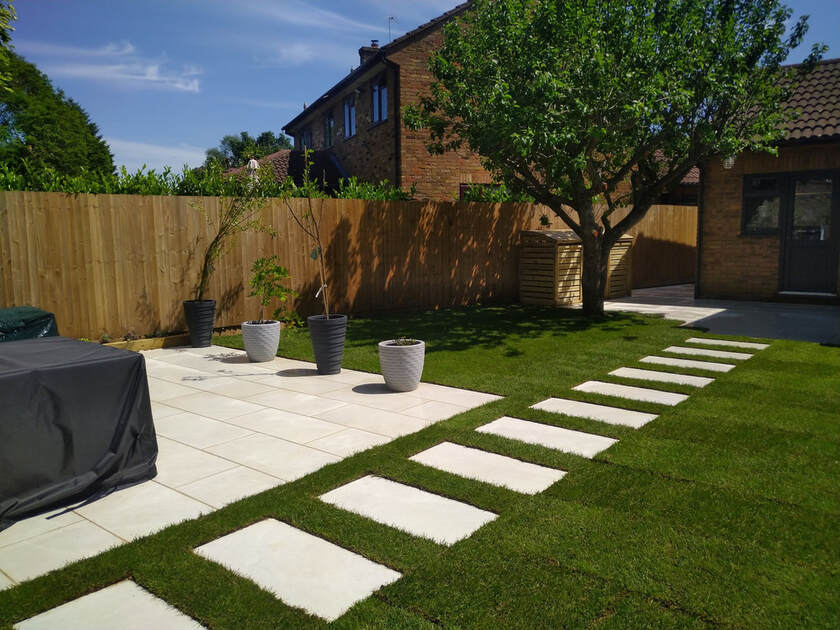
Our porcelain paving projects with stepping stones: Hyde Heath, Buckinghamshire
8. Stay away from wind traps
If your patio is positioned within a wind trap there is a high likelihood it will require more cleaning.
Wind traps typically exist within corners of the garden where prevailing winds blow toward. This can be particularly annoying during the fall when leaves are falling on mass.
Damp leaves and other debris can sit on your paving collecting dust and absorbing moisture. If you want a low maintenance patio try to position it away from wind traps.
Our Fossil Mint paving project: High Wycombe, Buckinghamshire
9. Remove overhanging branches
Overhanging tree branches are not the best situation for a low maintenance patio.
The most typical problem with tree branches is perched birds. Birds will happily perch above your beautiful patio and poop to their hearts content blissfully unaware.
The frustration with this is it will be a reoccurring problem until the branches are removed. Tree branches will also litter your patio with damp moss and dead leaves.
10. Seal your paving
One of the simplest things you can do to make your patio low maintenance is to apply sealant. Sealing will prevent moisture and stains sinking into the surface of your patio.
This will also protect against freeze and thaw damage and algae establishment. The best time to seal your patio is when it is first laid.
However, if it has been down a few years you can still seal it! It is advised you give it a good pressure wash first and let it dry out thoroughly before sealing.
This is best done during the warm summer months on a sunny day. If your patio is prone to algae and slippery in winter an anti-slip sealant would be best.

11. Do not install decking
Many will not recognise decking as a patio but as an outside surface it is worth mentioning. Decking is not a low maintenance solution for outside patios.
If you choose a timber deck you will have apply stains and oils seasonally. Many suppliers of composite decks insist their products are low maintenance.
However, so many composite decks are still built on timber frames. These will eventually degrade leading to a failed surface.
Both composite and timber decks do tend to become slippery during the winter months. If you do want a low maintenance patio, decking is probably not a good option for you.

Our garden design build with Balau hard wood decking: Pinner, Harrow
Thank you for reading our article on how to make a low maintenance patio. Below I will link to some other relevant articles you may find informative.
|
|

|

|
|
|
|
|
'As an Amazon Associate I earn from qualifying purchases'
This article contains Amazon affiliate links
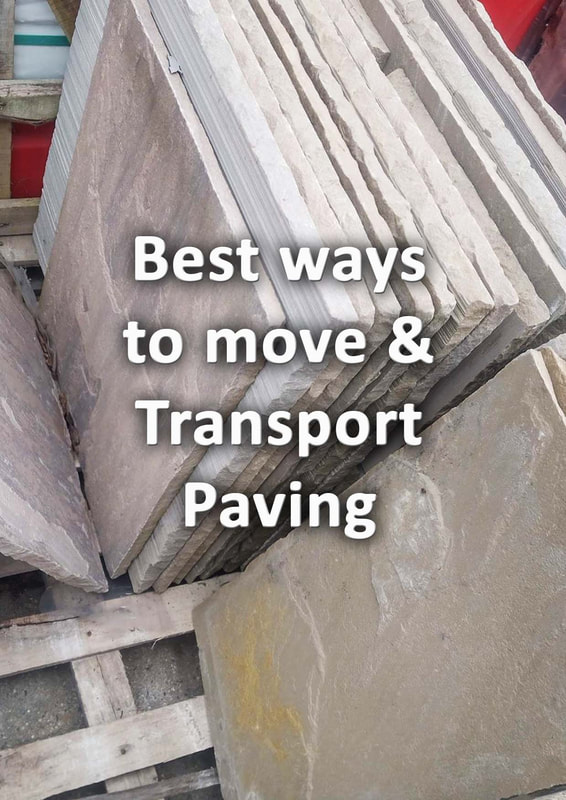
Paving is a heavy and durable building material which can be awkward to move around. A typical paving slab is around an inch thick and about 500mm x 500mm.
Typically made of either natural stone or concrete each unit requires some strength to handle. As paving is vulnerable to damage by chipping and cracking it should be handled with care.
Furthermore, lifting slabs awkwardly can lead to debilitating injuries of the back and joints. Therefore, finding safe ways to move and transport paving is of upmost importance.
Carriages for transporting paving must be easy on the body while protecting the paving from damage. In this article I will list the 4 main ways to transport paving safely and efficiently.
1. Builder’s wheelbarrow
The most common and typical method of moving paving is with a strong builders wheelbarrow.
This is a satisfactory method however it is difficult to shift many slabs at once. Very often paving has to be perched on top of the loading basin which can become unstable.
Abrupt stops can force paving to slide off the top scratching the surface and potentially breaking.

Builders wheelbarrow (Amazon)
2. The Stanley multi truck
The Stanley multi truck is based on a conventional sack barrow design but with a difference.
The truck has the ability to be loaded and lowered onto four wheels. The handle can then be extended and adjusted so the horizontal load can be pulled.
With good steering and a 200kg load capability the Stanley multi truck is ideal for moving paving.

The Stanley multi truck (Amazon)
3. Load surfer pallet truck
If you want to shift a serious load of paving why not invest in the Loadsurfer pallet truck. This pallet truck can lift and shift 2 tonnes of weight.
This Is ideal for loading up multiple pavers at once or moving whole pallets of paving. However even though pallet trucks can lift a lot of weight they are not very manoeuvrable.
These can struggle to navigate rough, uneven surfaces and awkward sideways. As they rely on man, pulling power they are not good for shifting weight uphill.

Loadsurfer pallet truck (Amazon)
4. Loadit heavy duty trolley
This heavy duty transportation trolley has a capacity of up to 300kg. Its robust pulling bar and swivelling wheels means it is easy to steer around heavy loads.
This makes it suitable for stacking paving for efficient transportation. The main drawback with this trolley is it becomes difficult to steer under heavy loads.
The small, hard, wheels also create a bumpy ride increasing the chances of paving cracking.

Loadit heavy duty trolley (Amazon)
Thank you for reading our article on the best ways to move and transport paving. Below I will include some other relevant articles you may find informative.

|
|

|
|
|
|
|
'As an Amazon Associate I earn from qualifying purchases'
This article contains affiliate links
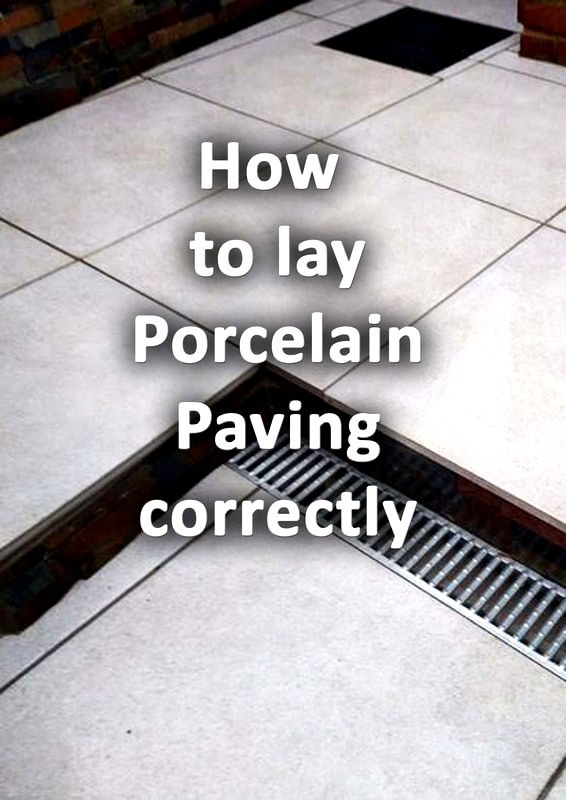
Porcelain paving has become one of the most popular paving options for patios and surfaces around the home. Its clean and contemporary aesthetic fits well with current modern and minimalist trends.
Porcelain generally comes in a range of neutral colours such as greys, whites and creams. The paving is regularly laid in one size very much like internal tiles.
As a manufactured material, porcelain is extremely dense and impervious. This gives it great resistance to discolouration and the extremities of weather.
Porcelain paving is actually more like large tiles than regular paving slabs. This makes them slightly different to lay than a conventional, natural stone and concrete paving.
Their low absorbency means they require a strong mortar with high bonding potential. Like tiles, porcelain paving also looks effective with smaller grout joints than traditional paving slabs.
Here I will answer some common porcelain questions and explain how to lay porcelain paving step by step.
What do you put under porcelain paving?
To lay porcelain paving you will need to remove the soft, topsoil layer of the ground. No loose or crumbly soil should be left and excavations should generally be about 150mm.
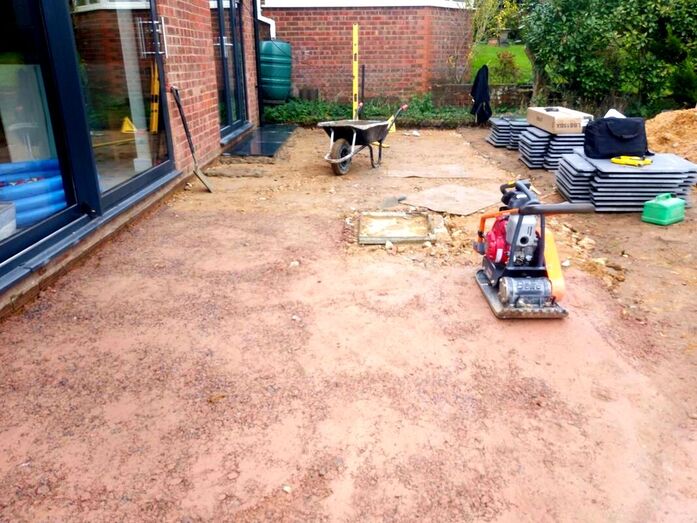
You will then need to spread a 100mm layer of compactable sub-base aggregate. The best material for this is Mot type 1,this should then be well compacted with a whacker plate.
You should then lay your porcelain paving on a pliable 1:4 mortar mix on a consistent mortar bed. There should be no voids under the paving which should be well bonded to the mortar below.

Does porcelain need to be laid on concrete?
Due to porcelains non absorbent nature it can be challenging for mortar to bond to the paving. This can make it challenging to lay especially on a very workable mortar.
For this reason the thicker mortar bed you use the more difficult porcelain is to lay. Consequently, some choose to install a concrete base to lay porcelain paving.
By doing this you are able to lay on a much thinner mortar bed of around 20mm.
One of our porcelain paving projects in Aylesbury, Buckinghamshire
This can make laying the porcelain pavers faster and provide a much more robust base. However bear in mind this is a much more labour intensive and expensive way to base porcelain.
I have found some porcelain has an absorbent and calibrated underside for easier laying. For more information on individual products contact the supplier, brand or manufacturer.
I have found some porcelain has an absorbent and calibrated underside for easier laying. For more information on individual products contact the supplier, brand or manufacturer.
What thickness of mortar do you need under porcelain paving?
Generally the ideal thickness for laying porcelain paving is between 20mm-30mm. If your porcelain is particularly impervious you may wish to lay a solid concrete base first.
This will enable you to bed down tiles on a thinner mortar bed without them sliding around. However a skilled paver should have no problem laying porcelain on a standard 30mm bed of mortar.

Can you lay porcelain tiles on a dry mix?
I do not recommend laying porcelain tiles on a dry mortar mix or screed. The reason for this is porcelain needs to bond well to the underlying mortar.
This is because porcelain paving does not readily absorb moisture and stick to mortar easily. This can lead to tiles shifting and moving potentially causing loose units, rocking and cracking.
Eventually this could lead to cracked grout, water penetration and a general failure of the surface.
What is the best mortar mix for porcelain paving?
The best mix for porcelain paving is a 1 part cement 4 parts sharp sand mix. The mix should contain some kind of waterproof bonding agent such as Sikabond and plasterciser.
Mortar should have the consistency of a stiff brick laying mix so it is rigid but easy to work. You should be able to smooth a sealed effect on the mortar with the back of a trowel.
This consistency will ensure a good suction layer between the paving and the mortar. It is important to ensure the tiles have a consistent mortar bed under each paver with no voids.
What is the best grout mix for porcelain paving?
The best grout mix for porcelain paving will be a 3:1 plastering sand, cement mix. This is best mixed up dry and small amounts of water added and mixed in gradually.
You do not want your grouting mix to become too wet. Grout should have a consistency of brown sugar, you should just be able to form a ball in your hand.
There should be no water discharge from the mix to prevent staining. For coloured grout mixes there are many different dyes andproducts on the market.
Potential problems of laying porcelain outside.
On the whole porcelain paving is a very good product which is both aesthetic and durable. However it is not perfect and there are some potential problems to using porcelain.
Cutting
Firstly, some porcelain tiles are difficult to cut neatly. This is because they are made of extremely dense materials, you will certainly need a diamond blade for your grinder. Some porcelain have hairline cracks inside the paving, these can crack open when cutting leading to a lot of wastage. My advice here is buy from a reputable supplier where the paving is packed properly.
Laying
Porcelain paving has very low levels of absorbency and permeability. This means it can struggle to bond to mortar mixes. Laying porcelain without experience can lead to poor bonding and cracking of the surface. Try to use a contractor with some good experience of laying porcelain tiles.
Reflective glare
Particularly if you are using very light coloured porcelain be prepared for the reflective nature of this material. In a full sun position you may find the reflected UV rays overwhelming, especially in the middle of the day.
Dirt
Even though porcelain is non absorbent and impervious this does not mean it cannot get dirty. Many clients are under an illusion that their brilliant, cream, porcelain, patio will stay this way. Like any outdoor surface algae, bird poop, and dirt will seasonally litter your patio. You will have to still wash down and pressure wash to keep it pristine! I personally do not agree that porcelain paving is no maintenance.
How to lay porcelain paving step by step
Setting out
The first thing you will have to do is mark out where you want you’re paving. This can be done with spray paint or string lines and pegs.
You may want to experiment with different shapes and forms before you commit to a size and shape. If you are planning on specific garden furniture make sure the size of your patio can accommodate it.
Working out your levels
Working out your levels for porcelain paving is very important. Porcelain paving looks best when it is laid level with only very slight falls for water runoff.
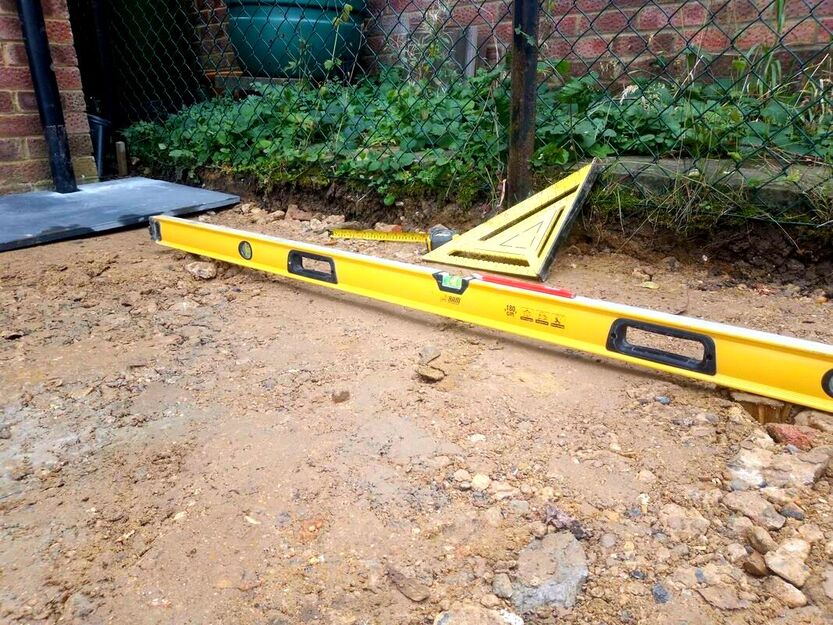
It is a good idea to peg out your finished level across your paving with a long spirit level. This will reveal if you need to build any retaining structures around your paving.
Working out your finished level will also allow you to accurately dig out for your sub-base.
Working out your levels for porcelain paving is very important. Porcelain paving looks best when it is laid level with only very slight falls for water runoff.
It is a good idea to peg out your finished level across your paving with a long spirit level. This will reveal if you need to build any retaining structures around your paving.
Working out your finished level will also allow you to accurately dig out for your sub-base.
Where will surface water run?
You will need to have a drainage strategy for your new area of paving. Porcelain is very impervious meaning it will create a lot of surface runoff during heavy rain.
You do not want puddles of water pooling against your home, structures or boundaries. If your paving is replacing soft topsoil you will need to mitigate the loss of natural ground absorption.
The most effective way to do this is with a garden soakaway which will hold excess surface run-off. Why not read my step by step guide on how to install a garden soakaway here.
You may also want to read my articles on patio drainage, drainage channels and installing drainage chambers.

One of our porcelain paving projects in Harrow, Greater London
Digging out
In order to build a robust patio you will need to dig out the top layer of topsoil. Typically this will be to a depth of around 150mm from the finished level.
This will allow for a sub-base of 100mm, a mortar bed of 30mm and allow 20mm for the porcelain.

Sub-base
A regular sub-base of compactable mot type 1 is a suitable base for porcelain paving. It will have to be spread to a minimum depth of 100mm and be well compacted.
However, if you have the time and budget a concrete base is even better. This way you can form a perfectly solid and flush base laid to perfect falls.
You can then lay your porcelain on a thinner bed of mortar with less need for vigorous tamping and levelling.

Preparation
The key to efficient laying is getting your mixing and laying areas well prepared. This involves stacking your paving where it is to hand but not obstructive.
Mixing areas should sheeted to prevent walking cement over the project. Mixers should also be positioned so they do not splash over tools and paving.
Working areas should be kept clean and all tools should be to hand.
Mortar mix
The best mortar mix for laying porcelain is a 1:4 cement and sharp sand mix. Mortar should have added plasticiser to make the mix workable without being too wet.
It will also be advantageous to add a waterproofing bonding agent like Sikabond. The mortar mix should have the consistency of a stiff, bricklaying mortar.
Bedding down your porcelain
The goal with bedding porcelain onto mortar is reaching a continuous fillet with no voids. Achieving this while keeping paving perfectly flush and level requires some skill.
Make sure the mortar does not ride up between your tiles, this will lead to inconsistent joints. for beginners, a concrete base and laying a thinner mortar bed will make laying porcelain easier.
One of our porcelain paving projects Hyde Heath, Buckinghamshire
Keeping your paving level
The more level and flush your sub-base is the easier it will be to level your porcelain. It is always a good idea to lay the first span of your paving to a tight string line.
As you lay make sure you check your levels with a long bricklayer’s spirit level.
The more level and flush your sub-base is the easier it will be to level your porcelain. It is always a good idea to lay the first span of your paving to a tight string line.
As you lay make sure you check your levels with a long bricklayer’s spirit level.
Our porcelain paving steps with stack slate cladding, Harrow, Greater London
Keeping your lines straight
It is amazing what the human eye can pick up on! Try to keep the grouting joints as perfectly aligned as possible. The best way to do this is to start laying along a straight feature like a wall or string line.
It is amazing what the human eye can pick up on! Try to keep the grouting joints as perfectly aligned as possible. The best way to do this is to start laying along a straight feature like a wall or string line.
Keep your joints consistent
Keeping your grouting joints consistent will make your porcelain look refined and professional. A good way to achieve this is to use spacers to keep gaps uniform. I personally find plastic wall pugs an effective spacer for porcelain.
Grouting your porcelain paving
Like all grouting, porcelain grouting has to be strong to resist seasonal extremities of the outdoors.
However, as porcelain is typically laid with thinner joints grout must be especially robust. Furthermore, as porcelain has low absorbency it may have difficulty bonding to paving.
Therefore it is advised to add a waterproof bonding agent to the mix like Sikabond.
Mix up 1 part cement and 3 parts plastering sand until it is well mixed. Add small amounts of water until it has the consistency of brown sugar.
The mix should be damp enough to work a finish but dry enough not to discharge water. It is popular to use different colour grouting with porcelain tiles.
Colours such as creams can be achieved by using cement colour dyes.
The mix should be damp enough to work a finish but dry enough not to discharge water. It is popular to use different colour grouting with porcelain tiles.
Colours such as creams can be achieved by using cement colour dyes.
Thank you for reading our article on how to lay porcelain paving correctly. Below I have included some other relevant articles you may find useful.

|

|
|
|
|
|
|
'As an Amazon Associate I earn from qualifying purchases'
This article contains affiliate links
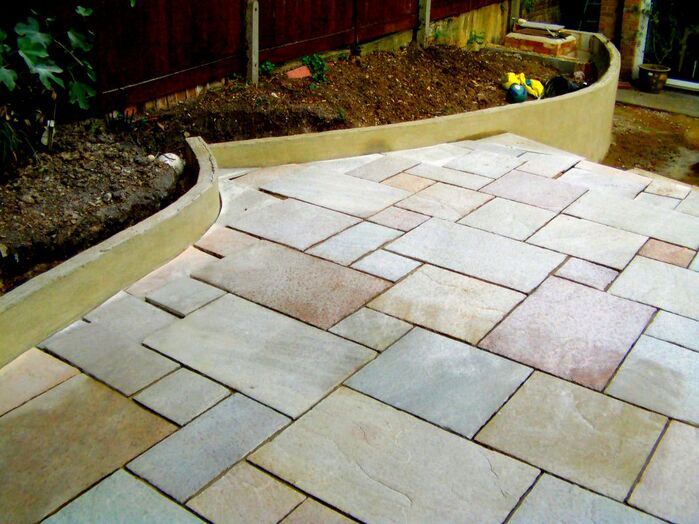
Indian sandstone is one of the most popular paving materials on the market today. Not only can it be worked into an array of specifications it also comes in a wide variety of colours.
Indian sandstone can come in a rustic, riven, form or cut and honed for a more contemporary style. When quarried, colour variations and even fossils can be celebrated within any single paving unit.
This allows a tremendous amount of choice and variation for any landscaping project. Indian sandstone also comes in a variety of sizes including multi-sized project packs.
Over larger areas these help to enhance visual texture and interest.

Unlike manufactured paving units using concrete and colour dyes Indian sandstone's colours do not fade. This makes this natural stone a worthwhile investment for a new garden pathway or patio.
Although laying Indian sandstone in principle is easy it is very easy to get it wrong. There are a great number of pitfalls you can fall into if you have no experience laying paving.
Some of these include puddles, uneven surfaces, loose paving, poor finishing and staining.
In this article I will explain how to lay Indian sandstone paving step by step with pictures.
Setting out
One of the most crucial stages of making any patio is setting out your paving. Try to visualise how your wish your patio to look, do you want curved edges or a brick border?
A good idea is to search for precedent images of other Indian sandstone patios online for ideas. When you have decided on your patios size and shape mark this out with pegs or spray paint.
Work out how many square metres of paving you need from the marked out surface area. It is advised to buy 10% extra than what you need to allow for cutting and breakages.
Buying your paving
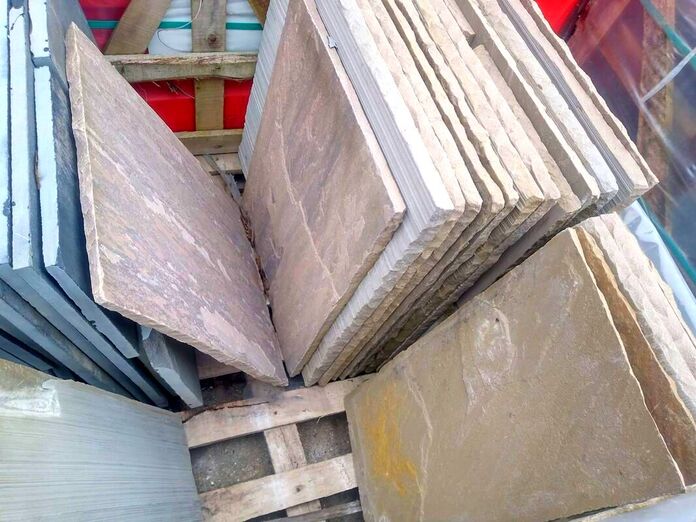
When buying your paving make sure you purchase from a reputable supplier. There are many cheaper websites selling Indian sandstone from very soft sandstone deposits.
These Indian sandstones are extremely porous and can soon become stained by algae blooms. Furthermore, these cheaper pavers can also be subject to freeze and thaw action in damp conditions.
I always recommend going with a well known brand such as; Marshalls, Bradstone, Pavestone and Brett.
Working out your levels
Working out your finished levels is a very important part of building a successful patio. Resolving your levels will give you some very important information.
Some of these include; if you will need to build any retaining features, or how many base materials you will need. The best way to work out your levels is by establishing known reference points.
These can be where your patio meets the level of a sideway, or your preferred level around the home. Please note the paving around your home should be about 150mm or 6 inches below the damp proof course.
Run a tight string line from your known references across the patio to find an optimum level. This can be pegged out so you know how deep to dig for your base.

Where will rainwater run?
A very important strategy for your Indian sandstone patio is drainage. You will want surface water to flow away from any buildings and to drain easily from the paving.
Indian sandstone is more absorbent than some other types of paving. This means it is susceptible to algae establishment and becoming slippery in damp conditions.
You will need to devise a basic patio drainage strategy for your Indian sandstone patio. For more information why not read our comprehensive article on patio drainage here.
Excavation
When you know where your finished level of your patio you can start excavating. You will need to excavate to a depth of about 160mm.
That will allow about 20mm for paving, 40mm for mortar and 100mm for sub-base. You need to make the excavation as square and neat as possible with no loose material left over.
Any loose soil left could sink leading to settlement and cracked paving. The best way to remove excavated soil from your garden is with a skip.
Why not visit our step by step guide on how to fill a skip with soil here. When working out how much soil you need to get rid of bear in mind it bulks up by 30% when excavated.
Sub-Base
Your laying base must be made up of a suitable, compactable, sub-base, aggregate, material. The best material for this is Mot type 1 compactable aggregate.
This dense material has angular particles which compact well under pressure. The key to laying Indian sandstone perfectly flush and level is by grading the base properly.
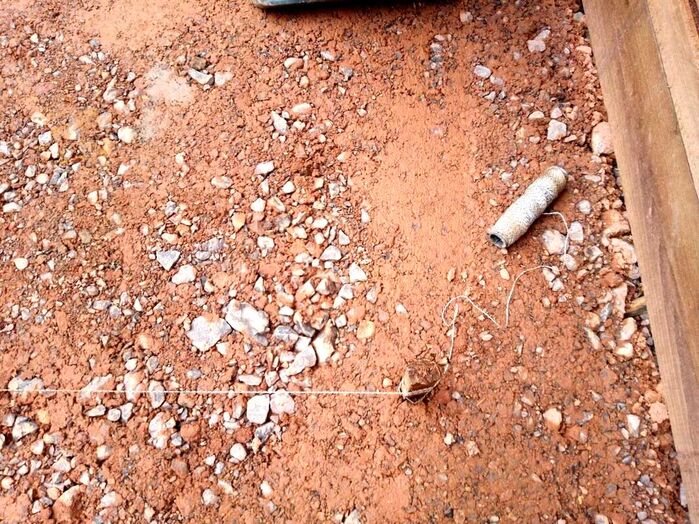
This will enable you to lay a consistent mortar bed of around 35mm which will make levelling the paving easier. The best way to spread your hardcore is by pegging out your sub-base level (55mm lower from finished patio level).
Using a long spirit level, tight string line, hammer and pegs plot out the sub base level. Then spread your sub base aggregate just slightly higher than the top of the pegs at an even gradient.
When you compact your base with a whacker plate the base will settle to the top of the pegs.

Preparation
Once you have a well levelled and compacted sub-base you can prepare for laying the paving. Make sure you have stacks of sandstone slabs around the outside of your patio, to hand.
If you are laying separate sizes stack them in their size grade. This way you can keep an eye on your pattern ratio as you lay.
Get everything you need as close to the laying area as possible. If your mixing with a cement mixer make sure it cannot splash and splutter over the sandstone.
This can lead to cement stains which are impossible to remove once set.

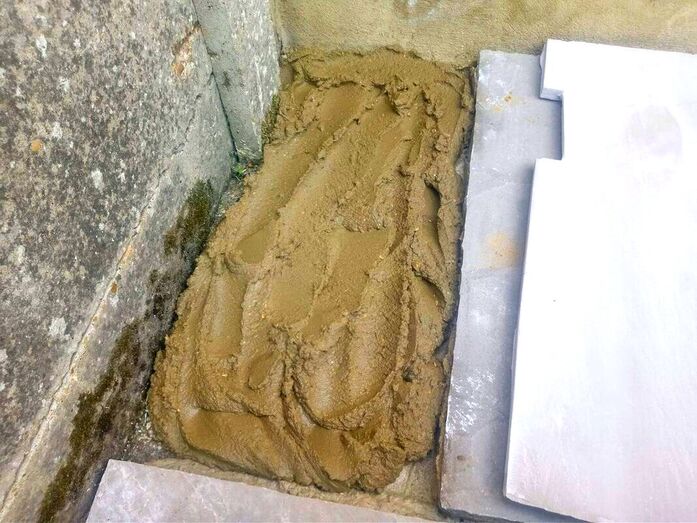
What is the best mortar mix for Indian Sandstone?
The best mortar mix for laying Indian sandstone is a 1 part cement, 4-5 parts sharp sand mix.
Sharp sand has course and angular particles which create a mortar with a high compressive strength, I personally like to mix 1 part cement, 1 part soft sand and 4 parts sharp sand. The little bit of soft sand makes the mix just that little bit more workable and sticky.
The mortar should have the consistency of a thick bricklaying mortar. You should be able to create wet suction on the mortar with the back of a trowel. This is important as the moisture content will enable the sandstone to stick to the mortar.
Too often, contractors make their mixes too powdery and dry leading to poor bonding. Such mixes can also make the paving feel hollow under foot.

The mortar should be wet and pliable enough to form a continuous and dense mortar bed.
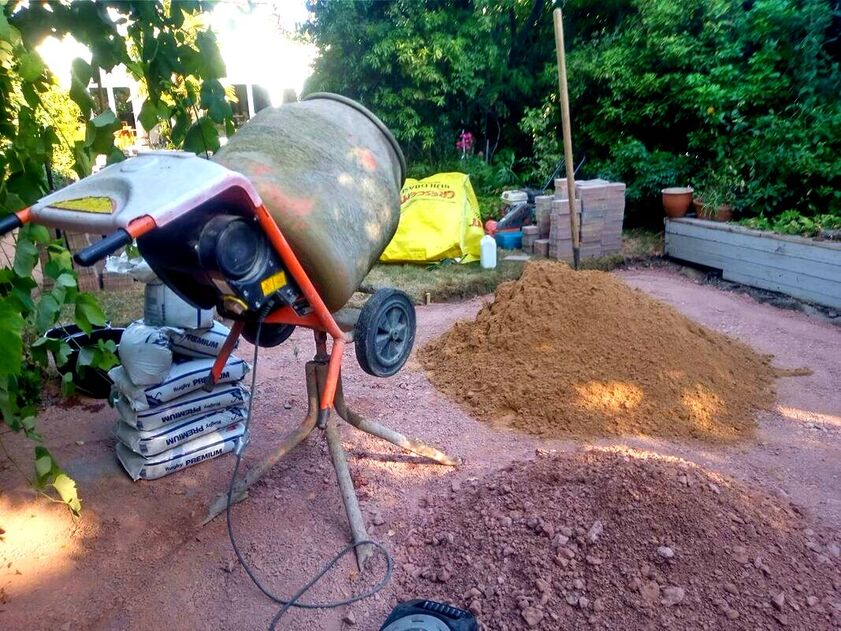
Start you mixer and add two thirds of a bucket of water to the spinning barrel. Add a dribble of mortar plasticiser and add half a bag of cement.
When the cement dust has become completely soluble in water add the sand. Usually I find13 shovels of sand makes the perfect ratio.
However, if you are not confident with ratios measure your mixes out in buckets. Mix until you have a good, workable, mortar, consistency.
How thick should mortar be under Indian sandstone?
Normally your mortar bed should be between 30mm and 40mm. Any less than this and your mortar base would be too thin and possibly crack. However any thicker and the mortar will become difficult to work and level.
Normally your mortar bed should be between 30mm and 40mm. Any less than this and your mortar base would be too thin and possibly crack. However any thicker and the mortar will become difficult to work and level.
Laying your first slab
Laying your first few slabs is the most important stage in building your patio. It is at this point that you will set your paving level and falls.
Try to keep your paving edges square with the line of the home and square to any walls. Bed down your first Indian sandstone slab and check its falls with a long spirit level.
Make sure your paving is laid on a consistent mortar bed with no gaps under the paving.
Keeping your joints constant
One of the biggest challenges when laying Indian sandstone is keeping your joints consistent. Much of the Indian sandstone on the market has a rustic finish.
This means some pavers can ever so slightly vary in size and shape. This can make it difficult to keep your grouting joints a consistent width. This is especially so is you are laying different sized paving within a pattern.
The best way to lay with consistent joints is to set out some paving before you start. This will give you an idea of the best size to set your joints.
As a general rule joints for Indian sandstone paving should be around 10mm.
Keeping your lines straight
As well as keeping your joints consistent you will also need to keep an eye on your lines.
The best way to keep your lines straight is to lay back from a perfectly straight feature like a wall. However the further out you build the more chance you have of wavy joint lines.
As you lay check your pattern lines and edges with a string line and long spirit level.
Cap off long joints
If you are laying different, sized, Indian sandstone paving to a pattern you will want to cap off long joints. This is where a grouting joint has become continuous without being blocked by another slab. As you work, keep an eye on your joints so none of them become too long without becoming capped off.
Keeping the project clean
A very important factor when laying Indian sandstone paving is keeping its surface clean. You want to prevent mortar splashes and cement staining as much as possible.
This also goes for paving which had been laid days previously. It is very easy to tread mortar across a patio staining it. Try to keep an eye on your paving and make sure mortar is not left upon the surface.
When I lay paving I have a bucket of water and hand brush nearby. If any cement gets flicked up on to the paving I wash it down immediately!
What is the best way to grout Indian Sandstone?
The best grout for Indian sandstone is a mortar mix containing 1 part cement 3 parts plastering sand.
I find Leighton buzzard plastering sand the best for this due to its consistent particles. The mix should only be slightly damp so you can form a ball with it in your hand.
There should be no cement or water discharge from the mix whatsoever. The mix should have the consistency of brown sugar.
This will allow you to point a neat finish without staining the paving. For our full guide on how to grout paving visit our step by step guide here.
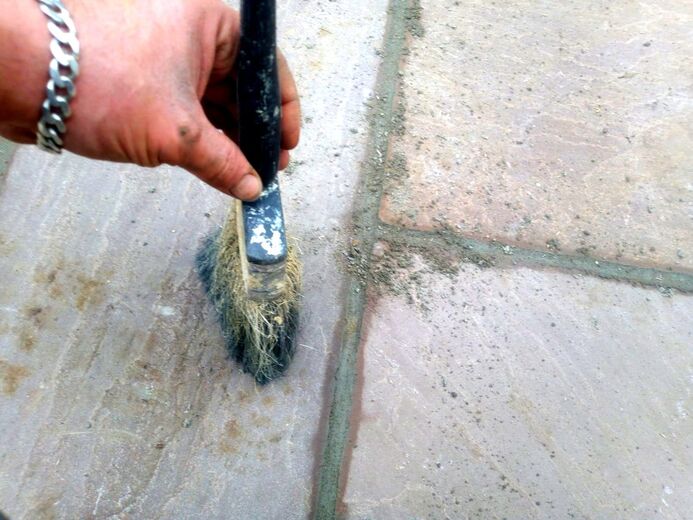
Do you need to seal Indian Sandstone?
You do not have to seal Indian sandstone but sealing will protect it from stains and algae.
Indian sandstone is naturally, porous so can absorb liquids like red wine, coffee, oil and bird poop. Such substances contain compounds which can stain Indian sandstone paving.
Therefore, it is recommended you do apply some sort of sealant if you foresee potential staining events. There are many sealants available on the market today and some especially for Indian sandstone.
I have linked to some of the most popular below.

 |
 |
For more information on these products displayed above click on the images to be taken to Amazon.uk.
Thank you for reading our article on how to lay Indian sandstone correctly. Below we have included some other articles you may find useful.

|
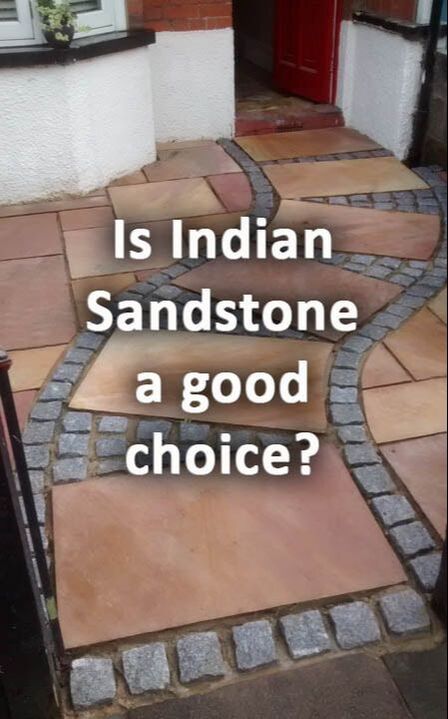
|
|
|
|
|
|
'As an Amazon associate I earn from qualifying purchases'
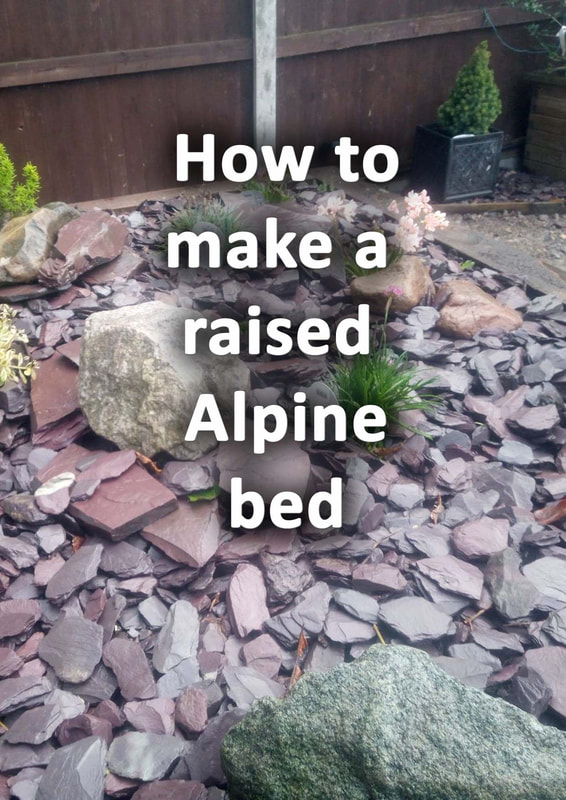
This article contains affiliate links
Alpine planting schemes and beds are a great way of creating a low maintenance feature within the garden.
Alpine plants are some of the most hardy and resilient of all plant species. Originating from cold, rocky environments, these plants have dense, growing habits and attractive flowers.
Alpine beds with gravels and various sized rocks can look amazing at the edge of a patio or lawn. Raised alpine beds can form enclosure and bring exciting visual textures to eye level.
In this article I will explain how to make a raised alpine bed step by step. I will include step by step pictures of a simple raised alpine bed I build recently with sleepers.
What are Alpines?
Alpines are a type of plant specially adapted for living in harsh, mountainous and exposed conditions.
In their natural habitat they are found at elevation above the line of where forests will grow. This means they are extremely hardy and can thrive within shallow soil and exposed locations.
Due to their natural habitats they are very drought tolerant and generally low maintenance. As Alpine plants are naturally dispersed within expansive landscapes they normally have large and attractive flowers.
This is to attract the attention of flying pollinators over a long distance. Their floral beauty, low maintenance and hardiness make them extremely popular amongst gardeners.
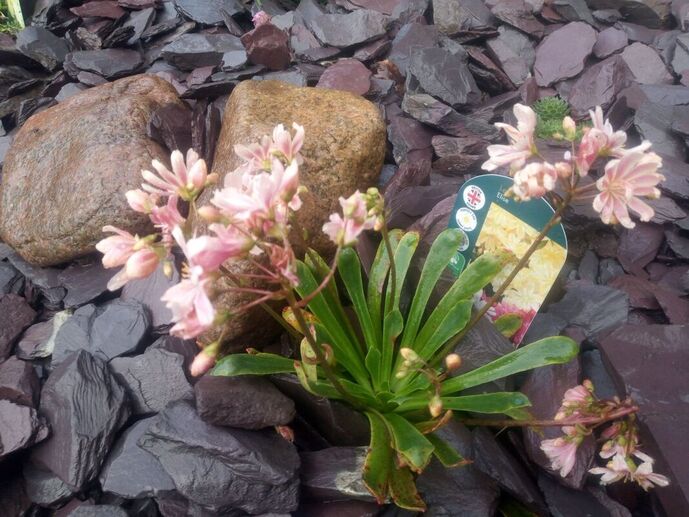
Are alpines hardy?
Due to adaptions within their native ranges and habitats alpine plants are extremely hardy. Alpines can thrive in sub zero temperatures, take prolonged sun and wind exposure as well as being drought tolerant.
Do alpines need a special soil?
Alpines need well drained and gritty soil that does not hold onto moisture. This mimics their natural and native environments where the underlying geology is mountain gravels and rock. Alpines roots do not like sitting in damp conditions especially during winter.
Alpines need well drained and gritty soil that does not hold onto moisture. This mimics their natural and native environments where the underlying geology is mountain gravels and rock. Alpines roots do not like sitting in damp conditions especially during winter.
What depth of soil do alpines need?
Alpines do not necessarily need deep soil to grow, this is because they are used to colonising cracks in rocks and shallow rocky ground. However, if you are growing them in a garden the soil must drain well. This actually favours deeper volumes of well drained soil such as a raised bed.
Alpines do not necessarily need deep soil to grow, this is because they are used to colonising cracks in rocks and shallow rocky ground. However, if you are growing them in a garden the soil must drain well. This actually favours deeper volumes of well drained soil such as a raised bed.
How to make an Alpine garden look natural?
The best way to make an alpine bed look natural is to use the same materials throughout. If you have slate rocks use slate chippings for the flatter planting areas.
Try to have different sized rocks and gravels graded down to smaller gravel particles. This will provide a much more natural looking setting for the alpine plants.
Space your plants out in pots first before you plant them in. Keep moving them about until they look natural.
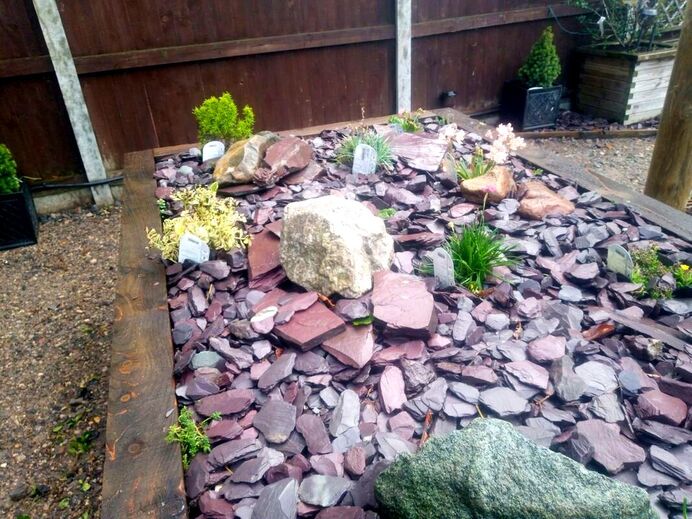
How to make a raised Alpine garden bed step by step
Step 1.
Mark out the position of where you wish your raised alpine garden to be situated.
Step 2.
If you’re building a raised bed with bricks and masonry you will need to install a level concrete foundation. This can be done by excavating out a trench and filling with wet concrete and tamping level.
Step 3.
Even if you are building with timber sleepers a shallow concrete foundation can be a worthwhile base. A level concrete base will allow you to fix your sleepers together square and level easily. Alternatively you can wedge sleeper’s level and fix them together like in the image below.
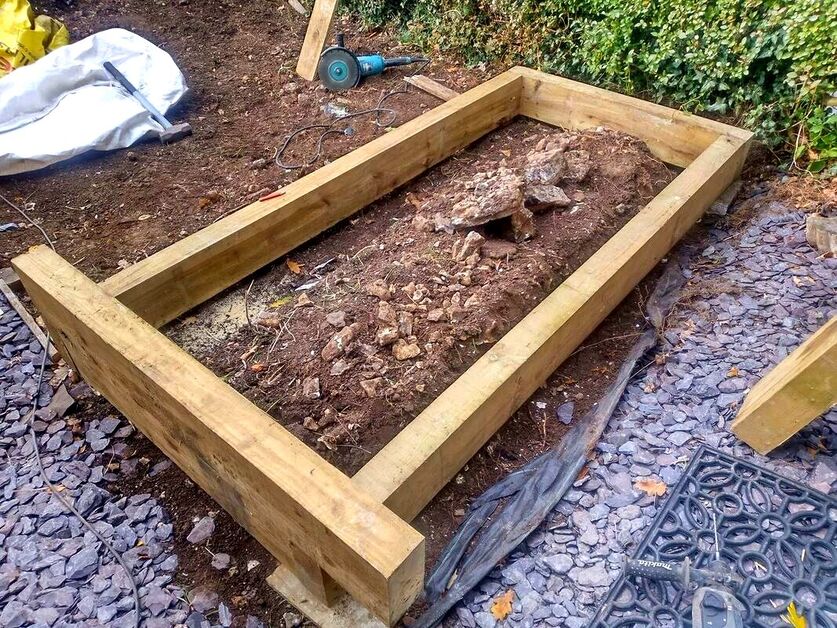
Step 4.
Fix your sleepers together for your base course; once this is in place, building up should be easy. As you build higher make sure your sleeper joins overlap for added strength.
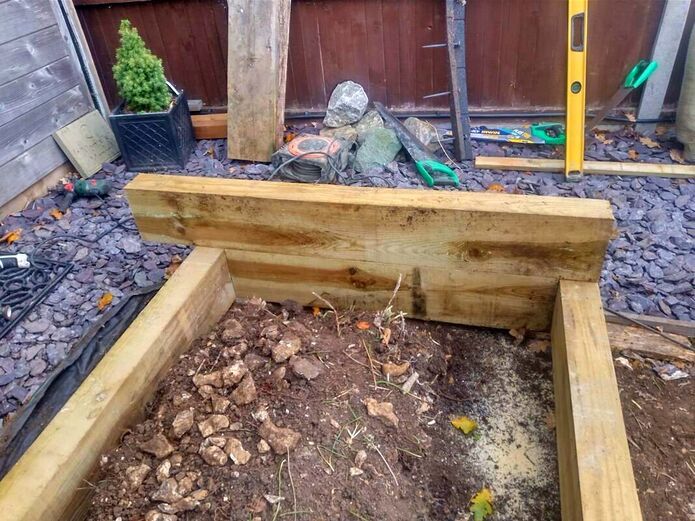
Step 5.
Make sure you cut your sleepers as squarely as possible so they fit together tightly. Very much like a brick wall you want your corners to be plumb and your top to be level.
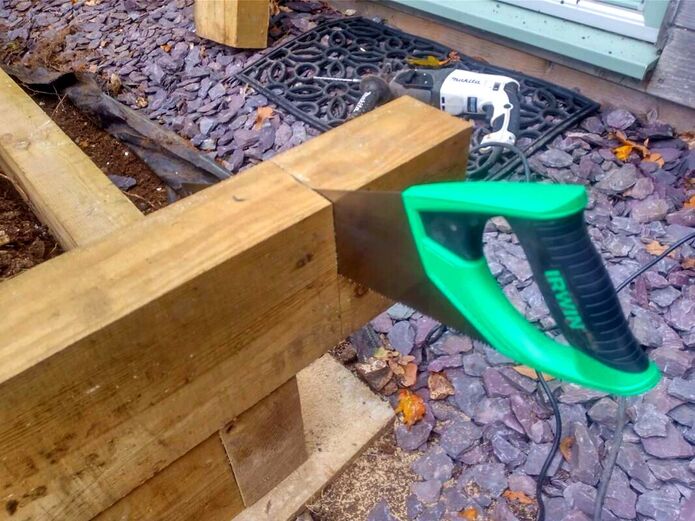
Step 6.
Fix your sleepers together at the corners with 200mm long timber lock screws. Sand down any rough timber or sharp edges.
Step 7.
Fill up your raised alpine bed with a free draining soil with plenty of grit and free draining gravels.
Step 8.
Lay a weed suppressant membrane to the top of the soil and peg into place.
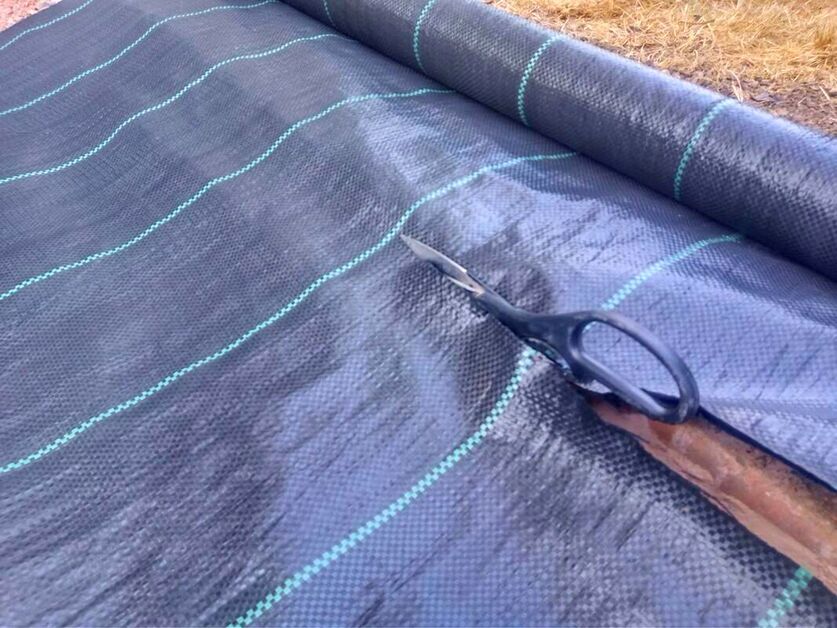
Step 9.
Supply and spread a decorate gravel or aggregate of your choice. In the example alpine garden below we use slate chippings.
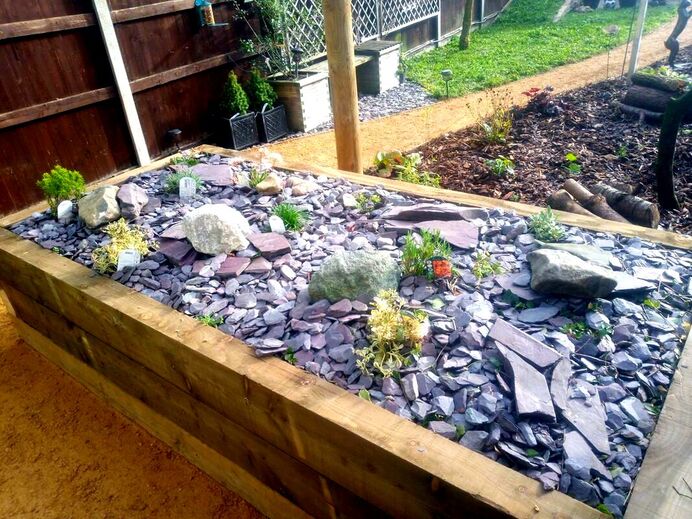
Step 10.
Supply and position rockery rocks in a naturalistic way to compliment your gravel. To match the slate chippings we positioned used blue slate rocks.
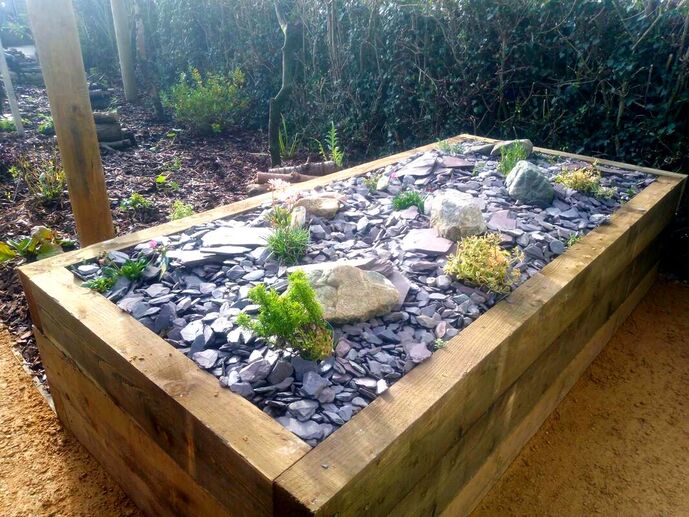
Step 11.
Supply and plant your new alpine plants through the plastic and backfill the gravel back around them.
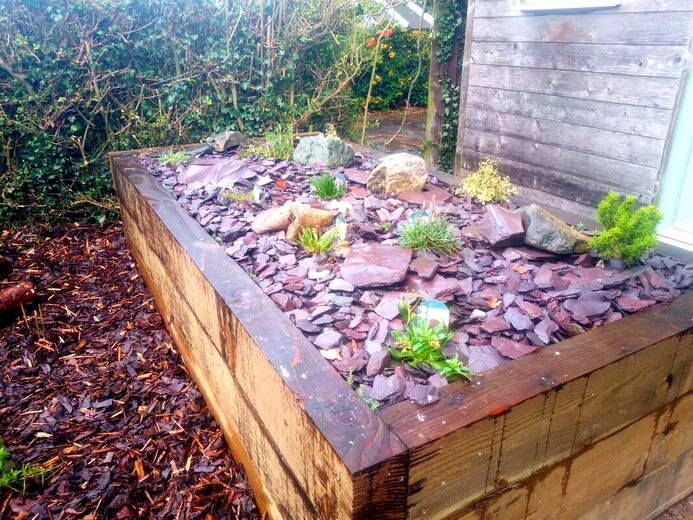
You have now completed your raised alpine garden! Get ready to enjoy seasonal flowers and the joy of watching it establish.
|
|
|
|
'As an Amazon Associate I earn from qualifying purchases'
This article contains affiliate links
Sideways around the home are often completely wasted, outdoor spaces. The frustrating thing is collectively; such areas typically can make up a large area.
This means most garden sideways become wasted space and a lost opportunity for extra utility. Garden sideways can provide the perfect location for extra garden storage or a workshop for a new hobby.
Concreting can be one of the most cost effective and fastest ways to prepare a sideway for other uses. In this article I will show you how to concrete a sideway correctly step by step.
Why concrete a side of house garden?
Sideways around homes can become ‘no go zones’ for the rest of the property. Such areas regularly become stacks of unwanted materials and general waste.
As sideways are normally narrow passages they rarely acquire any form of suitable investment. This leads to both muddy and messy zones around the home.
Such circumstances can encourage pests such as vermin and increase the risk of damp conditions around the property.
Sideways also become a haven for tree saplings and aggressive weeds which can soon become out of control.
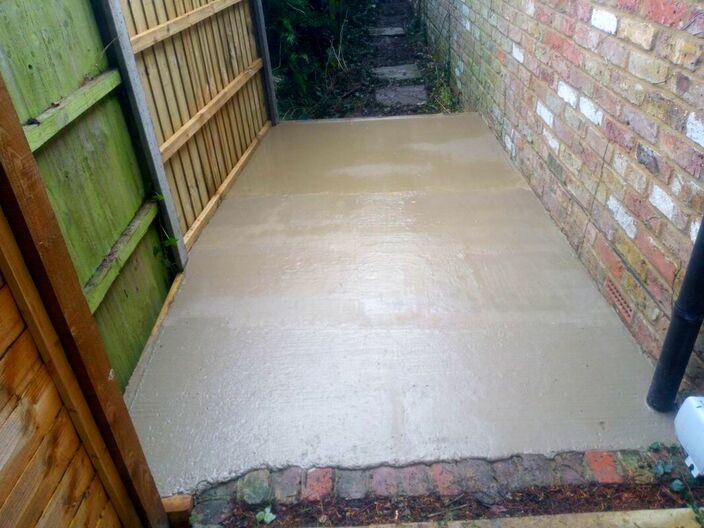
This can lead to hours of frustrating labour and even the possibility of structural problems.
Therefore, concreting your sideway can prevent weed establishment, divert water away from walls and generally bring order to such areas.
Therefore, concreting your sideway can prevent weed establishment, divert water away from walls and generally bring order to such areas.
Is concrete better than paving for sideways?
Generally concrete is better than paving for surfacing sideways. This especially the case if the surface will be hidden under a shed, workshop or storage facility.
If you need a surface which is relatively affordable and fast concrete is an efficient solution. In the scenario you’re sideway leads to premium paving you may want to carry the paving around the corner for a distance.
This will create the illusion that it spans the whole sideway. However, most of the time this is not necessary as sideways should be more functional than aesthetic.
What do you put under concrete?
It is best to lay your concrete upon a surface which has no risk of any movement. This means no loose or crumbly topsoil and only sturdy subsoil.
You will need to excavate the soft dark layer of soil until you reach the firm and dense subsoil. The state of your soil will vary depending on where you live.
Generally excavating out the top 160mm is usually adequate.
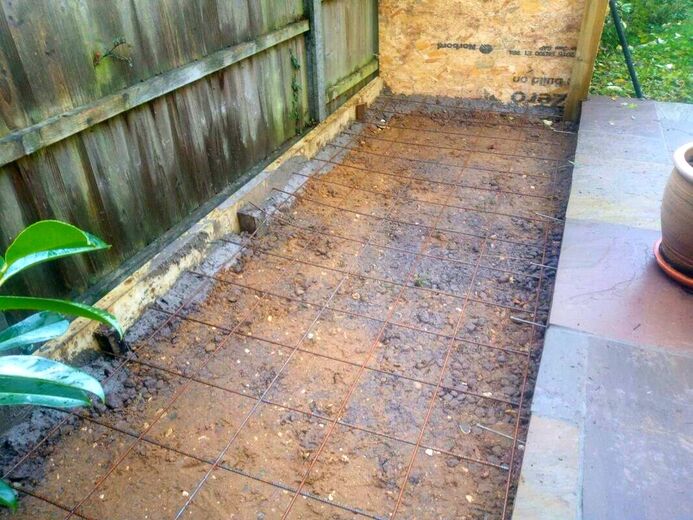
It is also beneficial to spread a layer of compactable hardcore or sub base under the concrete. This, when compacted, bites into the subsoil layer making it even more sturdy.
The sub-base aggregate also allows you to grade to a consistent and level base, perfect for laying concrete.
Generally the best sub base material for under concrete is crushed concrete or Mot type 1.
The sub-base aggregate also allows you to grade to a consistent and level base, perfect for laying concrete.
Generally the best sub base material for under concrete is crushed concrete or Mot type 1.
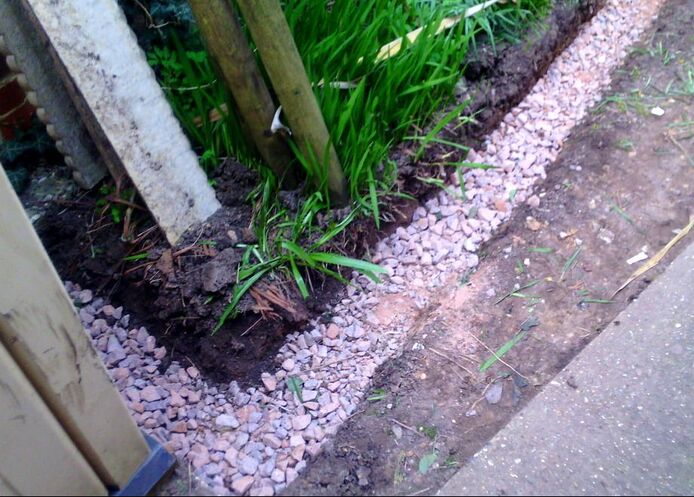
Mot type 1
Can you put concrete straight onto soil or dirt?
It is best not to put concrete straight onto soft topsoil or dirt. This is because the high levels of organic particles and air spaces make topsoil unstable.
This can potentially lead to the concrete cracking or even worse subsiding and sliding. This has the potential to cause damage to adjacent features and structures.
It is always advised to excavate out any soft topsoil and spread a compactable sub base first. If you have a generous depth of concrete with reinforcing you can concrete straight over a firm and robust subsoil.
This is as long as the subsoil is not subject to extreme fluctuations in seasonal water saturation.
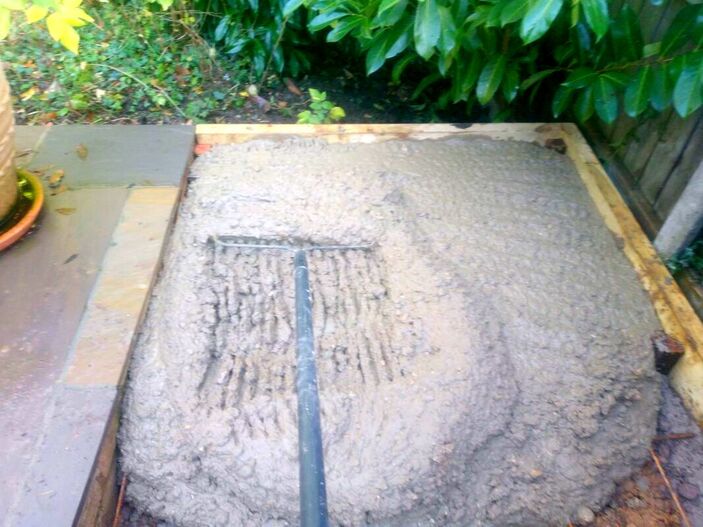
Do you need gravel under concrete?
You do not have to put gravel under concrete. However when people ask this question they are really asking, do you need to put compactable aggregates under concrete?
These are materials which look similar to gravel but are very different. Compactable sub bases such as Mot type 1 are designed to compact hard as a base to concrete and paving.
This is because they have particles graded from around 40mm to dust.
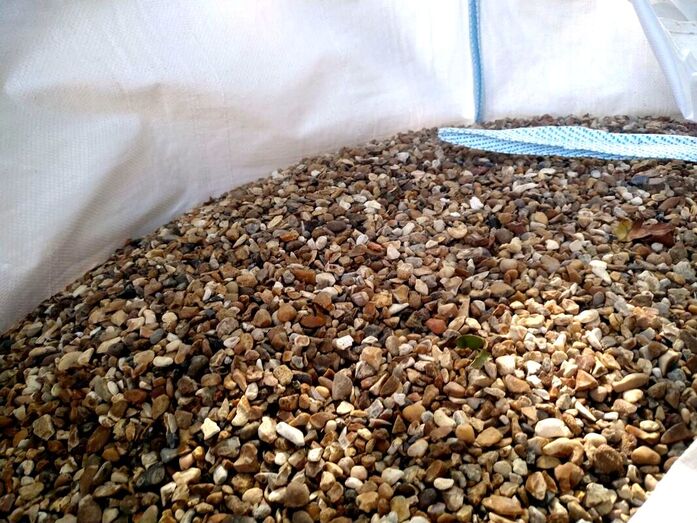
Gravel
The angular particles bind and compact together hard under pressure. Conventional and decorative gravels like the pea gravel above are not suitable for under concrete.
Their evenly graded particles mean they can easily displace under pressure. You can certainly bury a thin layer of these gravel aggregates under concrete but no more than 30mm.
I would add this should never be done on slopes or sites with unstable ground.
Their evenly graded particles mean they can easily displace under pressure. You can certainly bury a thin layer of these gravel aggregates under concrete but no more than 30mm.
I would add this should never be done on slopes or sites with unstable ground.
Should you put plastic under concrete?
It really depends on the moisture content of your underlying ground and climate. Concrete needs to hold a suitable level of moisture to cure correctly.
If your base and underlying subsoil are very dry this will suck moisture from your concrete. This is especially so during very hot and dry summer weather.
Such conditions can lead to weak and crumbly concrete and a general failure of the surface. Consequently, if you’re concreting sideway in hot and dry conditions you may want to put plastic underneath.
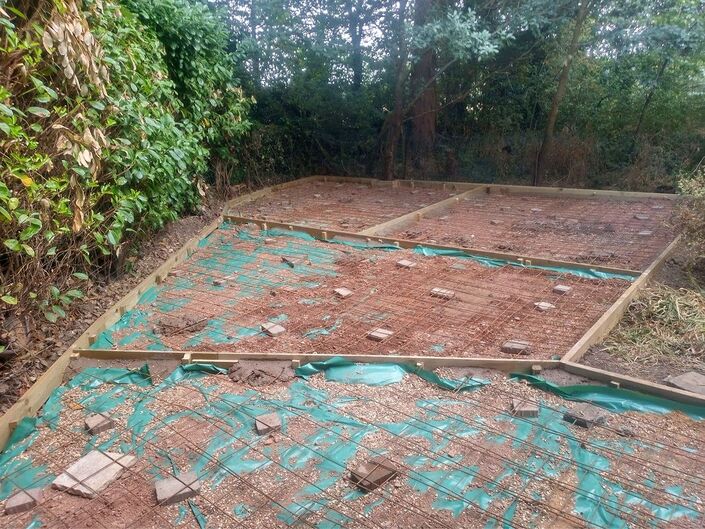
How do you finish a concrete sideway?
The best and simplest way to finish a concrete sideway is with a tamped finish. This allows for a very slight rippling within the surface which provides grip and texture.
The effect can be achieved by bouncing a straight edge gently upon the concretes surface. This allows the aggregates particles to shuffle together and compact well.
Such action brings the concrete cream to the surface which is easier to work to a satisfying finish. For a really smooth effect you can then work the concrete with a floating trowel.
However, this is usually not a necessary finish for concreting a sideway.
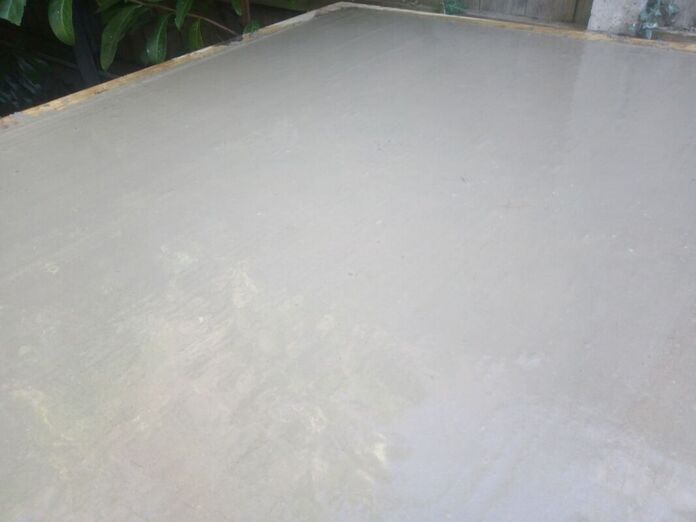
A smooth rippled finish from tamping
What do you need to concrete a sideway?
- Powerdrill
- Screws
- Cement mixer
- Builder’s wheelbarrow
- Builders bucket
- Hand brush
- Broom
- Spirit level
- Bricklayer’s trowel
- Floating trowel
- Metal rake
- Spade
- Shovel
How to concrete a sideway step by step
Step 1.
Excavate out any soft topsoil where you wish to lay new concrete.

Step 2.
Construct formwork (shuttering) to retain wet concrete and hold back from boundaries such as fences. Shuttering is normally constructed using external grade 6x2 timber fixed to 50x50mm timber pegs.
Make sure the top of your shuttering goes in at the perfect finished level for your concrete. Also make sure the level gently falls away from the house to prevent puddles and damp.
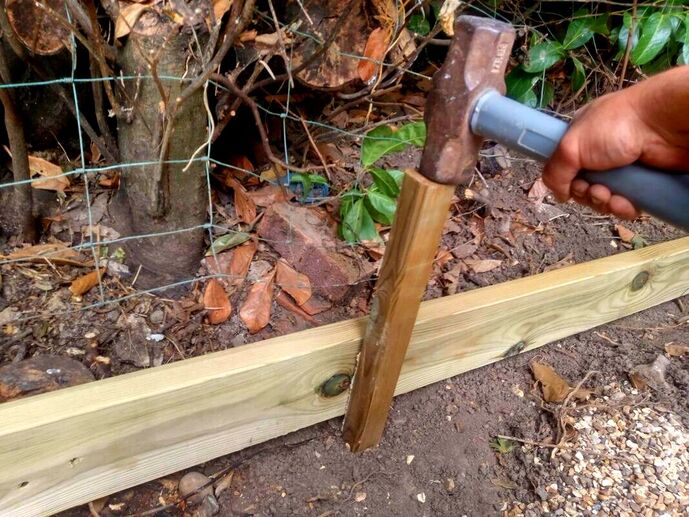
Step 3.
Make sure your shuttering can take the weight of wet concrete by firmly applying pressure. If it feels solid, good, if not, hammer in more timber pegs and screw in fixings securely.
Make sure your shuttering can take the weight of wet concrete by firmly applying pressure. If it feels solid, good, if not, hammer in more timber pegs and screw in fixings securely.
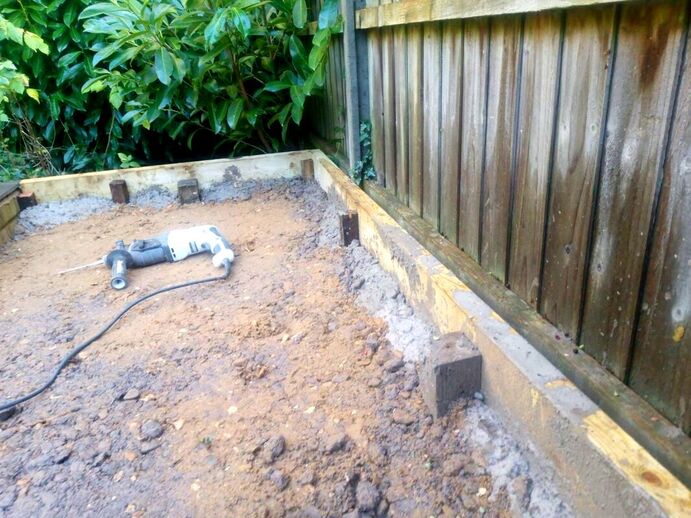
Step 4.
If your concrete sideway is adjoining a solid structure like a wall you will want to tie it in. This is where bolts or ties are fixed into the structure so the concrete bonds securely. This can be done by drilling holes into the wall and tapping in or fixing bolts.
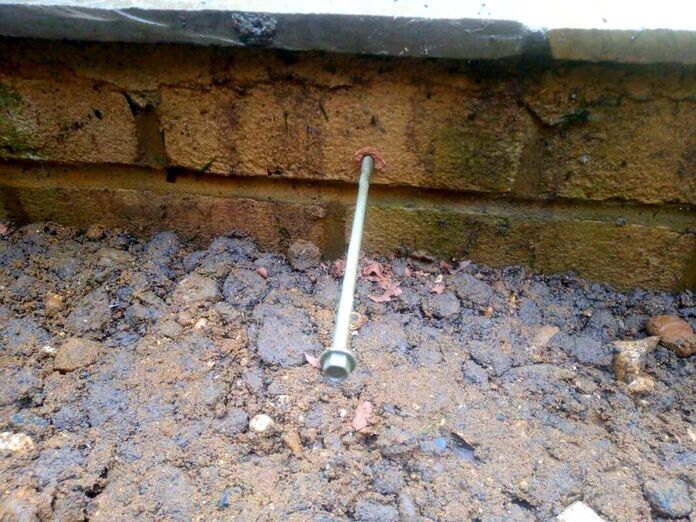
Step 5.
Fill up any low parts of your shuttering with compactable hardcore such as Mot type 1 and compact. You should aim for a concrete depth of between 6-4 inches (100-150mm). Spread your hardcore as evenly as possible and compact well with either a tamper or whacker plate.

Step 6.
If you are concreting a larger area you may want to add some reinforcing mesh. The mesh can be elevated off the hardcore using rubble or bricks. This will allow the reinforcing to sit within the centre of the concrete.
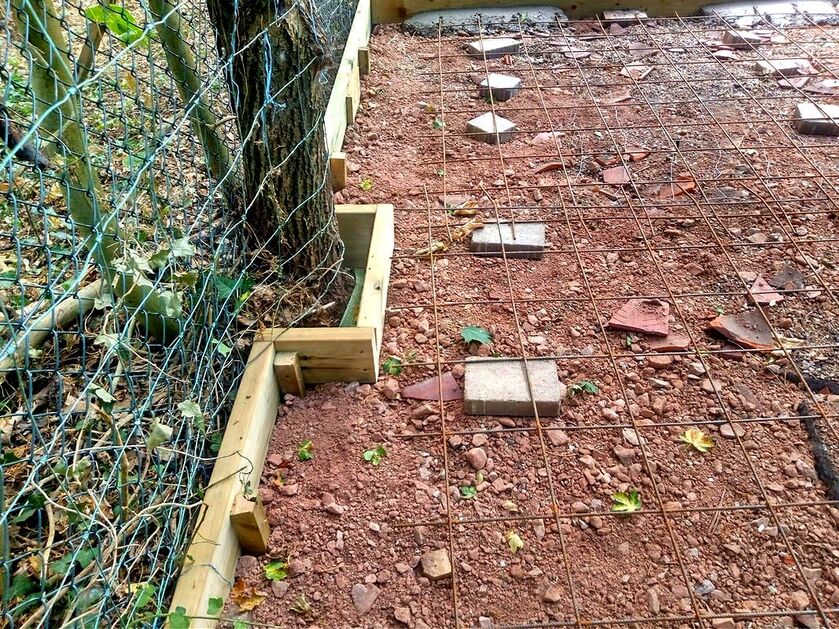
Step 7.
Get all of the materials you need to do the concrete mixing in a controlled area near the sideway. Concreting is a messy business which can stain walls and patios.
It is a good idea to cover mixing areas with sheets or where there is no threat of staining.
Get all of the materials you need to do the concrete mixing in a controlled area near the sideway. Concreting is a messy business which can stain walls and patios.
It is a good idea to cover mixing areas with sheets or where there is no threat of staining.

Before you start mixing concrete make sure there is no threat of rain for the next 24 hours.
Step 8.
Using a cement mixer, mix up 1 part dry cement to 5 parts ballast. Firstly add half a bucket of water to the mixer and then half a bag of cement.
Let it spin until all the clods have dissolved, keep adding more water if it is still cloggy. When the cement and water is a runny cream add the corresponding quantity of ballast (around 13 shovels).
Keep adding water if the mix becomes claggy but do not put in too much! Too much water will result in the concrete becoming too wet and discharging from the mixer.
When your concrete has the consistency of porridge and is well mixed, it is ready to pour.
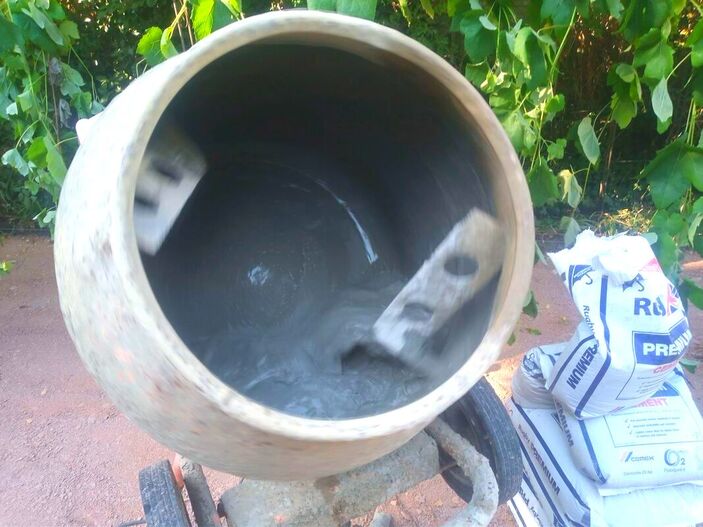
Step 9.
Empty your mixed concrete into a wheel barrow, I recommend only half filling the barrow at first. This will allow you to get used to barrowing concrete with minimum spillages and mess. Start to fill your formwork with the freshly mixed concrete.
Empty your mixed concrete into a wheel barrow, I recommend only half filling the barrow at first. This will allow you to get used to barrowing concrete with minimum spillages and mess. Start to fill your formwork with the freshly mixed concrete.
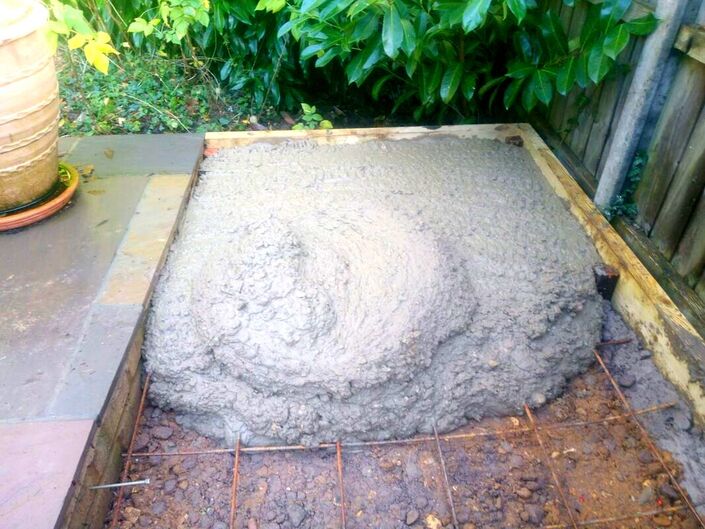
Step 10.
Using a rake, work the concrete so it is slightly higher than the top of the form work. The back of the rake can be used pump the concrete so it settles down with no air pockets.
Using a rake, work the concrete so it is slightly higher than the top of the form work. The back of the rake can be used pump the concrete so it settles down with no air pockets.
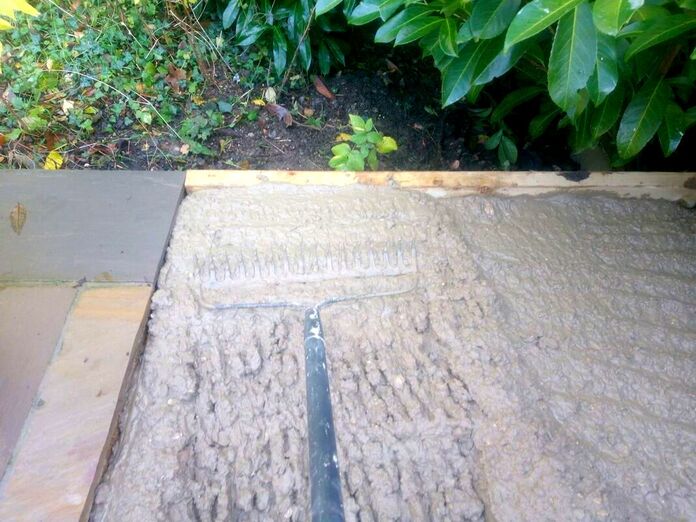
Step 11.
Using a straight edge tamp the concrete to realise a flush and level surface. If the concrete is too high in places scrape out excess with a trowel. Keep tamping until the concrete reaches a smooth finish flush with the top of the shuttering.
Using a straight edge tamp the concrete to realise a flush and level surface. If the concrete is too high in places scrape out excess with a trowel. Keep tamping until the concrete reaches a smooth finish flush with the top of the shuttering.
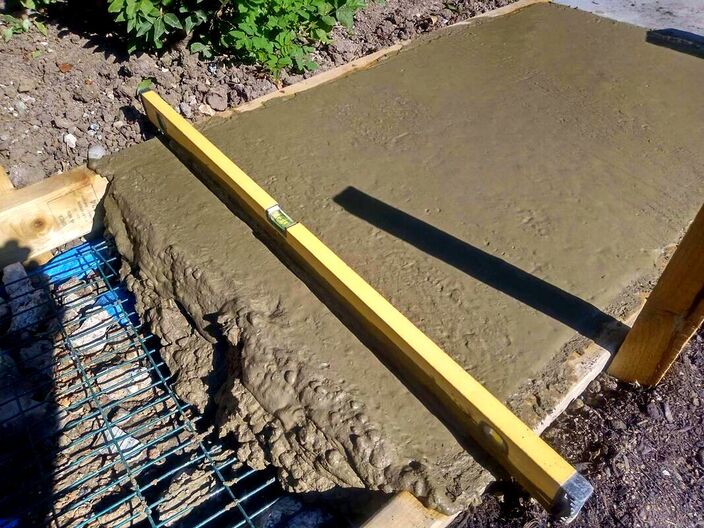
Step 12.
Clean concrete from all your tools so they do not stain and leave the sideway to cure. It is a good idea to leave all pets in the home during this time. If possible, fence the area off so wild animals do not wander over the surface during the night.
Clean concrete from all your tools so they do not stain and leave the sideway to cure. It is a good idea to leave all pets in the home during this time. If possible, fence the area off so wild animals do not wander over the surface during the night.
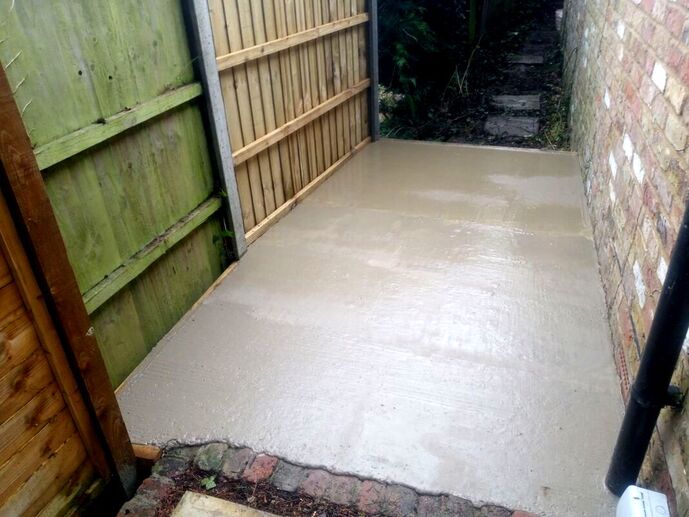
You have now successfully concreted your garden sideway! for further information on
how to concrete a sideway check out this other helpful article.
Below we have included some other articles which may interest you!
how to concrete a sideway check out this other helpful article.
Below we have included some other articles which may interest you!
|
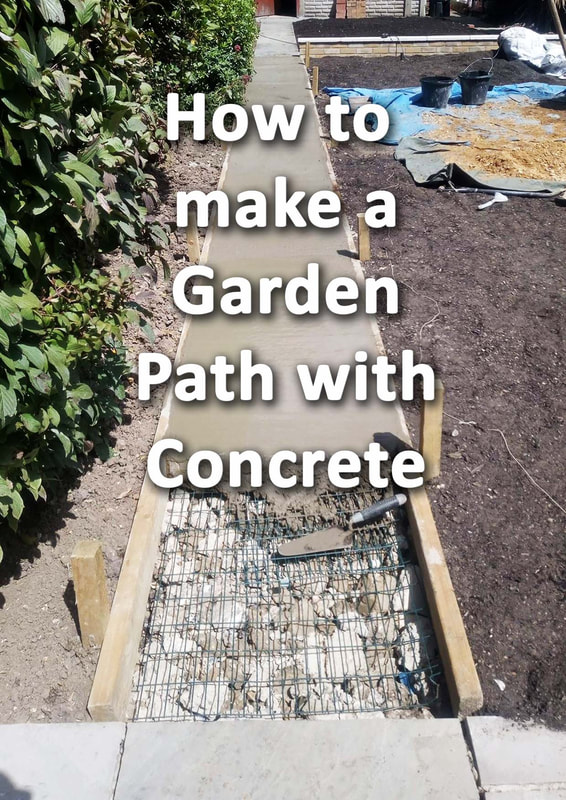
|
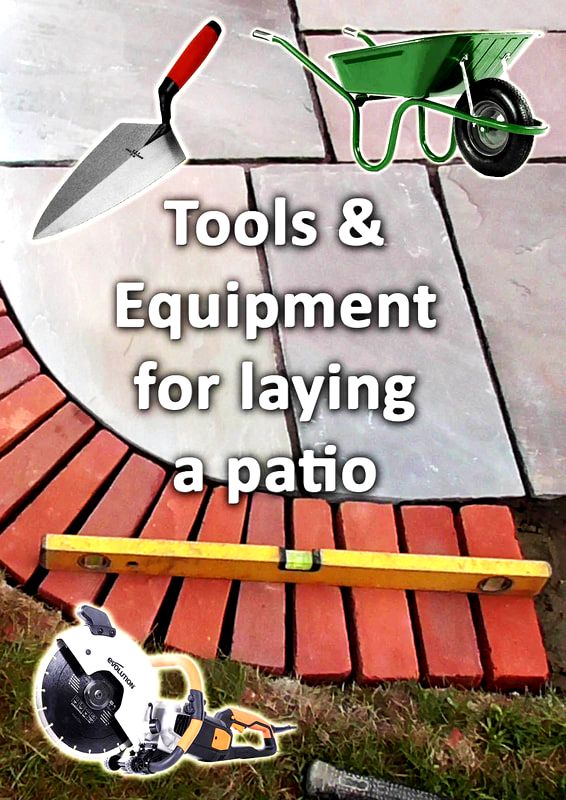
|
|
|
|
|
'As an Amazon Associate I earn from qualified purchases'
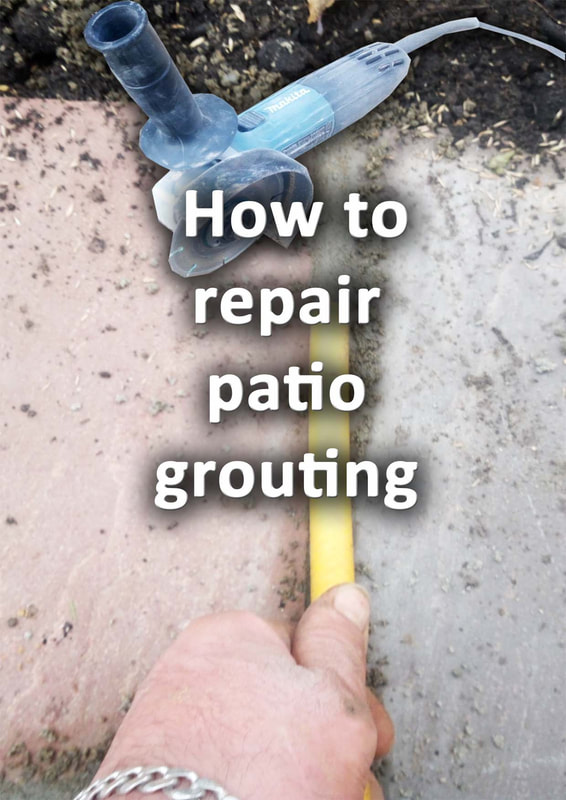
This article contains affiliate links
Patio grouting is exposed to every extremity nature can throw at it. Hours of powerful UV rays during summer, excessive frost in winter, as well as varying saturation levels throughout the year.
This can make it vunerable over time to movement, cracking and degradation. As most patio grouting and jointing is cement based it is not naturally suited to narrow and shallow applications.
In this article I will explain how to remove and repair patio grouting and pointing. I will describe the grouting mix and method of re-grouting used by the professionals.
Why do you have to grout between paving slabs?
Very few paving slabs are made square and uniform enough to be butted up tightly together.
Even when paving is suited to such laying the thin joints are susceptible to weed establishment. Unlike block paving, slabs are laid using rigid construction, in other words bedded down onto mortar.
This creates a continuous and solid surface which is not tolerant to movement. Hence grouting between paving seals the surface from the weather and protects paving edges.
Most paving including natural stone has slight distortions and imperfections. Grouting allows for some tolerance and give when laying paving to a specific pattern or bond.
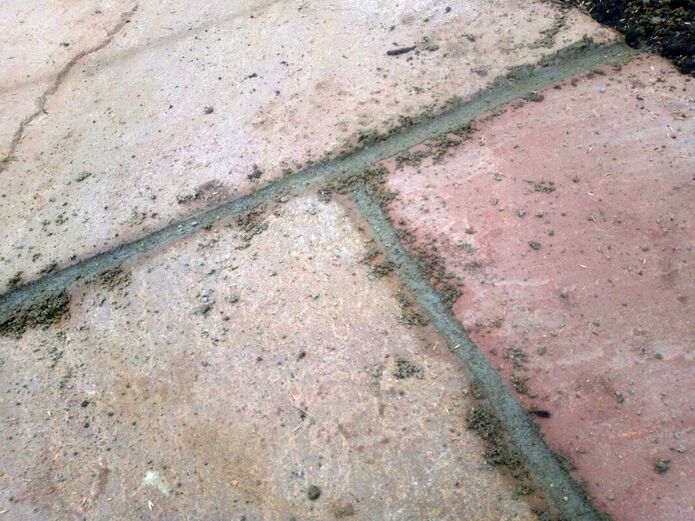
Can you Re-grout over old grout patio?
Not really, Mortar and cement base materials have very little flexible tolerance. This means the more they are applied over distance the more chance they have of cracking.
Grouting over old grouting may look acceptable at first but it will soon fail. The only way to re-grout a patio is to chase out the existing grouting and start over.
Do you have to remove old grout to grout a patio?
If you do not want your efforts to be completely wasted then yes! Just as you would not build a house on topsoil without a foundation you must remove old grout.
If you do not, the new thin application is likely to flake off after a single winter. The only way to ensure grouting will last is to apply a greater volume of mortar as possible.
The mix should be forced in deeply so it grips the inside of the joints tightly.
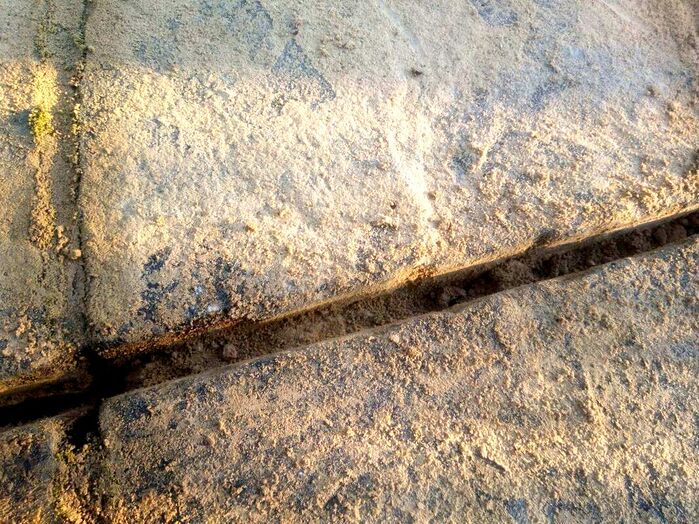
Why is my old patio grout crumbling?
Your old grout is crumbling because, most likely, the mix was too weak or applied incorrectly.
As patio jointing and grouting fills narrow gaps it must be strong! I recommend a mix which is 3 parts sand and 1 part cement for grouting. Normally a crumbly mix will be a sandy colour indicating a week mix.
Patio grouting should be a light grey colour unless colour dyes have been added. Another problem I see is with the application of grout to patios.
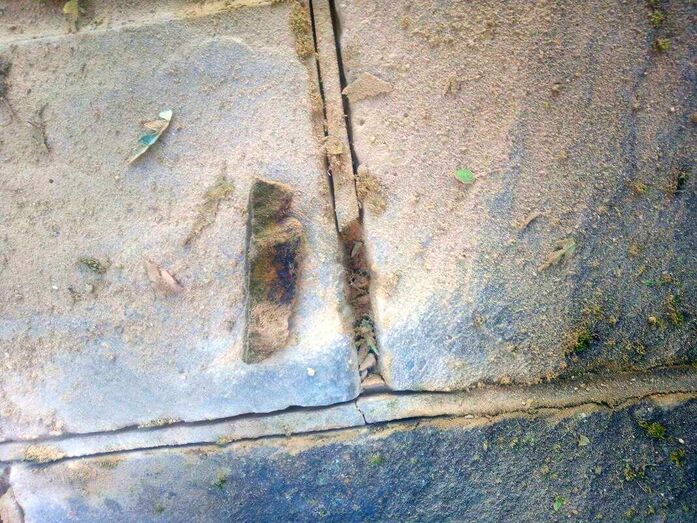
Merely sweeping a dry mix in between paving slabs will lead to failure. Such grouting will not have adequate moisture content or compaction to cure solid.
This will lead to excessive water absorption and weathering by freeze and thaw action. Patio grouting should be well mixed and just damp enough to form a tight ball in your hand.
There should be no wet cement discharge from the mortar whatsoever! This is very important as this will stain your paving!
Getting your grouting mix correct and applying it correctly is key to preventing a degraded and crumbly mix.
How long should patio grout last?
There is no reason a well mixed grout applied properly to a robustly built patio cant last 30 years.
How can I grout a patio without staining?
Grouting patios is an art which involves knowing your materials, assessing conditions and mixing correctly.
Grouting and pointing can stain patios badly and ruin thousands of pounds worth of work. I have seen this so many times again and again.
Grouting a patio is the most important and crucial part and must be undertaken with care and diligence. To grout a patio without staining make sure the paving and inner joints are dry before you start.
Check the weather and make sure there is ‘no risk of rain for at least 16 hours after completed grouting.
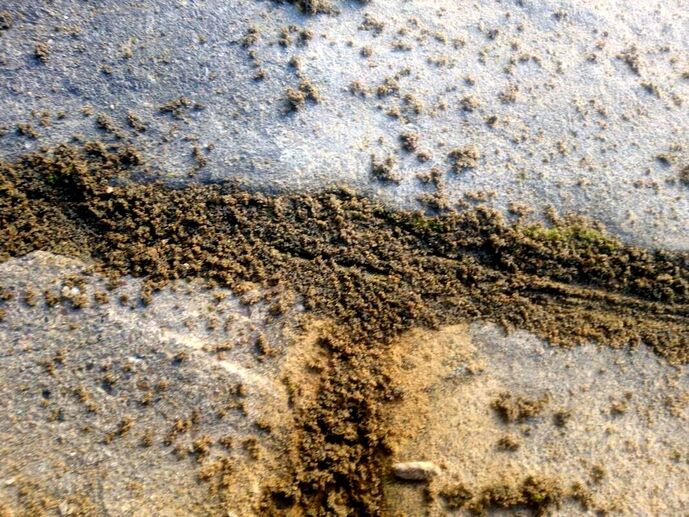
Your mix should be damp enough to compact well and work a finish but no more! If your mix leaches cement coloured moisture it has the potential to stain!
More information on how to mix your grouting will be contained in the step by step guide below. Be careful where you are walking! Messy mixing and mortar preparation can result in cement being walked all over a patio.
Make sure mixing is contained to separate areas and covered over with plastic! It is also important to gently sweep off excess grout as you work.
The best tool for this is a very soft brush like a large paint brush. This will create a good finish and reduce the risk of treading mortar into the paving’s surface.

What do you need to repair and replace patio grouting?


Fine dust mask 10 - pack (Amazon)


Barnwell rounded pointing trowel (Amazon)

Footprint jointing iron (Amazon)

How to repair and replace patio pointing step by step
Step 1.
Remove all existing grout which is degraded and cracked. The best way to do this is by cutting out old mortar with a grinder and diamond blade. Stubborn sections of mortar can be tapped out with a hammer and masonry chisel.
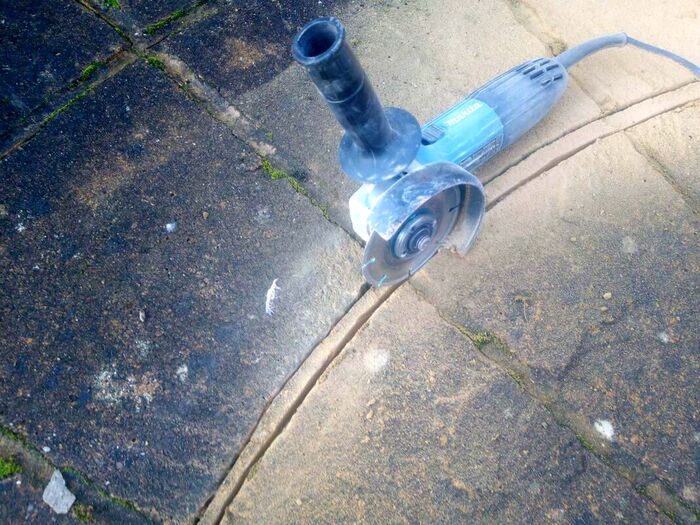
Step 2.
Sweep out any dust or residue from the patio and joints with a stiff brush.

Step 3.
Mix 3 parts plastering sand or Leighton Buzzard sand with one part dry cement. You will want to make sure your sand is not too wet so it can mix with the cement thoroughly. Mix the sand and cement dry until it is a consistent, dark grey, colour. For consistent mixes I measure out one full bucket of cement and three full buckets of sand.

Step 4.
To a builders bucket add about an egg cup of mortar plasticiser and weather proof bonding agent like Sikabond. Then fill the bucket about half full and mix thoroughly.
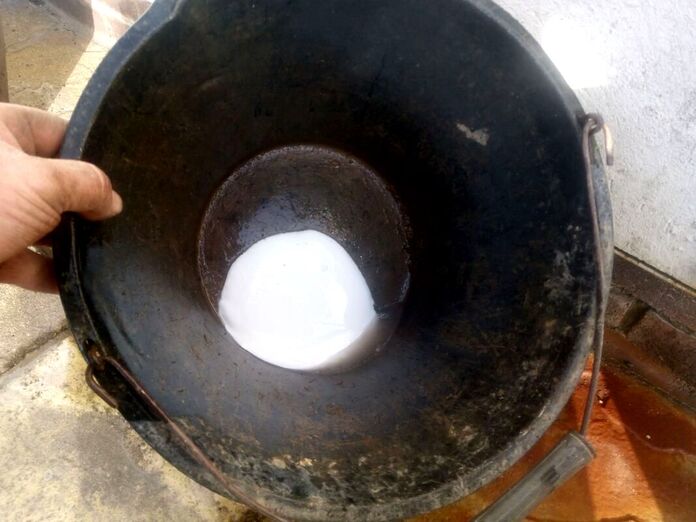
Step 5.
‘Very slowly’ add a dribble of the water to your cement mix. Remember, the worst thing you can do here is add too much!
You want your mix to be slightly damp ‘NOT’ wet! It should end up with the consistently of brown sugar! Mix slowly and thoroughly until all damp lumps have blended in.
Once your mix is consistent let it sit for 15 minutes, this will allow moisture to absorb consistently throughout the mix. Then give it a final turn over and mix before starting to grout the patio.
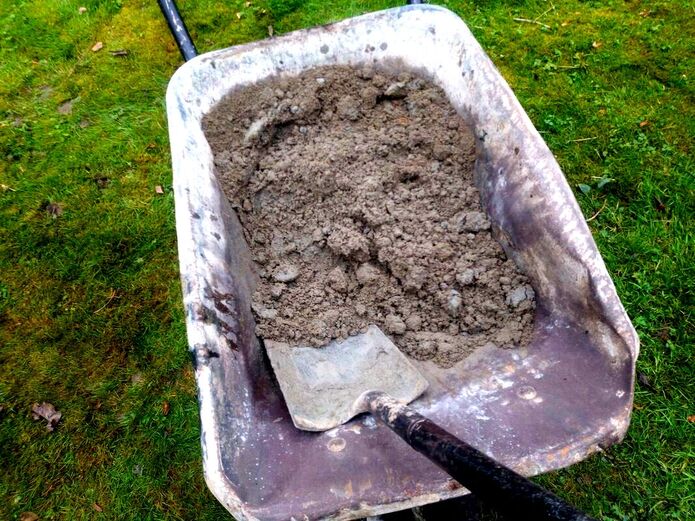
Step 6.
Using a pointing trowel, start ramming the grout mix into the paving joints tightly. Using the trowels edge tap the mortar until it forms a level and compacted fillet in the joint. As you work try to leave as little mortar on the paving surface as possible.

Step 7.
Using a hose pipe or jointing iron press down upon the grout mix to smooth along a neat finish. Try to leave no lines within the grouting and remove any excess grout as you work.
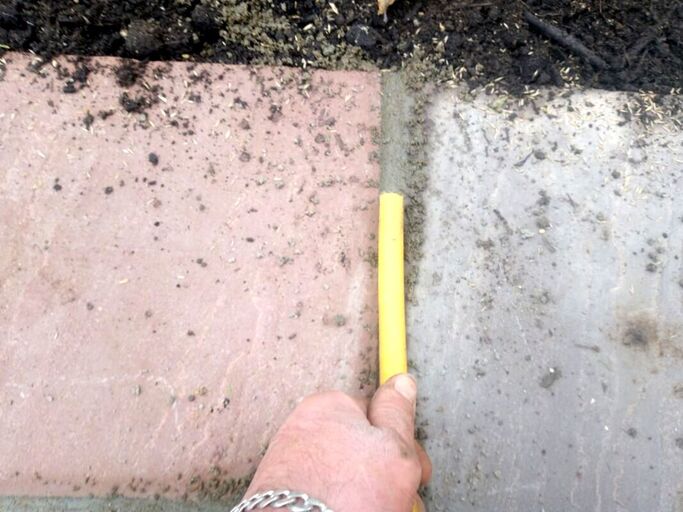
Step 8.
About 15 mins after jointing a neat finish brush off any excess grout from around the joints. Only do this with a very soft brush such as a large paint brush. This will smooth out any harsh edges to the mortar and help flick fine cement off the paving.
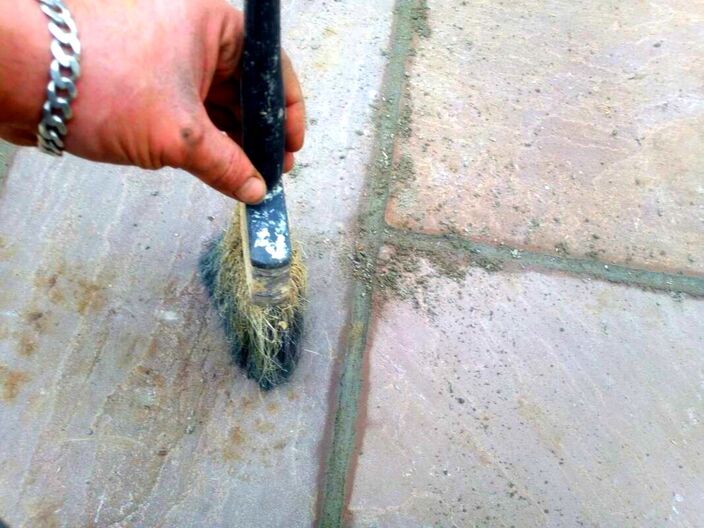
Patio grouting products

Sika all weather jointing compound (Amazon)

Wide gap jointing compound (Amazon)
You have now completed your patio grouting! Just make sure there is no rain expected or frosty conditions before you begin. Below I have included some other relevant articles you may find useful.

|
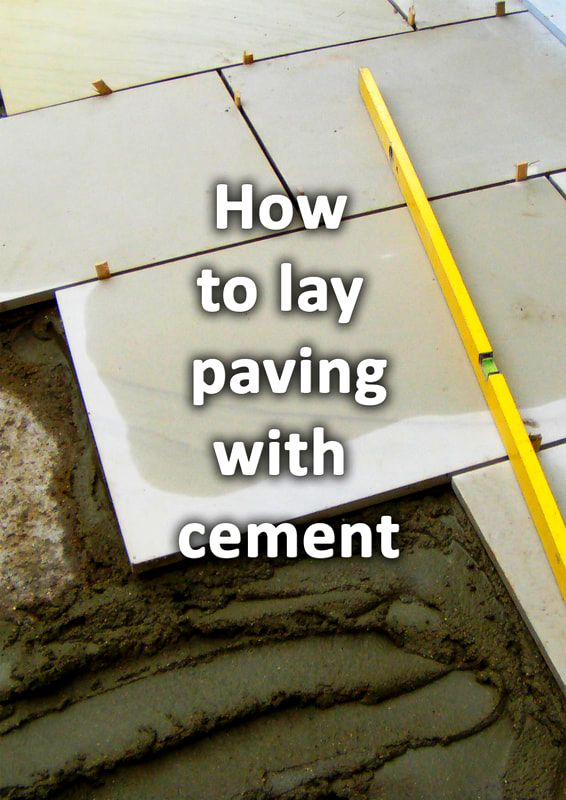
|

|
|
|
|
|
'As an Amazon Associate I earn from qualifying surfaces'

|
The Author
Paul Nicolaides
BA (Hons) Dip
Paul Nicolaides has over 30 years of recreational gardening and 20 years of professional landscaping experience. He has worked for landscape contractors including design and build practices across London and the South East. In 2006 he qualified with a BA Hons degree and post graduate diploma in Landscape Architecture. In 2009 he founded Ecospaces an ecological landscaping practice which aims to improve social cohesion and reduce climate change through landscaping. In 2016 he founded Buckinghamshire Landscape Gardeners which designs and builds gardens across Buckinghamshire and the South East. This blog aims to provide easy problem solving information to its audience and encourage others to take up the joy of landscaping and gardening.