
This article contains affiliate links
Every now and then you may come across an old concrete fence post buried in your back garden. It is common for posts to either be snapped or cut at the base when removing old fences.
It is often sods law that a new post has to be installed where an old post was. This means you have the exciting task of removing the old fence post concrete. Fence post concrete can be some of the most challenging and awkward buried concrete to remove. In this article I will explain how to remove old fence post concrete effectively. Do you have to remove the old post concrete?
One of the most common scenarios regarding fence post concrete removal is when replacing old fences with new fences.
It is a common desire to replace panels in the same arrangement as they were before. The problem with this is each new post falls upon where an old post once stood. This generally means every new fence post excavation is met with a hard lump of unmovable concrete. The best strategy to avoid this is building your new fence with posts in a different position. 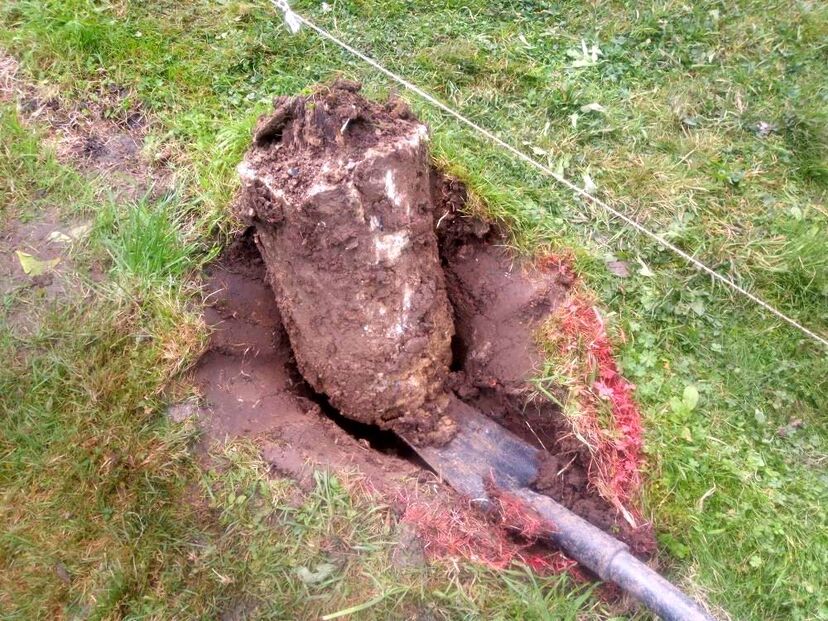
If your old fence began with a whole panel start your new fence with half a panel. This will reduce the chance of having to break out old concrete for every new post.
No matter how hard you try to avoid removing old fence concrete sometimes it is inevitable. Below I will explain the options available to remove old fence post concrete. How to remove fence post concrete with the post
The best scenario when removing fence post concrete is still having the fence post attached. This provides a long handle to try and force out the concrete by mechanical leverage.
The pull and push method
Probably the most basic method for removing post concrete, this involves pulling at the post to loosen the concrete. Begin to pull and push at the top of the post to work the concrete loose. If you have a wooden post be careful it does not suddenly snap at the base! (They often do!)
As you force more movement, the concrete foundation will shift loosely within the soil. When the concrete becomes loose enough it can be pulled out of the hole. 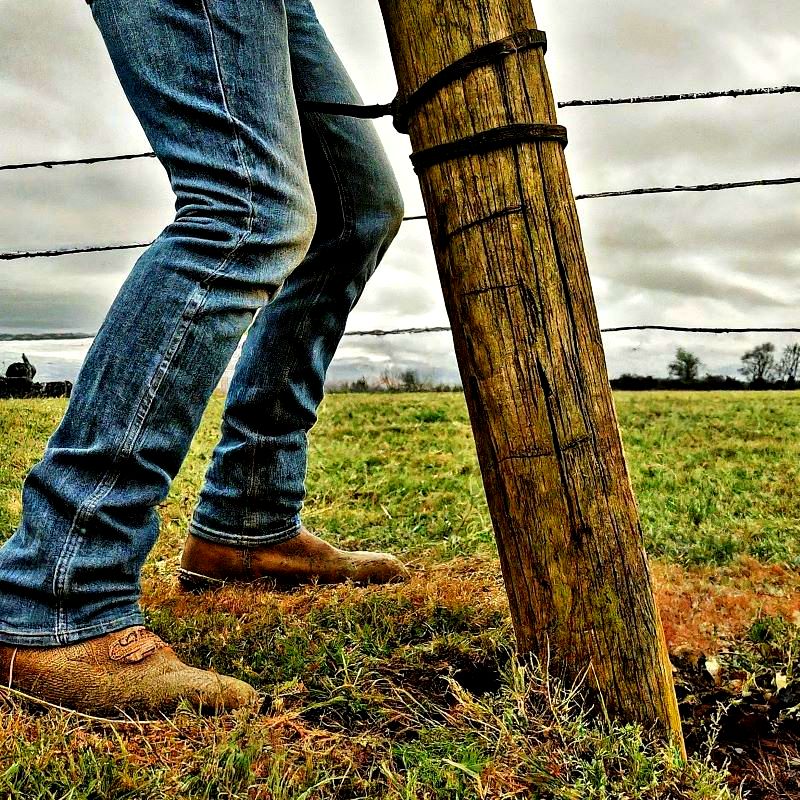
The roll tow method (car tyre and tow)
Using a vehicle to tow out a fence post is not always physically possible or advised. However, if done safely can be a very fast and easy method of removing buried fence posts.
You will need to attach a climbing rope securely to the base of your post, preferably fixed into the post. The rope should then be looped over the top of a large circular tyre. Attach the other end of the rope to a tow bar and slowly pull the fence post up and over the tyre. This should not be attempted where nearby property can become damaged. 
The leverage lift
The leverage lift involves using mechanical leverage to lever out the buried concrete vertically. This involves securing a strong rope or chain to the base of the fence post.
If you have a wooden post screwing a bolt or bracket to fix too can be effective. Tie the other end of your rope to a long and strong lever such as a digging bar. You only want a rope length of about 300mm to pull at the post. As you lever up the bar the rope will pull up the concrete vertically. This method however only works well when the concrete has already been worked loose. Use proper lifting techniques when attempting this method not to injure your lower back. How to remove fence post concrete without the post
Most of the time, the post that was attached to the buried concrete will have snapped off. This means you will not be able to use the post to help your remove the concrete. In such a situation there are three options available to remove the concrete. These are listed and described below.
The dig & bar method
The dig and bar method relies upon digging down one side of the concrete to dislodge it. Slowly excavate down once side of the post concrete using a digging bar and post diggers.
If the ground is hard and dry, allow some water to sink in for half an hour. When you have exposed one side of the concrete, use your bar to lever the concrete into the hole. The loose concrete mass can then be pulled out of the hole. 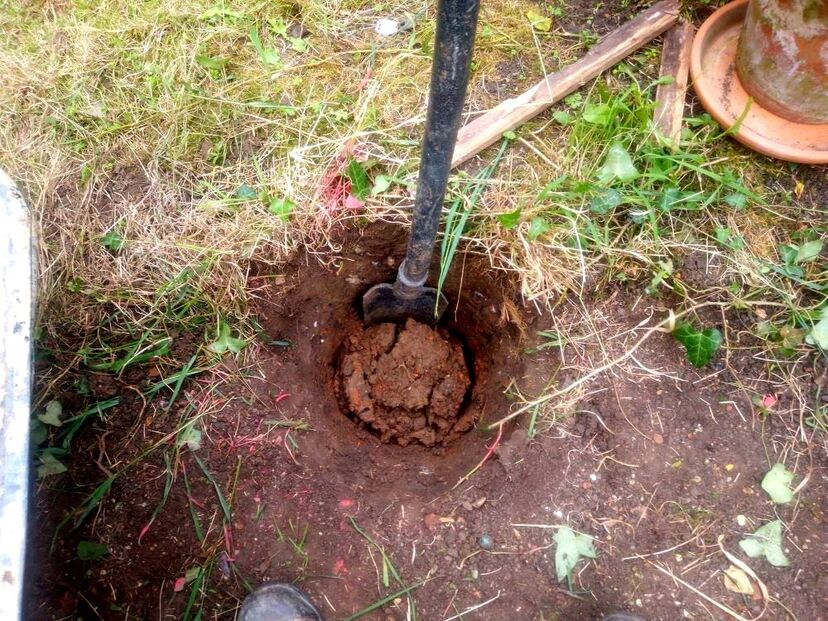
The Auger method
The auger method also involves excavating down one side of the concrete to loosen its mass. However, this is achieved with a mechanical auger which makes the excavation much easier.
This is best done with a gasoline powered auger with a 150mm diameter drill attachment. Excavate down one side of the post concrete until it is fully exposed. Then lever the concrete into the hole using a digging bar. 
The Breaker method
The breaker method is effective if you want to re-dig the same hole the concrete already sits within. It can however be quite slow and awkward to execute well.
For this method you will need an electric breaker with chisel attachments. Break into the concrete shattering it down the length of the post hole. As you gradually break through the concrete remove any loose fragments as you excavate lower. Eventually you will remove all the concrete leaving a fresh hole to concrete in another post. 
Thank you for reading our article on how to remove old fence post concrete! I will link to some other articles below you may also find useful.
'As an Amazon associate I earn from qualifying purchases'
0 Comments
This article contains affiliate links
In an increasingly eco-conscious world it is not just our energy sources and transportation which has been brought into question. Our gardens and landscapes are also being scrutinised as vehicles to reaching a more sustainable future.
I have long suggested that our negative impact upon the planet is more of a landscape issue than anything else. A great dependency upon fossil fuels, mechanised agriculture and distant supply chains all reinforce this concept. Modern landscapes are highly managed and energy hungry operations. Vast deserts of lawn covered public spaces with highly hybridised, high maintenance, planting displays. 
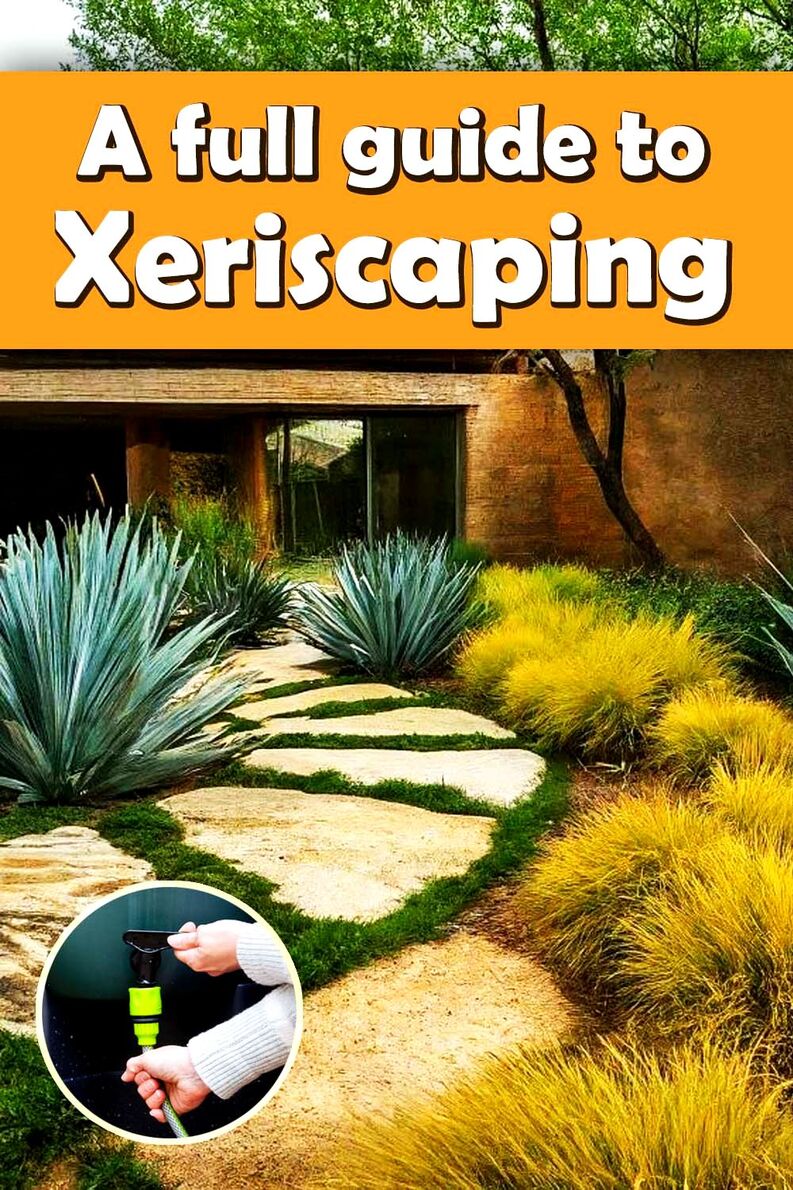
Such landscaping often requires large amounts of irrigation, energy and labour. 'Xeriscaping' is increasingly being put forward as a much more sustainable way to create and maintain landscapes.
Such landscaping focuses upon low input approaches using less while giving more to a sustainable future. Xeriscaping can not only reduce water consumption but also compliment sustainable architecture and boost biodiversity. In this article I will aim to summarise this innovative landscaping concept while breaking down all of its elements, and benefits. What is Xeriscaping?
Xeriscaping is a method of landscape design and construction which reduces water consumption and the need for irrigation. However, Xeriscaping is not just restricted to conserving water but also having a lower impact in general.
This means creating landscapes which require less energy input, maintenance, pesticides and herbicides. This has brought Xeriscaping firmly in line with more sustainable and eco-friendly landscaping practices. It is very common for Xeriscaping landscapes to also include native plants and wildlife habitats. 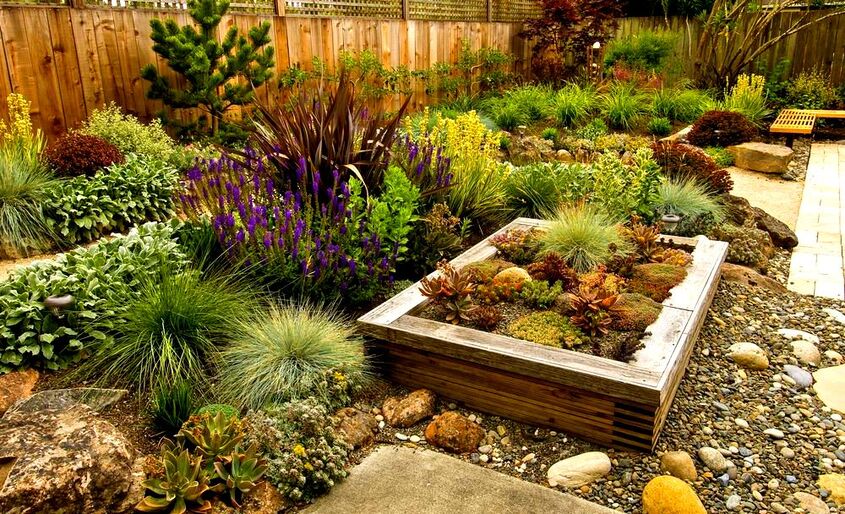
By its very nature Xeriscaping reduces the water consumption and encourages landscaping which is low maintenance, cost effective and better for the environment.
Why is Xeriscaping important?
Xeriscaping is important because it conserves water, reduces energy consumption, and the need for chemical applications into the landscape. Chemical fertilisers, herbicides and pesticides can escape into the wider landscape causing environmental damage.
Xeriscaping also reduces high maintenance landscape elements such as lawns and hedging. This reduces the need for intensive cutting regimes which help to eliminate emissions from combustion engines. By reducing such inputs and conserving fresh water Xcerscaping is helping to reduce human impacts upon the environment. This helps to reduce global threats of biodiversity loss, toxification, climate change and fossil fuel consumption. 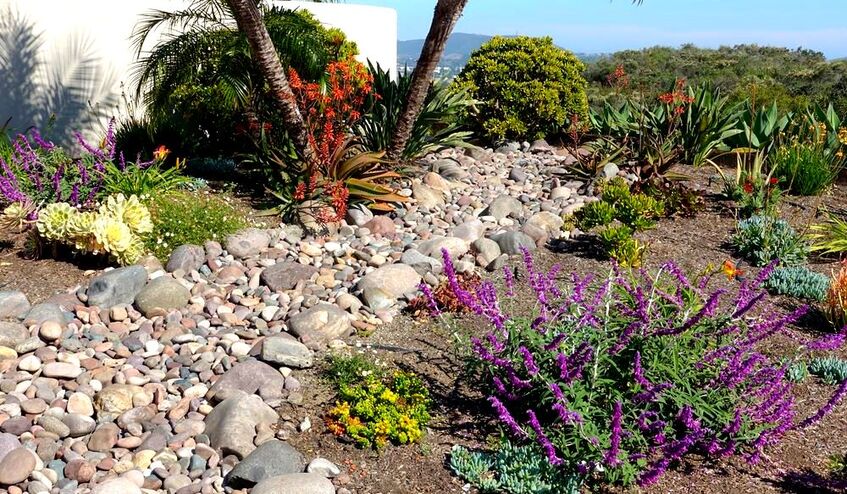
Understanding Xeriscaping
Many Xeriscaping projects are associated with hotter, dry, climates such California or the Mediterranean. Consequently, many assume that Xeriscaping is a type of desert garden or dry garden.
This is simply because many Xeriscaping gardens are focused within climates where preserving water is more important. However, even countries with high annual rainfall such as the UK are seeing a growing enthusiasm for Xeriscaping! As mentioned previously, landscapes which require less water also require less, mowing, weeding and hedge cutting than those that do. 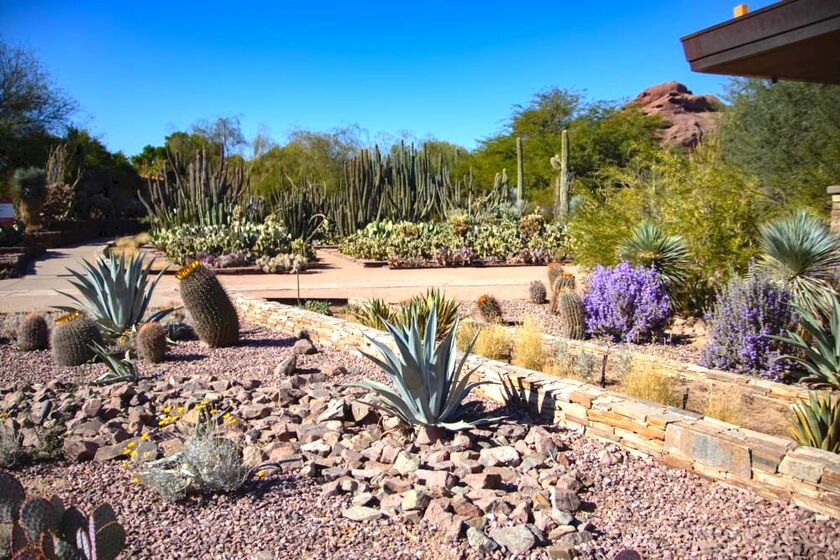
Therefore, even within wetter climates a combination of species selection and hard landscaping can create less intensive landscapes. These can look naturalistic whilst contemporary and also be good for the environment.
Planting schemes specify more natives and drought resistant species with a focus upon perennials. Perennials require less maintenance as they come up every year. Water conservation
One of the most fundamental elements of Xeriscaping is to conserve as much water as possible. Some of the best ways to conserve water is by implementing rain water harvesting techniques. The simplest way of doing this is by installing water butts to roof gutters.
For more intensive systems gutters and patio drainage systems can be channelled into underground storage tanks. These can be tapped into via a pump during hot and dry summers for sustainable landscape irrigation. Areas of hard standing can also be designed to fall towards planting areas to reduce the need for extra irrigation. 
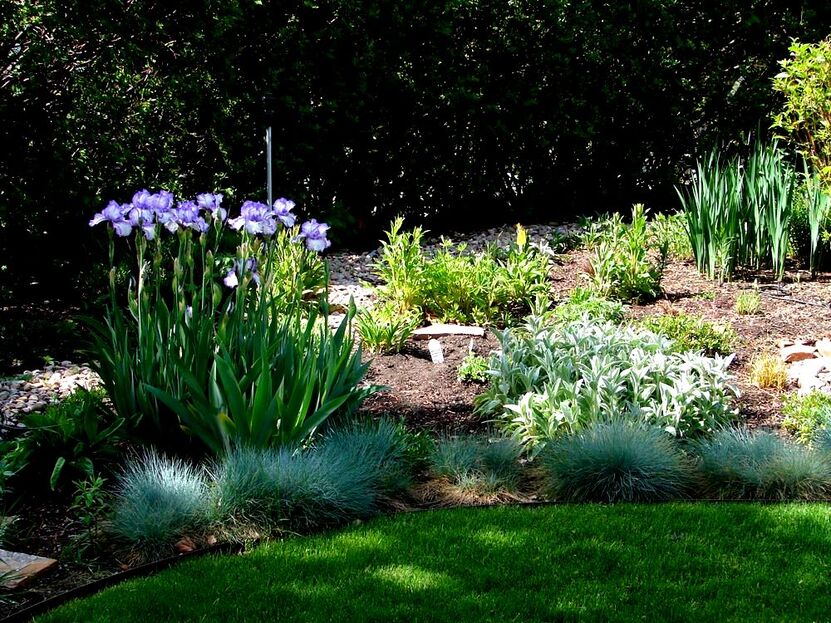
Native & Drought tolerant planting
Even if you live within a region with high annual rainfall summers can still become susceptible to drought. This can lead to dry, cracked, soil and dying plants. However with careful plant selection you can mitigate most of these threats.
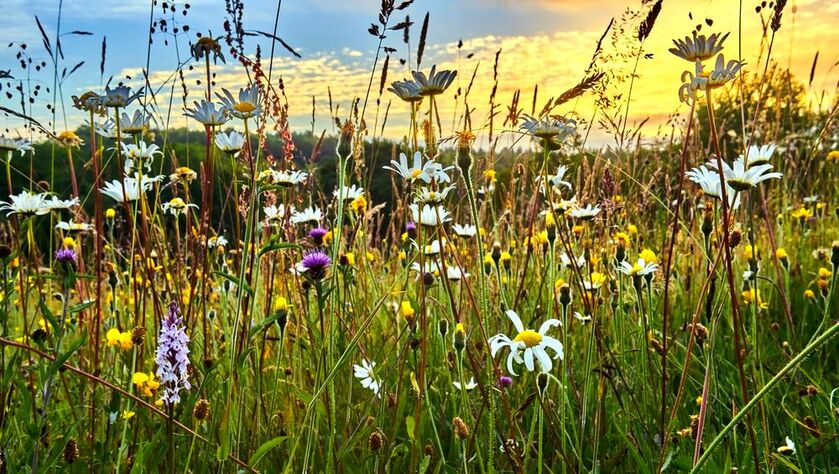
By choosing native plants and wildflowers endemic to your area you can reduce the impact o drought. These plants are adapted to your regional weather and soil type requiring less irrigation and care. Many native wildflowers and meadow species are also accustomed to poor soil and midsummer droughts. Alternatively, you may choose a landscape theme that naturally uses dry loving plants such as Mediterranean and Succulent gardens. 
Soil improvement & Mulching
One of the reasons modern landscaping suffers from periods of drought is poor quality soil. Many topsoil’s used today are from landscape suppliers who mix up their own topsoil loams and blends.
These are normally a combination of compost, fine sands and waste sub-soil from excavations. The problem with such topsoil is it has not had enough time to build up its own ecology. The billions of tiny bacteria, fungi, invertebrates and insects which make up soil is very complex. 
Soils with low levels of soil ecology usually leach nutrients and dry out faster in times of drought. Consequently, it is advantageous to dig in plenty of organic matter into your soil and mulch regularly.
Mulching will help to protect soil from moisture loss and help to feed and encourage soil life. Efficient irrigation techniques
Not all gardens will require the installation of irrigation systems. However gardens in particularly hot and dry climates may have to rely upon them during exceptionally dry periods.
If you do have irrigation systems make sure they are programmed to be as efficient as possible. This could involve irrigating at night to prevent as much water evaporation as possible. It is also efficient to employ irrigation systems which deliver water under the soils surface. This also prevents evaporation during hot weather. 
Lawn alternatives
Although lawns are one of the most pleasant looking and functional outdoor surfaces they are not always practical. Unless you live in a cool climate with high levels of rainfall lawns can require a lot of irrigation.
If not lawns can become dry and die off during the summer when they are most needed. Whether you live in a cool climate or not lawns can require intensive maintenance. This can take up valuable time and the use of expensive energy. In an Xeriscaping scheme you may wish to consider lawn alternatives such as gravels. 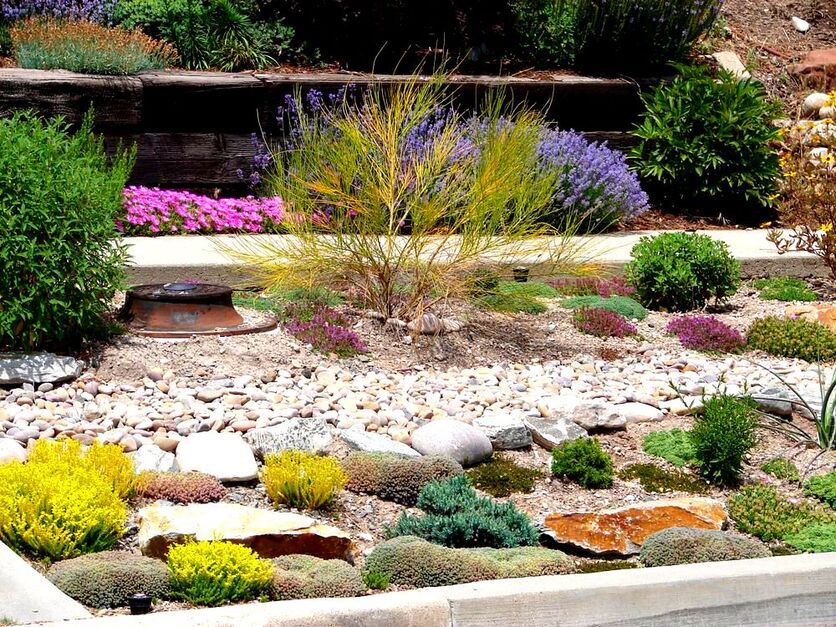
Materials for Xeriscaping
Paving
Conventional thoughts on suitable paving for Xeriscaping would suggest permeable paving is best. However I would say impermeable paving with a sustainable drainage strategy is best.
Permeable paving will simply allow water to seep through into the soil below. However, impermeable paving can direct water into flower borders to help irrigate plants. Alternatively surface water can be collected within channel drains and directed to a storage vessel for later use. From a sustainability point of view I would suggest using a locally sourced natural stone with robust installation. 
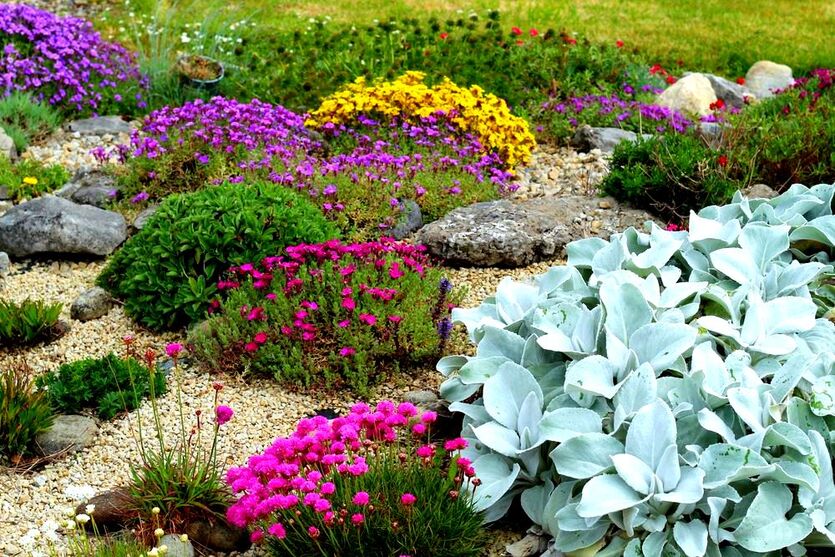
Gravels
Many Xeriscaping projects prefer not to install lawns as they can require extra irrigation during summer.
Consequently gravels can act as a satisfactory substitute for lawns and provide multifunctional surfaces. Gravel is especially effective in Xeriscaping projects with a desert or Mediterranean theme. Although brightly coloured, gravel can increase solar reflection and increase the urban heat island effect. In hot climates this could increase the need for irrigation than reduce it. 
Mulches
Mulches can play a crucial role within Xeriscaping projects and especially those trying to reduce heat island effects. Organic mulches such as ornamental bark, leaf mould and wood chip create a protective layer over soil.
As they degrade they can invigorate soil ecosystems and lead to healthier soil. Having a covering of organic material also helps soil to retain moisture during dry weather. This reduces the need for irrigation and keeps the soil at a stable temperature. Such mulches also help to prevent the establishment of weeds leading to less maintenance and herbicide use. 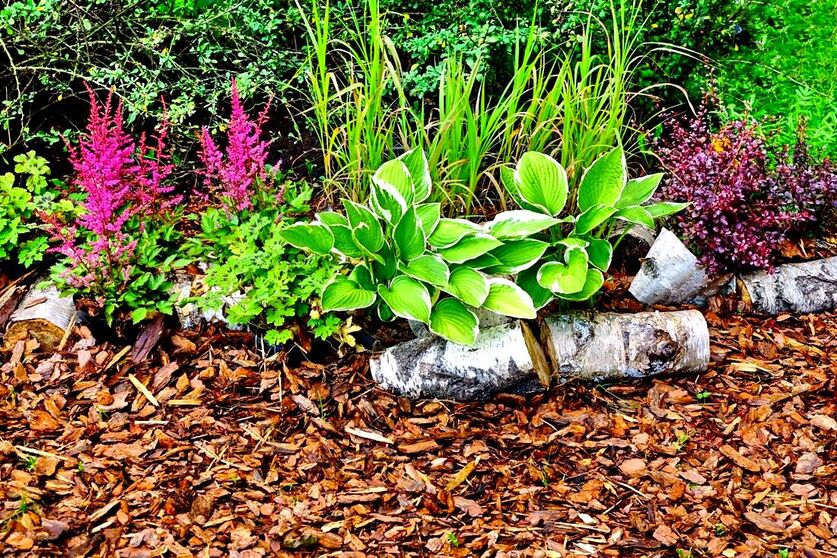
Rocks
Although not an essential element of every Xeriscaping project rocks do provide both functional and aesthetic benefits.
Rocks can be effective at creating naturalistic rain gardens which absorb and collect excess surface water. Rocks also lend themselves to the theme of dry, arid, landscaping which requires less irrigation. Landscaping such as alpine rockeries and dry succulent gardens are a great way to implement rocks into Xeriscaping. 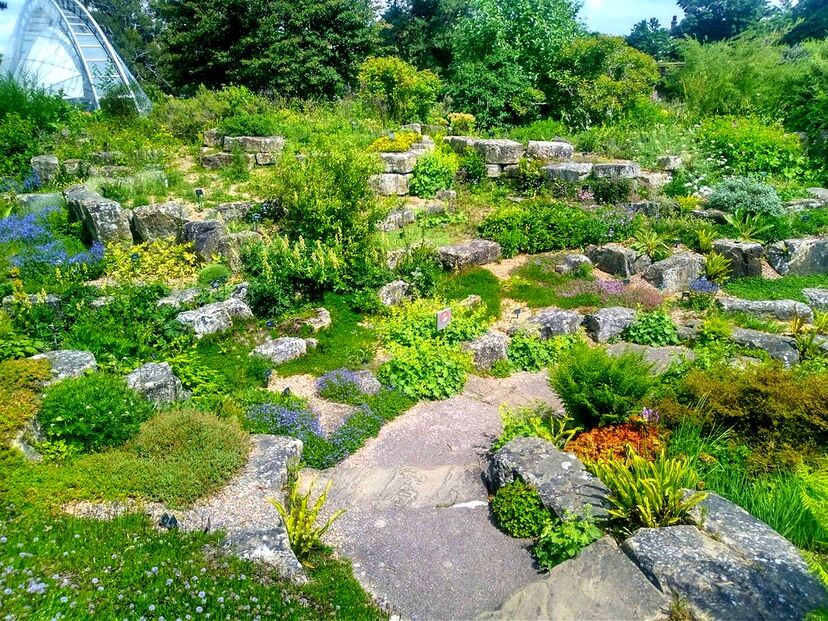
Walling
Every type of landscaping will require retaining features, level changes, terracing and raised topography.
Xeriscaping is no different and walling provides the perfect opportunity to add aesthetics and function to your design. Walls can be utilised to divert surface water, create raised beds and enhance microclimates. Natural stone walling such as dry stone walls and gabions naturally lend themselves to a dry garden theme. These are perfect for Mediterranean and dry Xeriscaping design themes. 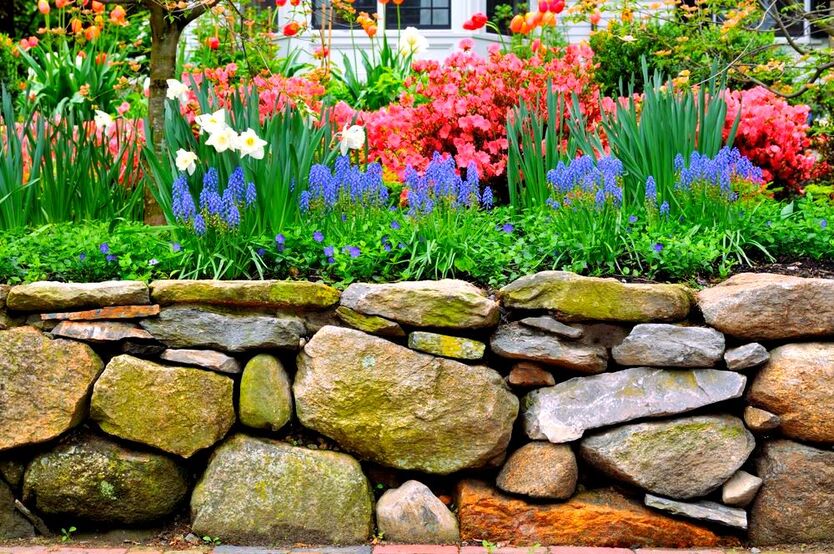
Planting for Xeriscaping
Native plants
Native plants are naturally adapted to a specific localities climate and soil conditions. This means they are less likely to require extra care and irrigation making them perfect for Xeriscaping.
Perennials
Perennials re-grow from the ground every growing season from deep roots, rhizomes and bulbs. These plants have ample water and food stored within their root structures making them more robust. Perennials are much more drought resistant than annuals and require much less maintenance.
Bulbs
Like perennials bulbs typically come up once a year for a limited amount of time. They also have energy and water stored within their bulbs making them less affected by extremes of weather. They also bring lots of seasonal interest to Xeriscaping landscaping projects.

Meadows
Meadows are wild grasslands which contain many robust wildflowers and hardy grass species. Meadows are fantastic for Xeriscaping as they do not require as much water as conventional lawns. These rich tapestries grow fast early on in the season and burst into bloom throughout the summer season. They are also fantastic for many species of wildlife!
Mediterranean plants
Mediterranean plants naturally come from places with hot summers and low rainfall. It is no surprise that the Mediterranean theme is so embraced within Xeriscaping. Dry Mediterranean gardens are often the perfect garden themes for low water consumption and reduced maintenance.
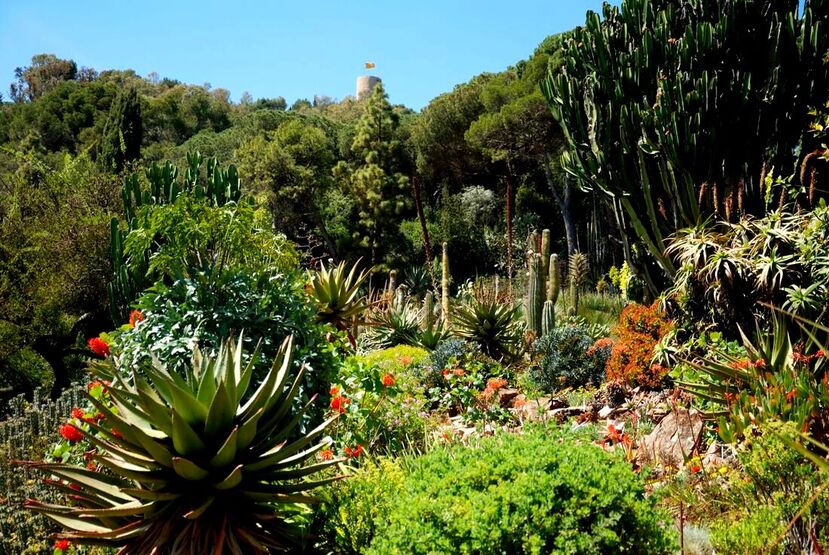
Succulents
Succulents are loved for their architectural shapes and interesting forms. These very attractive plants are extremely drought tolerant and low maintenance by nature. This makes outdoor succulent gardens the perfect accompaniment to Xeriscaping projects.
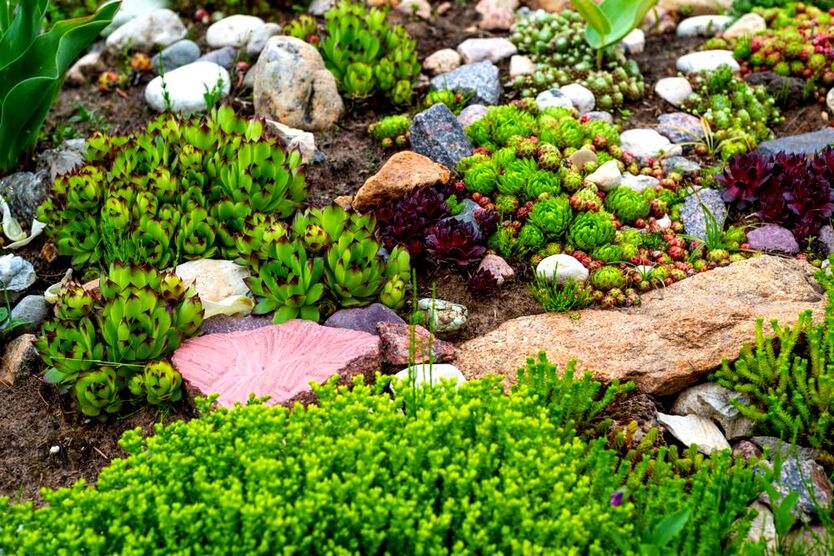
Alpines
Alpines are drought resistant plants native to cold and mountainous parts of the world. These plants have evolved to thrive in exposed locations in rocky soil. They are adapted to dry conditions and also perfect for Xeriscaping projects. These typically work well in raised Alpine rockeries with large builders and gravel beds.
Designing for sustainability
In recent times the idea of Xeriscaping has become a rather vogue and popular garden trend. Even popular gardening programs are now talking a lot about drought resistant plants and dry garden planting design.
However, it is important to remember that there is much more to sustainable landscaping than just saving water. I often say to my clients 'if you want a garden good for the planet you must take a holistic approach'. 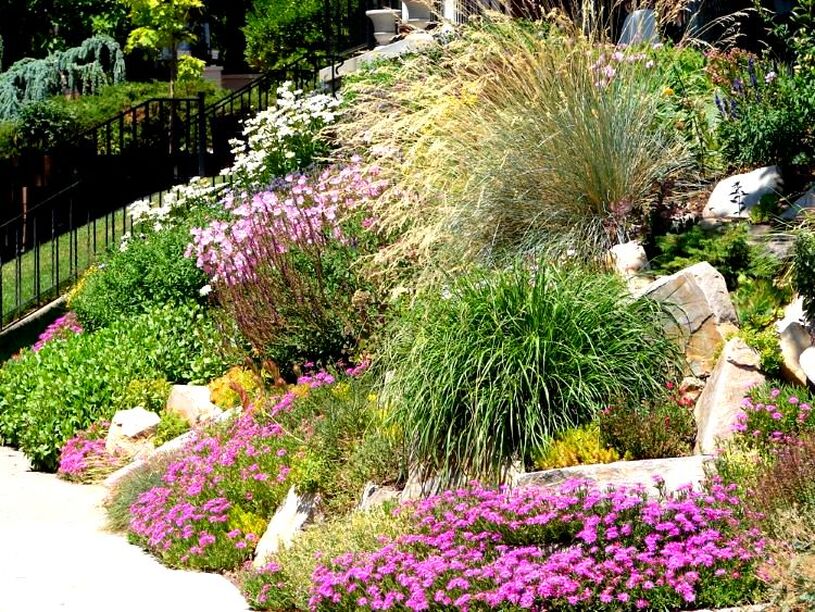
Designing for sustainability must include other benefits including; biodiversity, soil ecology, sustainable drainage, sustainable functionality with buildings, energy production, food production, organic recycling and eco therapy.
If you are excited about the benefits of Xeriscaping great! However, if it is a more sustainable and eco friendly landscape you seek Xeriscaping is only a small first step! Final thoughts
During my last year training as a Landscape Architect my dissertation focused upon Ecological design within Landscape architecture. I sincerely believe many problems faced today within the built environment can be solved with more sustainable landscapes. Whether reducing water consumption, improving mental health or teaching new skills, sustainable landscaping is the key to improving society.
Xeriscaping & sustainable landscaping services
If you require sustainable landscape design or eco landscaping services please do not hesitate to contact me.
As well as sustainable landscaping we also offer all conventional landscaping services including; paving, fencing, driveways, patios, planting, drainage, new lawns, clearances and gravel installation. Based in Amersham we cover most of Buckinghamshire including Hertfordshire, Oxfordshire and local regions of Amersham, Aylesbury, Beaconsfield, Chesham, Chalfont Great Missenden, Gerrards cross, High Wycombe & Tring. Why not watch a a video of some of our latest landscaping projects below?
'As an Amazon associate I earn from qualifying purchases'
This article contains affiliate links
English gardens are celebrated worldwide for their exceptional charm, beauty and adaptability. These gardens elements and influences are as diverse as the host country itself. With multiple historical and social influences as well a favourable climate with abundant water, English gardens are lush, vibrant and complex. However, the very essence of an English gardens beauty is both simplistic and charming. I have often thought the major appeal of English gardens is their contradiction between formality and informality. There is a distinct blurring between the lines between these two fundamentals which provides an exciting juxtaposition! 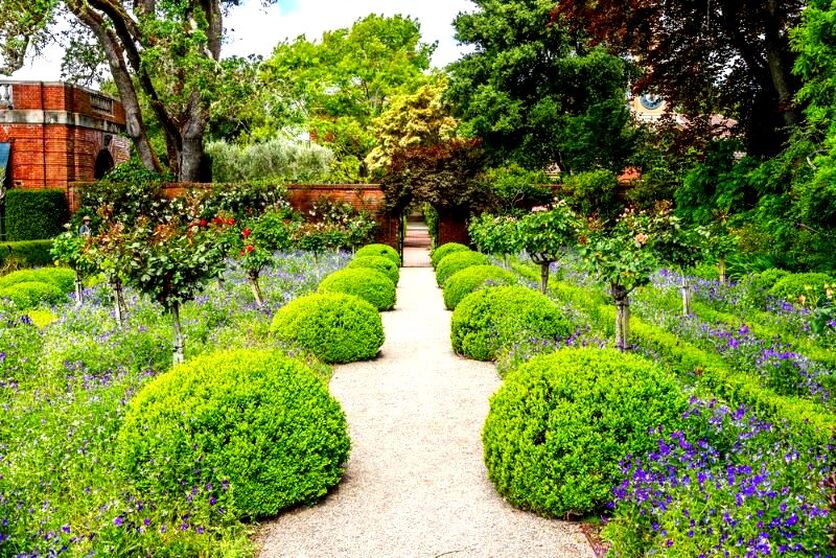
A layering of historical values, social ideals, global influences and horticultural expertise has formed a garden style like no other.
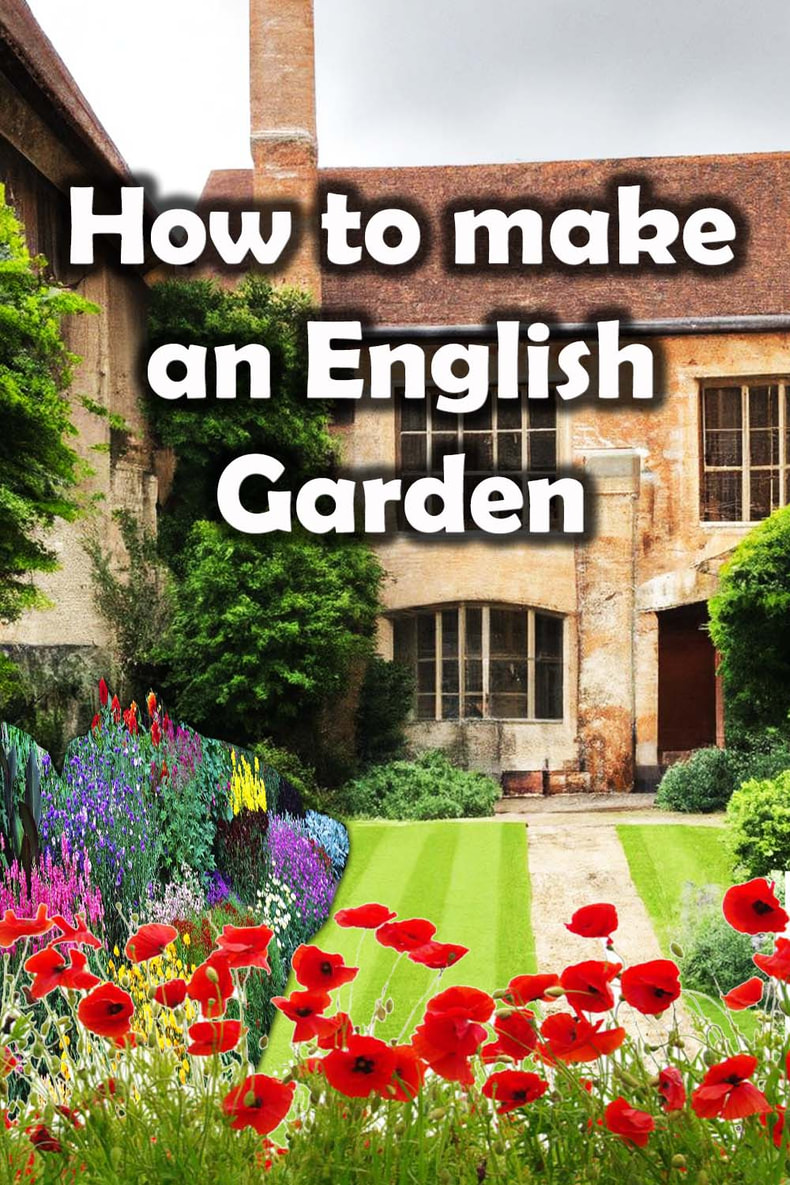
In this article, I will explore the origins of English gardens investigating their historical influences and aesthetic components. I will break down their fundamental parts so you can create your very own English garden. Discover everything you need to know to create your very own English garden whether it is in either a contemporary or traditional style. The history of the English garden design style
Pre 16 century many English gardens and landscapes were more functional than aesthetic. Fortified towns and rural villages utilised surrounding gardens for the production of food and medicinal herbs. After the first century AD the Roman Empire brought many influences over from the European continent. The Romans had their own horticultural traditions and architectural styles which influenced the islands landscapes. This more classical style had a focus upon geometric forms, axial pathways as well as ornamental fountains and statues. After the fall of the Roman Empire the spread of Christianity and Monasticism further influenced the arrangement of English gardens. Monasteries become places of horticultural experimentation and innovation. This led to many agricultural advances in crop growing and associated delicacies such as wine production. 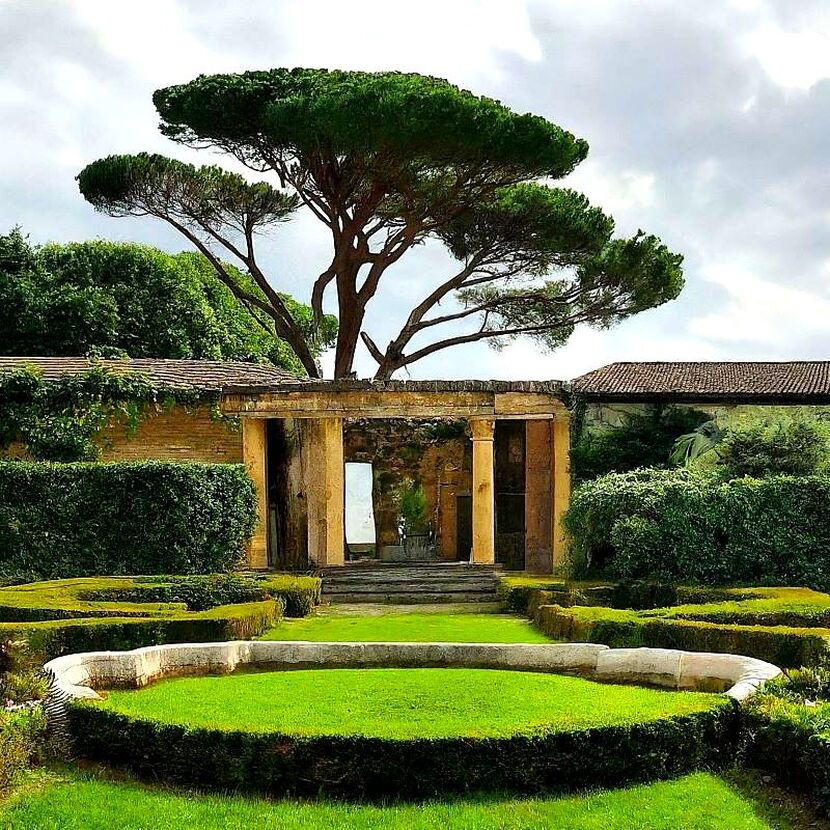
The heavy fortifications of the middle ages resulted in gardens and crops being strategically closer to buildings. This was essential in times of conflict and in the event of sieges.
This helped to evolve what is now recognised as the traditional ‘walled English garden’. Monasteries would organise their gardens into compartmentalised growing spaces for various crops. Some sections would be used to grow vegetables while others, fruits, teas and herbal remedies. The English climate also had a heavy influence upon gardens during these historical times. Being susceptible to high winds and late frosts there was always a need for extra shelter. Walled gardens helped to create calmer growing conditions for tender food crops to thrive. A combination of masonry walls and gravel surfaces also helped to absorb and reflect sunlight boosting warm microclimates. This led to an extended growing season and abundant crop harvests. 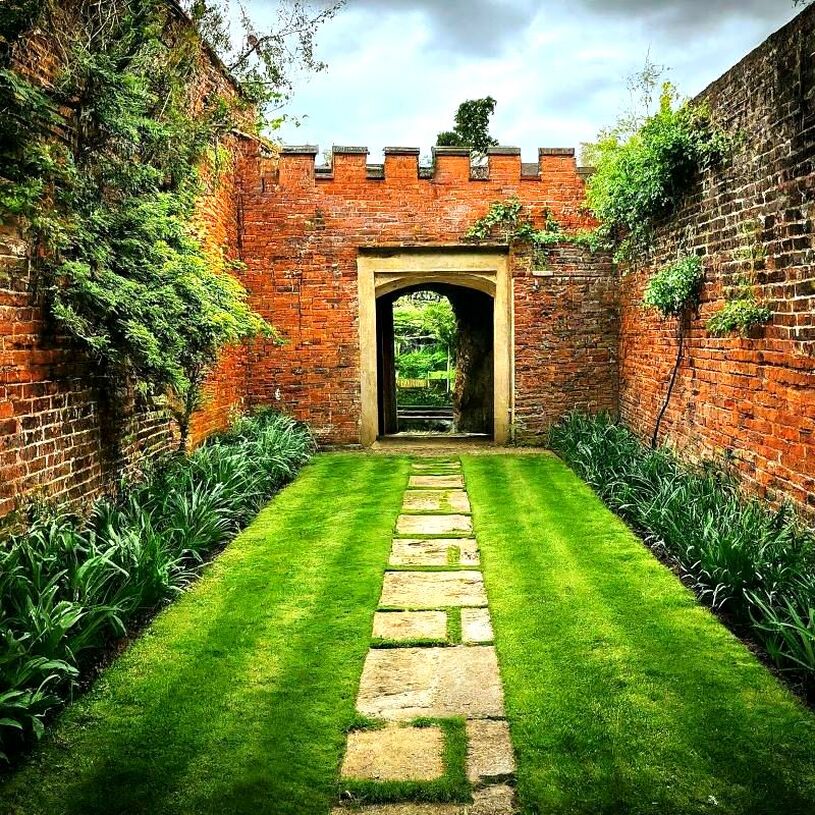
The 16th and 17 centuries saw England enter into the era of sea travel and empire expansion. This led to a period of sea faring exploration where specimen plants were brought from distant lands. English estates employed teams of gardeners and horticulturists who experimented with various planting types and colour designs.
In such cases classical landscape design met large generous borders exploding with new colourful exotics! These luxurious plantings where set within well structured gardens with symmetrical beds and geometric pathways. Such gardens were lined with tightly clipped hedges and regimented topiary. Grand English estates would require sizable budgets for such intensive horticultural regimes. Inevitably the rise and fall of family wealth would result in fluctuating levels of upkeep. This would result in some estates becoming less well managed and overgrown. Consequently, an overgrown look has evolved alongside the more traditional and classical English garden style. Groundcovers would spill out onto pathways while climbers would cover old walls and structures. Therefore it is often common to see combinations of both formal and more naturalistic elements within English gardens. 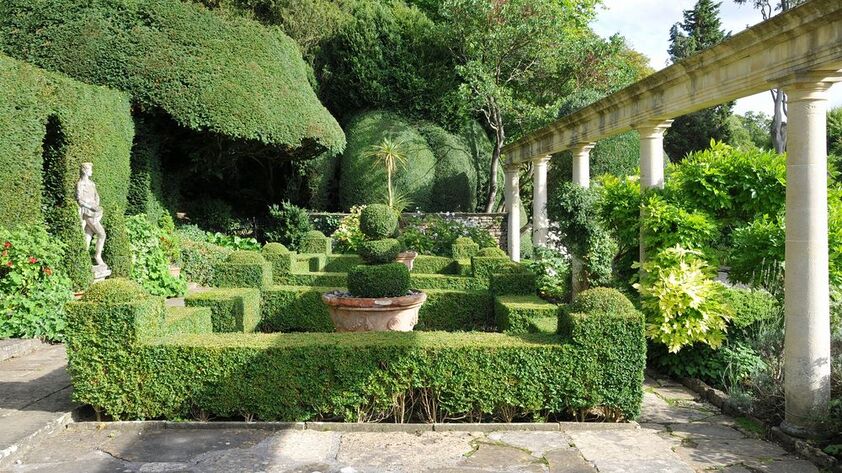
During the 18th Century many English garden designers started to move away from the classical style. Landscape architects such as William Kent and Capability Brown adopted more of a naturalistic style.
More emphasis was put upon mirroring the natural beauty of landscapes than geometric shapes and straight lines. Such gardens would captivate more of the romanticism of nature with sweeping grasslands, woodlands, and lakes. Many of these gardens would incorporate meandering pathways which would take you on a journey of discovery through nature! Such journeys would travel through places of enclosure followed by stunning views and interesting focal points. Such dramatic English landscape design can be seen within gardens such as Stourhead in Wiltshire. The Victorian era then saw an ever increasing interest in gardens and horticulture. This period of English history came at the aftermath of the industrial revolution. Many of the population now lived within towns and cities which were often overcrowded with poor air quality. 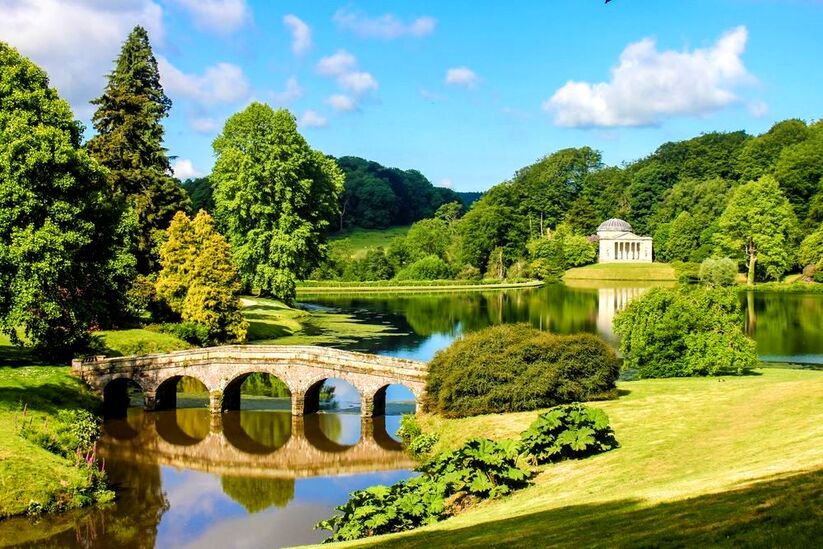
Stourhead in Wiltshire, England
Many government initiatives were brought forward to help green towns and cities to improve health. This led to the development of many new parks and public gardens within urban centres.
Many urban town houses would combine layers of the old English style with both formal and informal elements. Front gardens often featured geometric shapes, clipped hedges and decorative but functional pathways. Borders were often adorned with mass plantings of extravagant flowers typical of rustic cottage gardens. This combination of formal, naturalistic, rustic, historical and exotic is what makes English gardens so exciting! 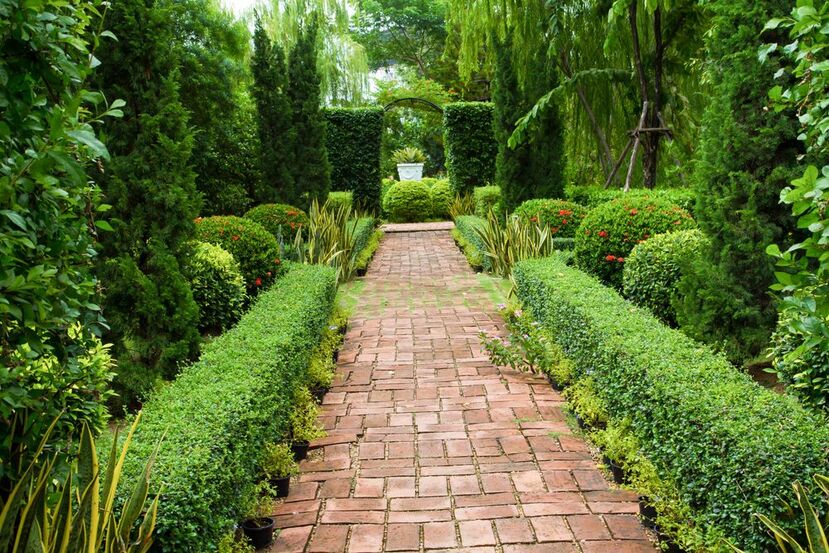
The evolution of English gardens within history and their many influences is what gives them so many multiple layers. It is these diverse layers which makes it easy for English gardens to blend into any garden style.
This means into the future, English gardens will continue to change and involve while still maintaining their timeless beauty! Design elements of an English garden
When planning an English garden, there are some typical elements which can add authenticity to your design. These elements have evolved through history and featured within many famous English gardens. Such elements can enhance your gardens character and charm adding interest and drama. Below I list and summarise some of the typical English garden design elements. Informality
English gardens are well known for their ability to blend into the surrounding landscape. Like Japanese gardens they can call upon the power of borrowed landscape to enhance their context.
Many English gardens will have a naturalistic feel in the form or rambling climbers, flowering meadows and dense flower borders. This helps to encourage biodiversity and celebrate nature. It is very rare for English gardens to not be adorned with the chorus of bird song for this reason. Traditional English gardens where a labour of love for local tradesmen and horticulturists. These gardens often feature rustic stone walls, decorative pathways, and naturalistic flower borders. 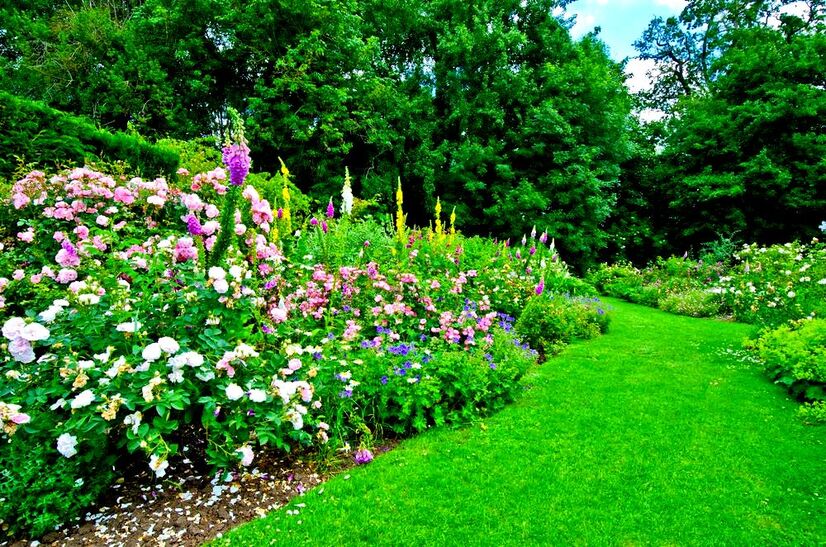
Planting
English garden planting is often utilised in a number of ways with a combination of both formal and informal. Very often, the main structure of the garden will be lined with low formal hedges and vertical clipped specimens.
These greatly contrast more naturalistic meadows and perennial flowering borders. In English gardens there is a great celebration and appreciation of seasonal change. During spring lawns are adorned with flowering bulbs and plants with long flowering seasons are favourable. It is typical for seasonal foliage, fruits and berries to be integrated in such designs. English gardens also have an emphasis on attracting plenty of wildlife so native and ecological planting is beneficial. 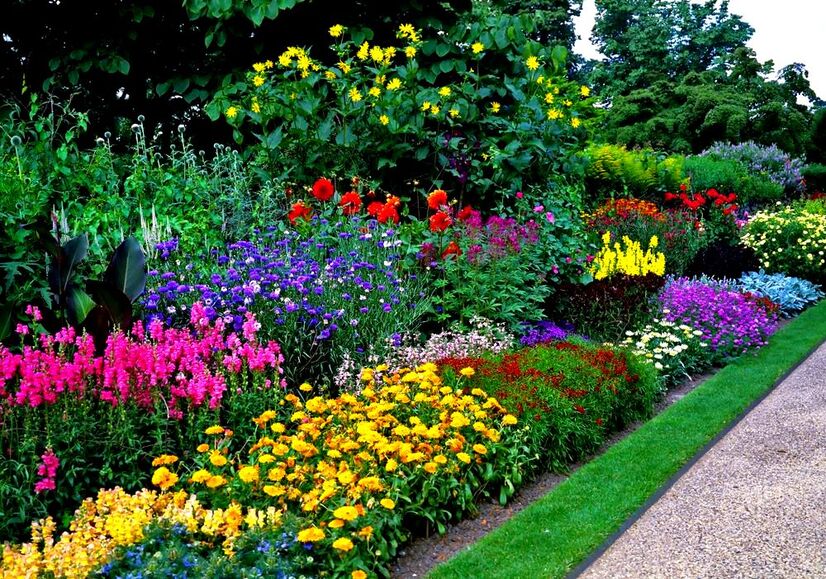
Focal points
The idea of hierarchy and structure is something which is well ingrained within English culture. With a distinct social class system and an emphasis on tradition and ceremony English gardens are adorned with focal points.
Some of these ideals are remnants of classical design periods. However, focal points also provide many opportunities to cause suspense, surprise and splendour. Many English gardens incorporate quirky ornamental features such as wells and even grottos. Water features, sculptures and ornaments are also a great way to adorn your English garden design. Perhaps your focal point will have some personal or cultural significance. 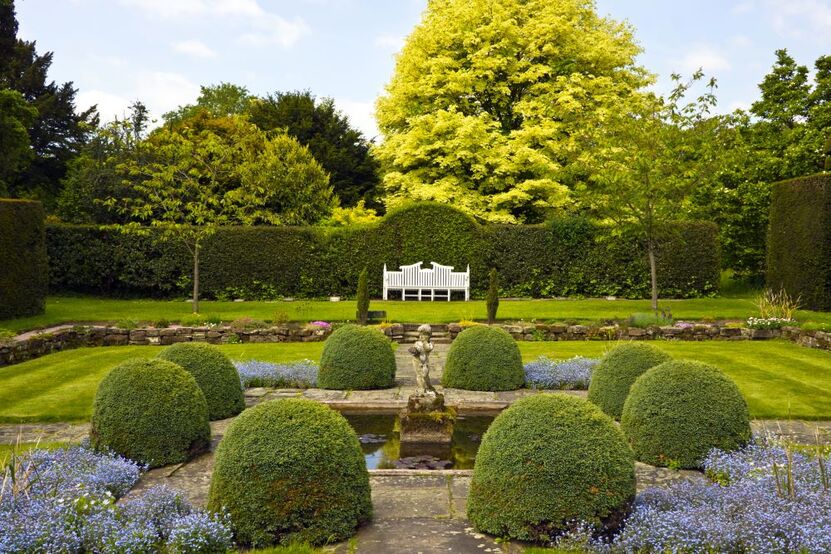
Pathways & walkways
Pathways and walkways are an important design element within English gardens serving both aesthetic and functional purposes. Pathways have always helped to create structure within gardens which had a square layout.
Walled gardens would be dissected by horizontal and vertical pathways which ran passed growing areas. More importantly, pathways are often used to create journeys and guide circulation through the landscape. Many famous English gardens use a combination of curvy, informal paths which cross more formal, structural areas. This can be an effective way to steer and focus the walker’s attention and build suspense. 
Traditional materials
Traditional materials have always been a feature of both English architecture and landscape design. Every region of Britain has its own contextual materials and local workmanship.
In the West Country there is an ample amount of natural stone which is used extensively in traditional buildings. TheCotswold region has its own distinctive yellow stone which adorns traditional cottages and villages. The South of England has the perfect clay for brick production of varying colours and styles. Consequently, English gardens should be a celebration of what is local and well crafted. It is this unique combination of contextual quality which adds so much value to English gardens. 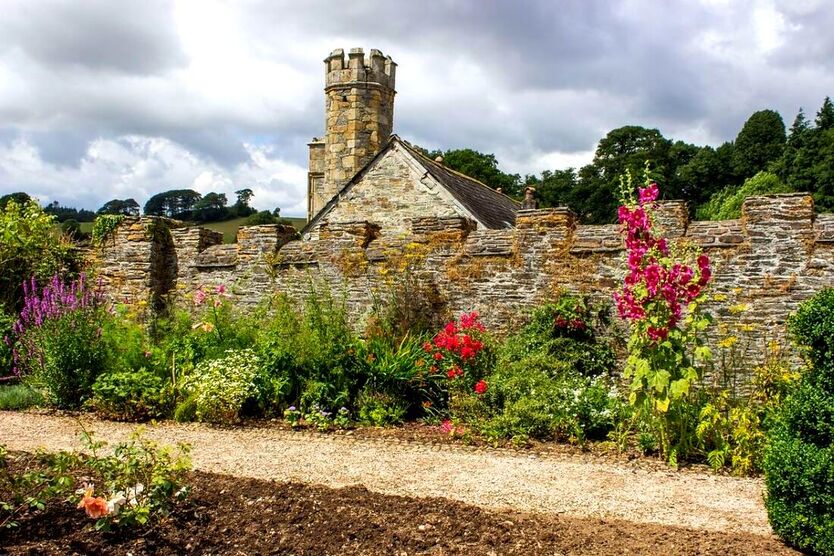
Lawns
Lawns within English gardens have long provided expansive spaces for relaxation and recreation. Go to any English village on a sunny day and you will local families congregating upon the village green.
You may even see a game of cricket played on expansive public lawns. Lawns are heavily integrated into both the English landscape and tradition. They can provide opportunities for sport as well as more relaxing activities. English gardens typically use lawns to form expansive walkways between borders. This helps to celebrate their large and well designed planting displays. Lawns can also be used to increase spatial hierarchy and biodiversity. Rougher areas of grass and meadow around trees and shrubs can be cut less often allowing bulbs and wildflowers to bloom. 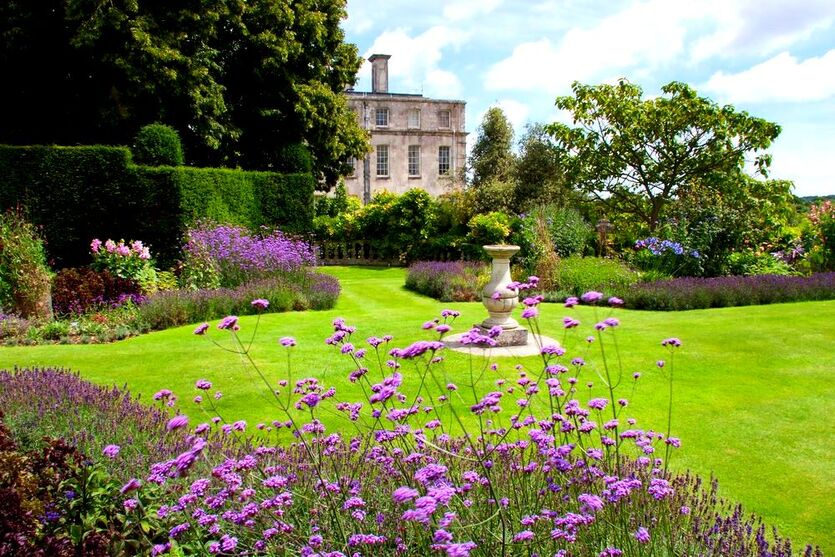
How to create your own English garden
Site analysis
When designing your very own English garden you will first need to conduct a site analysis. This entails assessing the current conditions of your site by identifying positives and negatives.
For example, where does the majority of your sunlight fall? Are there any good views? Or bad views you wish to hide? Such an analysis will aid decision making during the design process. 
An effective way of conducting a site analysis is by undertaking a SWOT analysis. This stands for Strengths, Weaknesses, Opportunities and Threats.
Write these four headings with equal spacing’s upon a blank piece of paper. Then list your sites strengths, weaknesses, opportunities and threats of the site and how it could affect your design. At the end of this process you should have quite a comprehensive site analysis. Inspiration
One of the best ways to oil the cogs of the design process is inspiration! One of the best ways to do this is by visiting some English gardens in real life.
If you do not have the ability to access these looking for inspiration online is a very convenient method. A web image search or a social media image based platform like Pinterest is also a great option. 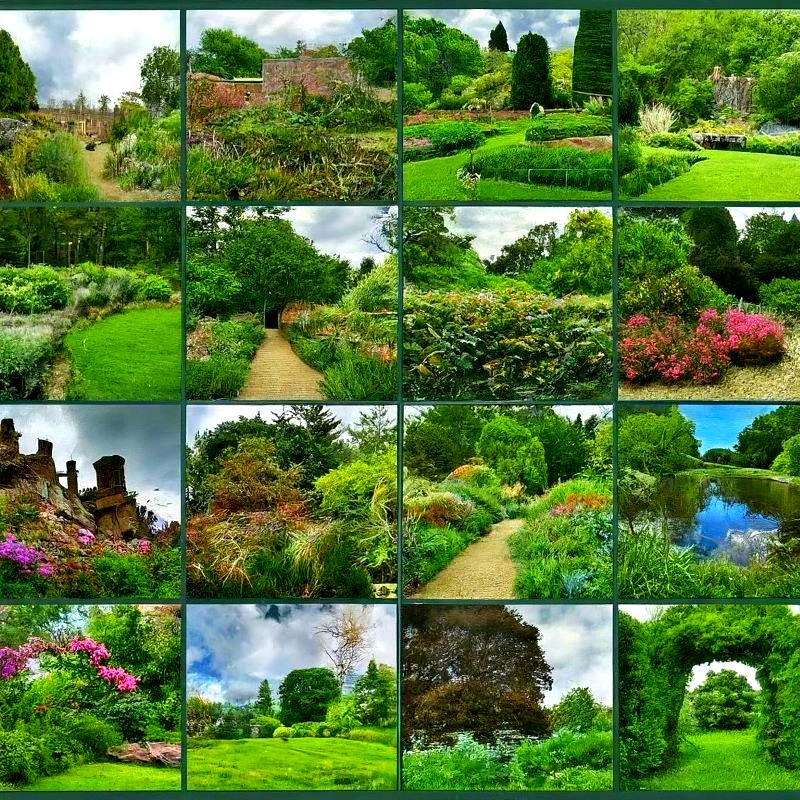
Try to find precedent images of English gardens you like and specific features within them.
You can search for terms like; 'English garden planting', patios, focal points or paths for specific inspiration. You can then compile these ideas and think about where they could fit into your English garden design. Define your style
Once you have plenty of images and ideas you can start to define what your style is. Do you prefer a more formal style with geometric shapes, clipped hedging and topiary?
Or perhaps you like a more naturalistic style with flower meadows and native planting. Maybe you want to want your English garden to be the perfect combination of both! What materials do you wish to use and do you have a colour pallet for flowers? All these questions will help you formulate your preferred design style. Create a layout
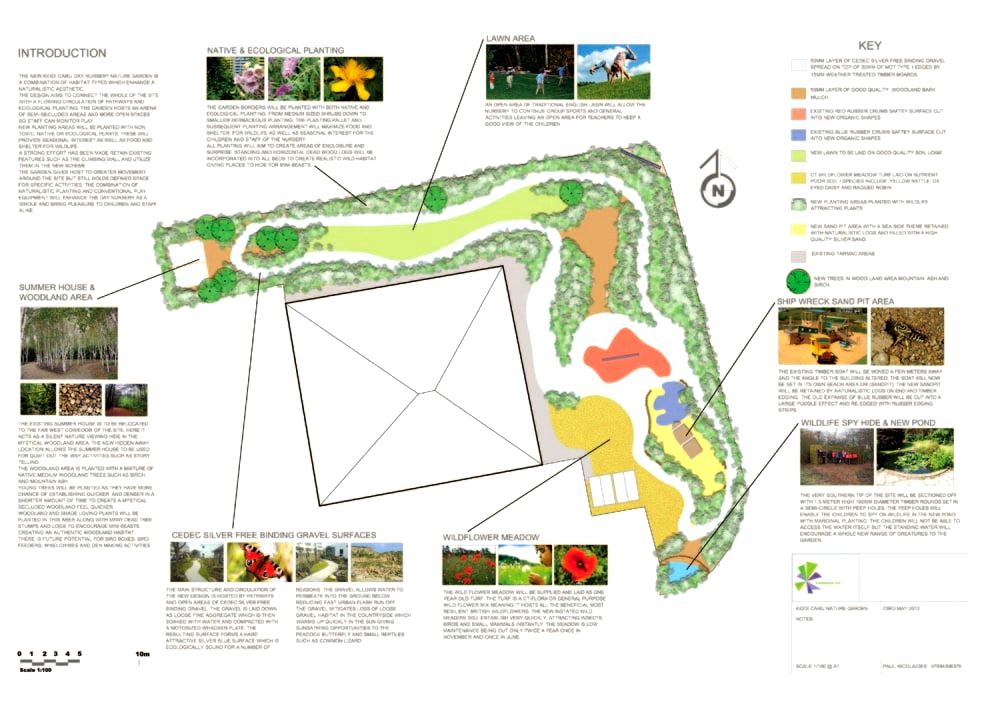
To start resolving your English garden design, create a scaled drawing of your existing site. Ideas and sketch proposals can be drawn over the plan using tracing paper.
A good strategy is to create sketch cut-outs of all the elements you want to include. These could be seating areas, pergolas, raised beds and lawns. Experiment by moving them around your design plan thinking about how they work in real life. As you resolve your design piece by piece you can start to put together a completed design. This will eventually end up a detailed plan or scaled layout drawing. 
Plan your circulation
During the process of deciding what elements go where you will need to plan for circulation. Circulation is how people move around a space and is crucial for linking different zones together.
Think about how you currently move around your site and how you would like this to chance. Do you want people to move through a journey and experience different views and focal points along the way? 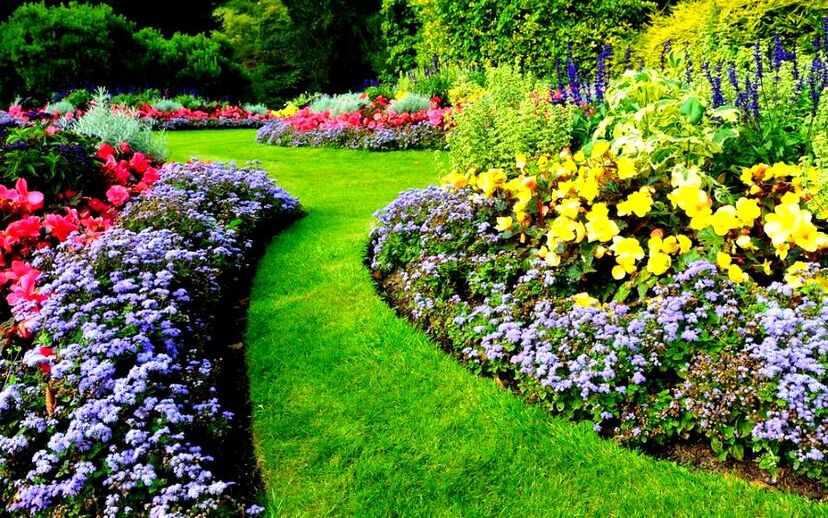
When you have decided upon what elements go where think about how you want to connect them. Do you want visitors to follow defined pathways or do you want them to freely move across the site.
When you have decided on your circulatory strategy implement it into your design plan. Create focal points
Focal points can come in a wide variety of forms within English gardens. Some common examples include; statues, sculptures, water features, outbuildings or even specimen trees and plants.
You may choose a focal point personal to you, perhaps with a cultural or family relevance. Many prefer to go for something more traditional such as waterfalls or a classical statue. You may also want to design pathways, planting and hedges to draw the eye towards specific focal points. 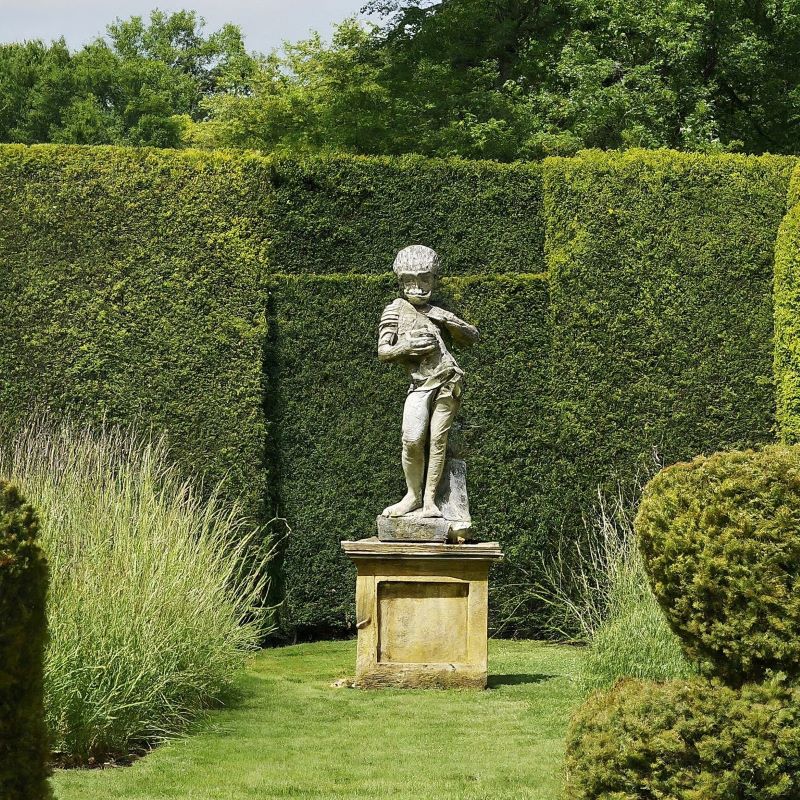
Choose your materials
What materials you decide to use within your English garden is completely up to you. However it is often effective to go with a specific theme or style which is consistent throughout your design.
Traditional materials that work well are rustic red bricks, natural stone and light coloured paving and gravels. However, there are many successful, contemporary, interpretations of English gardens which use more modern materials. Your precedent images will help guide you on what materials you wish to implement. 
Planting design
When it comes to planting an English garden there are many different things to consider. English garden planting design can be an extensive subject with numerous planting types and extensive borders.
However, reaching a stunning planting design is not out of reach for less experienced gardeners. If you are prepared to research and experiment you can achieve amazing borders which rival professional planting design. If you want borders full of English style flower displays the Encyclopaedia of Planting Combinations by Tony Lord is an excellent choice. 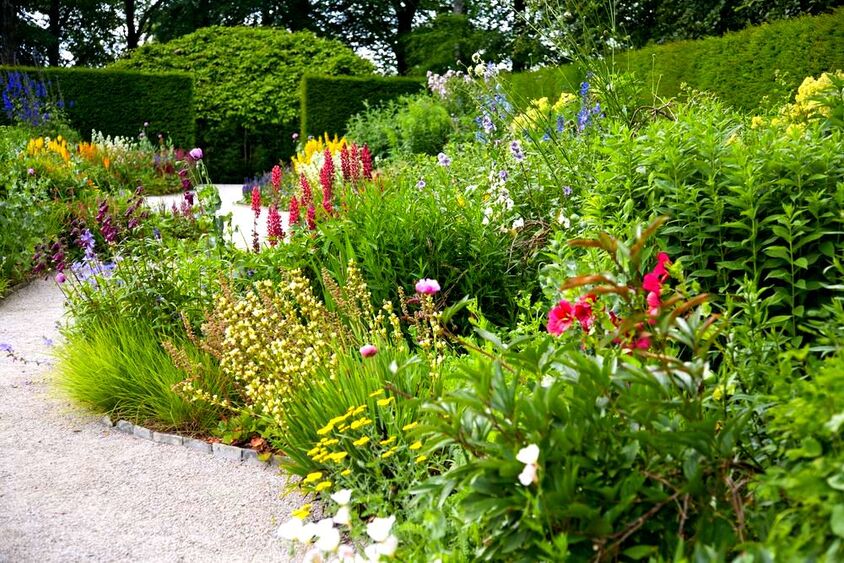
Traditional English garden borders layer planting with taller plants at the back and shorter species at the front. This provides plenty of interest for the eye to travel up and over planting beds.
Try to find plants which will grow well within your local climate and soil type. Think about what colour combinations you would like to implement. It is also worth considering what your planting will look like all year round. Try to incorporate as much seasonal interest as possible to keep it looking great year round. Typical English garden features
Fencing
Most that embark upon making an English garden do not have a rural cottage or large country estate. Therefore it is most likely you will have defined boundaries in the form of fences.
Standard fencing however can go far to exacerbate an English garden theme. Fencing can be painted or clad with hazel or willow woven panels for a traditional effect. Wires can also help you to cover boundaries with climbing plants including Roses, Boston ivy, Clematis and Jasmine. 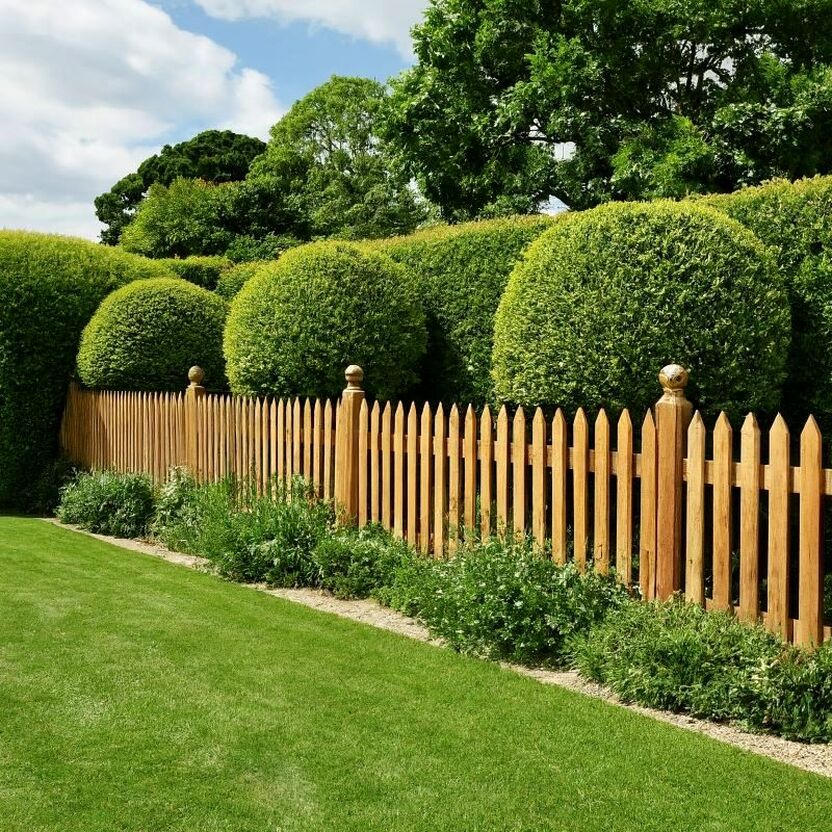
Walls
Walls within English gardens have always had a historical and cultural role. Walled gardens used to create shelter and boost micro climates in traditional growing areas.
Brick and stone walls in particular are especially in keeping with English garden tradition. Such walls do not only have to form boundaries, they can also form raised beds, steps and retaining features. Existing walls within an English garden can also be clad with natural stone walling or cladding to enhance their traditional appeal. 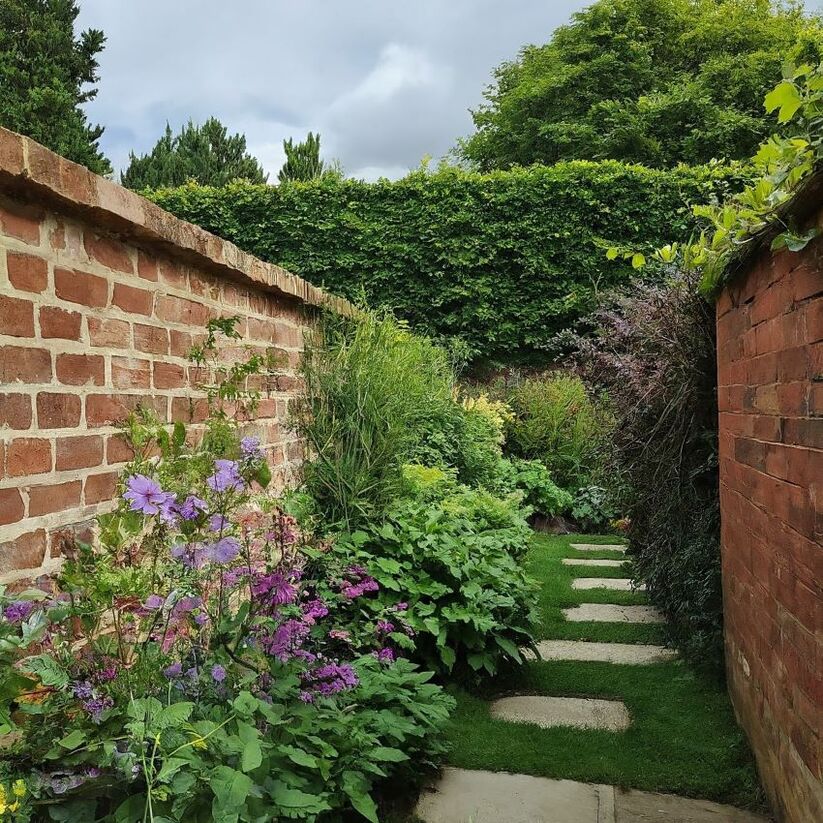
Trellis
Trellises are versatile structures with a number of different uses within English gardens. They are normally utilised as a vertical structure for climbing plants to grow.
They can be fixed to walls, fences and buildings to add foliage and interest to otherwise bare structures. In English gardens they are effective at forming screening and creating partitions. This can be perfect for creating journeys and building suspense! Trellis can also be used to funnel the eye towards focal points or block bad views. 
Pergolas
Pergolas have a long tradition as an elegant feature within English gardens. Such structures are typically admired with decorative joisting and clambering climbers such as roses.
In the summertime pergolas provide much needed shade as well helping to frame and shelter seating areas. They are a great place to grow scented plants and hang lighting making for fantastic dining areas. Pergolas also provide and architectural element to English gardens which can compliment or enhance surrounding buildings. 
Hedges
Hedges have been associated with the English landscape since the dawn of agriculture. Historically hedges were used to partition agricultural plots, contain livestock and form shelter belts.
In English gardens however hedges are more of a formal affair. Evergreen varieties such as Box and Yew can be planted and clipped to create formal structure. Such formal hedges can be used to line paths or accentuate geometric shapes. However hedges can also take a more informal role. Flowering and fruiting shrubs can be planted as a mixed hedge to create food and shelter for wildlife. 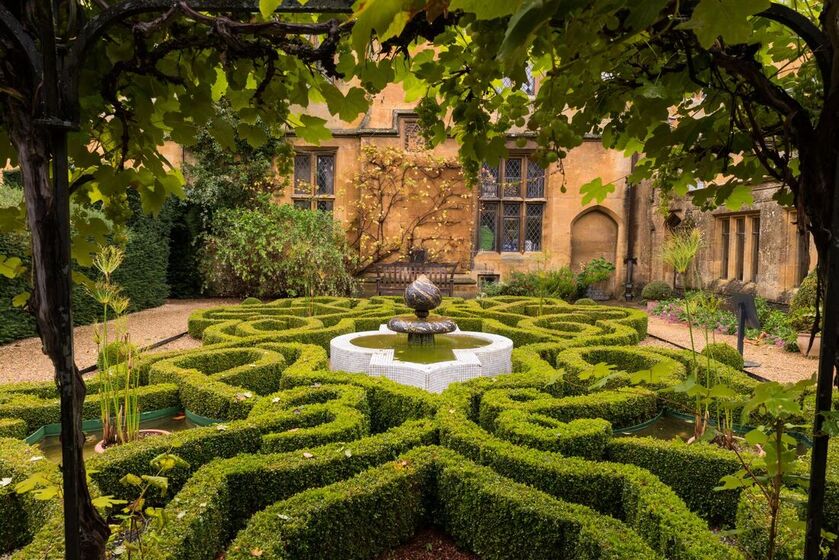
Enclosure
Going back far into English history enclosure has always played an important role for gardens. Since the middle ages, walled gardens formed shelter and microclimate for the production of fruits and vegetables.
In later times, courtyards became a popular way to integrate garden spaces into buildings. English courtyards are much loved for their charm and sophistication making fantastic dining spaces. Enclosure within English gardens creates a feeling of seclusion and safety making great places to relax and unwind. 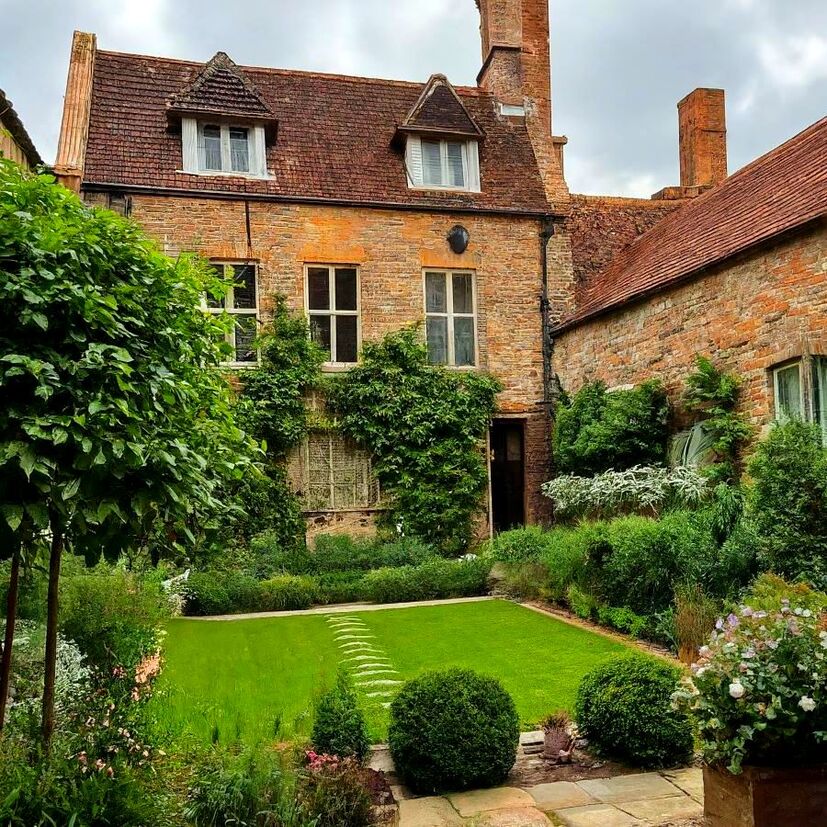
Edging
Whether an English garden follows a formal or more informal style it is sure edging will play a significant role. Garden edging plays an important part in defining spaces and retaining surfaces.
In English gardens masonry edgings can add visual texture to patios and other surfaces. Retaining edging such as setts and bricks are utilised to retain gravel seating areas and pathways. Edgings can also form linear planting beds for formal hedging and create mowing strips for lawns. English gardens also typically feature decorative raised edgings around paths and borders such as rope top edging. 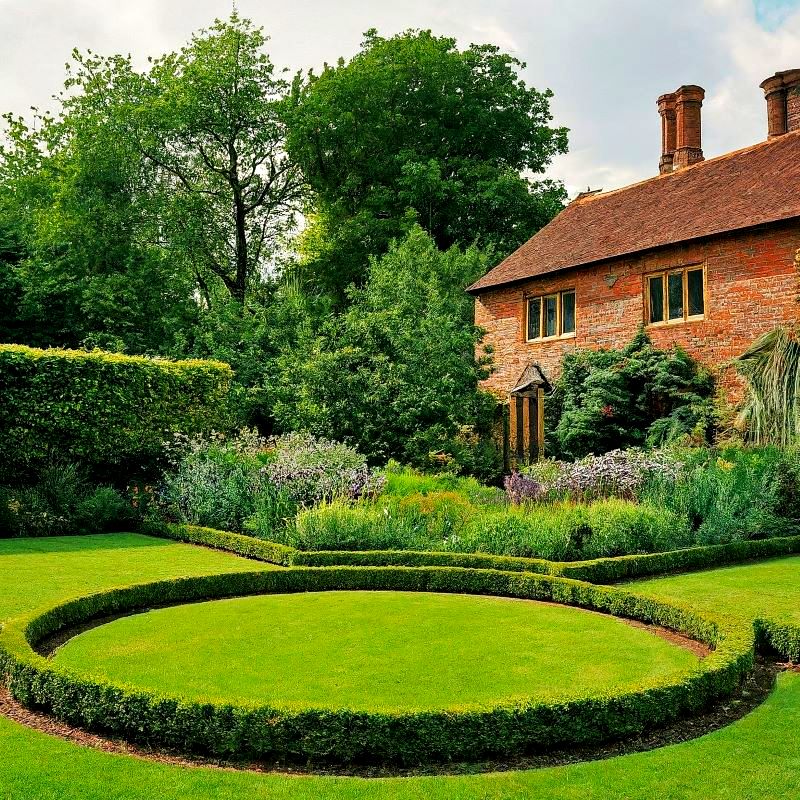
Walkways
Walkways have many functions within English gardens but generally there are two main functions, Structure and guidance. In classical English gardens there is commonly bold, angular or rectangular shapes integrated into the design.
Walkways normally provide structure to these shapes while providing circulatory access. Such walkways travel around the outside of such shapes with focal points or formal lawns in the centre. However, in informal English gardens walkways steer the traveller on a journey of discovery. Pathways are often winding, meandering through naturalistic features. Why not visit our article on the best pathways for English gardens here. 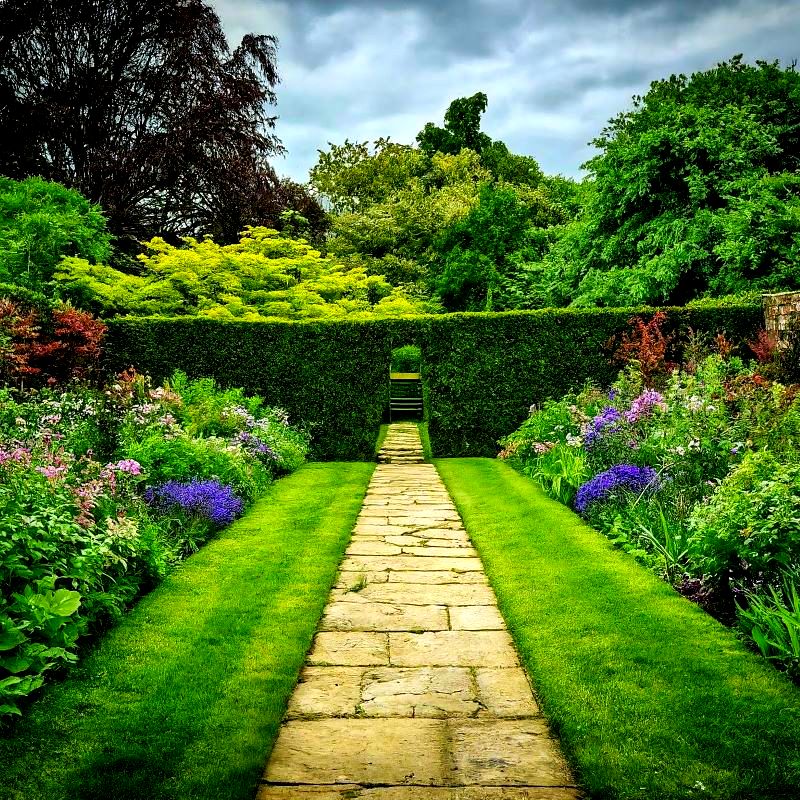
Planting
There is no doubt that one of the most captivating elements of English gardens is planting. Planting is enjoyed and celebrated in so many interesting and diverse ways.
Planting is used to; form structure, flower displays, attract wildlife, effect mood, produce food, create texture and seasonal interest. England has a long history of horticultural excellence ingrained within their history and culture. From vast plant collections brought back from the age of empire, to digging for victory during the Second World War. There are so many exciting ways planting can be used and integrated into English gardens. For more information on English garden planting design see our resource article here. 
Fruits
English gardens have always had a long history with fruit production. Historically south facing walls were utilised to train and grow espalier fruits up such as apples and pears.
During Britain’s sea faring explorations more exotic fruits were also collected and grown in this way. Orchards are also a common feature within traditional English gardens. Not only do these small trees produce fruit they also have exceptional spring blooms, autumn colour and ornamental value. Exotic varieties such as citrus and cactus fruit can also be enjoyed during summer with winter protection. If you like perhaps visit our article on the best fruits for English gardens here. 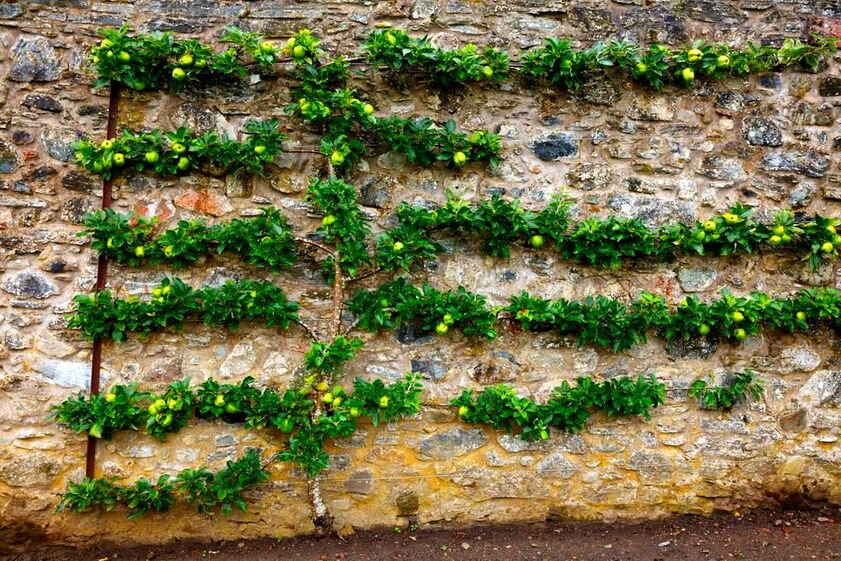
Vegetables
There are many functional and aesthetic ways vegetables can be integrated into English gardens. Firstly vegetable growing was one of the first fundamental purposes for defined garden spaces in England.
The vegetable garden or allotment has always been a traditional component of English garden design. Not only do these plots just produce food they have a unique aesthetic all of their own. Why not visit our article on traditional vegetables for English gardens here. 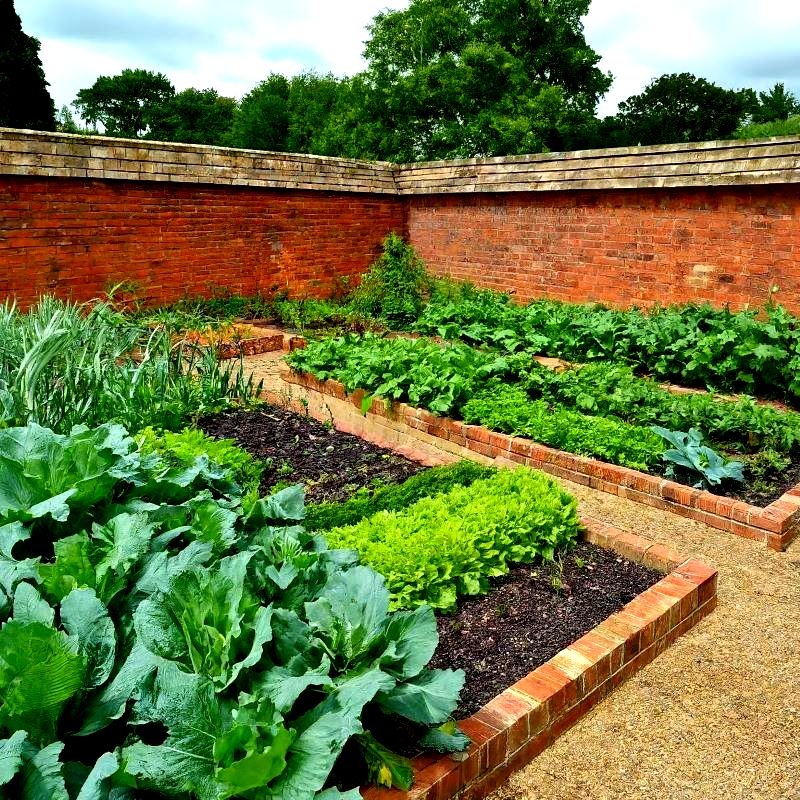
The straight rows of leaf crops and root vegetables create vibrant colours and interesting textures. Quirky features such as scare crows and make shift climbing frames add to their charming appeal.
Vegetables can also adorn decorative features such as squash over arches or radiant rainbow chard in raised beds. The modern English garden style
One of the most fascinating things about English gardens is they are always changing and open to interpretation. In recent years many have created contemporary versions of the traditional English style.
This has been accelerated with an increased interest of renovating old agricultural properties such as barns. Many barn conversions now embrace this new contemporary English cottage garden style. 
Some typical features of modern English gardens include, clean lines, minimalist design, modern courtyards, block planting, sustainable landscaping, low maintenance landscaping, sculpture, and biodiversity planting.
If you already have a contemporary style home or interior perhaps the modern English garden style is for you!
Thank you for reading our article; How to create an English garden! Below I will link to some of our other articles about English gardens you may find relevant.
If you require English garden services do not hesitate to contact us here.
'As an Amazon associate I earn from qualifying purchases'
This article contains affiliate links
It is believed our ancestors inhabited forests for most of our history before the land was cleared for agriculture. It is fair to say that woodlands have been more familiar to us as a species than suburbia.
If you spend any time within a woodland you will know how enjoyable and relaxing the experience can be. There have been many studies which indicate that simply being around trees is good for our well being. Consequently, it is no surprise that woodland gardens are becoming an ever more popular garden theme. Woodland gardens are a fantastic way to create peaceful, secluded gardens rich in wildlife. 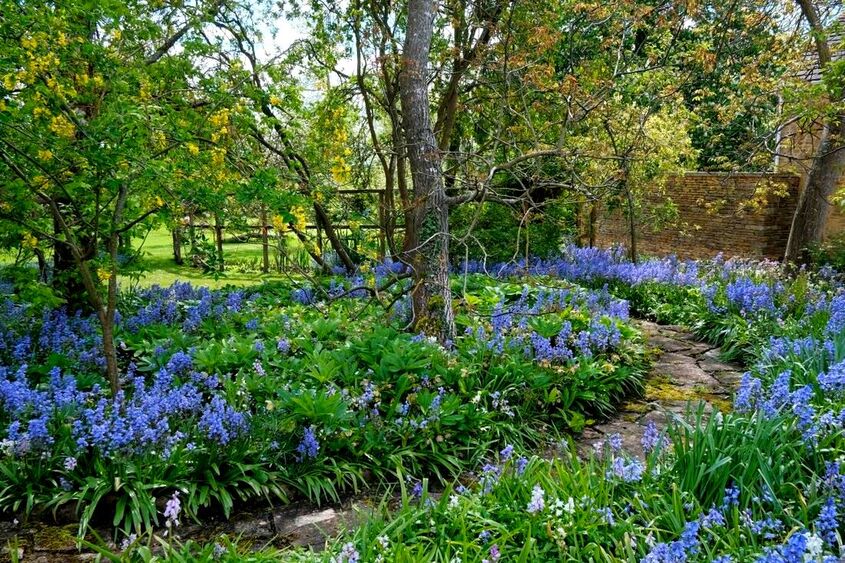
However, not everyone has a backyard large enough to establish their own forest! This is why woodland garden design needs to reach a delicate balance when it comes to scale. You may be pleased to know you don’t even need trees to create a successful woodland garden!
With some careful planning and correct species selection, even small spaces can become enchanting woodland gardens. In this article I walk you through all the steps and considerations of how to design a woodland garden. Finding inspiration
One of the best ways to start planning your garden is finding inspiration. This could be by visiting a well known forest park or searching for precedent images online. Web image search engines such as Pinterest are a great place to make a collection of visual ideas.
Start thinking about what kind of planting and effect you wish to create in each part of your site. Do you want to make your garden wildlife focused? Or perhaps you want to create as much seasonal interest as possible. Collect as many pictures and ideas as you can and add them to a scrap book or computer folder. Sometimes making a collage is a good idea to fix all of your ideas in one place. Planning your woodland garden
Now that you have collected multiple ideas and precedent images, have a walk around your site. Start to view your garden from different angles and think about what features you may want to place where.
Take some pictures of your garden from various angles and print them out on paper. You can then trace over individual images with tracing paper to experiment with ideas. 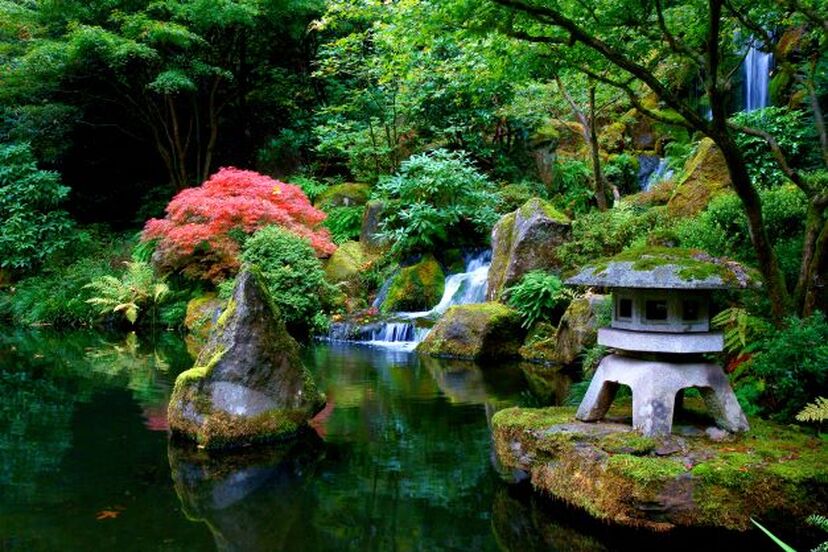
You can also utilise programs such as Photoshop to form collages over the photos to create design proposals. At this point you can create a scaled drawing of your garden and experiment with different sketch designs.
The most fundamental elements are locating your seating areas, pathways and planting zones. Sunlight
When designing a woodland garden one of the most important considerations is sunlight. In order for your woodland plants to grow best they must be positioned in a logical way. Even shade loving plants will require some dabbled sunlight so study how light hits your site.
It makes sense to have taller shrubs to the back of borders and smaller plants at the front. This way sunlight hits all of your plants at every canopy level. This will make your plants happier and also provide better airflow. Try to design your woodland so sunlight can penetrate at different times of the day. This will lead to a greater choice of planting and create a lighter and more inviting garden. Circulation
Circulation is the natural pattern in which people move around a space. During the design process circulation can be planned to enhance good views, build spatial hierarchy and create a journey.
Most of the time, your circulation will link together the most important parts of your design. In woodland gardens circulatory routes benefit from meandering journeys which travel through open zones and places of enclosure. Assess how you currently move through your garden and how it can be changed for the better. 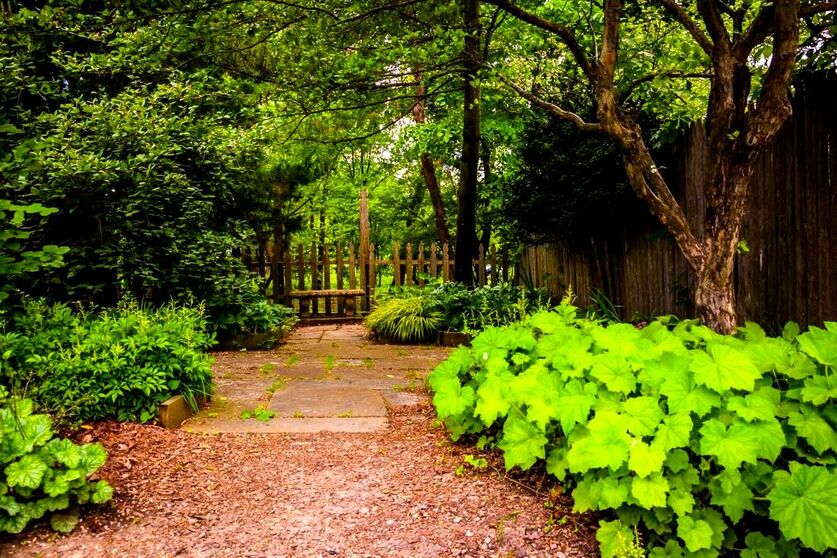
Designing your woodland garden
Now you have experimented with different design elements you can start to fit the pieces together. Draw out a scaled drawing of your site and start to develop and resolve your design.
Start with the essential elements and parts you know are going where and fill in the blanks. This does not have to be resolved in one session the design process can take a few sessions to complete! When you have completed your proposal, draft out your completed design plan. 
Woodland garden seating areas
Seating areas within woodland gardens provide the perfect place to relax and nature bathe! These shaded areas can provide cool and comfortable places during the warm summer months to relax and socialise.
Well placed seating areas will have enough enclosure to provide privacy but attractive views to admire. Woodland garden seating areas are great places for nest boxes and wildlife feeders to enjoy nature. The best seating areas look like woodland clearings that blend in with surrounding planting. These secluded spots are great places for log burners, chimineas, oudoor ovens and barbecues. 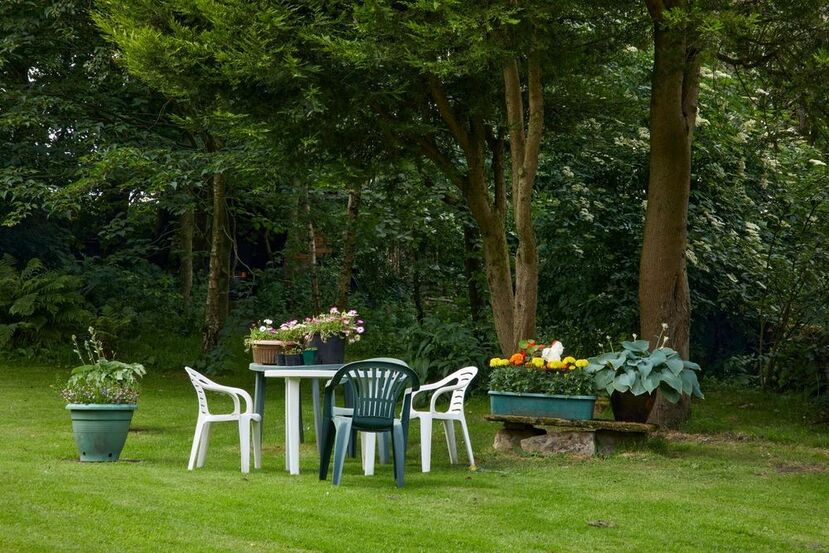
Woodland garden paths
Woodland garden paths are crucial to the gardens design and circulatory system. Pathways can help to take people on a journey and steer them towards landscape focal points.
It is common for pathways in woodland gardens to have curved and organic shapes. This fits in well with the informal nature of naturalistic planting and landscaping. Curvy paths can be formed using gravel board edgings and stone edgings such as granite setts or cobble stones. Some of the most favourite woodland garden path materials include free binding gravels and bark chippings. 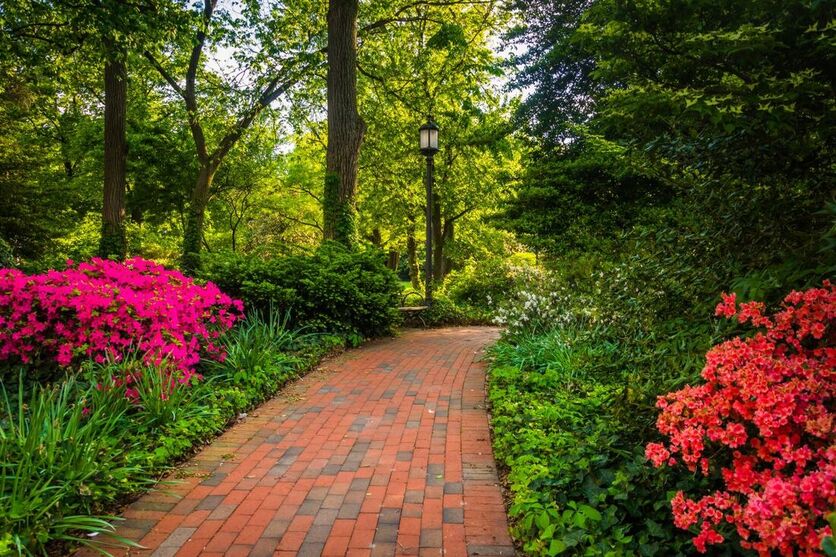
Woodland garden borders
As many woodlands today are historically not that old they often lack diversity. You may find local woodlands have trees of a similar age with few understory plants.
However, in more ancient woodlands there is a much more diverse canopy structure. Woodland gardens provide the opportunity to celebrate the many interesting plants native to forests. 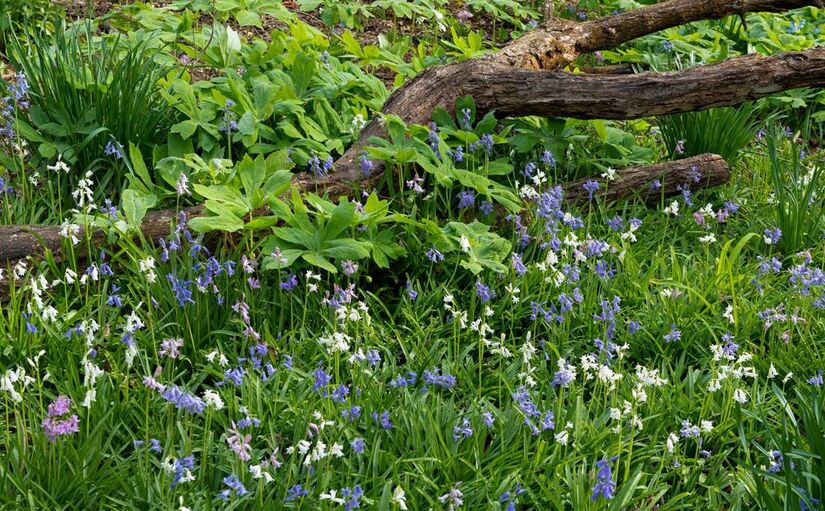
Woodland garden borders if planted well can be full of seasonal drama and colour. These borders can also be rich in wildlife habitat and animal life.
With good woodland garden border design your beds can be full of colour, texture and movement. Woodland garden planting design
Woodland garden planting design is a subject within its own right! Successful execution requires a thorough knowledge of the landscape elements within your own site.
Sunlight, soil, landform and circulation all need to be synchronised for the best planting displays. This is especially so if you have large trees within your woodland garden. Such situations can create dry shade, one of the most challenging growing environments for plants. 
To achieve the best visual impact your planting heights must slope up and away from paths and seating areas.
This means the eye is met with layers of planting interest and plants obtain as much light as possible. Seasonal elements must also be designed into your borders so there is all year round interest. Borrowed landscape
Borrowed landscape is when the surrounding landscape or planting of surrounding gardens visually benefits your own. Such a concept is often exercised in Japanese gardens with gardens designed to frame distant views.
It is very common for surrounding properties to have large trees which shade your landscape. This is the perfect situation for a small woodland garden where you do not want to plant larger trees. 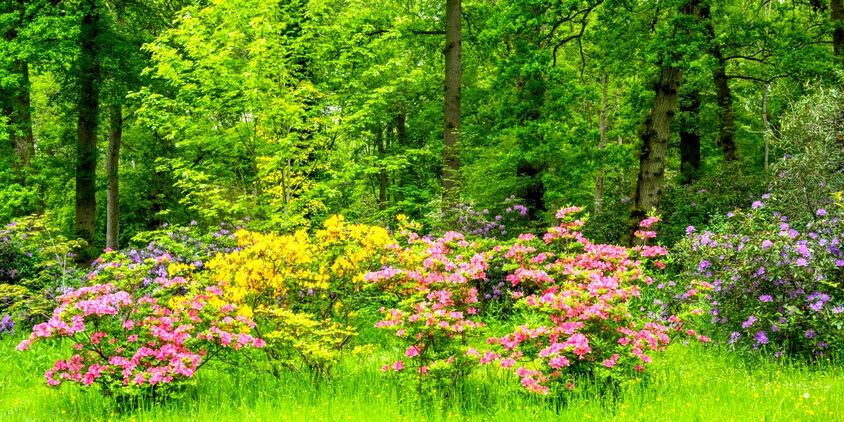
When designing a woodland garden neighbouring trees and shrubs should be incorporated into a master plan. This is particularly so with wildlife that does not recognise man-made boundaries.
When you zoom out it is often the case that local gardens collectively do resemble young woodlands. It is advantageous to recognise this when designing a woodland garden within your boundary. Planting structure
The planting structure of a successful woodland garden is very distinctive. Planting should be planted to create a combination of enclosure and open areas.
This is often the case in ancient woodlands with varying light levels and dabbled shade creating a soothing atmosphere. To create the most diversity the sites sunlight must also be maximised. This can be achieved by planting in pyramid or upward sloping planting structures. Such planting enables all plants to access sunlight within all canopies and provides three dimensional interest to satisfy the eye. 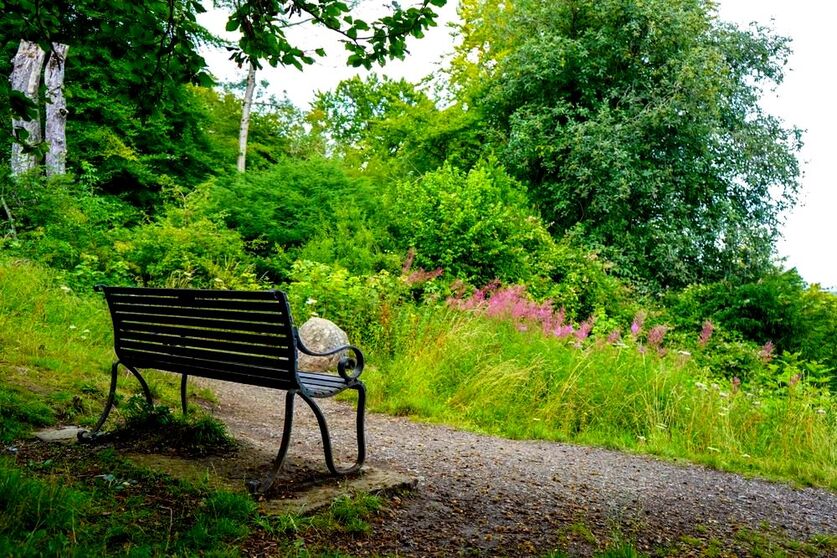
Seasonal interest
Seasonal interest is a very important element of woodland gardens. In nature, deciduous woodlands display some of the most seasonal change of any other habitat.
In Autumn and fall the leaves of trees turn radiant and bright colour tones before falling to the floor. Winter uncovers an interesting array of bark textures and colour tones. 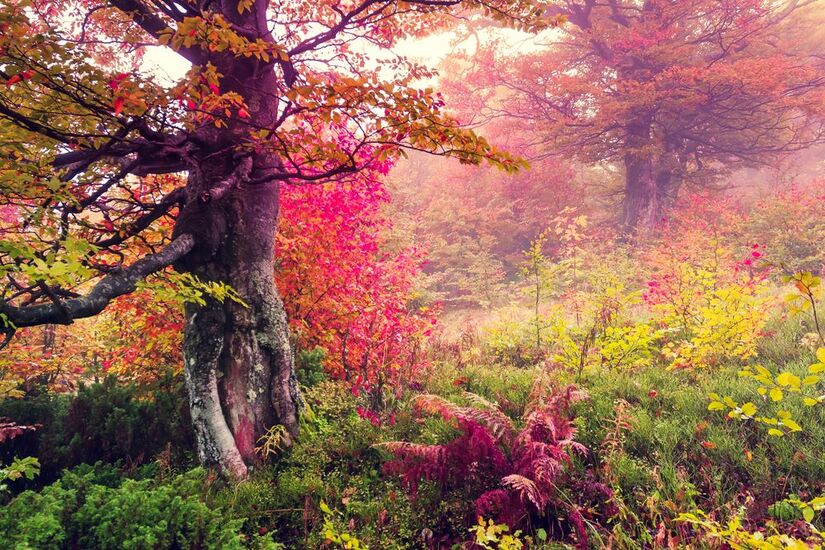
With the onset of spring, woodland bulbs erupt into colour before the leaf canopy opens out. During the growing season many shrubs and herbaceous plants can provide flowering and seasonal displays. When designing a woodland garden try to think about a plants seasonal qualities and how this can benefit your woodland design.
Woodland garden trees
Although you do not necessarily need trees to make a woodland garden they bring much to the table. Trees create the perfect canopy structure which is so distinctive of natural woodlands. Their seasonal change brings drama and interest as well as creating habitats for wildlife!
For most woodland gardens for a broad range of smaller tree species is most effective. Why not visit our list of suitable small tree species for woodland gardens here. 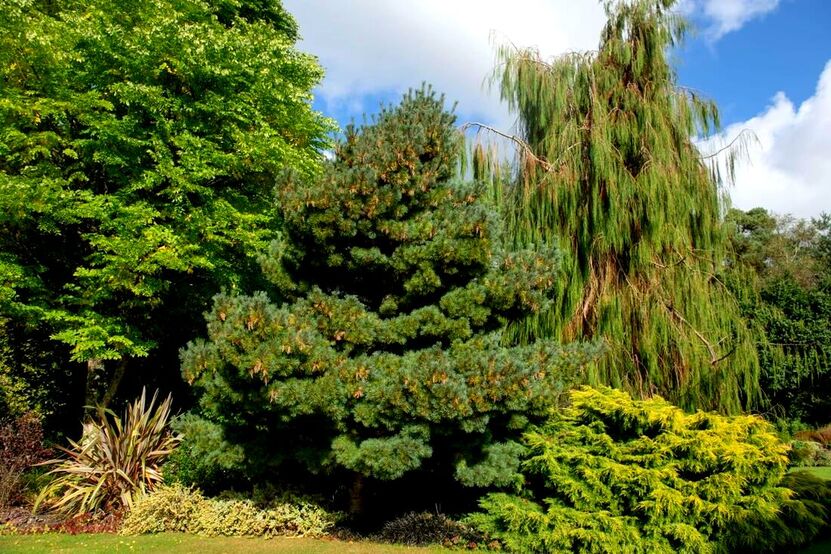
Woodland garden shrubs
Shrubs within a woodland garden provide the perfect intermediate canopy level. This can help to form enclosed spaces and provide an extra layer of seasonal interest.
Woodland garden shrubs can be pruned to allow more light and airflow through a design. There is a broad range of shrubs offering a diversity of benefits including flowers, berries and attractive foliage. Why not visit our list of suitable shrubs for woodland gardens here. 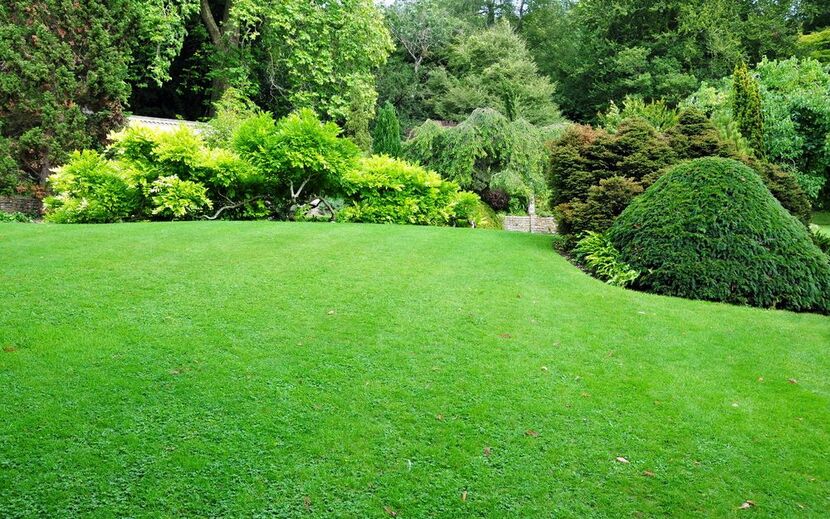
Woodland garden groundcovers
One of the most challenging aspects of woodland garden establishment is weed control. Very often weeds take advantage of any bare soil while larger woodland plantings are becoming established.
Groundcover plants in woodland gardens enable you to reach dense carpets of foliage. This can help to provide much needed greenery at ground level and weed suppression. These dense carpets of foliage also provide excellent cover and security for numerous wildlife species. Why not visit our article list on some of the best groundcover plants for woodland gardens here. 
Woodland garden perennials
Perennial plants are those which grow back from the base every growing season and die back down for the winter. Perennials are excellent for bringing much needed seasonal change to woodland gardens every year.
Some late winter perennials such as Hellebores are especially effective at bringing some spring colour. Planting a range of perennials however can ensure a succession of flowers and interest throughout the year. Why not visit our full list of the best perennials for woodland gardens here. 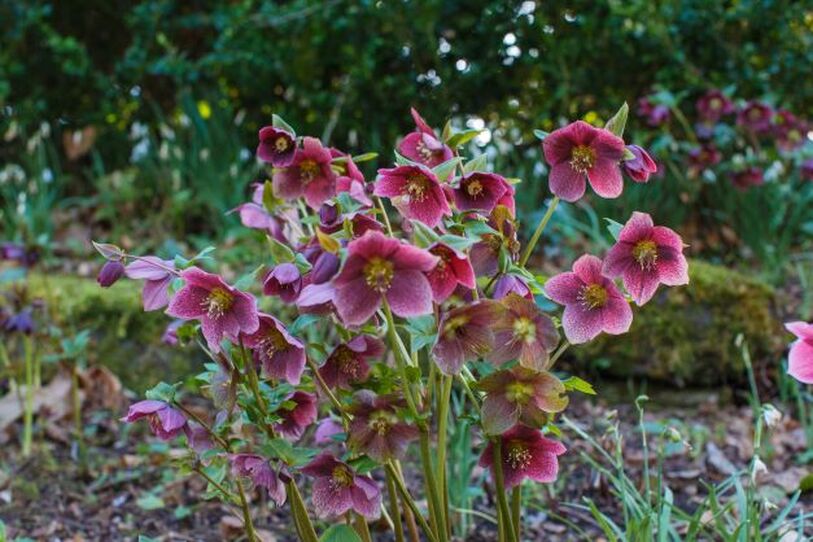
Woodland garden annuals
Annual plants are those which grow from seeds every year and die at the end of the season. By their very nature annuals self seed freely and once established will grow up from bare ground every year.
This process can be encouraged by maintaining some cultivated bare ground every spring time. Alternatively you can germinate a woodland selection every spring under cover and then plant them out directly. You may also want to consider sowing a shade loving woodland meadow. These are typical of woodland clearings and often referred to as glades. 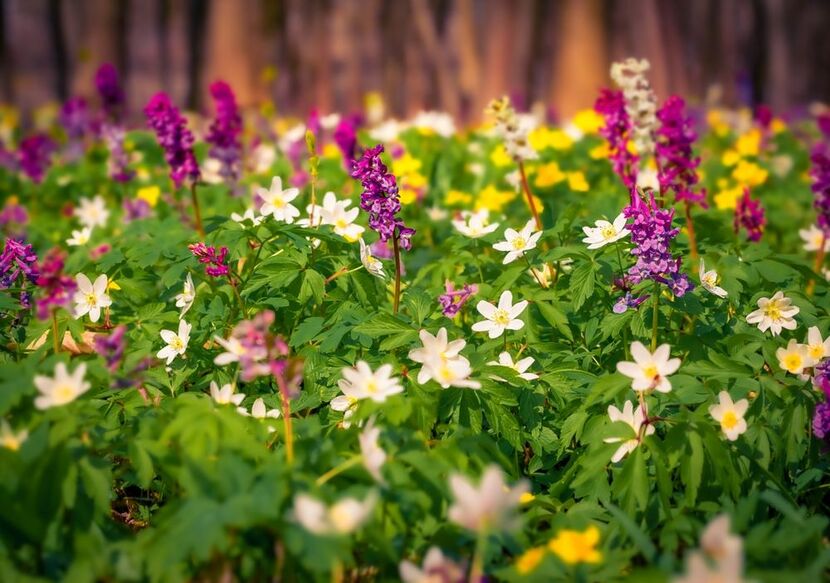
Lighting for woodland gardens
When it comes to enhancing a woodland gardens natural qualities there is no better installation than lighting. Lighting can really add drama and ambiance to a woodland garden really transforming the space.
Up-lighting is particularly effective at the base of trees facing up towards the canopy. This highlights vertical trunks and picks out the gentle movements of the canopy and individual leaves. I personally find contrasting colours can create a real magical feel especially at sunset. Mains external lighting is usually much more effective but solar lights can also create a satisfying effect. 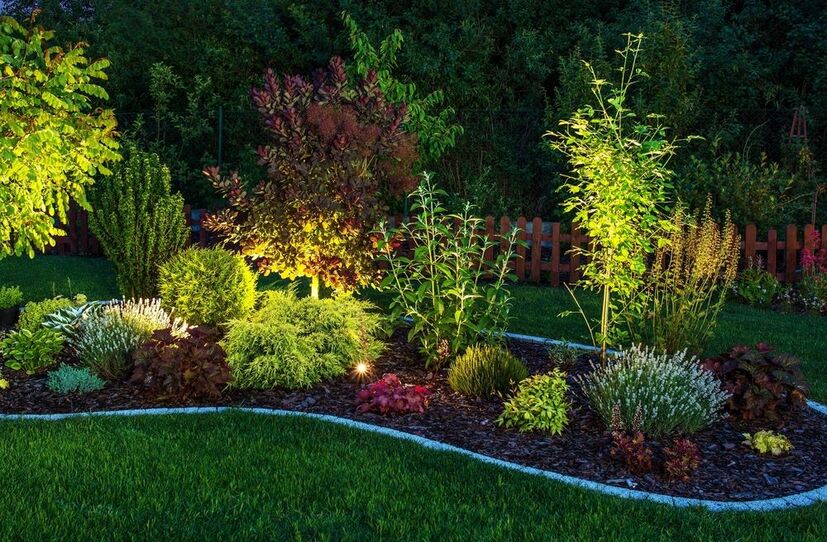
Thank you for reading my article on how to design a woodland garden. If you have any comments or questions please leave them below, I would love to hear from you!
If you require any woodland garden services including, clearing, planting, mulching, pathways, patios or raised beds do not hesitate to contact me. Based in Amersham I cover most of Buckinghamshire including Oxfordshire, Hertfordshire and West London. We have now also opened an office in Norfolk! Below I will link to some other woodland garden articles you may also find Useful.
'As an Amazon associate I earn from qualifying purchases'
This article contains affiliate links
No other garden style can immerse you within nature like woodland gardens can! Woodland gardens have the ability to transport you far away from civilisation into your very own dream land. Dense canopies of vegetation can block out surrounding buildings and boundaries to create a feeling of serenity.
Such environments are fantastic for recreation, contemplation and stress relief. However there is much more to woodland gardens than just trees and plants. 
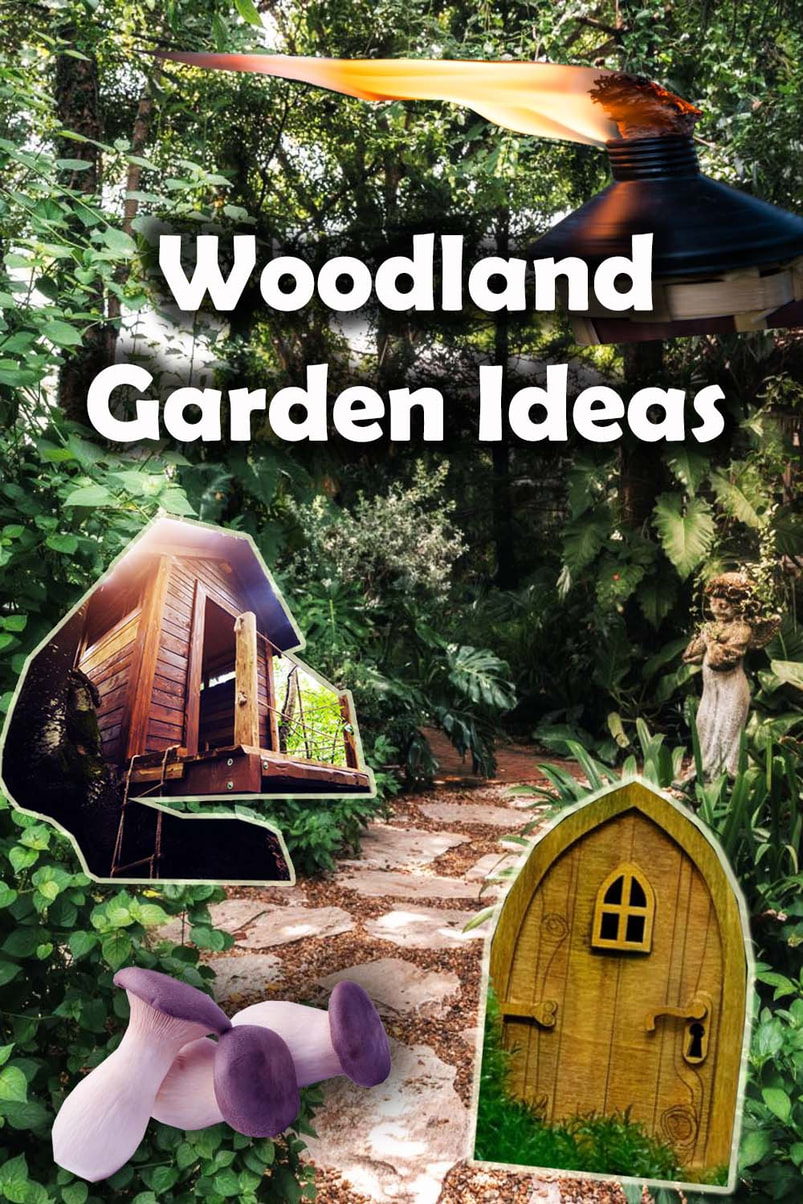
From luxury seating areas to wild camping dens and places of nature study there is so much to explore! Consequently, in this article I have compiled a list of 13 exciting woodland garden ideas.
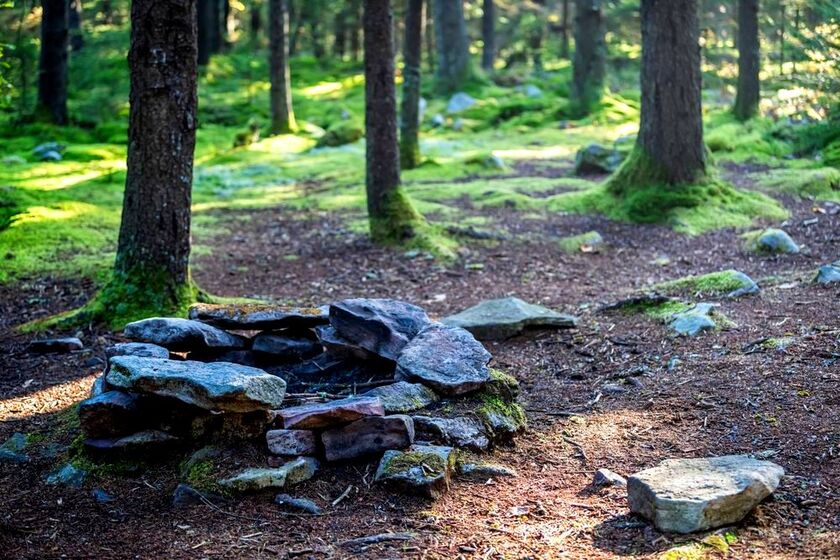
From hobby pursuits to exciting landscape installations there is something for the whole family to get involved! See our 13 exciting woodland garden ideas below! 1. Fire pits
Human beings have gathered around fires in forested environments for thousands of years. It is no surprise therefore that so many find such an activity so exciting and stimulating. Particularly within woodland gardens roaring fire pits can create a real feeling of inner peace. There is no better time to sit back and enjoy your woodland gardens atmosphere that at night. Not only are fire pits great to watch you can also cook up tasty evening meals!
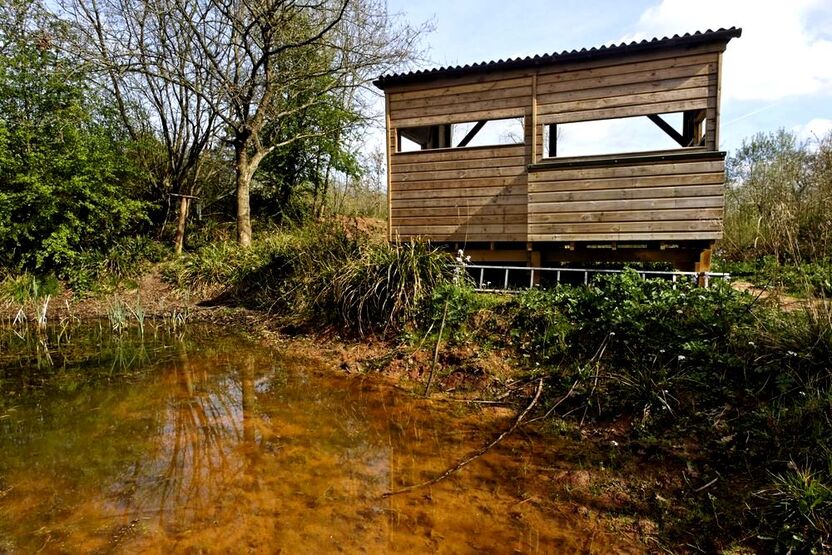
2. Bird watching hides
Bird watching hides are a great installation for incorporating into woodland gardens. Although at first they may seem a little over the top they have many benefits! Bird watching hides do not have to be just for watching birds. During the evening as the sun comes down they provide plenty of opportunities to see other wildlife too. These can include small mammals, amphibians and even reptiles. Hides also provide the opportunity to sit silently and admire your woodland garden in peace.
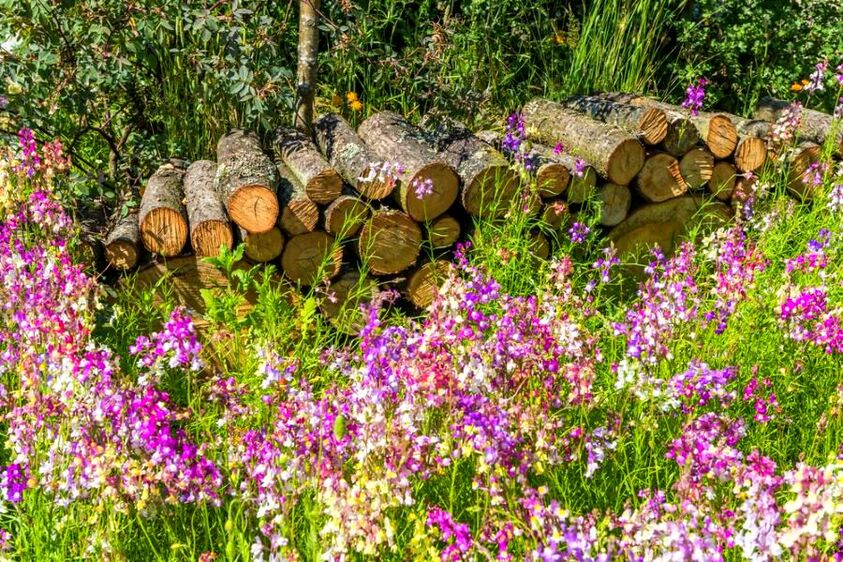
3. Logs piles
Log piles can really provide the opportunity to include some ecology into your woodland garden. Very often, gardens and managed landscapes are too tidy and free of organic debris. In natural woodlands dead trees as well as decomposing timbers provide lots of habitat for smaller creatures. This intern can encourage greater numbers of birds and other larger animals to your woodland garden. Logs can also be arranged to provide naturalistic sculptures and structures.
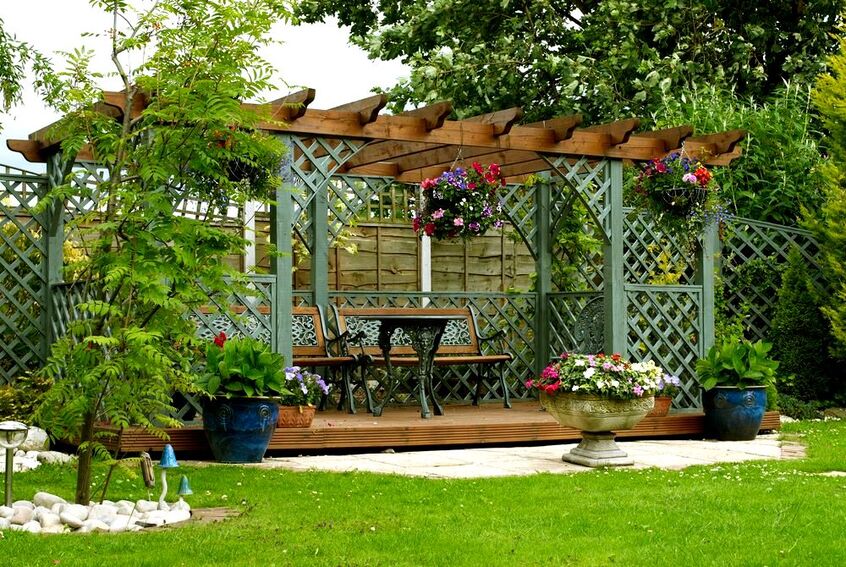
4. Pergolas
Pergolas can create a real focal point within woodland gardens and add spatial hierarchy to a space. These structures are the perfect opportunity to grow a dense covering of climbing plants. Climbers grown over such structures are a fantastic way to increase seclusion and boost privacy. This is particularly advantageous if your garden is too small to grow trees and large shrubs. Pergolas can also be built with transparent roofs so you still have a sheltered seating area even when it rains.
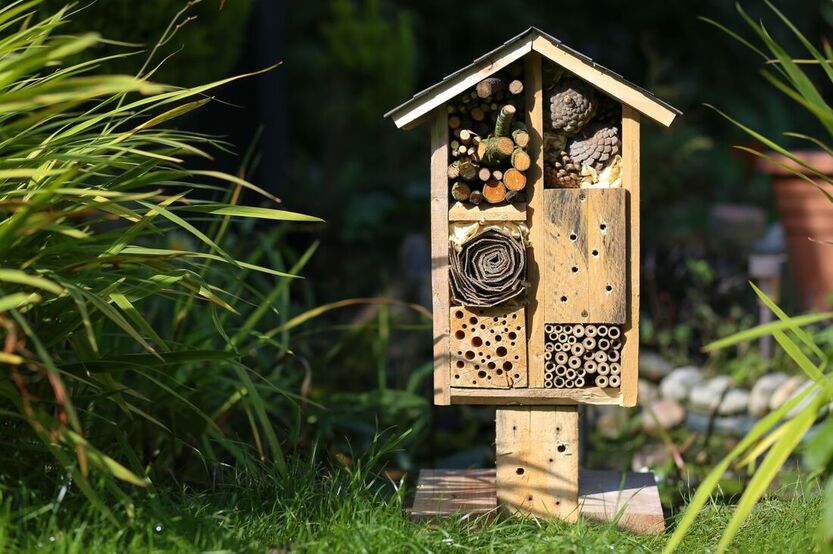
5. Insect hotels
Insect hotels are an arrangement of different materials to create shelter and nesting opportunities for small creatures. These can range in both size and aesthetics but traditionally been made up of rustic waste materials. However in recent times insect hotels have become well refined pieces of land art and sculpture. This has led to a variety of small insect hotels appearing on the market. These hotel nest boxes can make a great ecological installation to any woodland garden.
6. Benches
Woodland gardens have always been somewhere for people to relax and enjoy nature. This makes providing some well positioned seating paramount within a woodland garden. These can be particularly effective facing features of interest such as bird feeders and garden focal points. Benches can be sourced online or if you are feeling creative built with sleepers or old tree trunks.

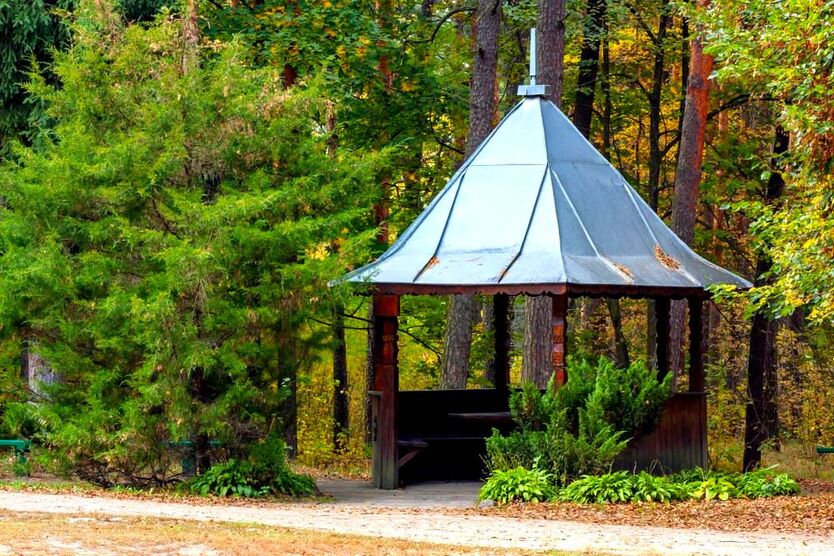
7. Arbour seats
Arbour seats are small, covered, seating areas designed to create outdoor resting places. Arbour seats can create the perfect environment to read a book or simply admire your garden. These covered seating areas come in a wide variety of styles and designs to suit your tastes. In woodland gardens they are perfect for seating areas or positioned to admire a particular view.
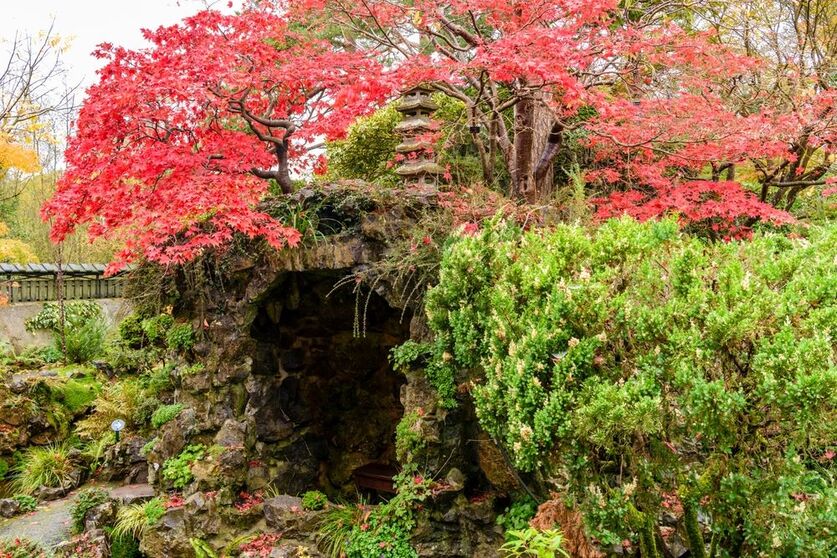
8. Grottos
Grottos are a type of manmade cave built in gardens historically as a garden feature. Grottos have had many designs over the years with many hosting monuments or religious features. The dark enclosure of grottos would create contrasting experiences from open landscapes to enclosed spaces. In woodland gardens grottos can be built to create artificial ruins which have an exciting, rustic appeal. These can look extremely effective with plants and climbers growing over them!
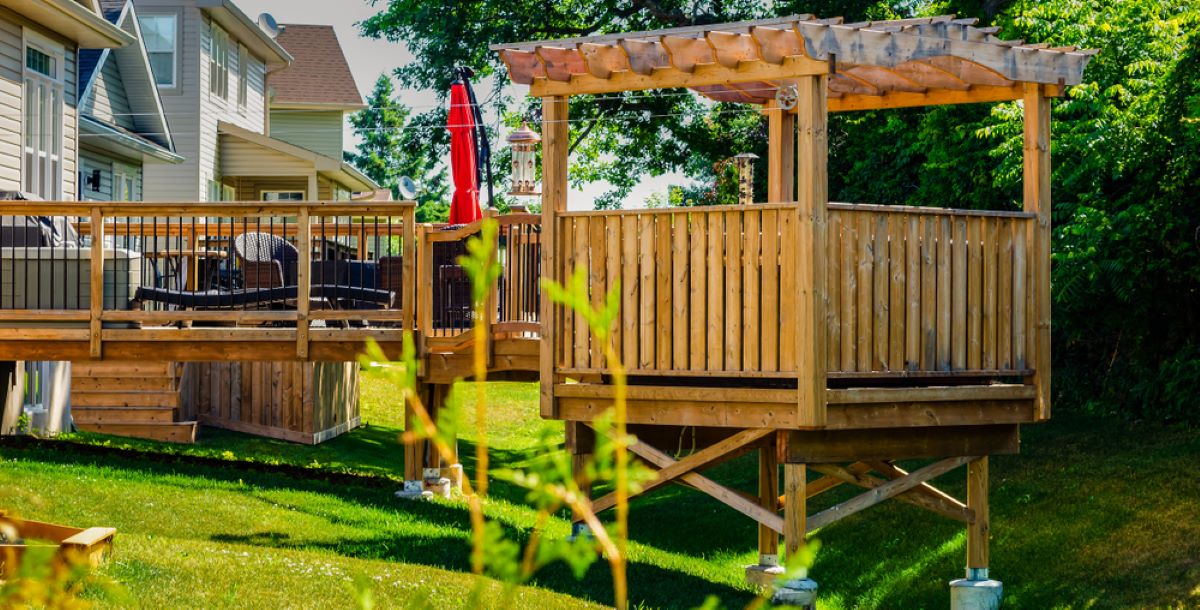
9. Raised decks
Decks can provide the perfect, elevated, platforms to look over our landscaped gardens. This elevation is even more effective within woodland gardens as it places you within the vegetation. This can really help you to experience your woodland paradise at its very best. Raised decks can provide the perfect platform for outdoor dining and nature watching. Such decks also hold the added advantage of creating much needed storage space underneath.
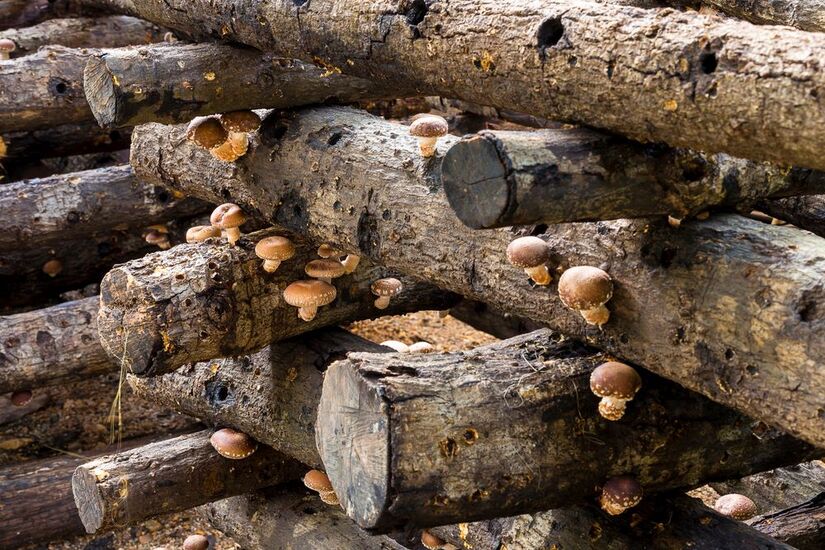
10. Mushroom farms
Mushroom farming may seem like an unlikely garden exercise for most people. However, growing mushrooms is less complicated than some may imagine! There are now plenty of mushroom growing kits and infected wooded dowels on the market. The infected dowels can be hammered into tree logs so the mycelium infects the timber. After a few months the mushrooms should start to sprout. Woodland gardens provide the perfect shady and sheltered places for growing fungi.
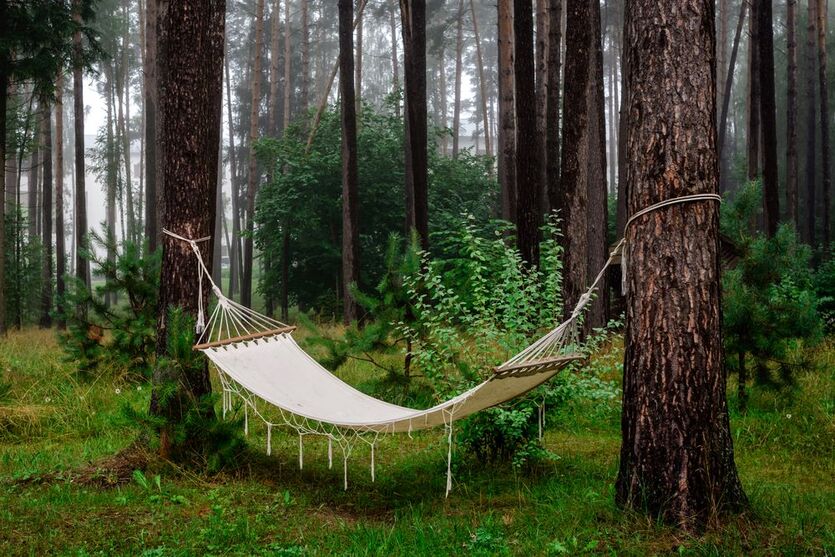
11. Hammocks
One of the best ways to enjoy a woodland garden is to simply spend time relaxing. There is nothing quite like sitting back and listening to rustling leaves and bird song. One of the best ways to do this is by lounging in comfort swinging amongst the vegetation! The only true way to do this in style is with a hammock. There is now a good range of garden hammocks on the market perfect for woodland gardens.
12. Garden torches
If there is one thing better than electrical outdoor lighting it is a naked flame! The dancing light of real flames can really set off a woodland garden during the evening time. This is especially so if you are having guests round for a late night party. One of the best ways to light up seating areas and walkways during such events is with garden torches. These fuel lit torches can have a real impact and are a fun way to celebrate your woodland paradise.

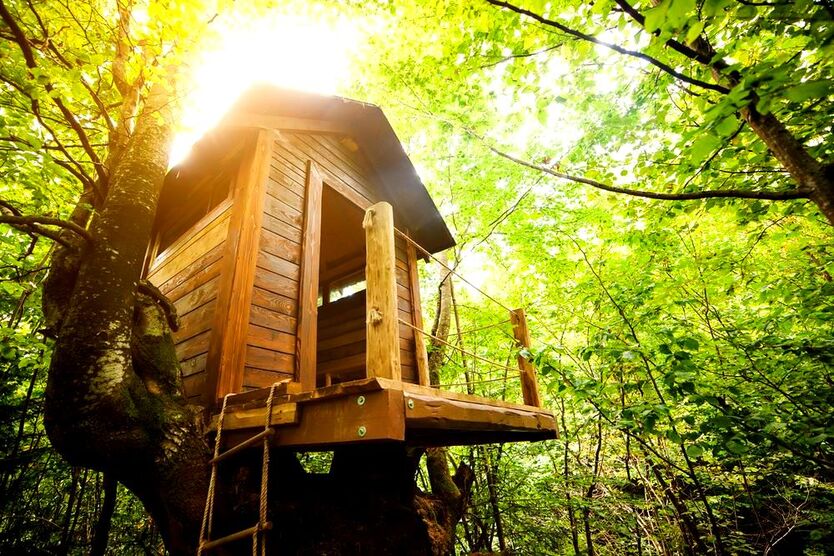
13. Tree house
Tree houses can add much fun and enchantment to woodland gardens especially if they are built with character. When elevated amongst the branches you will be able to appreciate the garden from a different perspective. Being able to sit within the canopy will enable you to observe wildlife and reconnect with nature. Tree houses will also offer the opportunity for friends and family to connect without the disturbance of electrical devices and social media.
Thank you for reading our article on woodland garden ideas! Below I have included some other woodland garden articles you may find helpful.
'As an Amazon associate I earn from qualifying purchases'
This article contains affiliate links
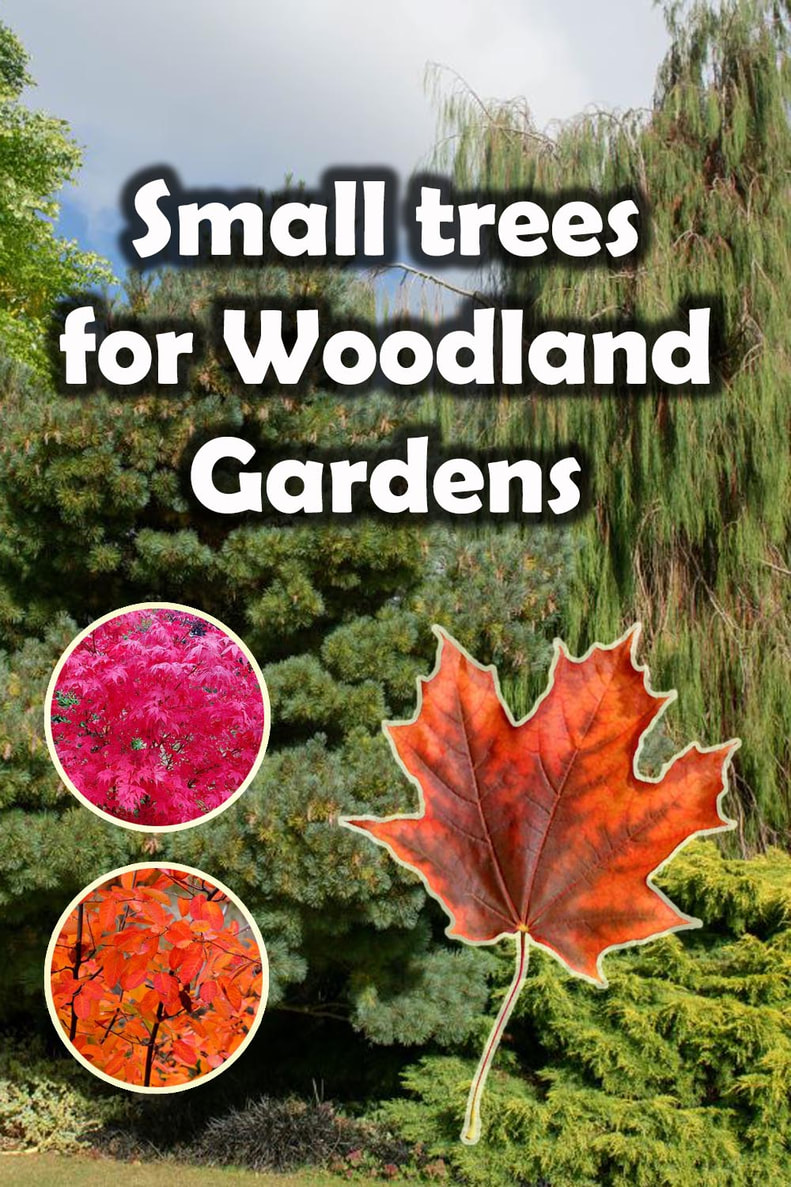
When it comes to the perfect woodland garden, selecting the best trees can be a tricky affair. Although trees can be the best way to reach a good effect some trees can simply grow too large.
For most gardens large trees are simply out of the question. They can grow out of the realm of a reasonable scale for your woodland garden design. Consequently, selecting small tree species can be the best strategy to proceed. Smaller trees closely planted with woodland shrubs can create some root restriction leading to much more manageable specimens. Therefore, in this article I will list and describe 10 small trees perfect for woodland gardens. 1. Acer palmatum
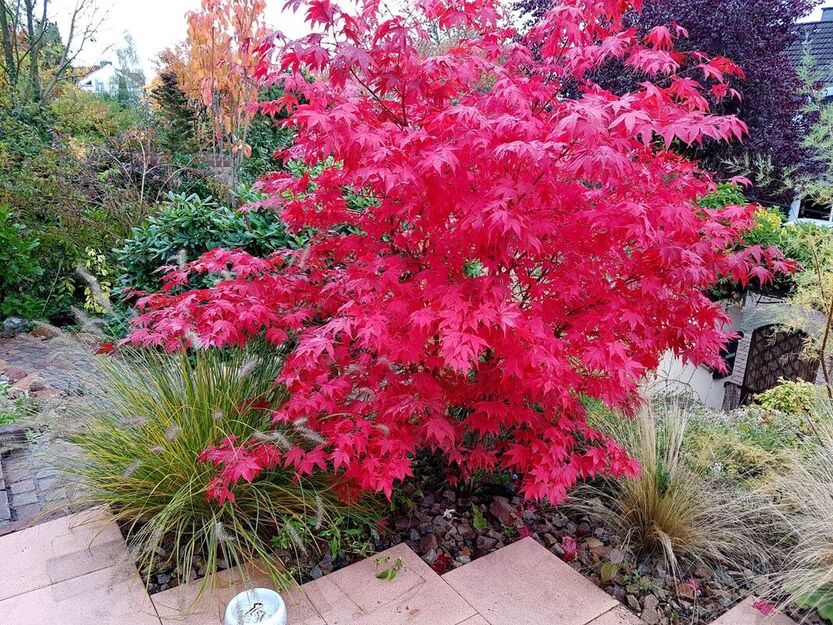
Also known as the 'Japanese maple' this small tree is well known for its amazing colours and jagged foliage. This tree is very popular within Japanese gardens where it is favoured for its fantastic form. Acer palmatum displays a shape typical of much larger trees while being a small and compact specimen. This makes it perfect for use within woodland gardens that want to add foliage colour and texture.
2. Amelancheir
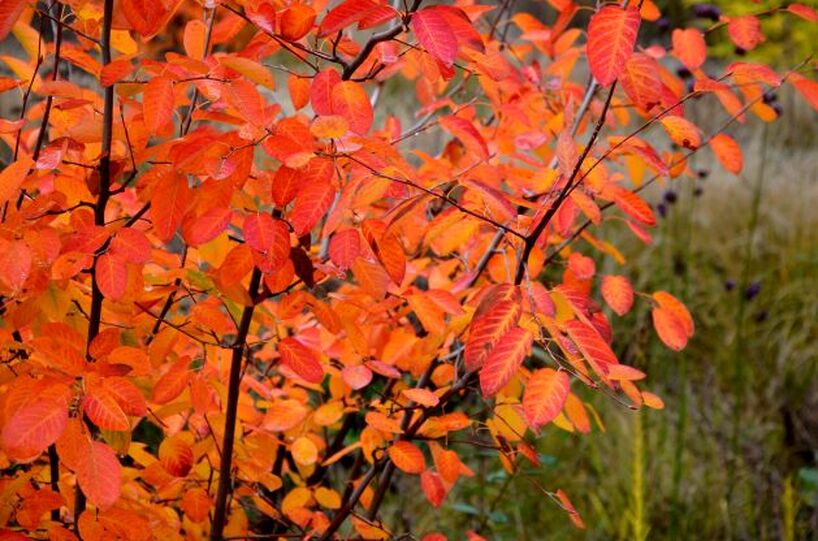
Sometimes referred to as ‘Serviceberry’ this small, ornamental tree is loved for its white flowers, berries and stunning autumn foliage. Like Acer it achieves an attractive form at an acceptable height and spread. This makes it great for forming a woodland canopy without the need for too much pruning. The tree also provides continuous seasonal interest throughout the calendar making it a good all-rounder.
3. Magnolia
Magnolias are a genus of flowering tree native to Southern China and the Southern United States. Well known for their stunningly large flowers which are sweetly scented it can provide seasonal wonder to woodland gardens. Its blooms range in colour from; white, yellow, pink to purple. Magnolias also have attractive glossy leaves which provide plenty summer interest. This tree appreciates a well drained soil and can tolerate partial shade.

4. Weeping birch
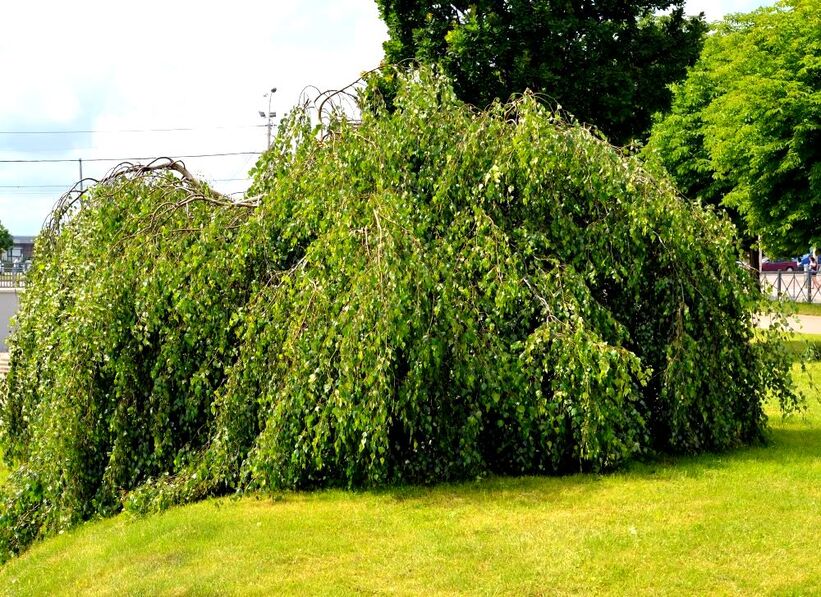
The weeping birch is an exceptionally popular tree characterised by its white trunk and long weeping branches and stems. Also known by its Latin name (Betula pendula ‘Tristis’) it has long been the small landscaping tree of choice. Like other birch trees it has small serrated leaves which turn golden yellow in autumn. These trees prefer moist but well drained soil and thrive in sunny positions.
5. Liquidambar styraciflua
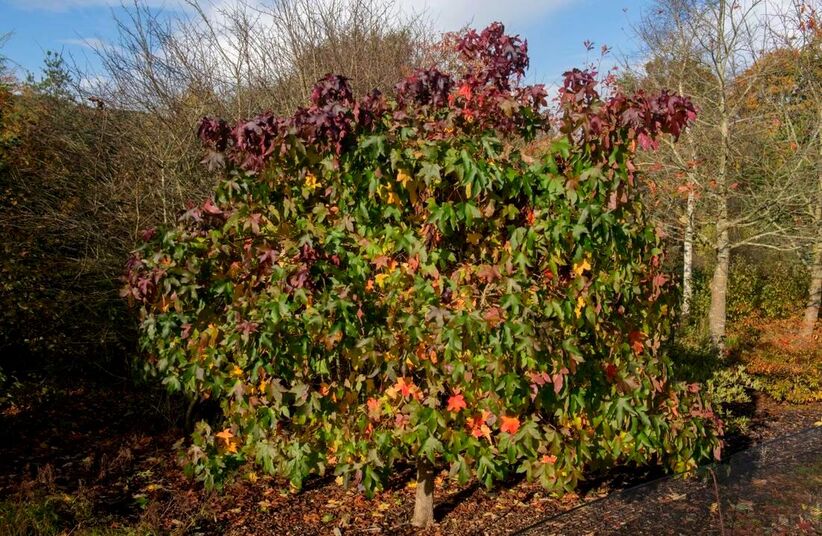
Liquidamber styraiflua is an attractive, deciduous tree native to North America. Being adaptable to a multitude of conditions it has become widely adopted as a landscape specimen. This tree has large start shaped leaves which display the most radiant of autumn colours. When young the tree has an interesting conical form which matures to a more rounded form.
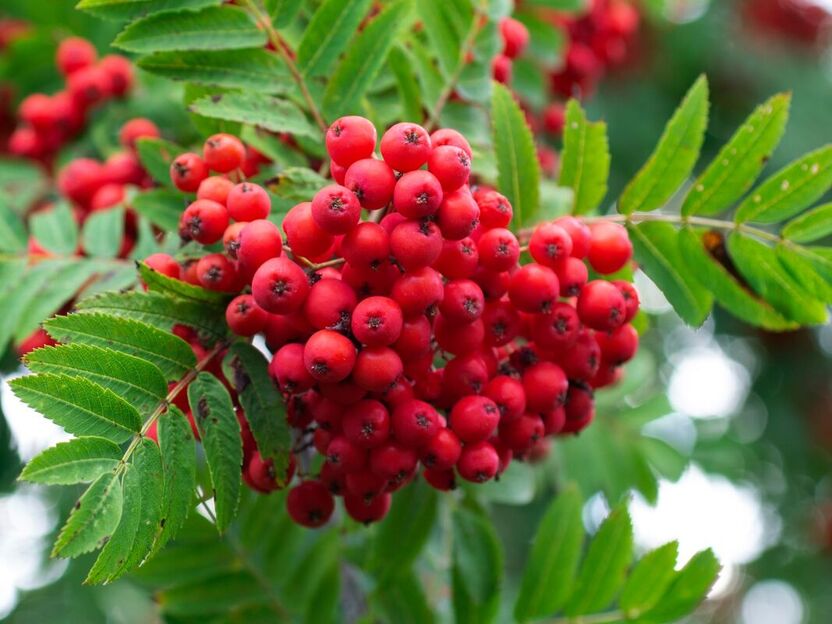
6. Mountain ash
Also known by its Latin name Sorbus aucuparia the Mountain ash is an attractive but resilient landscaping tree. This small tree is perfect for woodland gardens as it never gets very large. During autumn it produces plenty of decorative red berries which birds love to consume. It has long and thin pinnate leaves which display attractive colouration during the autumn season.
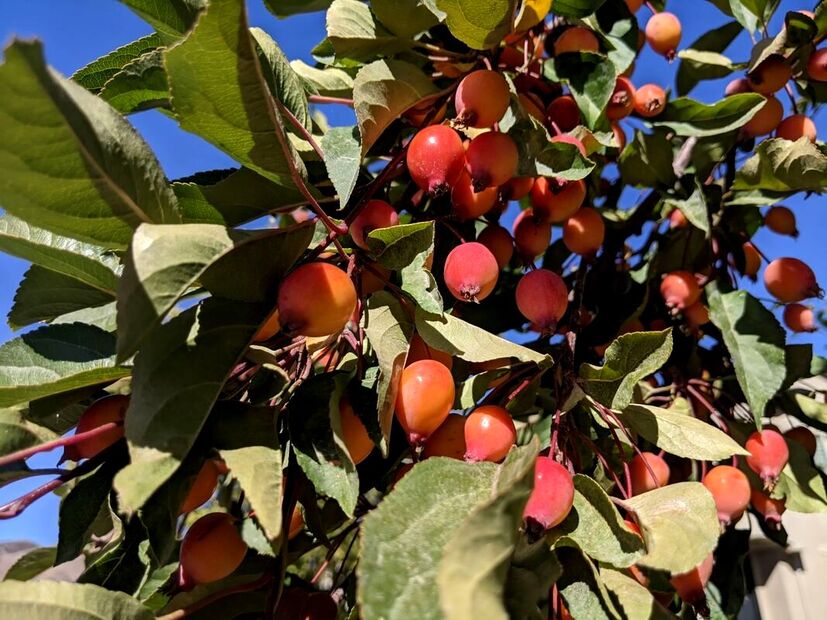
7. Crab apple
Although technically an apple the crab apple has been long appreciated and bred for its ornamental value. These small and compact deciduous trees are highly favoured for their spring flowers and small autumn fruits. The fruits are extremely ornamental and come in a wide range of different colours. Being edible they also provide much needed winter food for foraging birds. These trees are tolerant and multipurpose making them perfect for woodland gardens.
8. Indian bean tree
The Indian bean tree is a particularly interesting tree which looks more like an over grown vine. It has large bean shaped leaves with long, hanging bean like seed pods. Unlike its name it is actually not from India but the Southern United States. This tree when coppiced grows exceptionally large leaves making it look even more ornamental. Its decorative flowers, leaves and seed pods make it a novelty specimen for woodland gardens.

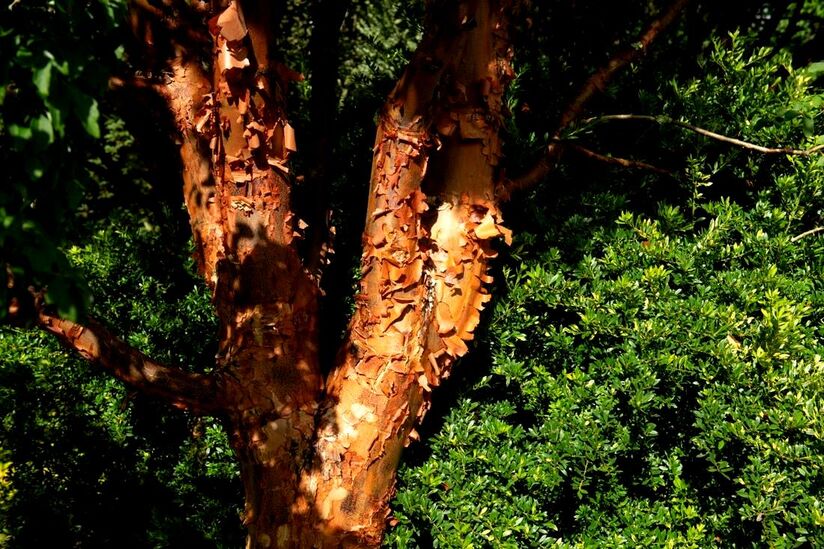
9. Acer griseum
Acer griseum is a small, ornamental tree perfect for small sites and compact woodland gardens. This tree reaches an attractive form of up to 10m with little need for pruning. Commonly referred to as the ‘Paper bark maple’ its most attractive asset is its papery, pealing bark. This makes it just as appealing during the cold winter months! Acer grisium has three lobed leaves which turn radiant shades of orange and red during the fall.
10. Cherry
As members of the Prunus family Cherry trees encompass a broad range of species and varieties. These small trees are highly valued for their ornamental qualities and fruit production. The fruits of cherries have a rich dark red colour and are thought of as highly sophisticated. During spring these trees are full of blossom followed by attractive foliage that displays good autumn colour. The cherries general hardiness and all round good qualities make it the perfect addition to woodland gardens.

Thank you for reading our article on the best trees for woodland gardens! If you require planting or landscaping services do not hesitate tocontact us.
Based in Amersham, Buckinghamshire we cover Buckinghamshire and neighbouring counties. Below I will link to some other woodland garden articles you may also find relevant.
'As an Amazon associate I earn from qualifying purchases'
This article contains affiliate links
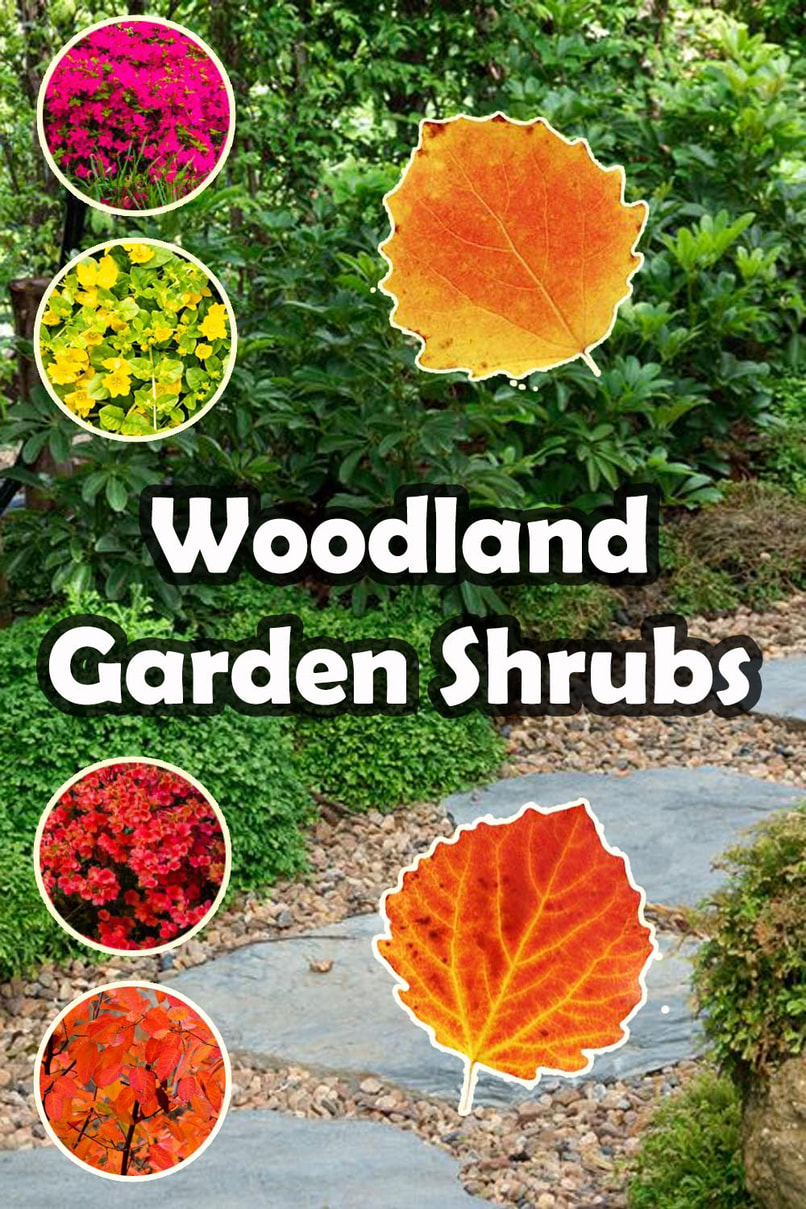
Shrubs are one of the most important elements within woodland gardens. Not only do shrubs provide interest and colour they also help to form a layered canopy structure.
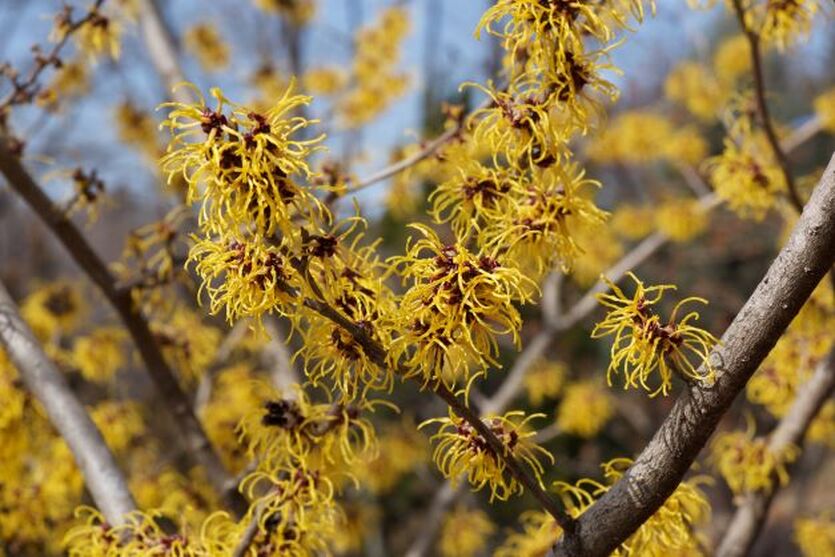
Shrubs will generally cover a wide spectrum of different sizes and growing habits. This can range from small trees to dense ground covers and physical boundary hedges. Such attributes makes shrubs such a functional part of woodland garden design. Shrubs can enable you to create dense thickets, visual barriers and marvellous walls of texture and foliage. In this article I list and summarise 10 shrubs perfect for woodland garden planting design. From large to small, evergreen and wildlife friendly we have something for every woodland paradise here. 1. Witch hazel
Scientifically known as Hamamelis, Witch hazel has always been valued for its striking winter blooms with unusual scent. It is well known for its medicinal properties and use within the skin care industry. This shrub flowers in early spring generally around February time displaying colours of yellow, orange and red. It has oval leaves with slightly jagged edges which display the most radiant autumn colour during fall.
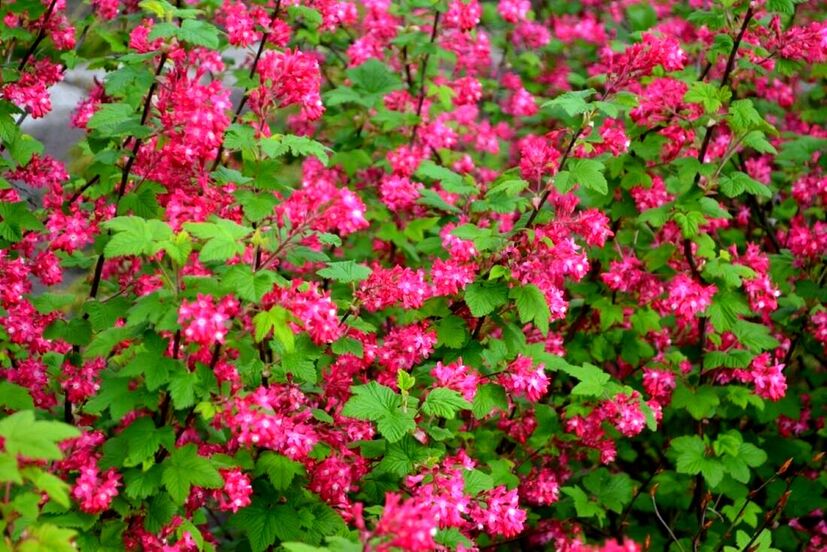
2. Flowering current
Also known by its Latin name (Ribes sanguineum) this deciduous shrub is loved for its decorative foliage and colourful flowers. Origionally from Western North America, this shrub never grows too large or gets out of control. This makes it absolutely perfect for smaller woodland gardens or lower canopy planting. During spring it produces weeping clusters of very attractive white, pink and red flowers.
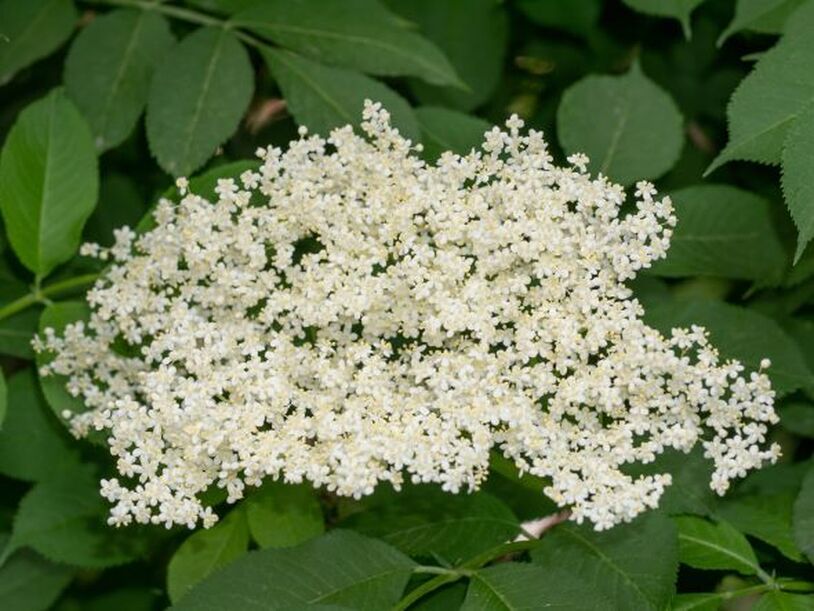
3. Elder
Commonly known as Elderberry this shrub is well known for both its berries and scented flowers. The flowers are used to flavour drinks while berries can be made into jams and chutneys. These shrubs are very widespread being native to Eurasia as well as North Africa. They have a tolerance to most growing conditions as well as shady woodland gardens.
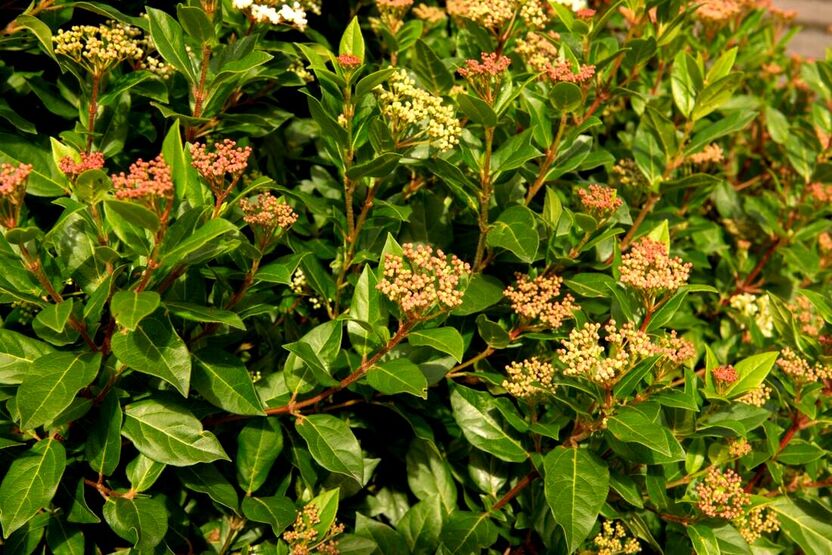
4. Viburnum Tinus
Native to the Mediterranean this evergreen shrub provides plenty of glossy foliage and attractive white flowers. In late summer its flowers give way to small metallic blue berries which are a novelty. In woodland gardens this shrub provides plenty of year round interest and shelter for wildlife. Being able to tolerate both part shade and dry conditions it can thrive around the canopies of larger trees.
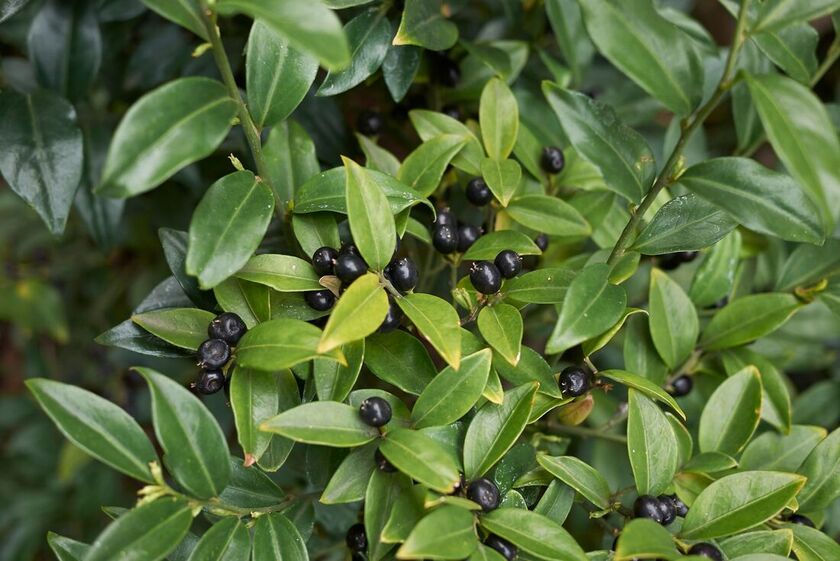
5. Sarcococca
Also known as ‘Sweet box’ or ‘Christmas box’ Sarcococca is an evergreen shrub originally from Asia. These shrubs are much loved for their glossy leaves and scented white flowers during winter time. The flowers are small but give off a powerful scent which can travel some distance. The flowers are followed by dark shiny berries which add some extra seasonal interest. The Sweet box has the ability to thrive in shady areas making it suitable for woodland garden designs.
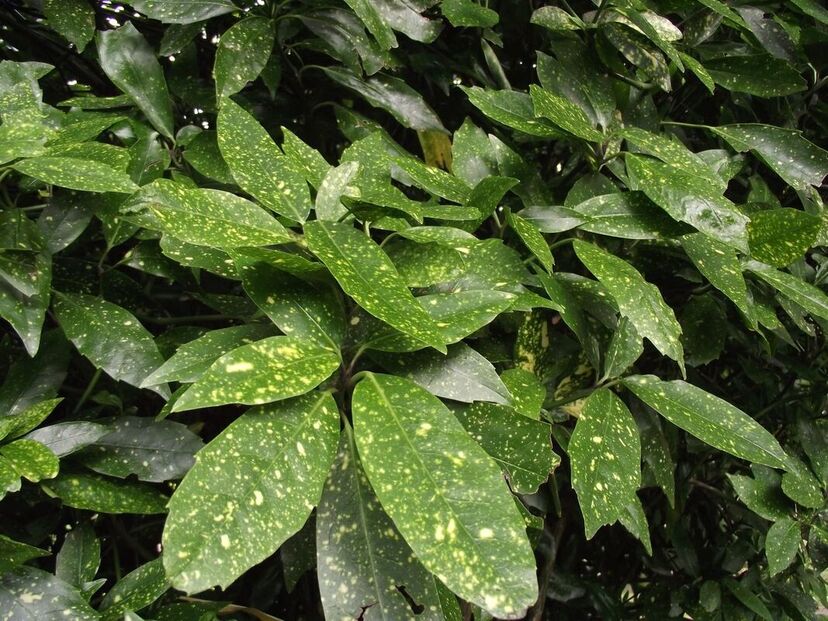
6. Aucuba Japonica
Commonly referred to as the ‘Spotted Laurel’ Aucuba is an evergreen shrub originally from East Asia and Japan. This shrub is particularly favoured for its large glossy leaves with golden speckling. In autumn the female plant produces bright red berries providing a bold visual contrast. Aucuba can tolerate a range of soil types and shady conditions making it the perfect candidate for woodland gardens.
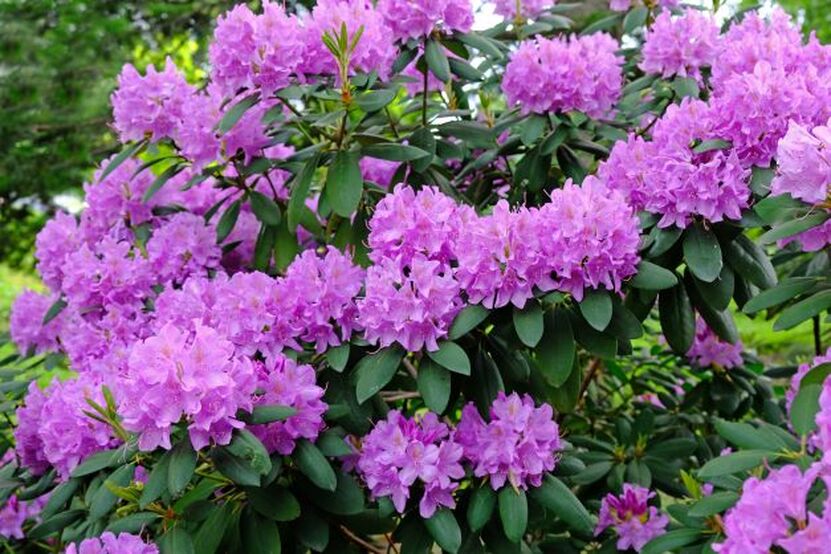
7. Rhododendron
Rhododendron is a wide ranging genus of evergreen shrub typically originating from the Himalayas. These shrubs can produce a dense under canopy to surrounding trees creating a sheltered habitat for wildlife. During spring they erupt in clusters of colourful flowers with colours ranging from white to purple. These shrubs do prefers to grow in acidic soil so some soil amelioration may be necessary. Top of Form
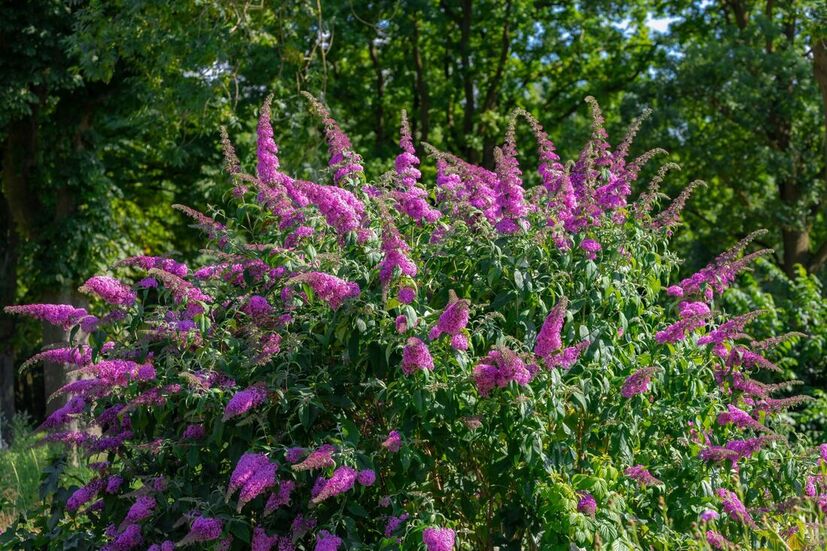
8. Buddleia
Buddliea has long been famous for its ability to attract many species of moth and butterfly. Being native to Africa, Asia and the Americas this shrub is extremely widespread and tolerant of many growing conditions. During summer it produces fragrant flowers loved by a whole range of pollinating insects. Buddleia can easily survive in shallow soil and put up with dry shady growing conditions. It makes an effective lower canopy shrub for woodland gardens.
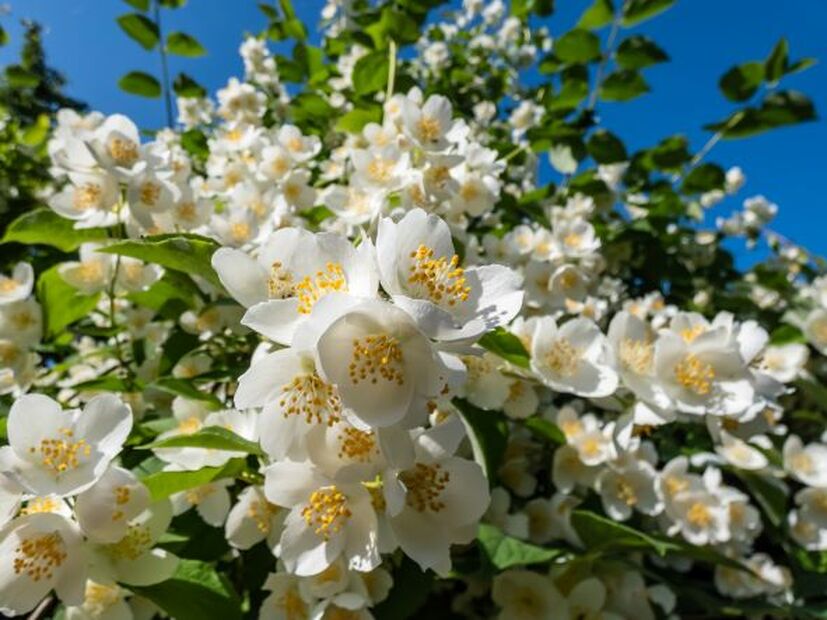
9. Phillidelphus
Phillidelphus is a medium sized shrub much loved for its strongly scented and attractive white flowers. Native to Europe, Asia and North America these shrubs are very adaptable of growing positions and soil types. Although generally low maintenance these shrubs do coppice and pollard well. They make a great lower canopy specimen and fragrance plant for woodland gardens.
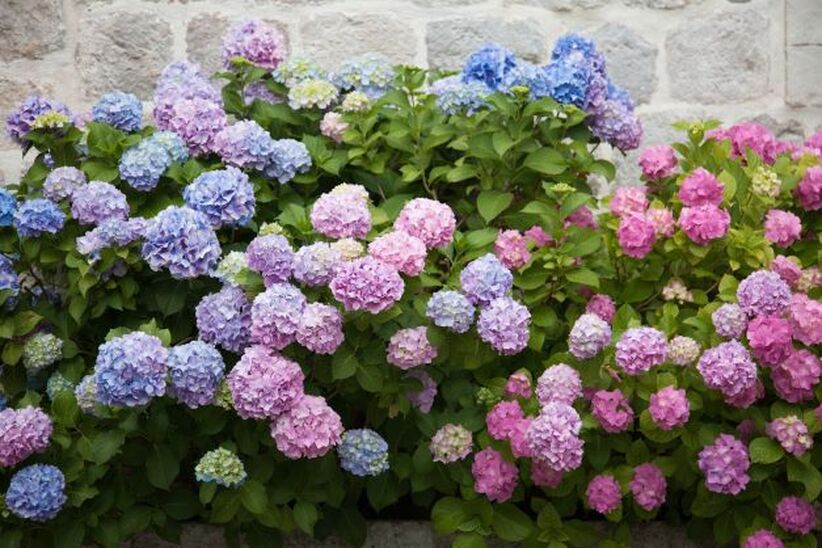
10. Hydrangea
Hydrangea belongs to a genus of flowering plants much loved for their large foliage and stunning flowers. Native to Asia and the Americas these shrubs are not particularly fussy and can tolerate part shade. The flowers come in a range of colours including; blue, purple, pink, white. Hydrangeas grow to an attractive spherical form which makes them a front of border gem for woodland gardens.
Thank you for reading my article on the best shrubs for woodland gardens! Below I will link to some of our other woodland garden articles you may find relevant.
'As an Amazon associate I earn from qualifying purchases'
This article contains affiliate links
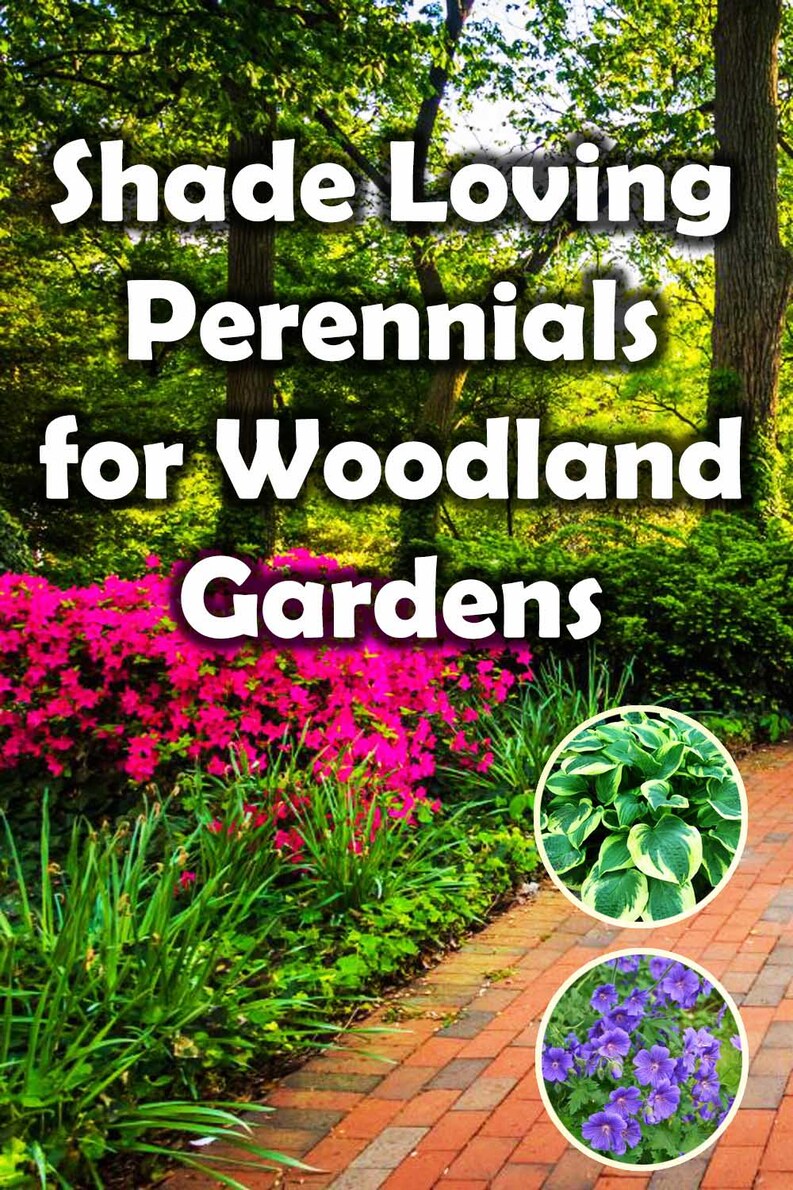
Perennial plants are those which grow during each growing season and die back in winter. There growing cycle means they add some much needed seasonal change to woodland gardens.
These deep rooted plants can form lush plant communities on otherwise difficult and shaded ground. Many perennials have attractive foliage and brightly coloured flowers bringing interest to the forest floor. Not only are woodland garden perennials attractive to people they are also beneficial to wildlife. Perennials create dense pockets of vegetation and often provide plenty of nectar and pollen for beneficial insects. Why not inject some extra life into your project, with our top 10 perennial plants for woodland gardens. 1. Hellebores
Native to Europe and Asia these shade loving perennials are perfect for woodland gardens. Not only are they accustomed to growing in dabbled shade they also flower early in the season. Flowering in mid February they open their beautiful blooms when little else is on show. Hellebores are perfect for situating along pathways or in a position so they can be enjoyed from the home.

2. Hostas
Hostas are vibrant and lush looking perennial plants which originally come from East Asia. Although Hostas do have attractive flowers they are more favoured for their large leaves. Their large, Oval shaped leaves can have striking colours including grey, blues and bright yellows. With a love for shady borders they make an absolute must for the woodland garden. During midsummer they sprout flower spikes with a cluster of bell shaped blooms.

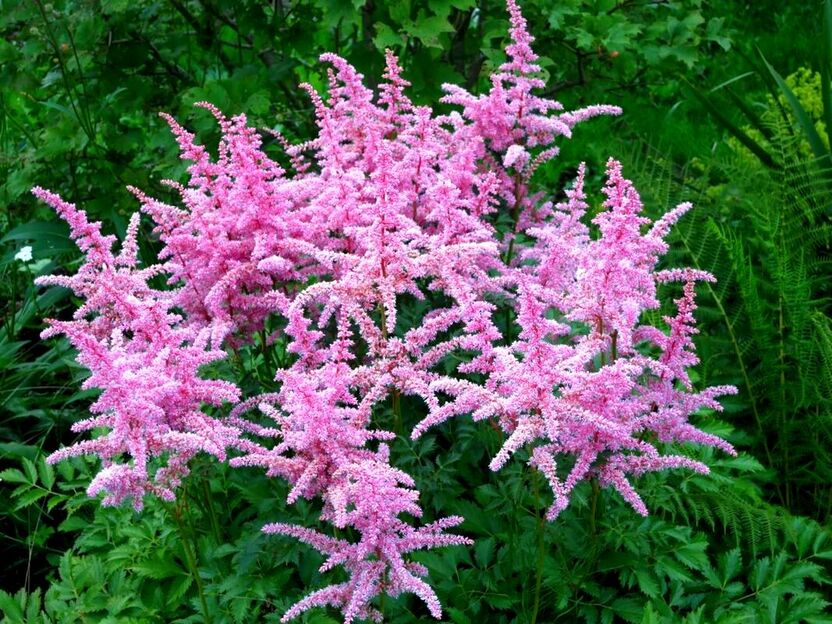
3. Astilbe
Astilbe are attractive perennials favoured for their foliage but more so their vibrant flowers. The flowers range from white to pink and purple to red and bloom during the summer months. Flowers grow into feathery plumes of colour which make them extremely effective in panting designs. Astilbes prefer to grow in dappled shade making them an excellent candidate for woodland gardens.
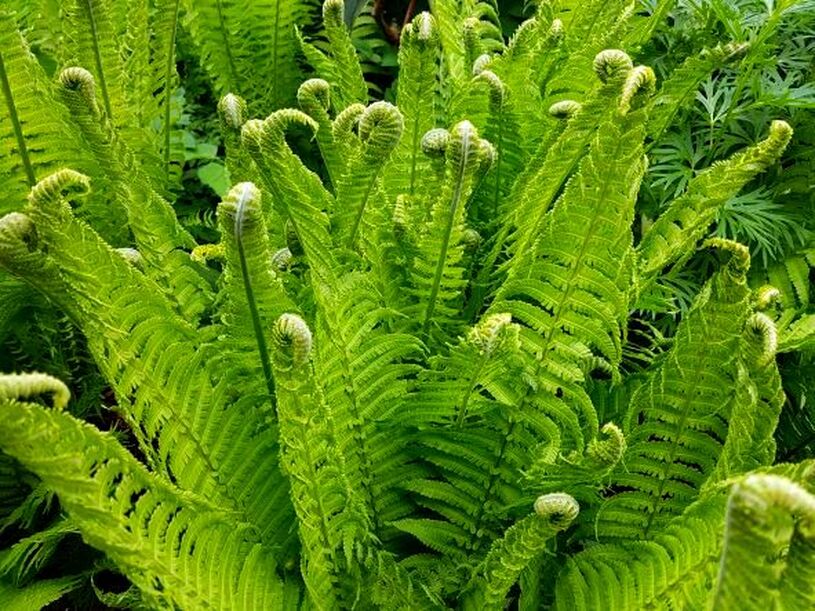
4. Ostrich fern
The Ostrich fern is a perennial, woodland fern famous for its large and attractive leaf fronds. Being extremely widespread it is found across North America, Europe and Asia. This makes this fern extremely hardy and adaptable to a variety of growing conditions. Ostrich fern prefers to grow within cool and damp, shady borders making it very suitable for woodland gardens. These ferns can form dense growing communities making exceptional groundcover and understory planting.
5. Coral bells
Also known by its Latin name Heuchera, this low growing plant is favoured for its delicate flowers and vibrant foliage. Originating from America its foliage forms a low growing bushy cluster of foliage. Its leaves have interesting and brightly toned colourations including; pinks, purples, yellows and greens. During summer it throws up tall, thin flower stalks which erupt in small bell shaped flowers. Coral bells are extremely shade tolerant and create a great perennial groundcover to woodland borders.

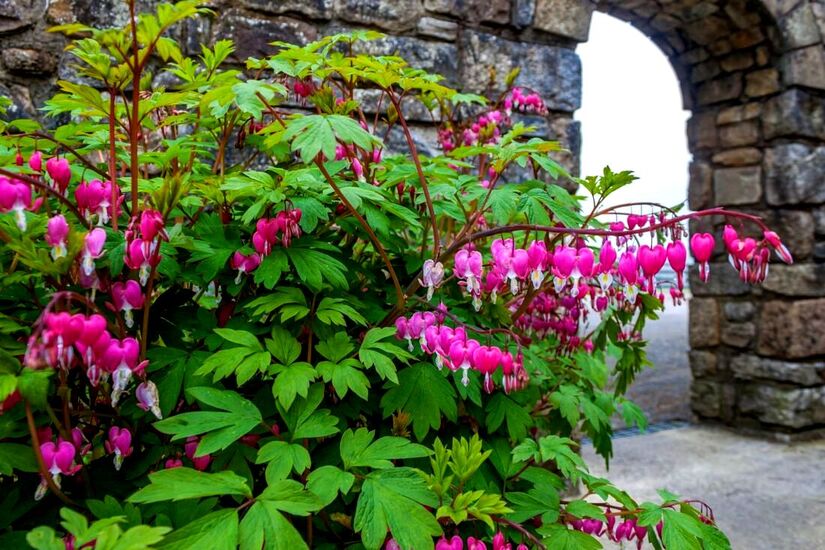
6. Bleeding heart
Bleeding heart or 'Dicentra spectabilis' is a herbaceous perennial originally native to Asia and North America. This plant is well admired for its heart shaped blooms which almost look artificial. The flowers appear in spring or early summer depending upon seasonal temperatures. Having a tolerance for shady spots this plant is perfect for adding some wonder to woodland gardens.
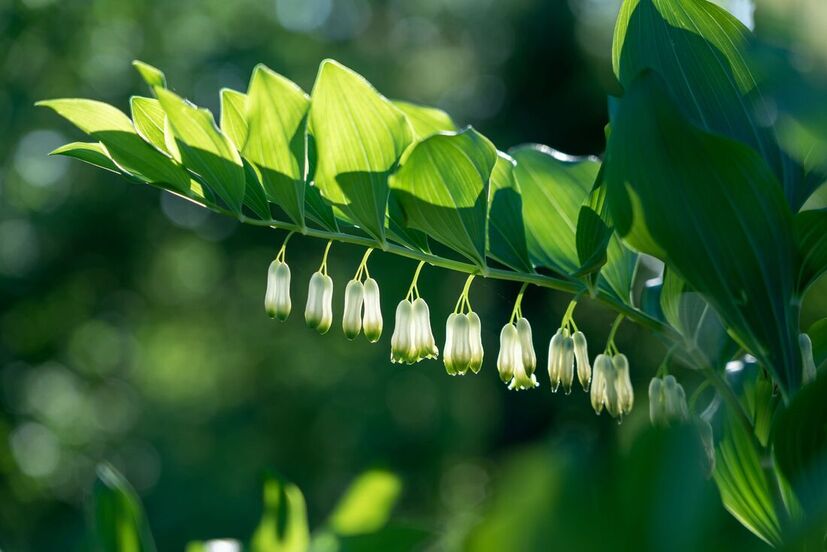
7. Solomon seal
Also known by its Latin name Polygonatum this unusual plant has arching stems and bell shaped flowers. Native to the cool forests of the northern hemisphere this woodland plant is very resilient. Solomon seal sprouts every spring from rhizomes eventually spreading to form small colonies. This attractive plant is perfect for adding seasonal variation to the front of woodland borders.
8. Japanese Anemone
Japanese Anemones are delightful flowering perennials that provide welcome blooms to the end of the growing season. These plants form a dense thicket of a jagged dark green foliage making them an effective groundcover. The flowers are five lobed and come in shades of white and light pink. The flowers are raised up above the foliage on tall stems which dance on the breeze. Being shade tolerant the Japanese Anemone is the perfect perennial for a shady woodland border.

9. Lilly of the valley
Lilly of the valley (Convallaria majalis ) is a low growing perennial loved for its small fragrant flowers. The flowers are white and bell shaped suspended upon thin arching stems. Native to the temperate woodlands of Eurasia this perennial can tolerate shady borers and likes moist but well drained soil. The Lilly of the valley spreads via underground rhizomes and can spread to form colonies of attractive groundcover.
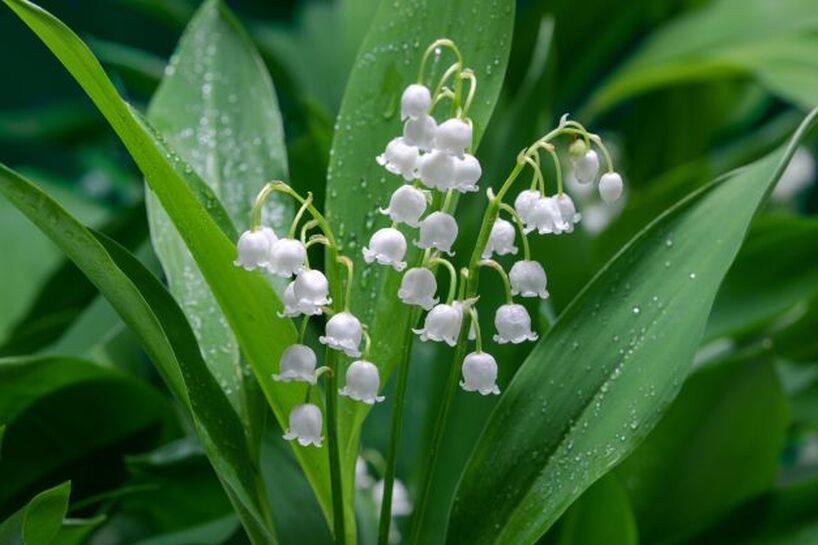
10. Japanese forest grass
Japanese forest grass is an ornamental grass well known for its busy, arching foliage. The foliage ranges from dark green to a radiant yellow with some varieties being variegated. During the fall, these grasses can display some exceptional autumn colour turning shades of orange and red. Native to the cool, damp forests of Japan this grass is resilient and shade tolerant. It is particularly effective for block planting ground covers in forest gardens.

Thank you for reading our article on 10 great woodland garden perennials! Below I will link to some of our other woodland garden articles you may find useful.
'As an amazon associate I earn from qualifying purchases'
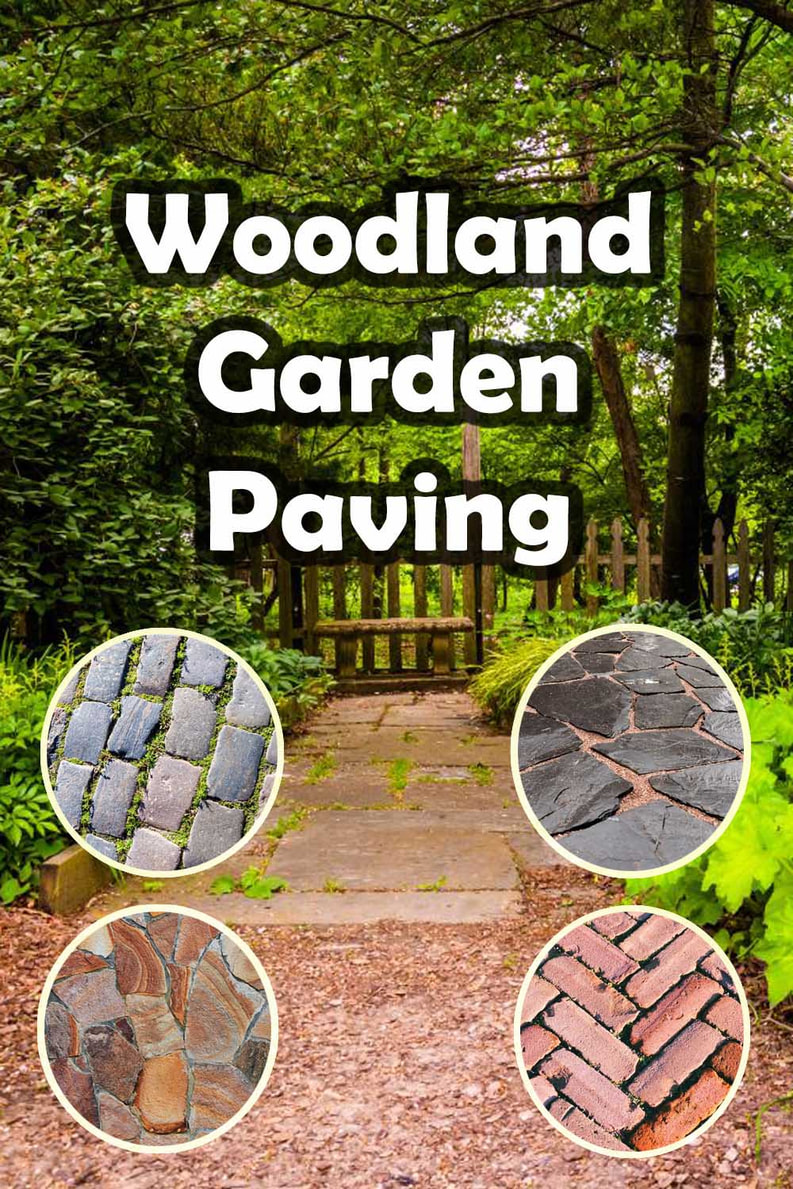
This article contains affiliate links
Woodland gardens are celebrated for their array of interesting foliage and shady borders full of specimen plants.
When planning a woodland garden paving may not be high on the list of priorities. However, paving can play a critical role within woodland gardens defining pathways and providing good seating areas. The question is; what is the best paving material for woodland gardens? In this article I seek to answer this very question! I will provide my take on the best paving for woodland gardens listing and summarising 7 types of paving material. What is the best paving for woodland gardens?
The best paving for woodland gardens would be a natural stone with darker and multi-tonal colour variations. Such a paver will be able to resist continuous colour staining from leaf tannins, berries and bird droppings. For this reason paving should also have a low permeability and non slip surface. Paving within woodland gardens will also most likely benefit from a good quality non slip sealant. 1. Granite
Granite has been utilised as a paving and surfacing material since ancient times. Its high density and durability makes it extremely resilient and weather resistant. Either granite setts or granite paving slabs can be a great choice especially for contemporary woodland garden designs. However, it should be recommended granite will benefit from an external grade sealant. As it is a naturally lighter tone it can be vulnerable to stains.

2. Black slate
If you wanted one paving material which is stain resistant and impermeable, black slate would be top of the bunch. Black slate has the extra advantage of being dark enough many stains will not show up on the surface. This means it is easy to keep looking its best all year round. Black slate also works well with either modern or traditional looking woodland gardens.
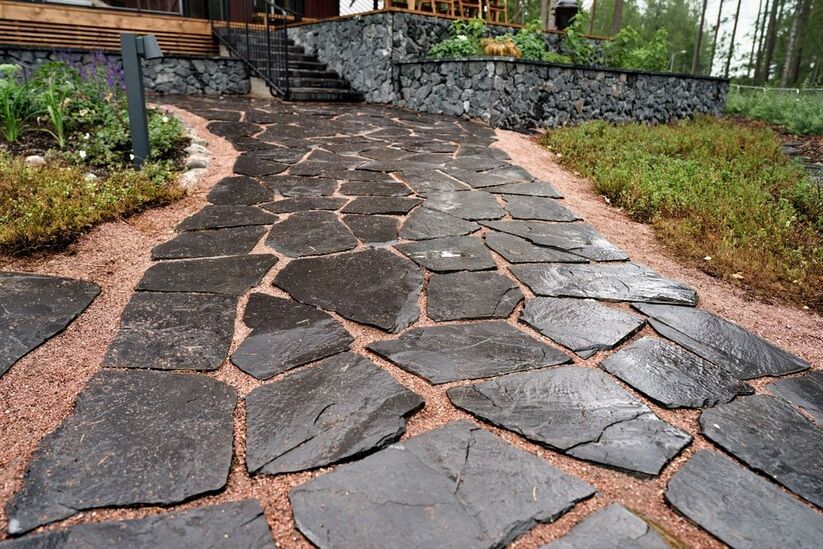
3. Wood style porcelain
Wood styled porcelain is a type of external grade porcelain made to look like wood. This porcelain comes in a range of natural wood aesthetic types including; Walnut, Maple, Cherry and Oak. This paving has all the typical advantages of using porcelain including, imperviousness, durability and low maintenance. At the same time its timber aesthetic makes it perfectly in keeping with a woodland garden theme.

4. Sandstone
Sandstone has become one of the most popular natural stone paving materials on the market. Not only is this extremely versatile stone beautiful it is reasonably affordable for a natural stone. Indian sandstone especially comes in a broad range of textures and colour tones. Sandstone can bring a more traditional look to woodland garden paths and patios. As sandstone is slightly porous it is advised to seal pavers with an external grade sealant!

5. Black limestone
Black limestone is a sedimentary rock loved for its dark tones and natural variation. This stone was formed over millions of years from a combination of organic material and compacted sediments. Such formation means the stone often displays mineral deposits as wells as well as shells and small fossils. The stones dark colours and varied surface makes it a perfect surfacing material for woodland gardens.

6. Natural stone setts
Natural stone setts now come in a range of materials perfect for creating decorative and robust surfacing. Traditionally granite setts were the smaller paving unit of choice and are still widely used. However there are now Sandstone, Slate and even limestone sett pavers. Setts naturally have a more traditional and historical look making them fit in well with naturalistic woodland garden designs.

7. Block paving
Block paving is a pre-cast paving block typically used to lay driveways and car ports. Due to its popularity however, block paving now includes a multitude of different styles and products. This has also made it popular for landscaping applications including patios and pathways. For woodland gardens I find cobble effect block paving like Marshalls tegula or Brett Alpha Trio, and excellent choice. These lighter blocks light sandstone will benefit from a non-slip external sealant.

Thank you for reading my article on 7 paving choices for woodland gardens! If you require paving or landscaping services do not hesitate to contact me.
Based in Amersham I offer pathway, driveway and patio laying services across Buckinghamshire. We are also experts in woodland garden planting and planting design. For more information on our landscape services, visit our contact page here. Below I will link to our other woodland garden articles you may also find useful.
Contact us
'As an Amazon associate I earn from qualifying purchases'

This article contains affiliate links
Groundcover plants within woodland gardens provide a firm planting base between larger trees and shrubs. These floor covering plants provide shelter for wildlife and a barrier to weed establishment.
Any bare soil always has the threat of becoming colonised by unwanted plants. Consequently, groundcovers enable you to take full control of your planting borders. Woodland gardens however do host some challenges to typical groundcover varieties. Such gardens can often present one of the most difficult growing environments; dry shade. In this article, I identify 10 groundcover plants that can withstand these conditions and actually thrive in woodland gardens. 1. Pachysandra
Pachysandra is an evergreen perennial favoured for its interesting foliage and small white flowers. This plant forms dense mats of vegetation making it an effective groundcover. It has an ability to thrive in shady conditions making it perfect for woodland planting schemes. Pachysandra is also extremely low maintenance and tolerant of most soil types.
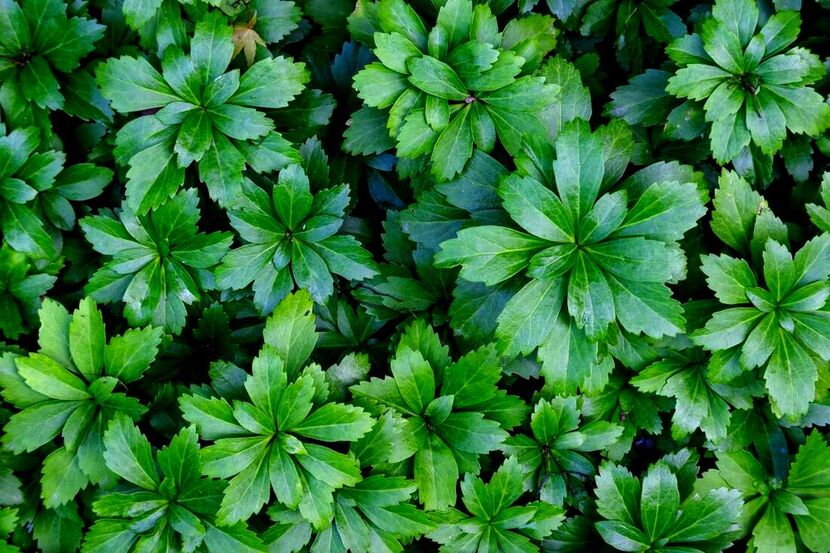
2. Ostrich fern
Also known by its Latin name (Matteuccia struthiopteris) Ostrich fern is a perennial fern native to forests of the northern hemisphere. Favoured for its large, feather like, leaves it can form dense thickets of multiple specimens. Its ability to spread makes it a particularly effective groundcover for woodland gardens. This fern, once established, can create a lush and green foliage display every season.

3. Hosta
Hostas are herbaceous, perennial plants favoured for their large, lush, leaves and attractive growing habit. These plants grow from bulbs which can divide and spread forming dense groundcovers overtime. Planted in blocks, they can add colour to shady woodland borders and provide shelter to wildlife. During summer they have the added benefit of producing attractive, bell shaped flowers.
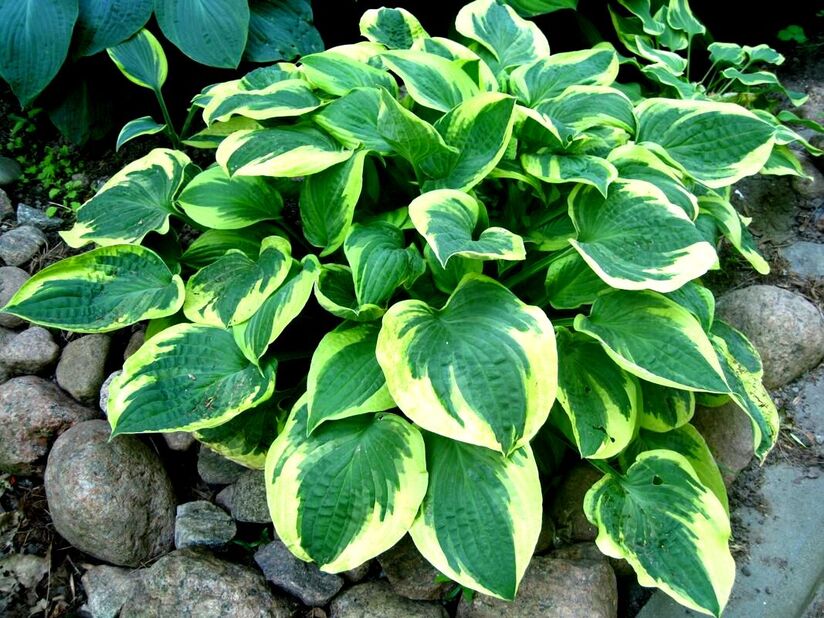
4. Japanese forest grass
Often referred to by its Latin name (Hakonechloa macra) this grass originated from the mountain forests of Japan. This grass is highly favoured for its arching foliage which almost looks fountain like. Its foliage is typically lush green or variegated and can display tones of brown and red during the fall. When planted within groups it can form a lush groundcover under the woodland canopy.
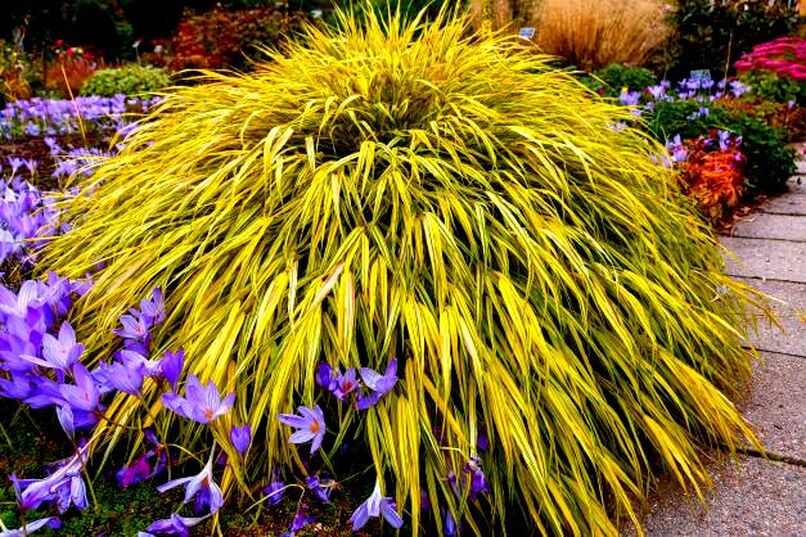
5. Coral bells
Coral bells is herbaceous perennial plant much loved for its radiant foliage and small delicate flowers. Often described by its scientific name (Heuchera) this plant can thrive in a broad range of growing conditions. The foliage can come in a diversity of colours including yellow, pink and deep red. This combined with its low, compact; habit makes it perfect for block planting and dense groundcovers. Growing well in partial shade makes it quite suitable for woodland gardens.
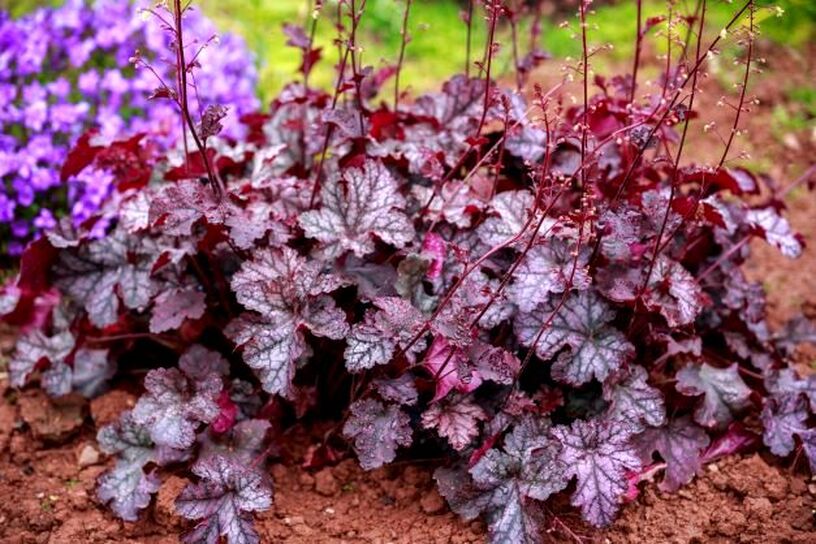
6. Hypericum calycinum
Often referred to by its common name ‘Creeping St Johns Wort’ this plant is a low growing evergreen perennial. Originally native to Eurasia it is favoured for its dense, spreading, habit, oval foliage and yellow flowers. It has an ability to adapt to various growing conditions and help to suppress weeds. Its dense foliage makes it perfect for creating secure habitats and travel routes for wildlife.
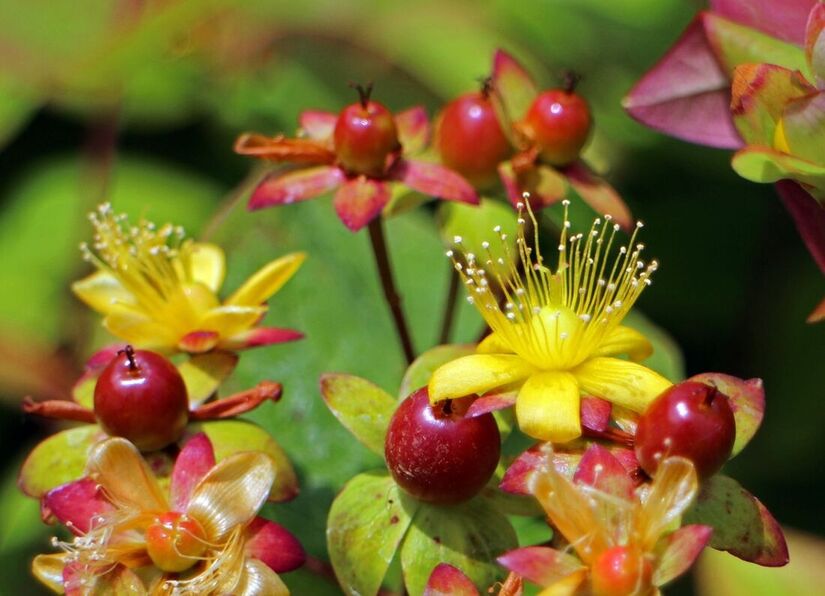
7. Cotoneaster horizontalis
Occasionally called Rockspray, Cotoneaster horizontalis is a low growing, trailing shrub native to China. It is popular for its seasonal variation and horizontal branching habit. During summer this plant produces hundreds of small flowers that are popular with bees. As autumn approaches the foliage turns radiant tones of yellow, orange and red. Being able to tolerate part shade this plant can make an attractive groundcover to woodland garden borders.

8. Cranesbill Geranium
Cranesbill Geraniums are attractive plants with a vigorous and low growing habit. They are particularly favoured for their palmate leaves and delicate flowers which have a long blooming season. Being able to tolerate part shade it is a worthy candidate for covering woodland garden borders. It also has a good tolerance of varying soil types and growing positions.

9. Japanese anemone
Originally a native to China and Japan this perennial plant is both beautiful and resilient in nature. Its leaves are three-parted with a jagged outline giving them a unique texture. Their stunning flowers are raised up upon delicate stems which bob and flow with the breeze. Originating from woodland environments they are more than capable of tolerating shady borders. These plants form a bushy mass of low growing foliage that can shade out weeds and decorate borders.
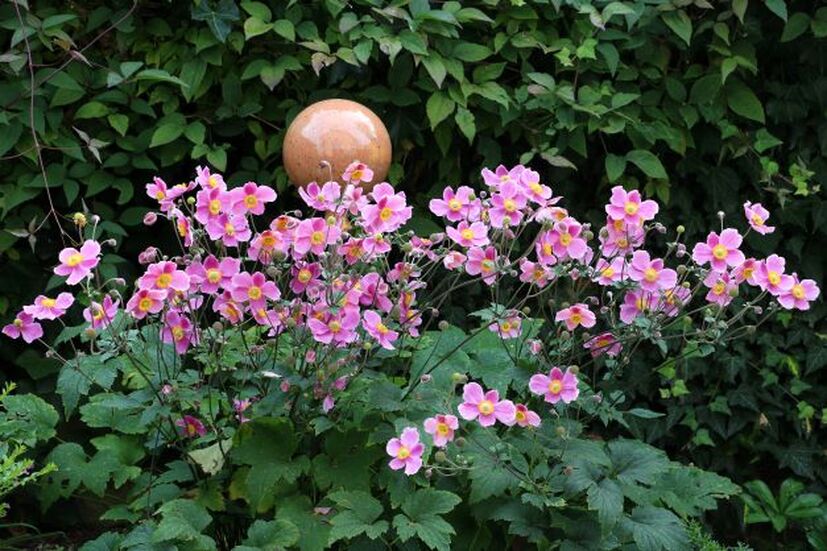
10. Vinca minor
Vinca minor is a creeping, low growing plant originating from Europe and Asia. Also known as Periwinkle or creeping myrtle it is an evergreen perennial with glossy green foliage. Due to its dense growing habit and general resilience it is often used as a landscape ground cover. This plant is fast to establish and requires little after care once established. During spring it produces stunning blue and purple flowers which can sometimes bloom in autumn. Its ability to tolerate shade makes it a great groundcover plant for woodland gardens.
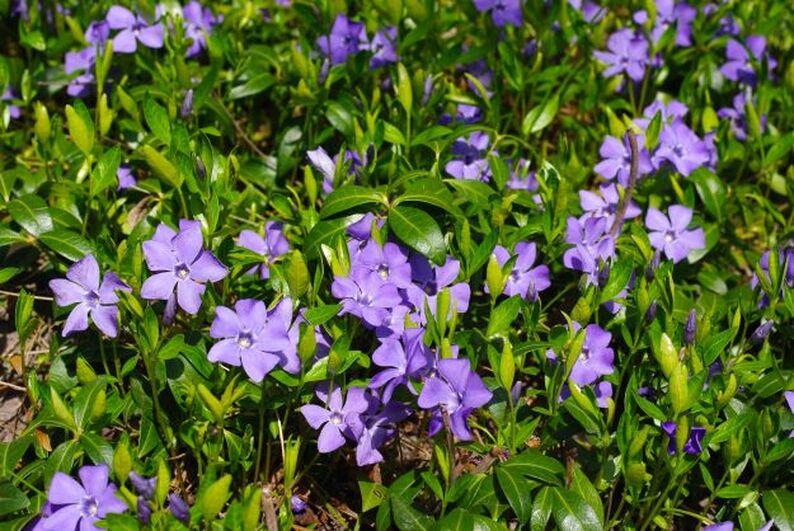
Thank you for reading our article on the best ground cover plants for woodland gardens! Why not check some of our other articles about woodland gardens below? If you require landscaping services in Buckinghamshire or surrounding areas please contact us here.
'As an Amazon associate I earn from qualifying purchases'
|
The Author
|


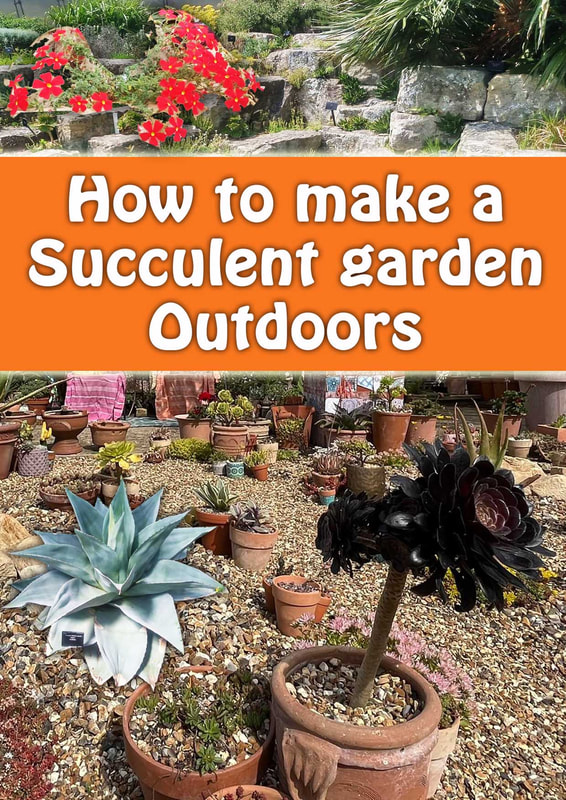


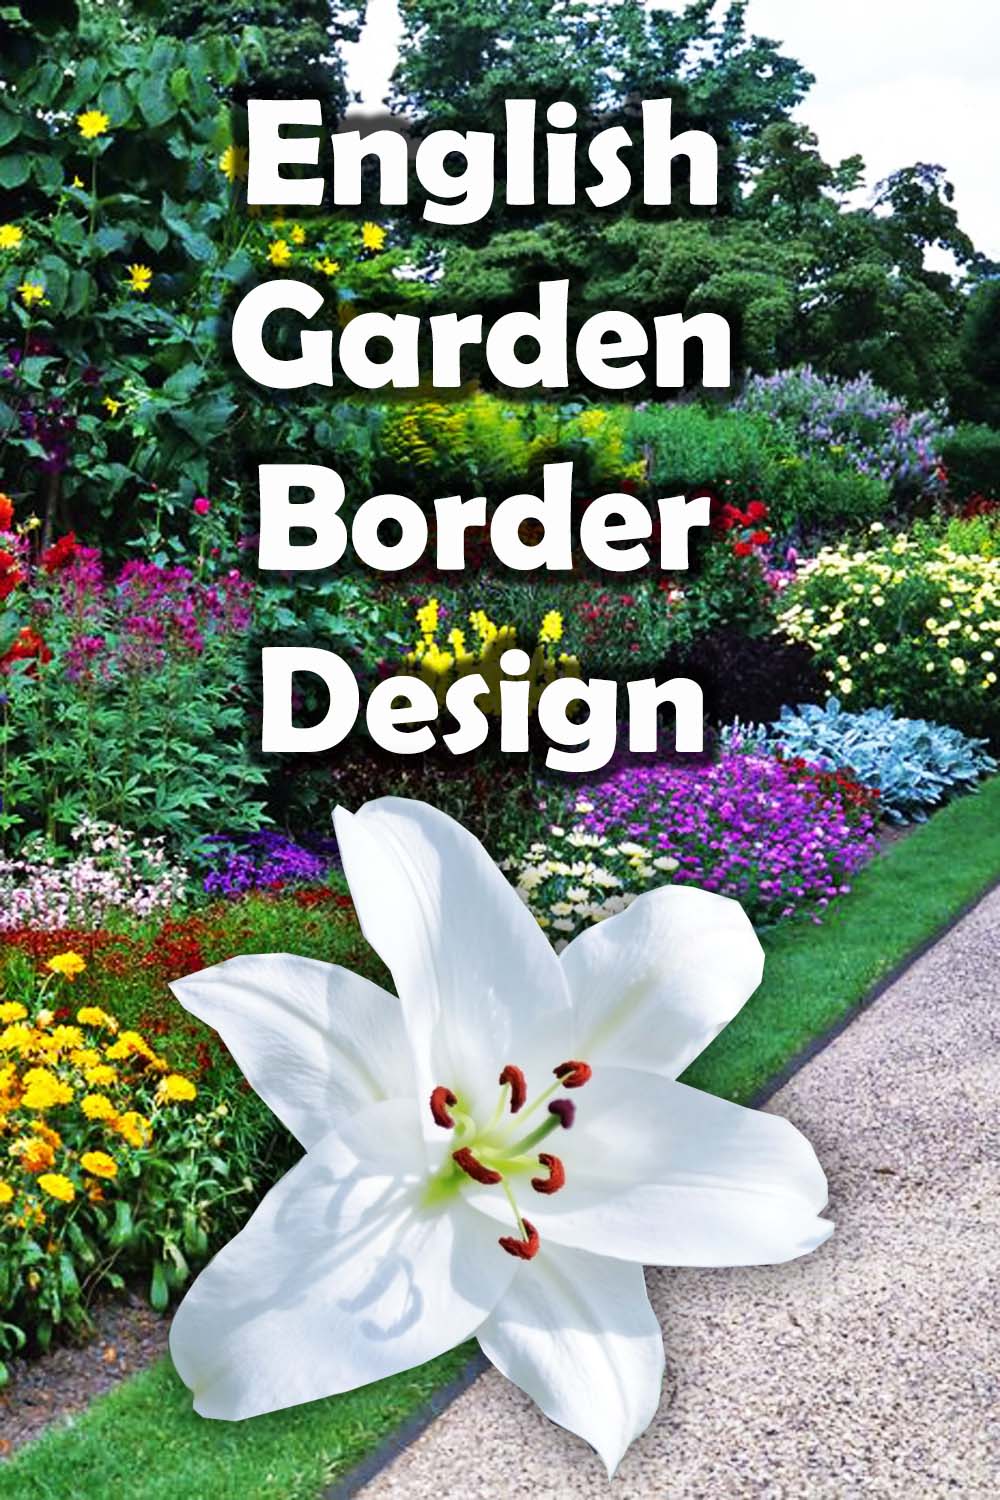
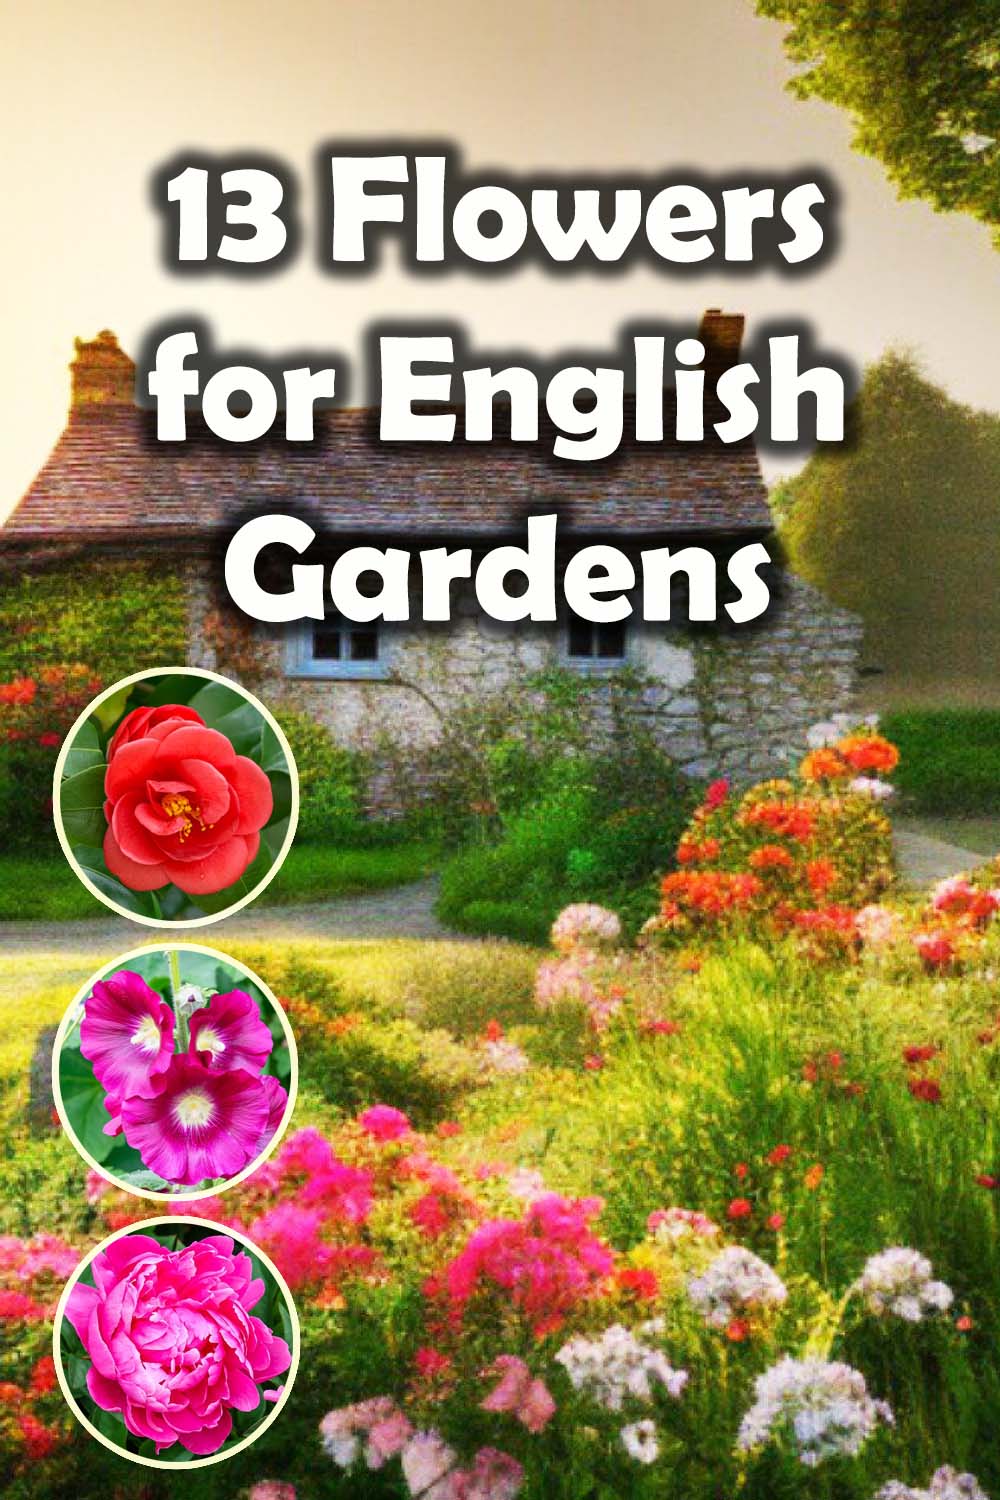
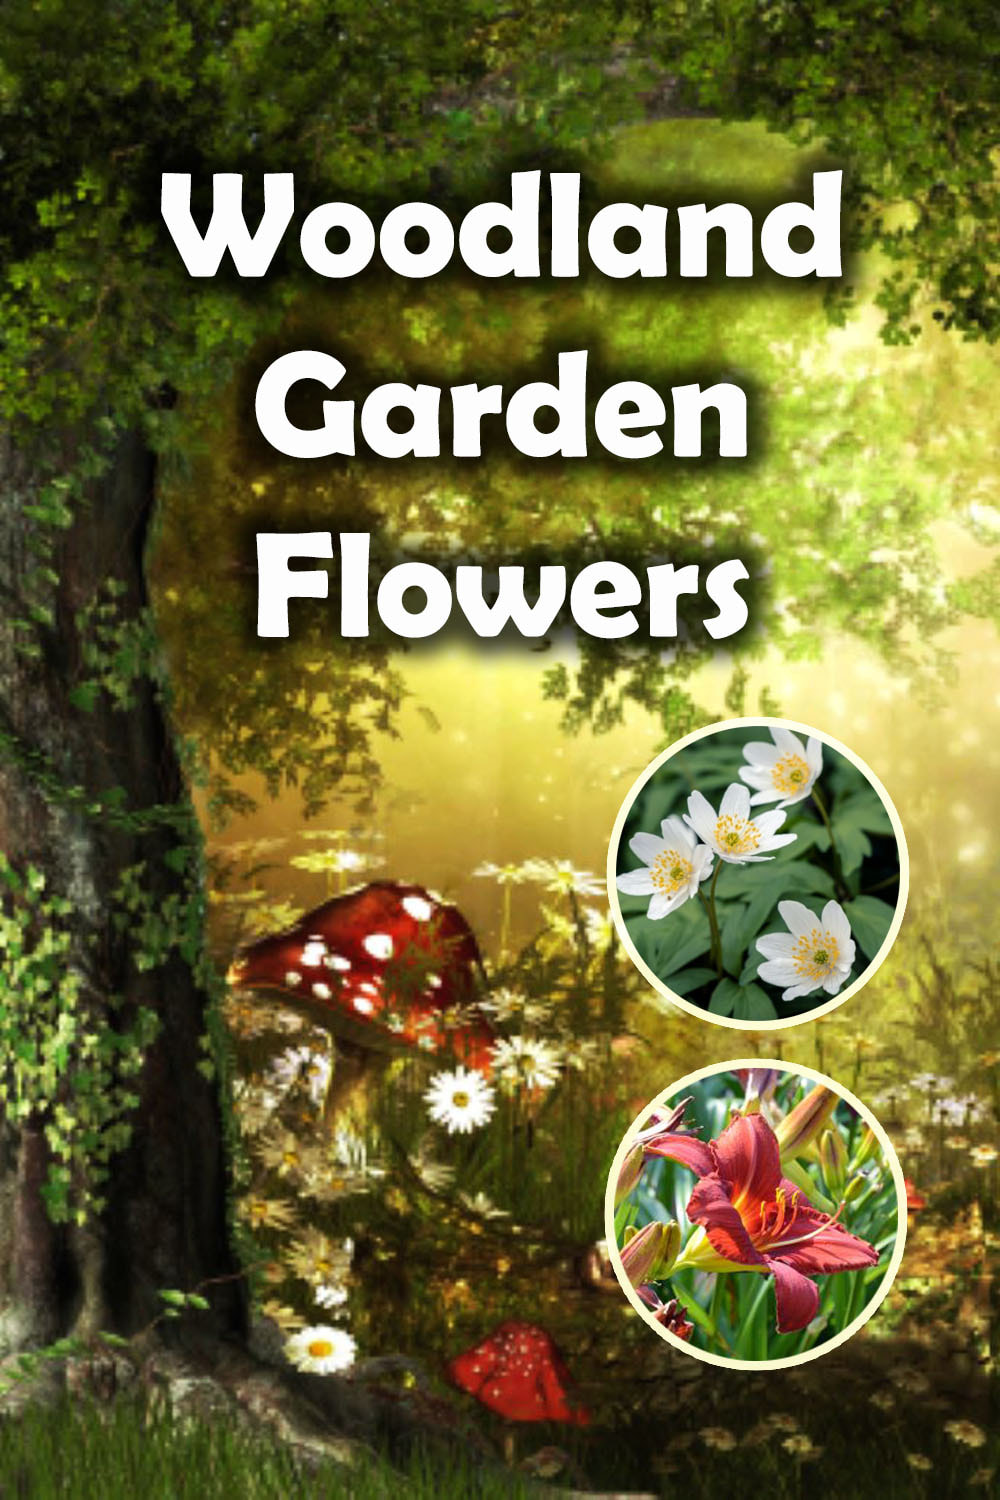


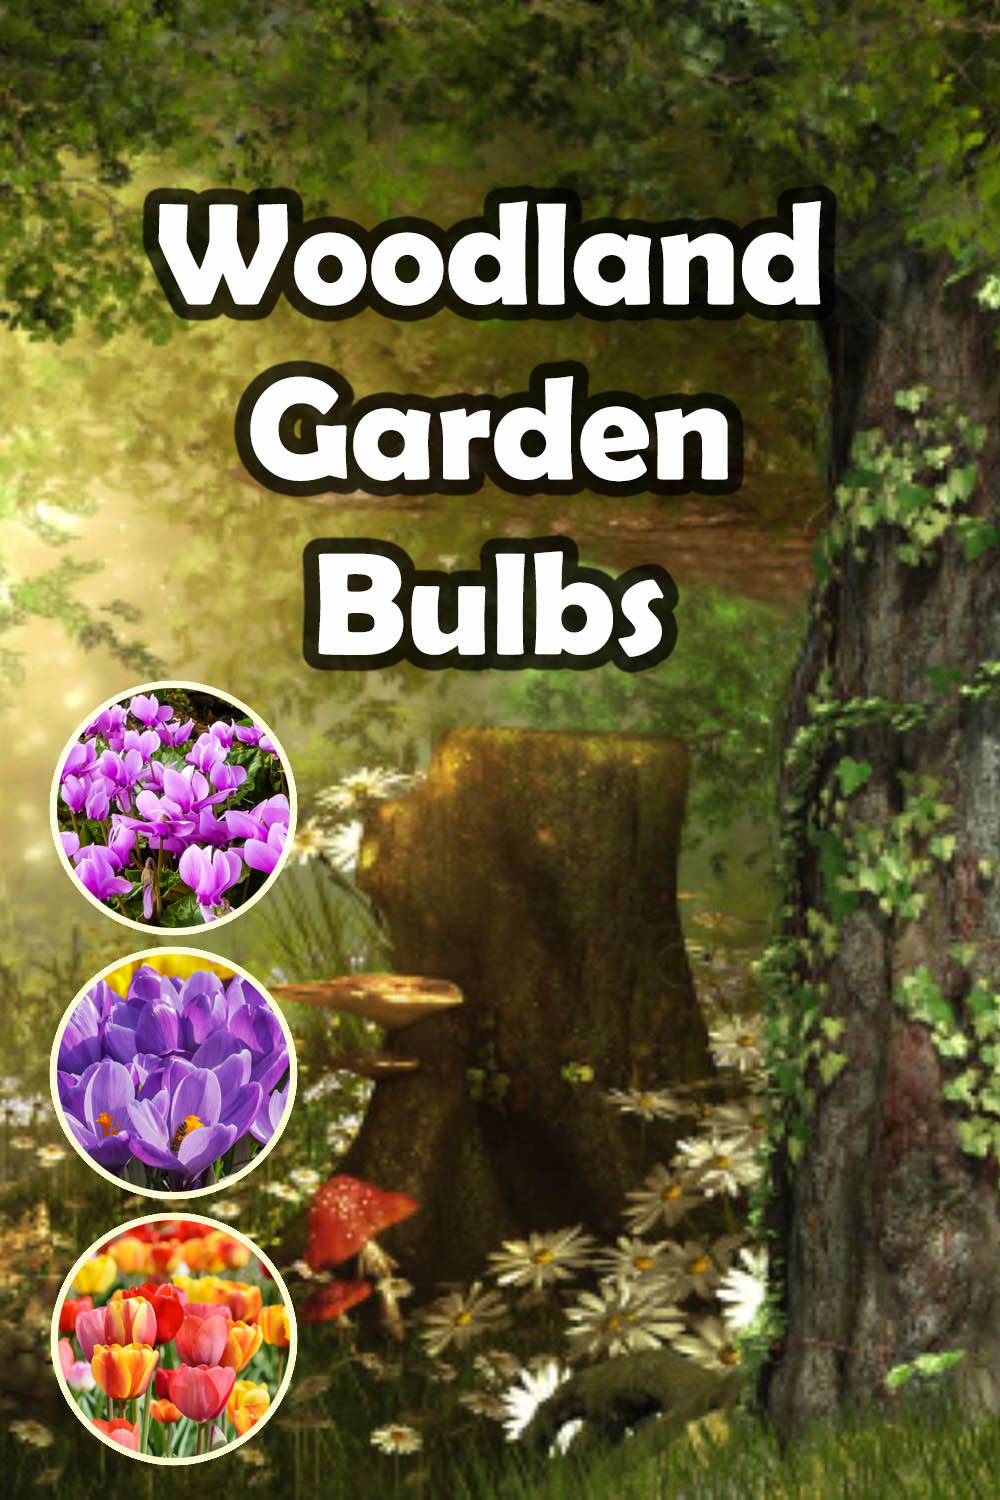

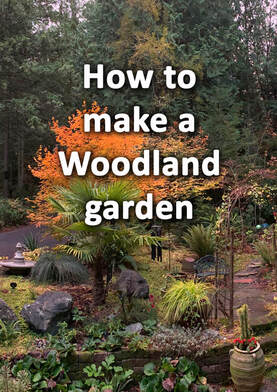


Serving the landscapes of Buckinghamshire, Amersham, Aylesbury & High Wycombe
Hyde Heath, Amersham, Buckinghamshire
|
|