This article contains affiliate links
Paving can provide the perfect outside surface for a whole range of activities and past times. The key to creating successful paved surfaces is making sure they are built in a durable and robust manner.
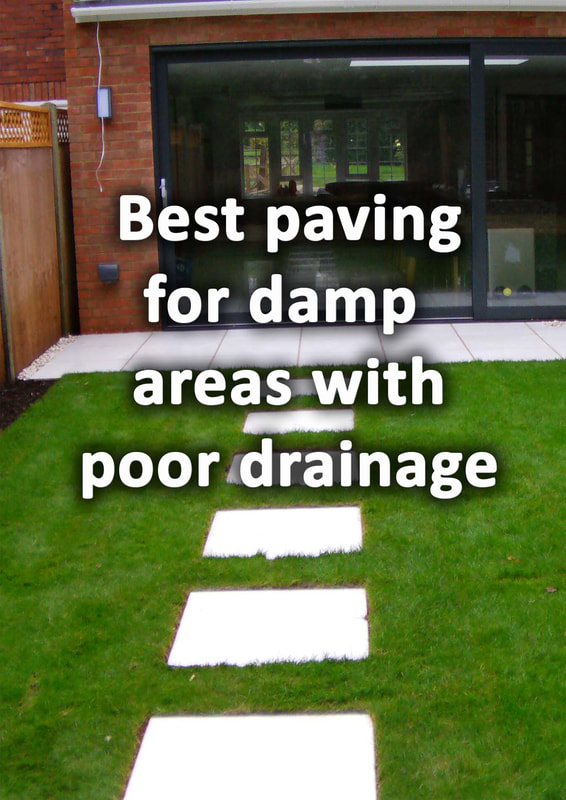
This really comes down to making sure your paving has the correct base and is laid correctly. However, there are some elements to laying paving you do not have complete control over. The most important of these is your ground! If you have particularly boggy ground it is possible your surface could be subject to movement. Damp conditions can also lead to paving degradation and discolouration over time. Here I will discuss some suggestions for paving on boggy soil and the best paving for damp areas. How can poor drainage affect paving?Movement
Soil particles have a naturally ability to absorb moisture in times of heavy rain. The problem with seasonal, soil, saturation and drying is it can cause ground contraction. This natural phenomena can be further exacerbated by soil type and nearby development. In ground consisting of heavy clay based sub-soil, movement can substantial. Clay soil can shrink and crack in summer and swell during the winter months. This can cause paving to buckle and crack over time. 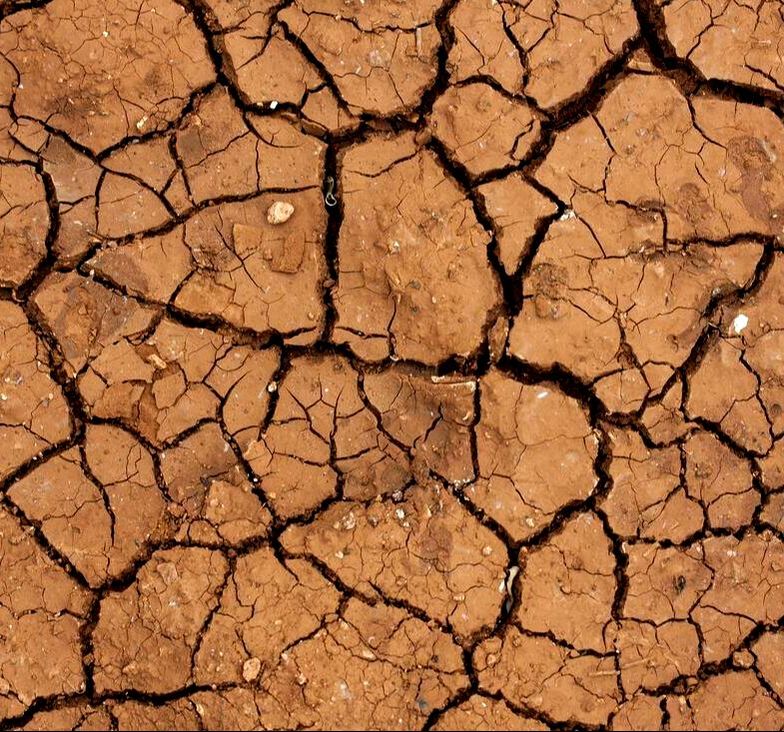
SinkingThis is becoming an increasing common problem with towns and urban areas. New construction rules do not allow new developments to plumb surface run off into drainage networks. This results in more saturated gardens and a higher, seasonal, water table. Such levels of ground saturation lubricate soil particles and over time causes sinking and movement. This can be detrimental to the integrity of structures such as boundaries and surfaces such as patios. Freeze & thaw
Boggy ground conditions over time can degrade your paving throughfreeze and thaw action. This is where paving absorbs water and becomes saturated during winter. When temperatures dip below zero this moisture freezes and expands leading to blown and crumbly surfaces. Algae
Paving which has become completely saturated can become a breeding ground for algae. These microscopic plants can create a dark and unattractive discolouration to paving slabs. Algae can also form thin, organic, slurry, to the surface of the paving. This can make the paving slippery and potentially dangerous. It is very important you use impervious and dense stone for paving in damp conditions. It is also beneficial to choose a paving with a non slip or textured finish. This is especially so if the damp area of paving does not receive enough sunlight during the year. 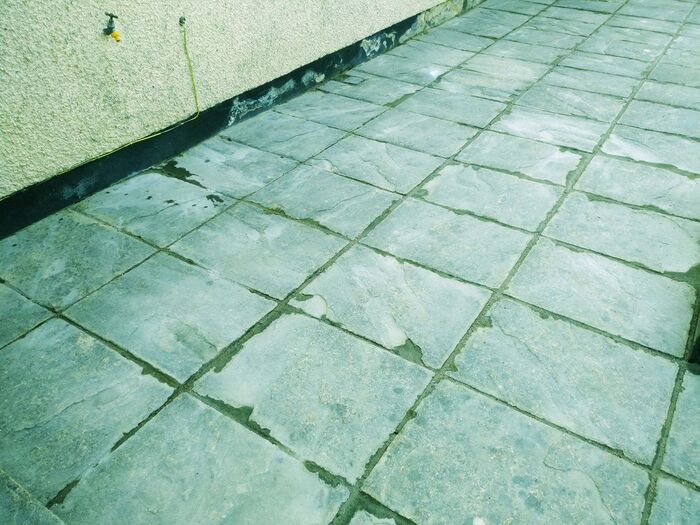
Paving over boggy soil
If you have to pave over boggy ground you should install a drainage system. This does not have to be technical and can consist of drainage channels and a soakaway system. The reason most ground becomes boggy is the water is simply trapped. All you need to do is make your topsoil more free draining and give the water somewhere to go. Below I will link to three articles which will explain how to drain your garden successfully. If you are worried about paving on boggy ground, lay paving higher than the surrounding ground level This will keep your paving drier throughout the season. How to drain your garden & solve garden drainage problems How to improve drainage on clay soil Patio drainage system solutions for hard surfaces 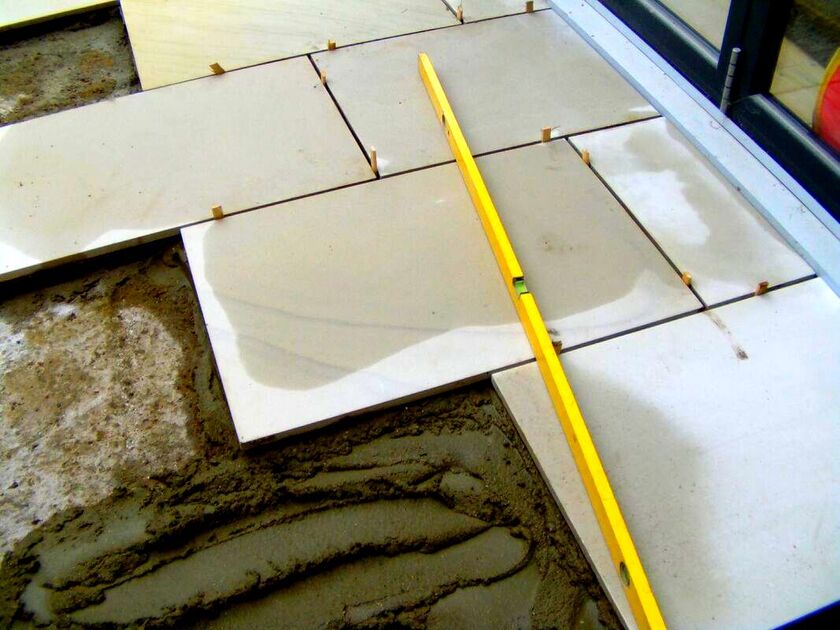
You may also want to over exaggerate your paving’s base and mortar layer. This will make the surface much more robust and resistant to movement.
Consider mixing waterproofing agents into your mortar layer to prevent rising moisture. In extreme cases you could even lay a reinforced, waterproof, concrete plinth as a base. This could incorporate a damp proof membrane to prevent water penetration. Such solutions will cost more and be more labour intensive but will provide piece of mind. What paving is not slippery?
If you are concerned about slippery paving you should focus more upon your paving’s material than feel. If a paving material is very absorbent there is a good chance it will become slippery over time. This is because microscopic plants such as algae will colonise the surface making it slippery. In such a case it would be better to use a dense material with minimal permeability. These combined with an effective drainage strategy would be a better non-slip choice. 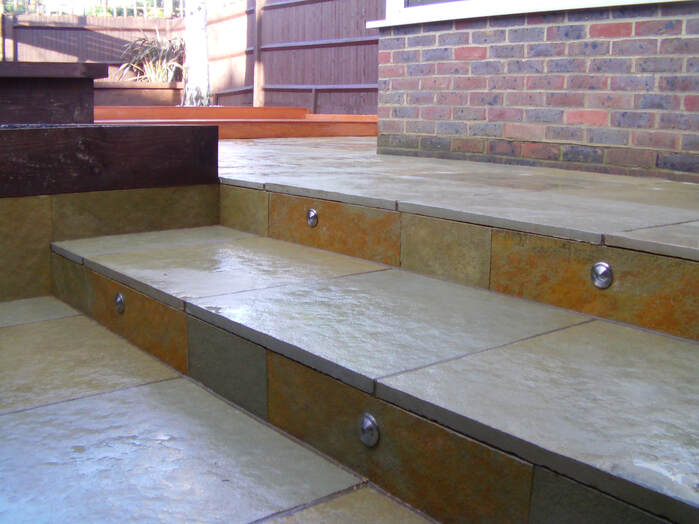
This is even if the paving you use looks potentially more slippery. I think the best non-slip paving is textured granite, non slip porcelain, textured slate, and riven sandstone sealed with an anti-slip sealant.
There are also many concrete pavers on the market with a non-slip textured finish. Some of these include Saxon Buff and Granite aggregate concrete pavers. However, it is important to recognise that over time these pavers will become more porous. 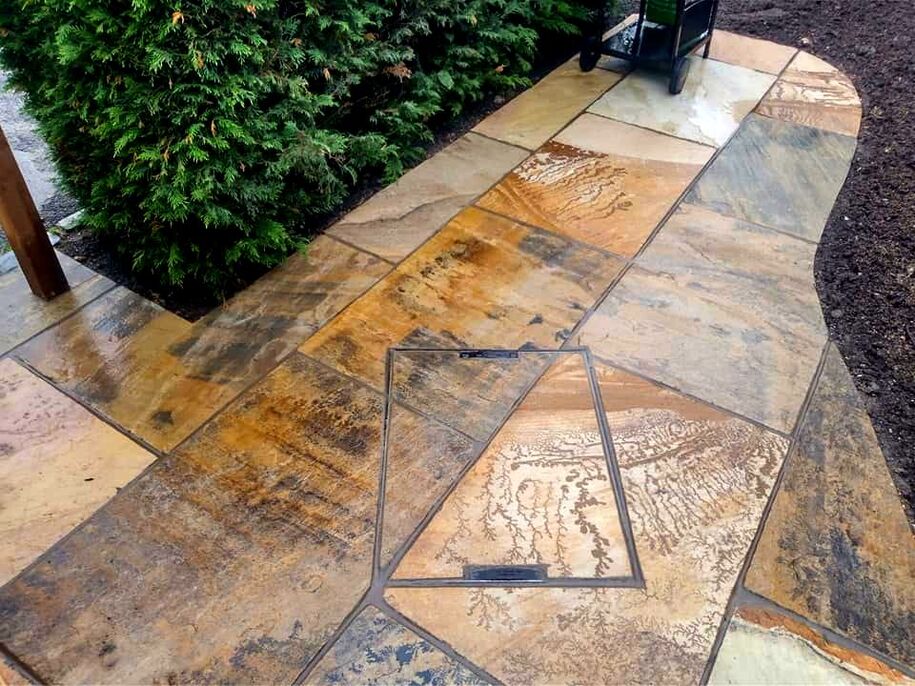
As acid within rain degrades the top surface eventually colours can fade and algae can become established.
It is worth mentioning that resin bound aggregate is also a very good anti slip surface. However you must make sure your base work is robust as any movement can cause cracking. What is the best paving for damp areas?Below I have listed some of the paving I would recommend for damp conditions. These all have their pros and cons for every individual garden project. If your damp problem is excess surface water the solution will be different from that of just boggy ground. Below I have listed the best paving for damp areas with an explanation for each. Textured stone aggregate paving
Textured granite aggregate paving has fantastic grip and a contemporary style. These pavers have a good visual texture similar to granite but are expensive. This paving however, is still concrete based and will absorb water. This means they have fantastic anti-slip qualities for surface water but may become too damp in seasonally boggy ground. This could lead to eventual algae growth and surface degradation. 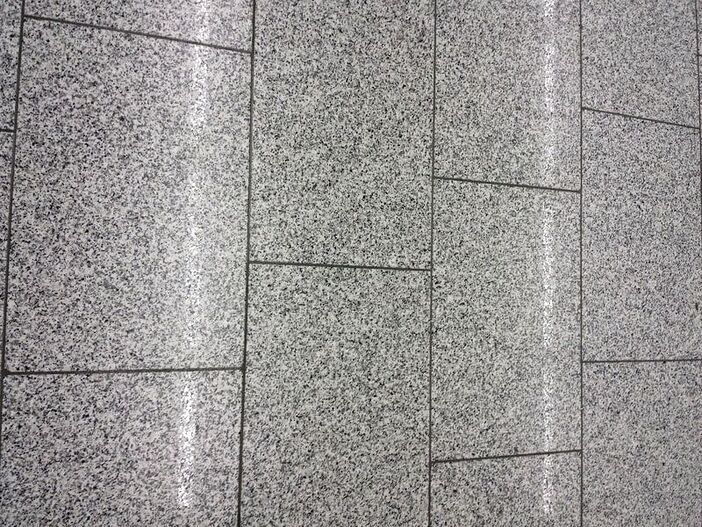
Granite
Granite is an effective, natural, stone, paving choice, for damp, boggy and shady areas. Its low water absorption and dense structure means it is resilient to weather action. The stones light colours make it brighten up dull, north facing, patios and has a clean, and contemporary look. The fine crystals which make up the stone provide a naturally textured and anti-slip surface. 
Non slip Porcelain
Contrary to common belief porcelain paving is not actually very slippery when wet. Porcelain paving is a manmade product which manufactured with an anti-slip texture. There are however a varying range of porcelain paving on the market, some have more grip than others! The best thing to do is request a sample paver before committing to a purchase. Porcelain paving is brightly coloured, textured and impervious making it a good choice for damp shady gardens. 
Riven slate
Many would be surprised to see slate put forward as an anti slip surface. However, riven slate has shallow ridges and angles which do enhance grip. Very much like porcelain slate has a low permeability meaning it does not absorb water. This means combined with good patio drainage it is ideal for damp areas. 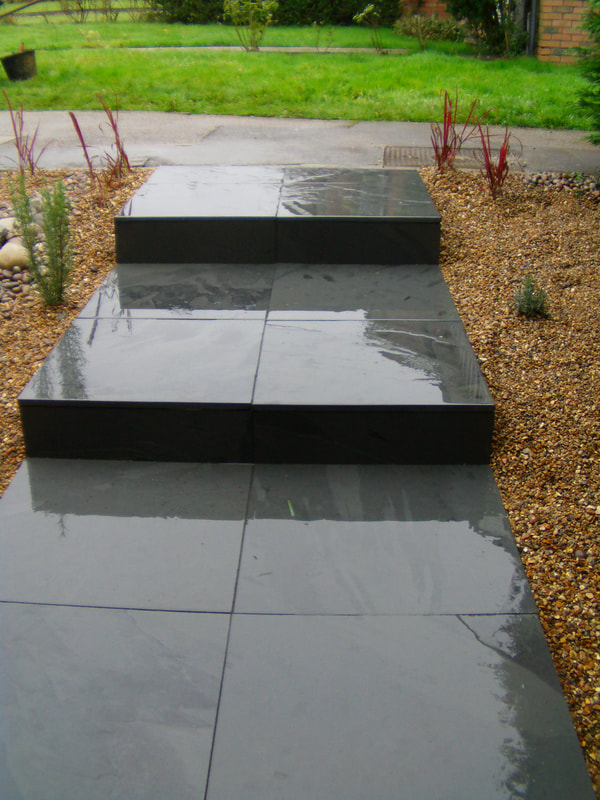
Riven dense sandstone which is sealed
Sandstones such as Indian sandstone are generally less suitable for damp areas. This is because they will absorb water, dust and encourage algae blooms. These can make the surface slippery when wet. However, if you choose a riven sandstone with a textured surface it can be a better choice. If the sandstone is then sealed with an anti-slip sealant it can be suitable for damp areas. Bear in mind this is best suited to areas which get good amounts of seasonal sunlight. 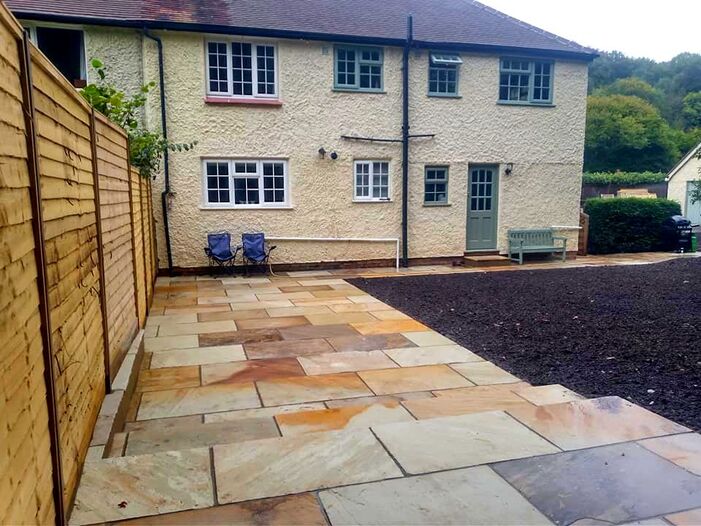
Resin bound aggregate
Although resin bound aggregate is not paving it is worth a mention as an alternative. This surface can allow water to pass through reducing the risk of it becoming slippery. Resin bound also has a very grippy texture making it the ultimate anti-slip surface. This permeable surfacing solution is very effective at allowing water to freely escape. This can make it ideal for damp conditions as long as it has a robust base. 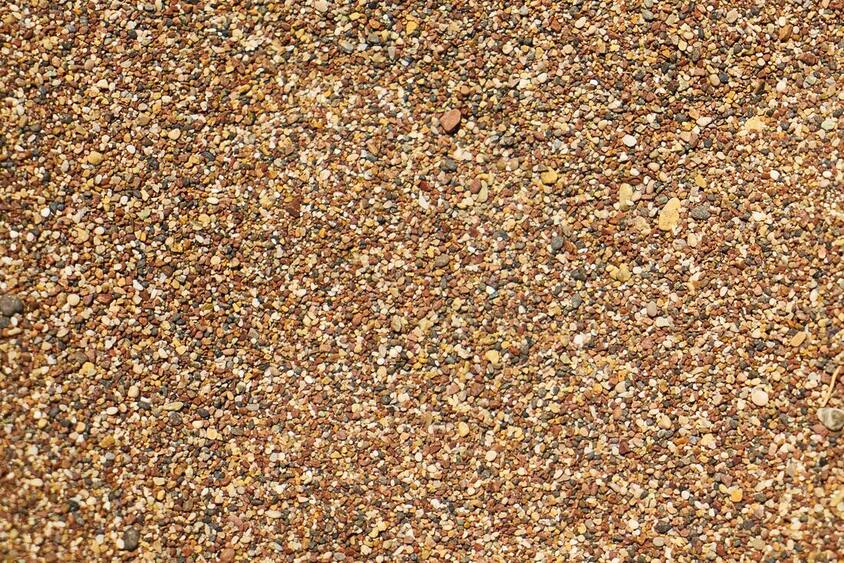
Thank you for reading our article on the best paving for damp areas. Below we have also included some other articles you may find useful.
'As an Amazon Associate I earn from qualifying purchases'
0 Comments
This article contains affiliate links
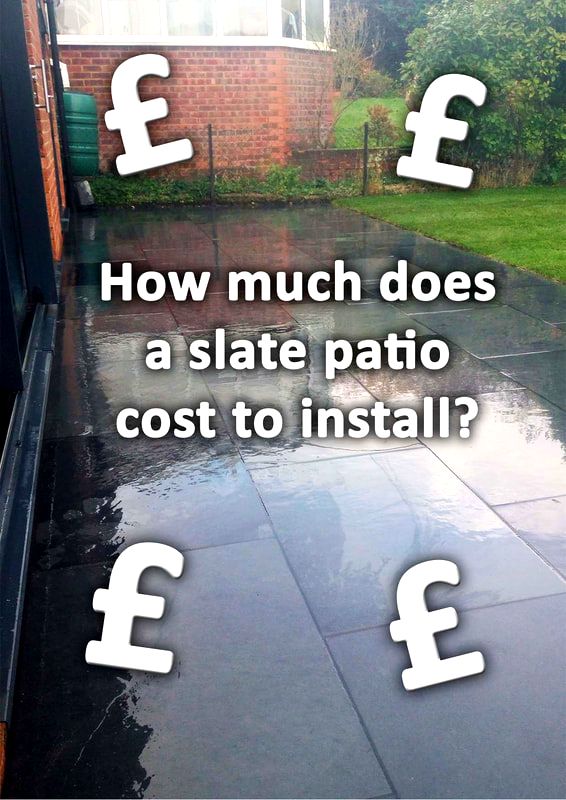
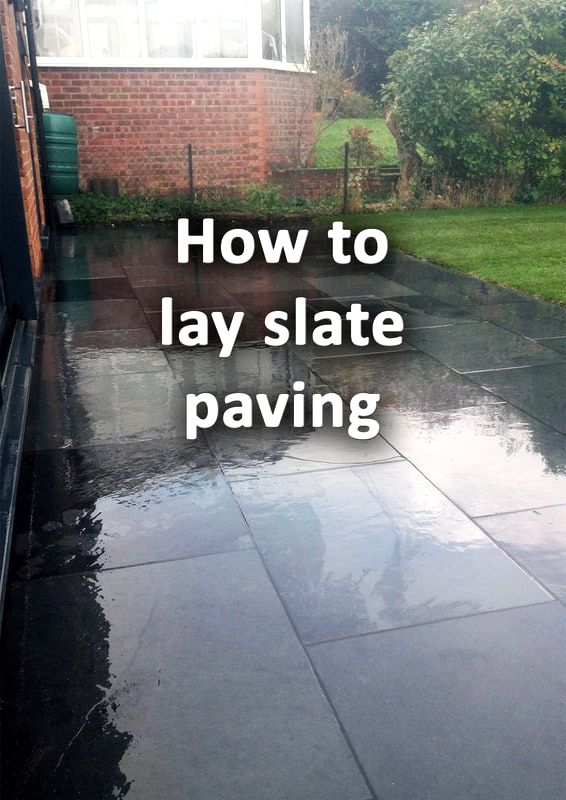
Slate is a durable natural stone very suited to paving and patios. Geologic processes and forces have taken millions of years to form this extremely dense natural stone.
One of the greatest advantages of slate paving is it is impervious to water penetration. This has historically led to slate being utilised for damp proof courses and roofing materials. Being a metamorphic rock its strata has been compressed within a linear grain. This makes it easy to split into flat sheets perfect for surfacing materials. Furthermore, slates natural smoothness makes it look extremely contemporary. This is especially so with slate paving with darker shades of grey and black. These bold colours can create fantastic contrasts with surrounding landscaping such as walls and lawns. Consequently, I will investigate how much the average slate patio costs in the UK. In this article our case study found that: The average cost of Slate paving installation in the UK is £142.74 per m2 The average cost of Slate paving installation in the UK 'labour only' is £65.00 per m2 The average cost of Slate paving in the UK 'materials only' including waste is £77.74 per m2 Below will list and summarise the variables as well as conduct a 50 square metre slate patio case study. If you want to know how much a slate patio costs, you have come to the right place! Are slate patios expensive?Like any heavy construction slate paving is expensive due to cost of heavy building materials, waste disposal and skilled, labour. Landscaping and paving companies also have to factor in more risk than other trades. A week of bad weather can destroy any hope of staying on schedule or making profit. Therefore the profit and risk margin on paving projects is typically sizable. 
One of our slate patio projects in Chesham, Buckinghamshire
Slate patios are also expensive because most developed economies have huge skills shortages. For years western countries have focused the education system around academic subjects.
The media have portrayed builders and other trades as from lower social classes. This has led to a serious decline in recruitment for physical trades. Consequently labour rates for trade’s people have risen significantly in the past decade. Materials
It’s surprising how many tons of heavy materials need to be shifted to correctly build a patio. Patio materials such as paving, sand, cement and sub-base aggregates are heavy and expensive. Not only are they expensive to buy they require strong labour to move them around. When assessing slate paving quotations it is good to ask for a detailed works description. This way you know exactly what you are paying for with no scrimping on base-work. On average slate paving is around £50 per square metre to buy with delivery. 
Waste
Another cost when building a slate patio is removing waste from site. This normally comes in the form of excavated, soft, ground. To build a patio correctly you will need to remove this soft topsoil layer. Excavating a depth of 150mm will allow you to install a robust and well compacted sub-base. Soil dig out will typically be removed from site by grabs and skips. Labour
For many decades there have been a declining number of young people learning skilled trades. This has led to one of the biggest construction skills shortages in history. Education systems have focused too much on academic studies which do not suit all students’ abilities. The result has been a dramatic rise in the cost of skilled labour. Very often, clients assume that manual workers will be cheap. However this is certainly not the case anymore! 
One of our Slate patio projects in Harrow, Greater London
The amount patio builders charge varies greatly upon different variables. The first being geography, in the UK the highest labour rates will be found in London.
However in regions with less wealth and demand rates will be lower. Supply and demand will also play a part in what you pay. Contractors with great reputations can be booked up months in advance! Such tradesmen can command higher day rates. 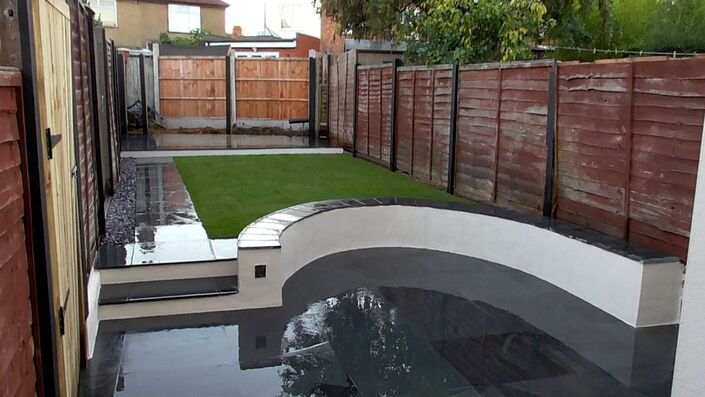
One of our slate patio and landscaping projects in Watford, Hertfordshire
However, careless contractors who are difficult to deal with will have less demand. Therefore they will normally have to charge less.
There are always exceptions to the rule but on the whole this scenario is true. Patio layers can earn anywhere from £150 - £350 depending upon location, reputation, efficiency and client base. However, the most typical rate I see for good self employed contractors is £250 per day. A price case study for a 50 square metre Patio
Not all slate paving quotations are the same; many clients think a cheap quotation is ‘good value’. However, a cheap quotation usually means scrimping on essential sub-base materials and specification. Consequently, I have listed a works description of what is being priced for within the case study below:
Table costs based upon a 50 square metre slate patio
Extra costs for slate patios
Very often with patio projects there can be extra costs and sub-projects other than the paving itself. These can include re-levelling, clearances, drainage, drain covers, retaining features and steps. Such extras can add extra cost to the standard laying of the paving. Manhole covers
It is not unusual for a new patio to fall upon an existing drain or inspection cover. These typically will add extra cost to your patio. The effect on price will depend on the level of extra work needed. Normally new patios will have a change in level from the existing surface. This means a new cover will have to be set flush with the new patio. It is normal to install a recessed paving cover so you do not notice it. These do take a little time and skilled cutting to install correctly. The average manhole cover installed to a new patio can cost between £150-£300 including materials and labour. If you wish to install a recess manhole yourself why not read our step by step guide. 
One of our recessed manholes using slate in Buckinghamshire
Patio drainage
A very important consideration of a new patio is implementing a drainage strategy. This is because it is very common for new paving to accelerate storm water runoff. Consequently, it is a good Idea to add patio drainage to eliminate the risk of flooding. New patios are not allowed to discharge runoff into the existing drainage network. Therefore you need to give water somewhere to drain so it can be absorbed by the ground. The most typical way of doing this is by excavating and installing a soakaway. A series of grated channel drains can then be laid within the paving to capture the water. This can then be plumbed into the drainage soakaway. It is very difficult to guess the cost of patio drainage as there are many variables. However for a 50 square meter patio with drainage gulley’s plumbed into a soak-away would cost around £2,000.00 
Steps
It is very common for a new patio to be an uncomfortable height from your door ledge. Therefore installing a patio step is quite a common occurrence. The size and complexity of your steps will depend upon your specific situation. However, a single step up is the most common type of patio step. Such a step the size of two regular slabs would normally cost around £250 to install. Retaining structures
One of the largest hidden costs of a new patio is level changes. If your existing site is particularly uneven or sloping you may need to install retaining walls. Such structures require excavation to the correct specification to prevent subsidence. The cost of retaining structures will vary depending upon your specific project. However, these will usually require excavation, concrete foundations and the building of retaining walls. Retaining walls have to be built strong and robust to retain heavy loads. This requires large quantities of materials and costly, skilled labour to execute. It is impossible to provide a rough cost for retaining features as there are so many site variations. However, I have written some costing guides for garden levelling and retaining walls below. How much does a garden retaining wall cost? How much does it cost to level a garden? 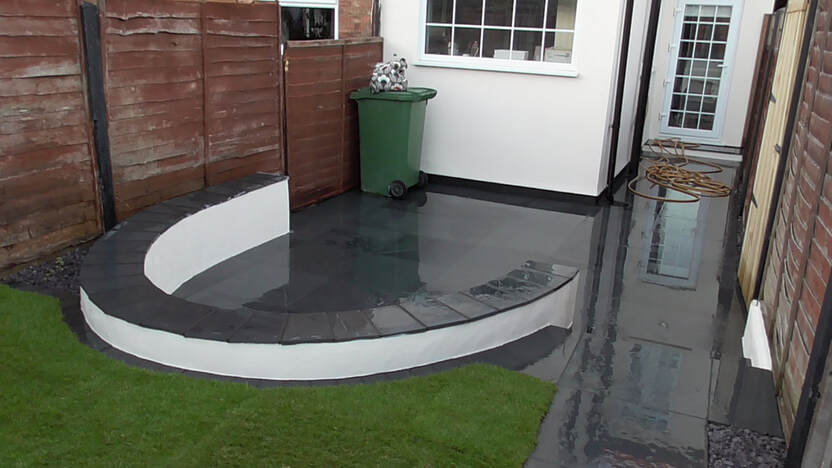
Making good
One of the unforeseen consequences of building a new patio is the mess it creates. Many go to the trouble of installing paving and end up destroy the lawn in the process! There will normally be a need for making good around the new patio and marrying in levels. However a competent contractor would have factored this in to their original budget.
Thank you for reading our article on how much does a slate patio cost. If require patio or paving services please do not hesitate to contact us. Below I will link to some other relevant articles you may find informative.
'As an Amazon associate I earn from qualifying purchases'
This article contains affiliate links
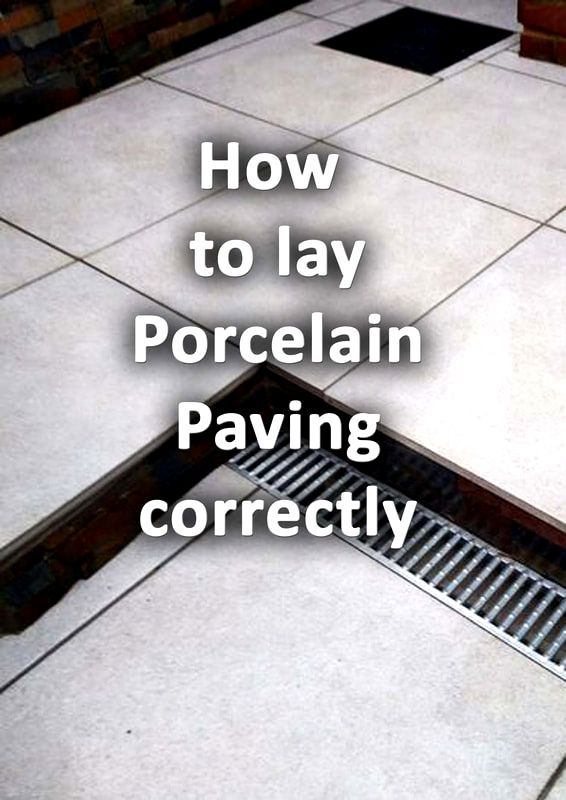
Porcelain paving has become one of our most favourite patio, paving, choices. With modern garden design in vouge many wish for paving with a contemporary feel.
One of the main candidates to fulfil this desire is Porcelain. Porcelain paving is more similar to a tile than conventional paving making it weather proof and hard wearing. Being manufactured from natural materials and fired at high temperatures means there are many products to choose from. If you see a contemporary, light coloured paving in a magazine there is a high chance it is porcelain! However, the important question is how much does porcelain patio cost? In this article our case study found that: The average cost of Porcelain paving installation in the UK is £142.74 per m2 The average cost of Porcelain paving installation in the UK 'labour only' is £65.00 per m2 The average cost of Porcelain paving in the UK 'materials only' including waste is £77.74 per m2 Here I will discuss the variables to find out how much porcelain patios cost per square metre. I will provide a case study breaking down all costs and quantities of a porcelain patios construction. Are porcelain patios expensive?
There are varying factors which will dictate the cost of a porcelain patio. These include; access, labour, base materials and the paving itself. Porcelain paving is on average 25% higher in cost than average natural stone paving. However, due to Porcelain being so popular, there are now plenty of highly priced, premium products on the market. To buy porcelain paving there is normally a range of products varying from £30 - £120 per square metre. I find the most typical amount paid to buy porcelain paving is around £50 per square metre. Consequently, I will use this amount to price up our porcelain paving, price, case study. 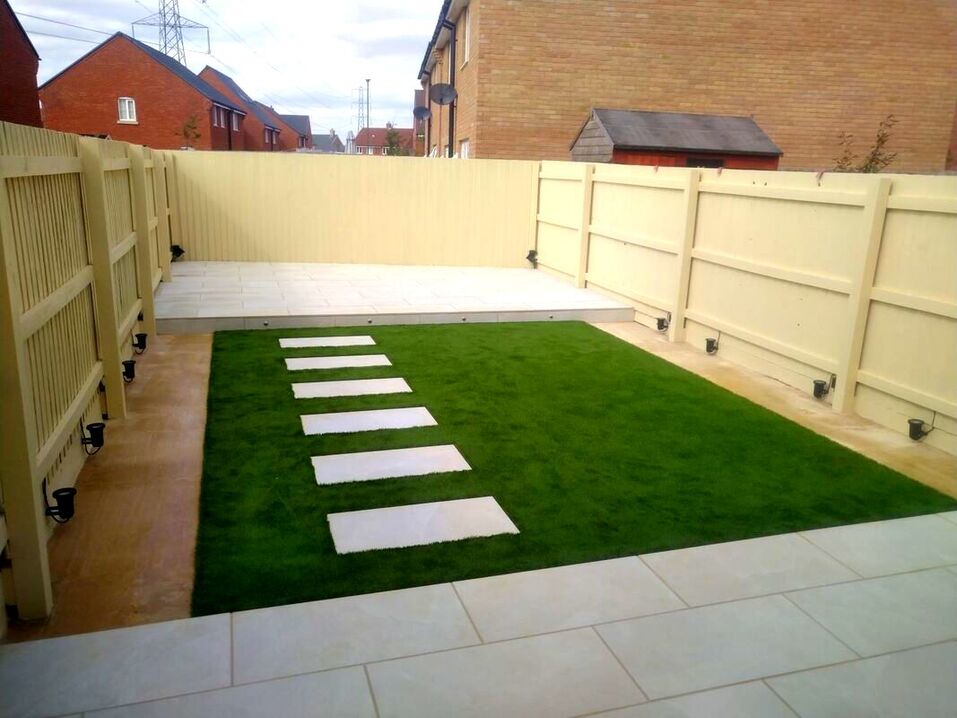
One of our porcelain paving projects in Aylesbury
Therefore, it is advised to specify which porcelain you want before instructing contractors for quotations. This prevents paving companies allowing large sums for ambiguous paving expectations.
Porcelain is extremely durable and weather resistant, Its colours do not fade over time meaning as long as it is laid well will last many decades. This actually makes porcelain paving rather good value for money. Why do porcelain patio quotations vary so much?
As hinted above there are so many variables which go into paving quotations. Some paving contractors prefer to lay a level concrete base underneath porcelain paving. This is because porcelain is more like a tile than a conventional paving materials. The impervious nature of porcelain can make it much more challenging to lay. 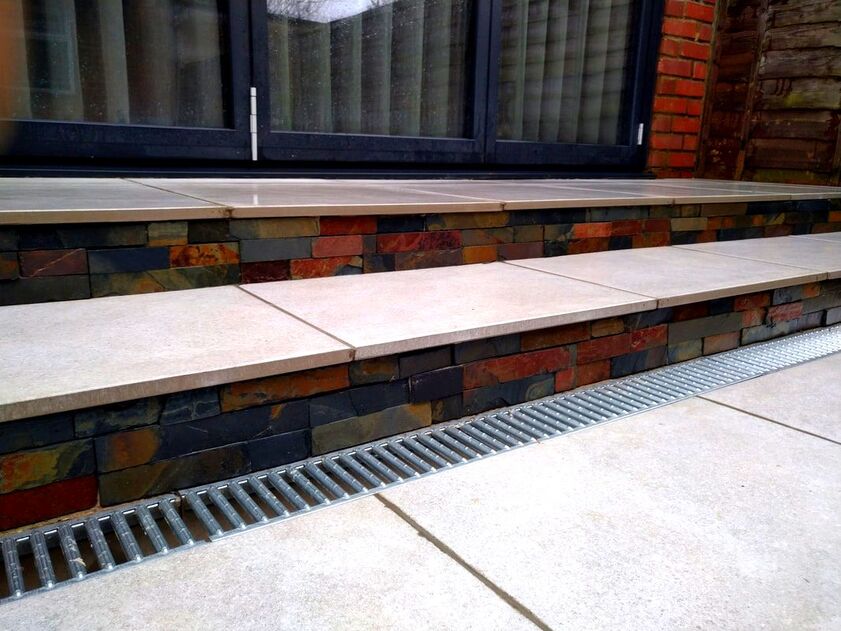
One of our porcelain projects in Harrow
Such base preparation can be much more labour intensive and expensive than conventional bases.
There is also an extremely wide spectrum of porcelain products on the market today. Some of these are remarkably variable in their price per square metre. Consequently you may wish to be very specific with the porcelain, paving, product you specify. Bear in mind there is always a difference in what paving companies charge. One man bands will generally charge less and larger companies. 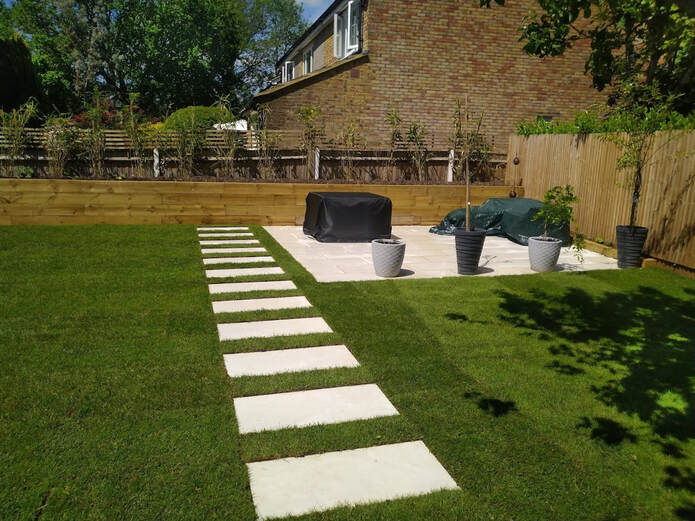
One of our porcelain paving projects with other garden landscaping in Hyde Heath
However recognise that all contractors are subject to the same fundamental laws of economics.
Supply and demand means that bad tradesmen will always be in less demand than good tradesmen. Do not be surprised to wait for builders with a good reputation and pay a little more. However to avoid disappointment and a whole lot of grief stay away from very cheap quotations. Materials
Materials will make up a large proportion of the cost of a porcelain patio. Materials not only just include the paving itself but the base materials also. It can be surprising just how many loose aggregates and materials can cost. Bear in mind that a cheap price normally translates into less base-work. Less base-work means a cracked patio with loose paving within a few years. Consequently, it is always a good idea to ask for a detailed works description with the quotation. Waste
If you commission a competent paving contractor they will make sure your patio is excavated correctly. A new patio should be excavated to a minimum depth of 150mm. There should be no loose soil or material left within the excavation. This will ensure no movement or settlement in the future. It is remarkable just how much spoil and waste can come out of such an excavation. Not only are skips and grabs expensive but the labour it takes to shift such loads. 
Labour
There is no denying that finding skilled labour today is both challenging and expensive. However there is much more to laying paving correctly than many people expect. Unfortunately some assume that landscaping should be a cheap service. The problem with that assumption is it has created a whole market of undesirables. Don’t be surprised if you’re ‘too good to be true price’ turns out to be a complete nightmare! It’s amazing how many clients have learn the hard way. 
If you want to know how to choose a competent patio builder visit our guide here. The reality is, outdoor construction requires robust materials and physically strong labour and skilled craftsmanship.
That’s before discussing the variables of bad weather and even considering profit and risk. If you want quality paving which reaches your expectations do not expect the labour to be cheap. A price case study for a 50 square metre Porcelain Patio
The case study below will price up a 50 square meter porcelain patio to the correct specification.
A data table will be used so all quantities, costs and calculations can be transparent. This case study will aim to find out the average price per square metre of porcelain paving installation. The works specification
In order to quantify the cost of a porcelain patio you must price to the correct specification. Here I will include a paving project specification which dictates the quantities for the table below:
Table costs based upon a 50 square metre porcelain patio
Extra costs for porcelain patios
Porcelain paving projects do not just involve the physical laying of the paving. Very often, there are other projects, clearance costs, levelling, drainage, steps and retaining structures to also be installed. These costs have to be added to the standard cost of simply laying the patio itself. Such typical costs are listed and summarised below Manhole covers
It is very common for a new patio to fall upon an existing manhole or inspection chamber. In such a scenario it is likely this will need to be re-set or replaced. The cost of this will depend upon a few, varying factors. Sometimes a new patio will require existing inspection chambers to be adjusted in height. Furthermore, old chambers may be cracked and degraded which will require repair. 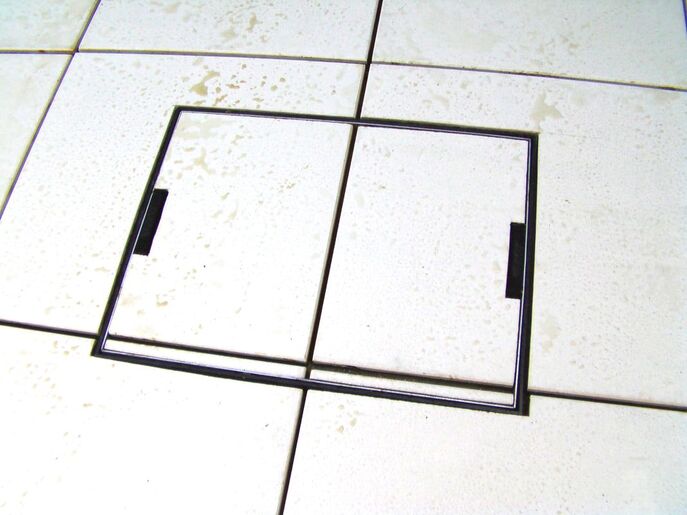
One of our neatly cut porcelain paving recess manhole covers
Recess manhole covers look fantastic if set and cut in well. However, these will also add some extra cost to your porcelain paving.
The average manhole cover installed to a new patio can cost between £150-£300 including materials and labour. If you wish to install a recess manhole yourself why not read our step by step guide. Patio drainage
Patio drainage is a subject within it-self and can add extra cost to a patio project. Such installations can include drainage gulley's and soak-away installation. New patios are not allowed to direct runoff into existing drainage networks. Consequently, patio drainage systems, soakaways and water storage tanks should be installed. There are too many variable patio drainage scenarios to guess a rough price. However a 50 square meter patio with drainage gulley’s plumbed into a soak-away would cost around £2,000.00 
One of our porcelain paving patios in Harrow, Greater London
Steps
Installing patio steps is very typical where the home is at a higher level than the paving. The size of the steps will always depend on this height and the client’s preference. However, a single step up is typically the most likely scenario. Such as step the area of a large slab would normally cost around £250 to install. Retaining structures
When installing any new patio there will very often be level changes. When patios become raised up than the surrounding ground retaining features will be required. Retaining walls and features can be very costly, patio installations. Retaining walls need to be robust enough to retain heavy patio construction. Such installations typically require skilled labour and expensive materials. If you’re new paving has many retaining features and level changes expect some extra cost. There are too many variable factors to calculate an average figure here. However we have some written some other articles which may help below. How much does a garden retaining wall cost? How much does it cost to level a garden? Making good
At the end of every paving project there will always be some making good projects to undertake. For example, needing to marry in levels around your new porcelain or repair turf. Sometimes returning the site to a good standard is a project within itself!
Thank you for reading our article on how much does a porcelain patio costs. If require patio or paving services please do not hesitate to contact us. Below I will link to some other relevant articles you may find informative.
'As an Amazon associate I earn from qualifying purchases'

This article contains affiliate links
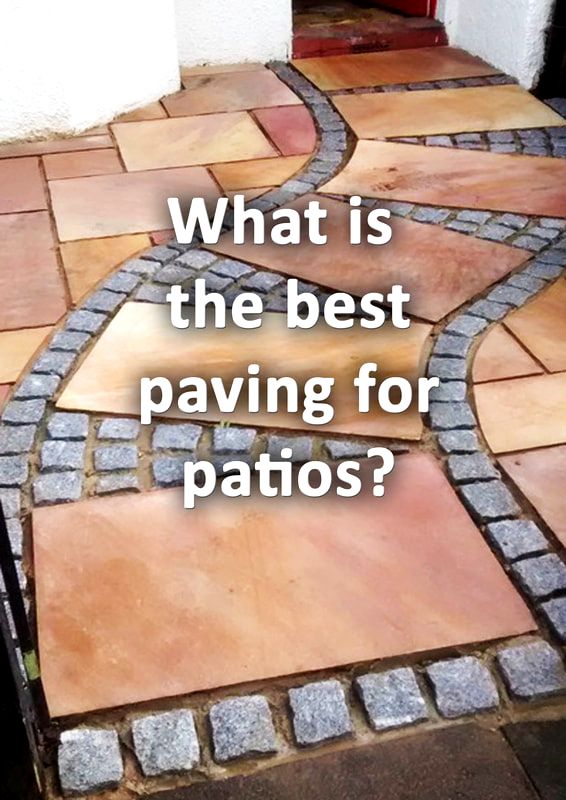
Indian sandstone has become one of the most popular garden paving materials. Not only does it come in a range of colours and specifications it is generally good value.
Indian sandstone is suitable for a wide variety of different landscaping projects and garden designs. Such versatility makes it such a fantastic choice for a new patio. If you want to know how much Indian sandstone costs to install there are some variables. Some of these include your geographical location, skilled labour accessibility and laying paving to the correct specification. In this article our case study found that: The average cost of Indian sandstone paving installation in the UK is £132.72 per m2 The average cost of Indian sandstone paving installation in the UK 'labour only' is £65.00 per m2 The average cost of Indian sandstone paving in the UK 'materials only' including waste is £67.72 per m2 Here I will list and explain the variables effecting the cost of installing Indian sandstone. I will also break down all of the average unit material and labour costs so you can scrutinise my figures. This case study will be based on an average sized 50 square metre Indian sandstone patio. Why are patios so expensive?
A very common question asked by many is; why are patios are so expensive? In reality this is not a question asked just about patios but most services. Many often predict the cost of private services to the downside. This is because we all have our very own positive, outcome, bias. The cost of Indian sandstone installation will be a simple mathematic calculation, the cost of Labour, materials, waste, profit and risk. All three of these are usually much more costly than many people think. 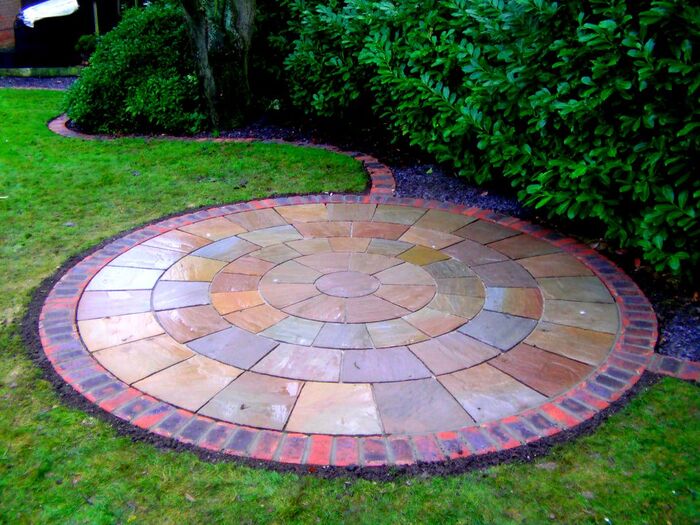
Why do patio quotations vary so much?
When working through the variables, it is actually understandable why patio installation costs vary. There is a huge range of material and labour variability on the market. Some Indian sandstone is simply much better quality than other brands. Some Sandstone is poor quality and open to staining and water penetration. Others are poorly cut resulting in inconsistent joints and lengthy laying times. Some patio tradesmen cut corners and are not in demand while others have a good reputation and are always booked up. Often inexperienced tradesmen miss details during the pricing process leading to a much lower price. This can also lead to corner cutting and shoddy results. Below I will look in more detail at the variables of paving installation costs. Materials
Materials for patio construction vary greatly depending on the quantity and quality. On the whole better quality materials will be more expensive. I always say go for a recognised brand when selecting paving materials. Another variable many do not consider is the amount of materials used. If a contractor does not install a correct base at the right depth they will dramatically reduce their costs. This will result in less labour, material and waste costs. 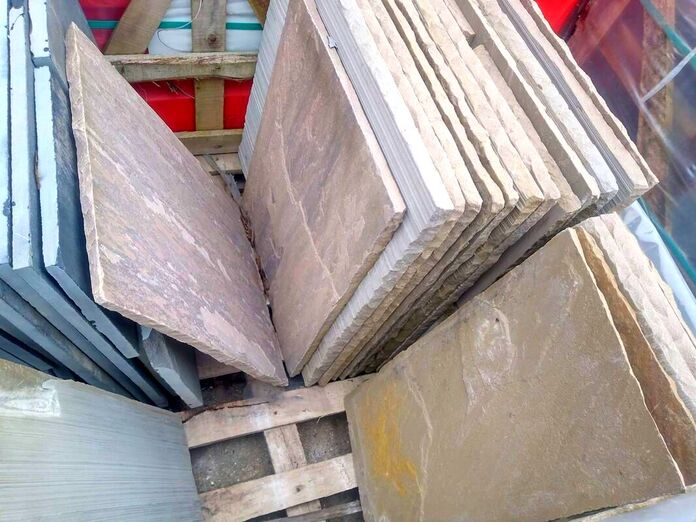
So your quotation may have been £2,000.00 cheaper but you were actually ripped off! You may get a few years use out of it but ultimately it will fail.
There is a very high chance it will soon become full of cracks with rocking paving. Consequently material costs for patio construction can vary hugely depending on the installation. You must always make sure that your contractor provides you with a detailed description of the work. This must include descriptions of the sub-base materials and depths. This makes sure your quotation will be a binding contract for the correct specification. Waste
For patio installation the most typical waste is muck and soil during the excavation phase. Normally this is removed with skips for methodical removal. However, for larger projects you may require a larger grab lorry to remove larger loads. Heavy waste such as muck, concrete and soil is expensive to remove from site. Hence, make sure your contractor is keeping to the correct depth specification. LabourWhen it comes to labour there is also a broad spectrum of variability in what patio installers charge. Below I have discussed some of the main influences and variables of skilled labour prices.
Geographic location
Firstly allow me to tackle the first variable in labour costs, geographic location. If we are looking at the UK, we have the largest geographic wealth divide in Europe. This means are richest region, London and the Southeast is one of the richest in Europe. However other areas such as parts of the north and west are much poorer. Therefore you really cannot expect labour costs to be a one ‘size fits all’ across the country. There could be as much as a 40% variation in labour costs between London and other regions. Having said that, living costs in London are grossly out of sync with labour prices! Quality & Reputation The next variable is quality and reputation. In any profession or trade there some who are in high demand and others who aren’t. Have you ever noticed why some expensive tradesmen are always booked up? This is due to the fundamental economic rule of supply and demand. I know good builders who earn more than doctors, lawyers and architects. This is quite simply because they are highly sought after and extremely efficient. 
The skilled labour shortage
Unfortunately in the UK we have this misguided idea that trades people are somehow untrustworthy or at a lower class. We have had TV programs such as ‘Rogue Traders’ which scrutinises every builder’s price. However, I haven’t yet seen them scrutinise the grotesque bonuses which we see from ‘some’ professions in the city! We also have trade websites which list contractors with mug shots like they are criminals. It’s no surprise today that we have the lowest level of young people entering skilled trades. Future prices of skilled labour A person in any trade will be valued by their quality, demand and personality. Today we have a shortage in skilled labour which is making labour prices dramatically rise. This problem is also linked to demographics, western countries have declining birth rates and aging populations. To install a patio well to last the test of time do not expect reliable and skilled labour to be cheap. For a self employed patio layer in the UK day rates vary from £120 to £350 per day. This will depend on your geographic location, organisation size, demand and efficiency of the contractor. In the case study below I will work to a labour rate I typically see for ‘in demand’ patio contractors, £250 per day. 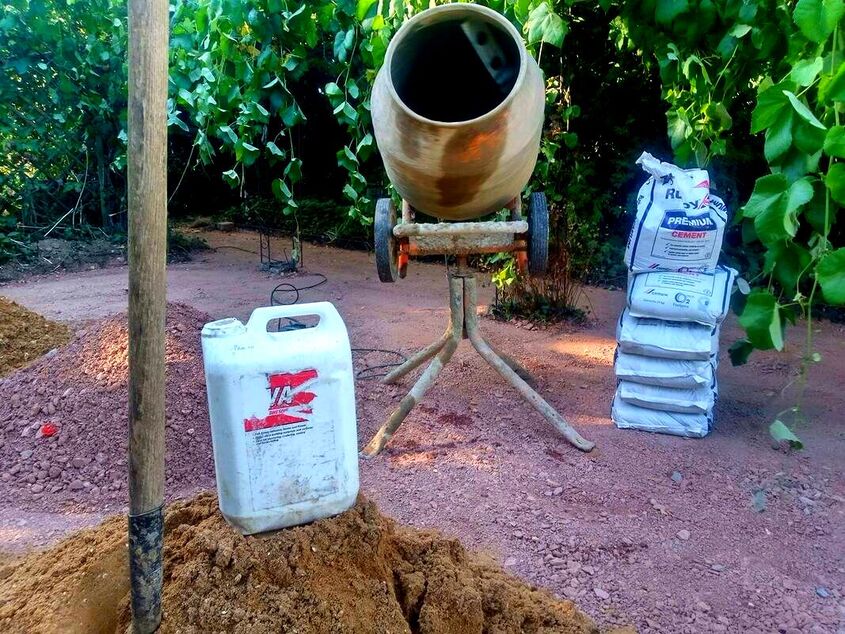
A price case study for a 50 square metre Patio
In the case study below I will price up an Indian sandstone patio of 50 square meters. I will use a data table to list all quantities and unit costs. By doing this I will aim to work out the ‘average’ price per square meter of an Indian sandstone patio. The works specification
To quantify the installation cost of an Indian sandstone patio you must price to a specification. Below I will include a works description which will provide the quantities for the table below:
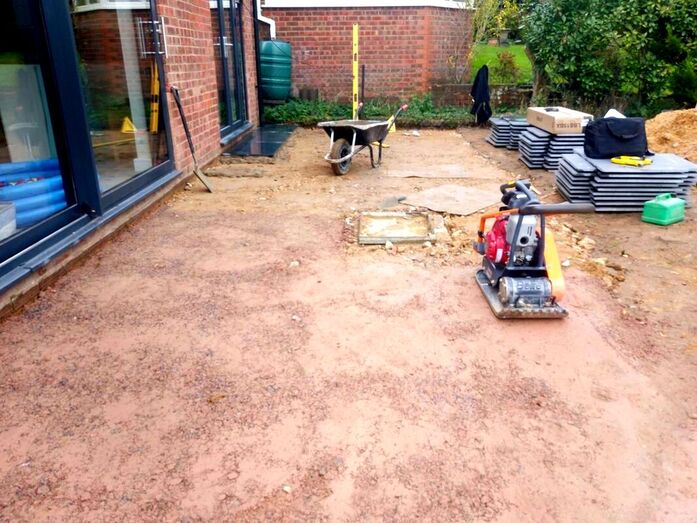
Table costs based upon a 50 square metre Indian sandstone patio
Extra costs for Indian sandstone patios
Most Indian sandstone projects do not just involve the actual laying of the paving. Very often there are parallel tasks, clearance costs, levelling, drainage, steps and retaining structures to be installed. These will also have to be factored into the price of your Indian sandstone patio. Manhole covers
It is very common for a new patio to fall on top of an existing manhole or inspection chamber. In such a case it is more than likely this will need to be re-set or replaced. The cost of this will depend upon a few different factors. Occasionally new paving levels will mean chambers will have to be altered. If you are installing a recessed manhole cover these can add both cost and labour to a paving project. The average manhole cover installed to a new patio can cost between £150-£300 including materials and labour. 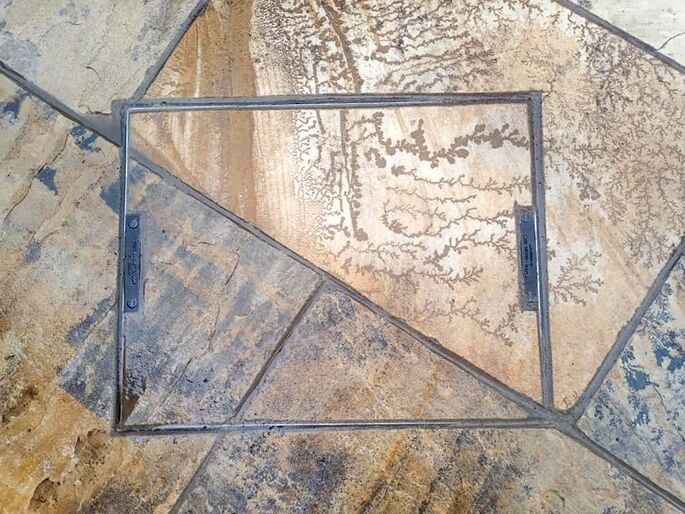
Steps
Installing new steps for a patio is a very common affair. Although there is huge variation in new patio steps a small, single, step is the most common scenario. These small steps normally cost around £200.00 Retaining structures
When installing a new patio there will very often be some changes in level. The moment a patio becomes higher than the surrounding ground it will require a retaining feature. This is by far the most underestimated expense of a new patio. Retaining structures need to be robust and strong to take heavy loads. Such construction generally requires expensive labour and materials. If you’re new patio has many retaining features and level changes expect some substantial extra cost. Although imposable to put a figure on, we have some written some other articles which may help below. How much does a garden retaining wall cost? How much does it cost to level a garden? Patio drainage
Patio drainage is a subject within it-self and can add much extra work to a patio project. Typical installations include drainage gulley installations and soak-aways. Very often new patios are not allowed to plumb into existing drainage networks. Consequently new patio drainage systems and storage vessels must be installed. There is no way to accurately price patio drainage as every scenario is different. However a 50 square meter patio with drainage gulley’s plumbed into a new soak-away would cost around £2,000.00 
Making goodThere is always making good to be undertaken at the very end of a patio project. New lawn may have to be laid around edges and the site will need to be cleared. This is always more work than many think and should at least be taken into account.
Thank you for reading our article on how much does an Indian sandstone patio cost. If require patio or paving services please do not hesitate to contact us. Below I will link to some other relevant articles you may find informative.
'As an Amazon associate I earn from qualifying purchases'
This article contains affiliate links
Planning a new patio can be an exciting process! Typically patios and landscaping is one of the last alterations people make to their homes.
A new patio with a pristine garden is like the cherry on top for any household. Visualising a new patio brings pleasurable expectations warm summer days spent with family and friends. Most of the time however, completed patio projects bring some hindsight of potentially better outcomes. This is because there is always more to building a good patio than meets the eye. Particularly if you have no experience with laying paving there are some potential traps to fall into. In this article I will break down the patio planning and construction process step by step. By doing so I will aim to identify every potential problem you may experience during the process. This should provide you the best possible chance of constructing the perfect patio first time. Ordering enough paving
Firstly, the most common problem I see is clients not ordering enough paving. It is standard procedure to always order 10% more paving than what you need. This will provide contingency for wastage, cutting, breakages and spares. Also bear in mind that many suppliers do not sell by the square metre. This means you may have to buy whole packs to obtain the quantity you want. Consequently you may end up with much more paving than you require. Always make sure you enquire how many square metres a single pack holds. 
Poor quality paving
Most paving at the end of the day is either natural stone or manufactured with concrete aggregates. Paving unlike internal materials needs to be strong and robust to handle the extremities of outdoor life. This means it really is not worth risking laying substandard paving just to save a few hundred pounds. 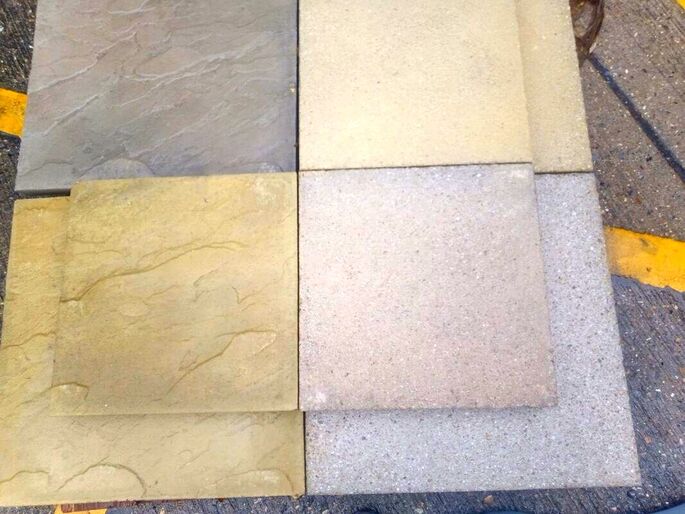
Bear in mind that manufactured concrete paving with colour dyes will start fading after about 15 years.
I always say you are better off going with a non porous type of paving and preferably natural stone. Some of these include granite, slates, dense sandstones and porcelain. As a safety mechanism, buy your paving from a well known brand or prominent online supplier. Choosing colours wisely
A typical trap to fall into is prioritising aesthetics over functionality. In landscaping function should always come before form. A pristine white patio may look good in a magazine but is it practical for your garden? Birds will still poop and stains will still stain even if your paving is sealed. Even most sealed surfaces can still become stained and dirty over time. Using very light coloured paving can also cause a lot of glare in very sunny positions. I always recommend clients challenge their ideas when they choose very light coloured paving. 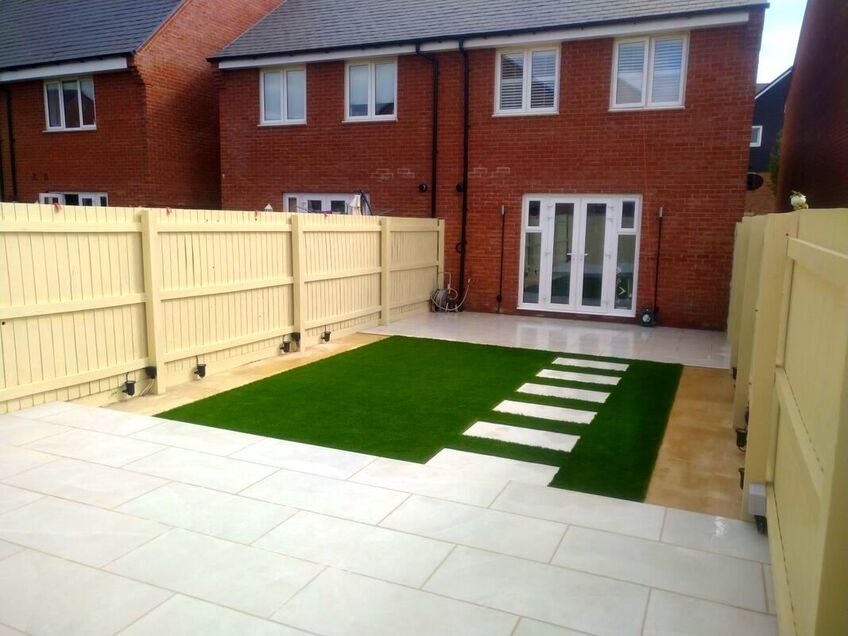
Bad weather
Nothing can turn a new patio project into a chaotic muddy mess like bad weather. This is particularly the case with the excavation phase of the project. However, building in damp conditions is possible but not in times of heavy rain. The time to build a patio is really from spring to early autumn. As well as being generally drier there is little or no risk of frost. Working out your finished level
One of the most crucial stages of planning your new patio is working out your levels. Identifying and pegging out your finished level will prevent you from digging out too much. It will also enable you to successfully order the correct amount of materials you need for your base and mortar. It is very uncommon for a new patio to meet surrounding levels perfectly. 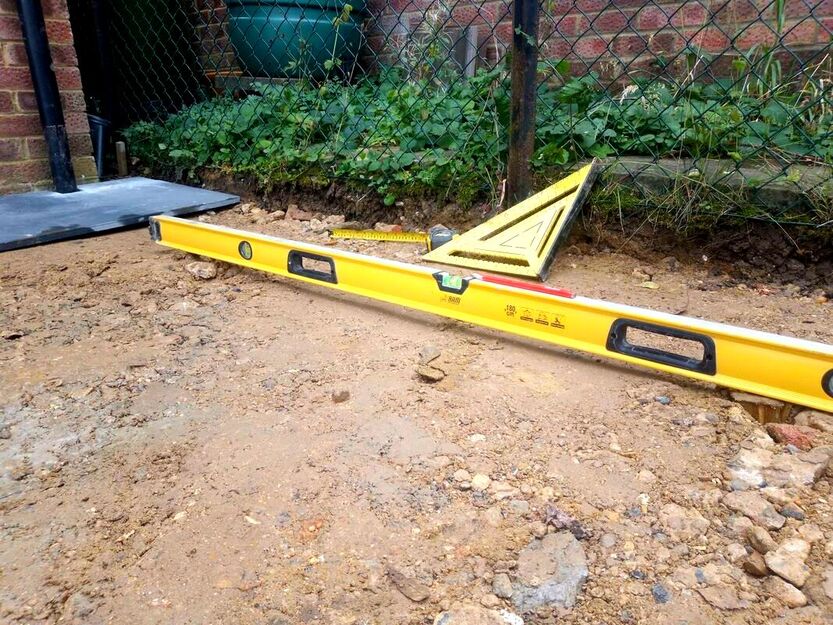
Very often the surrounding ground may end up to low or too high compared to the patio level.
Consequently his means as well as the paving you will also need to install retaining features. This often trips up novice pavers making the project more expensive than they had realised. It is also very common to have to re-level a lawn after a new patio is installed. Excavating your base
It is important when installing your new patio to excavate the ground correctly. Typically you will need to dig down to a depth of around 150mm. This will allow for a 100mm depth of compactable sub-base, 30mm of mortar which leaves for a paving thickness of 20mm. Your excavation should have a flat and consistent bottom and sides. It is important to leave no loose soil within the excavation as this could lead to sinking. The best way to get rid of soil from a garden is with a skip. To work out how much soil you need to get rid of you will need to times the area by depth. Make sure you get the decimal point in the correct place and realise soil when excavated bulks up by 30%. 
Tree roots
When installing a new patio tree roots do pose a threat to your completed project. As roots grow they can expand and crack paving. This is especially so if surrounding trees are young and have some room to grow. You may wish to consider removing trees and tree roots around your new patio area first. Installing the correct base
A patios base will be the difference between durable longevity and failure. Installing the correct base will provide the perfect foundation on which your paving can be laid. Typically the sub-base will be a minimum of 100mm thick and consist of compactable aggregates with angular particles. The most common of these is Mot type 1 compactable sub base. This is available from all builders’ merchants and can be delivered loose or in bulk bags. Once your sub-base has been well levelled it needs to be compacted with a compactor plate. 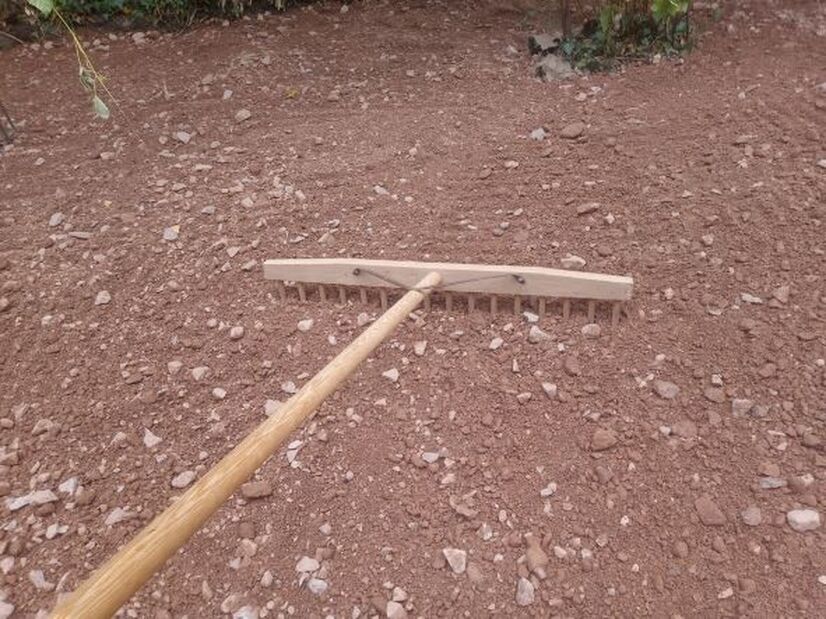
Implementing a drainage strategy
Patio drainage is a much more important element of patio construction than many give it credit for. A drainage strategy is even more crucial if you are paving over virgin soil such as lawn. This is because you will be subtracting from your gardens naturally ability to absorb storm water. This can lead to accelerated levels of surface run off and localised flooding. 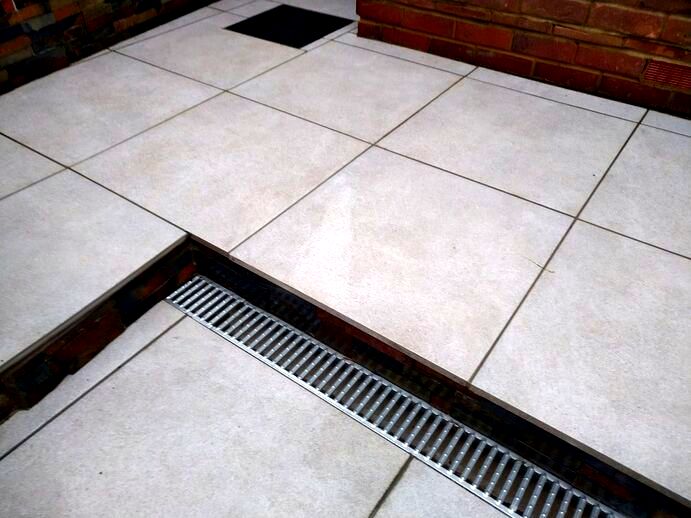
You will also want to ensure that there is no water pooling against your home.
This can lead to damp, mould and structural issues. Consequently it is important you collect water from your patio and direct it into a drainage feature. This will not be the local drainage network but probably a garden soakaway. For more in depth information of patio drainage visit our article here. For step by step garden soakaway installation visit our guide here. Mixing mortar correctly
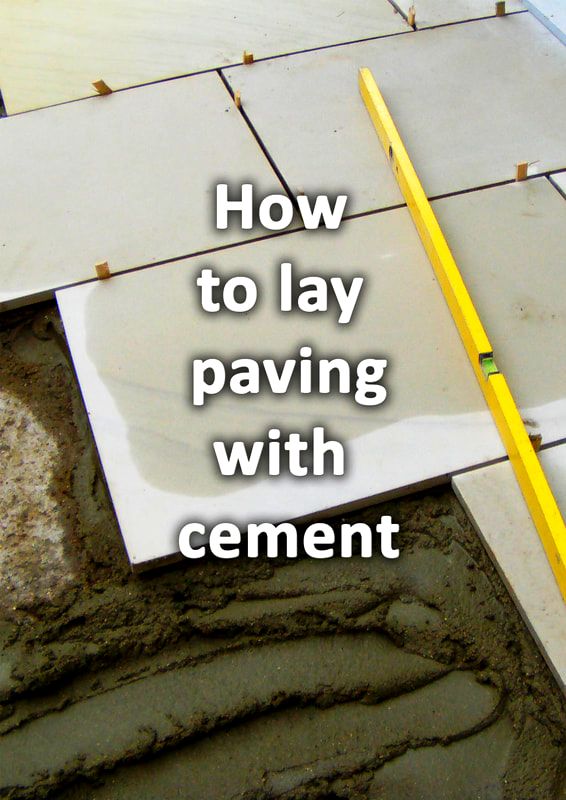
Mixing the correct mortar mix is an extremely important part of laying paving correctly. Not only will correctly mixed mortar be easier to work with it will bond solidly with your pavers. This will prevent the threat of rocking and a hollow feeling underfoot. It still amazes me just how many paving companies use the incorrect mortar mix! Firstly, paving mortar must have a sufficient moisture content to lubricate the sand and cement particles. This enables the mortar to bed down into a densely compacted mortar fillet. 
Too often contractors use very powdery and dry mixes to lay paving. This leads to poor bonding and air pockets between the particles.
The result is a hollow feeling underfoot and a less robust bedding layer. The reason this is a common problem is it is much easier and faster to lay paving this way. Always make sure your mortar is wet enough you can cause suction with the back of a trowel. It is this suction seal which will ensure a good, dense and solid bonding with your paving. However, your mix must not be so wet is discharges water! 
Make sure you add plasticiser to your mortar to improve workability with less water. It is also a good idea to add a waterproof bonding agent such as Sikabond.
It is also important to mix up the correct sand and cement ratios for laying paving. Your mix should really be a ratio of 1 part cement and 4 parts sand. Make sure cement is hydrated within the mixer first before adding any sand. You need to allow the mixer to do its work and mix the mortar thoroughly. A rough guide for mixing paving mortar is half a 25kg bag of cement to 13 shovels of sand. If you are worried about getting the quantities correct, measure out your materials in buckets. Laying your pavingLaying paving is simple in principle but it requires experience and skill to do correctly. The biggest potential problem for a newbie is not levelling your paving correctly. You do not want individual pavers at slightly varying gradients! This is a sure way to end up with puddles and poor drainage. It is important you lay your paving to a tight string line so you keep laying flush over distance. If you install a well levelled and flush sub base this process will be much easier! As you lay, check your levels repetitively with a long spirit level. You must also lay your paving on a continuous mortar bed with no underlying voids. 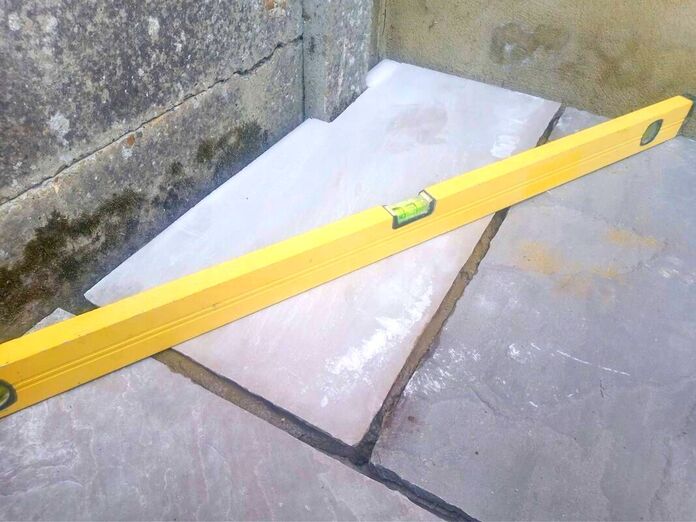
Keeping your paving square
Very often it is difficult for inexperienced pavers to lay their paving square. The best way to do this is to lay along an existing straight feature such as a building. It is a good idea to set up a tight string line first to check buildings are straight. It is amazing what the human eye can notice so laying your paving straight and square is paramount. As you lay, check your joints and lines with a string line or a long straight edge. Cutting
Cutting in a patio correctly requires careful measuring and some skill. If you are new to cutting you will simply have to take your time and learn as you go. Be prepared to waste some paving here and be patient. Make sure you have a fresh diamond blade, eye protection and a dust mask. 
Avoid puddles
As you lay you will have to check your surface levels with a long spirit level. This will enable you to keep a close eye on your levels and falls. Remember that any undulations or divots within your surface will create puddles. To avoid puddles, start with a level base, use a string line and check progress with a spirit level. Grouting the paving correctly
Grouting should be one of the simplest parts of building a patio but usually causes the most problems. The reason for this is there is a fine line between getting it right and staining your paving. Firstly, it is crucial that the weather conditions are correct. There must be not moisture within the joints and there must be no risk of either rain or frost. 
You must also never grout a patio is the surface is wet! This also goes for excessive hot summer sun as this will dry out your grouting before it sets.
You will have to mix 3:1 cement to plastering sand dry until it is well mixed. Then you will need to gradually mix in a little water to get to the correct moisture content. 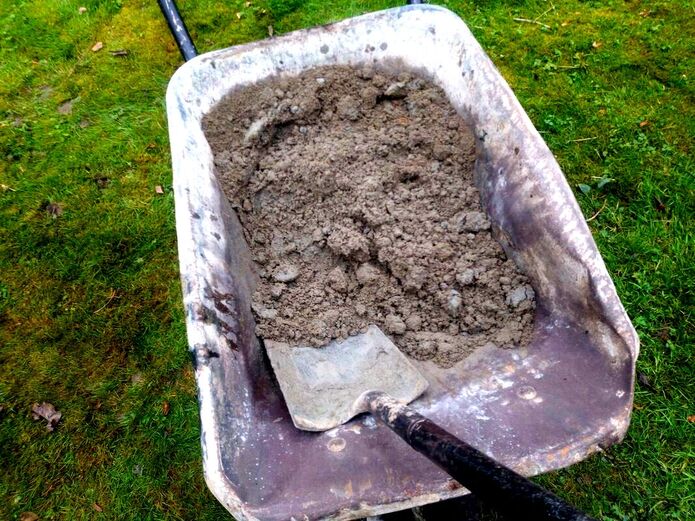
You are aiming for a consistency of brown sugar so you can just form a ball in your hand.
This will be moist enough to work a finish but not wet enough to stain the paving. For a step by step guide on how to grout paving correctly visit our guide here. Alternatively you may wish to consider using a jointing product such as Easy joint. Avoid staining
Staining a patio is something rarely on the radar of most people new to paving. However every year, thousands of pounds worth of paving has to be replaced due to staining. The most common way is through incorrect grouting. Make sure you never grout in wet conditions and follow a good step by step guide correctly. Rogue cement is the easiest way to stain your new paving! 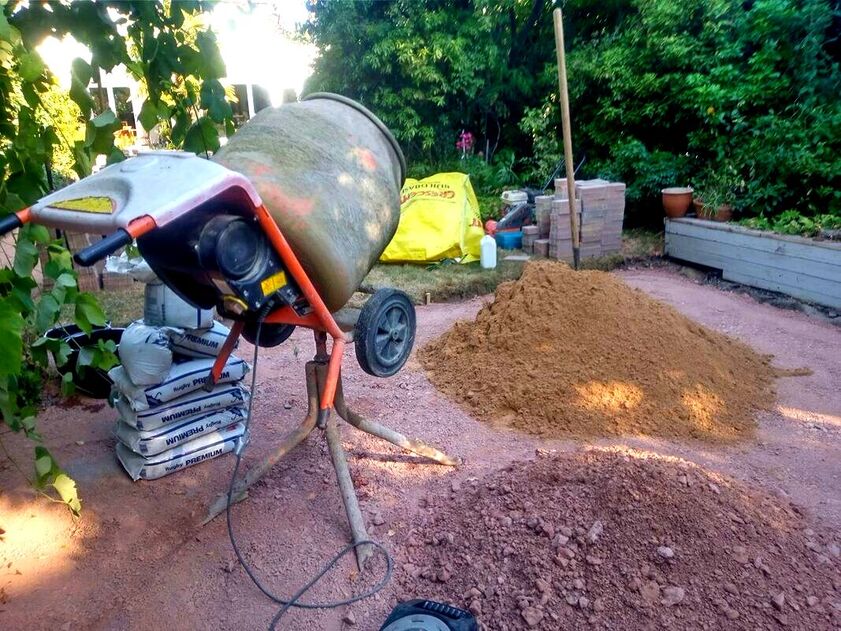
Make sure when you mix your mortar your mixer is not slashing onto your paving.
Furthermore, it is crucial your helpers are not walking cement over the surface of the patio. When I lay paving I always have a clean bucket of water and a hand brush to hand. This way I can clean off any small cement and mortar splashes as they occur. Sealing your paving
If you are new to paving and worried about staining you may wish to pre-seal your paving. This will take a little extra time but will stop your paving from absorbing water and stains. However, even with pre-sealing you should still aim to keep your paving clean! Patio sealants can also be applied when your paving is completed. Sealing will also provide extra protection from the weather and often enhance colours. 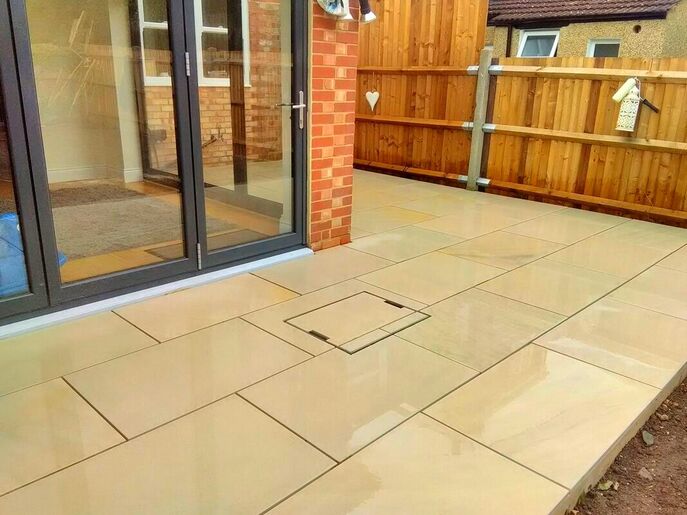
Thank you for reading our article on considerations and potential problems of laying paving. Below I have included some other paving articles you may find relevant and useful.
'As an Amazon Associate I earn from qualifying purchases'

This article contains affiliate links
Garden paths are an effective way to connect up various features within the garden. Pathways enable you to create comfortable passage across potentially muddy outdoor areas.
Paths can also serve as great mowing edges to the perimeter to lawns and frame other garden features. Planning a path can become an integral part of a gardens design forming bold lines and interesting journeys. The question is, what is the best paving for a garden pathway? In this article I will explain some path surfacing considerations and criteria for the best paving choices for pathways. DesignFundamentally the best pathway paving for your garden will be in keeping with existing precedent. If you live in a contemporary style home you will want your pathway functional and clean. For example, if your homes colour theme is greys and blacks you will want to continue this theme. Therefore, a straight black slate path will probably be an effective option. If you live in a traditional cottage however you may prefer a more rustic approach. 
Perhaps buff sandstone would be better for such a garden path with a less formal structure.
A cottage garden pathway may meaner around planting beds with more organic shaping. Ultimately, the best paving for a garden path will be one that is in keeping with your existing garden. If your patio is built with porcelain this is probably the best material for your garden path. What is the best paving for paths?
Garden paths typically travel through areas of soft landscaping such as lawns and flower borders. This means they are subject to more moist conditions than conventional patios. As primary routes of travel, pathways are also more likely to become stained by mud and dirt. Therefore the best paving for paths are those with low absorbency and good grip. Consequently we suggest that riven slate, granite, granite aggregate, porcelain and sealed sandstone are the best paving for paths. 
Best paving for a curved path
Curved paths can also be paved with conventionally square paving; however this involves much skilled cutting. I often suggest the best paving for a curved path is small sized paving units. This allows you to slightly splay your joints to reach a gentle curve. Therefore the best paving for curved paths are block paving, setts, bricks and clay pavers. 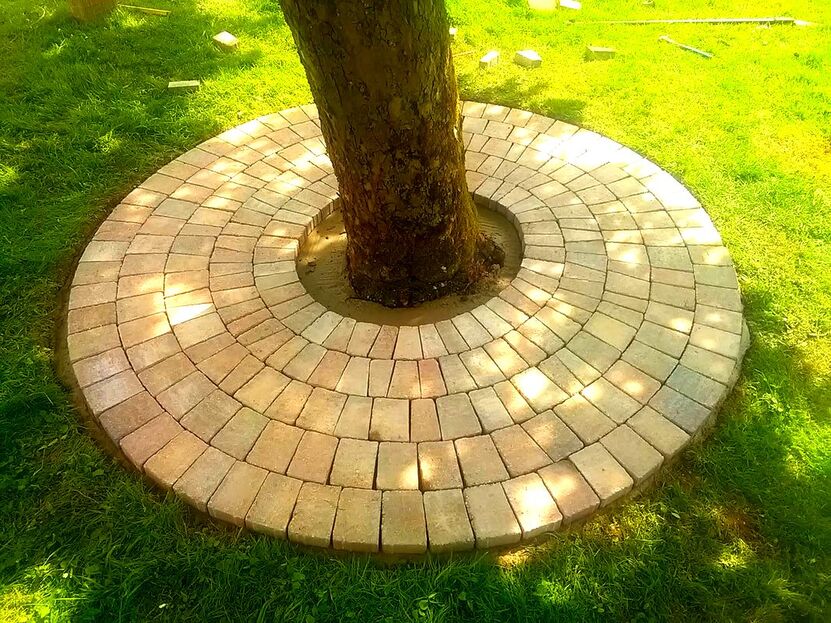
Thank you for reading our article on the best paving for garden paths. Below we have included some other relevant articles you may find informative.
'As an Amazon Associate I earn from qualifying purchases'
This article contains affiliate links
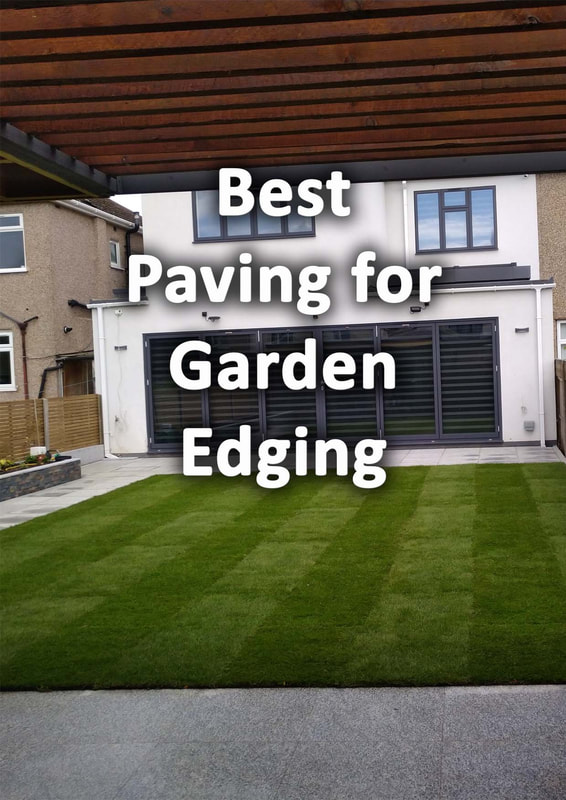
The market is full of interesting and varying edging solutions for your garden. However, many overlook the fact that paving actually makes very effective garden edging.
There are two main ways paving can be used as edging. The first way is to make flush edgings which can act as surface separators and mowing edges. The second way is to install paving slabs as retaining edging, on edge. With a little preparation and skill paving edging can be cut into a variety of shapes including curves. Using paving as edging is more labour intensive to install, however it is far more robust than many other edging products. How do you use paving as retaining edging?
The best way to use paving as retaining edging is to install it vertically along beds and borders. Excavate a foundation where you want your new edging to sit. Then lay a consistent and flush shallow concrete foundation to the channel. Next cut your paving into consistent widths, cut them as neatly as possible so the heights are consistent when set in. 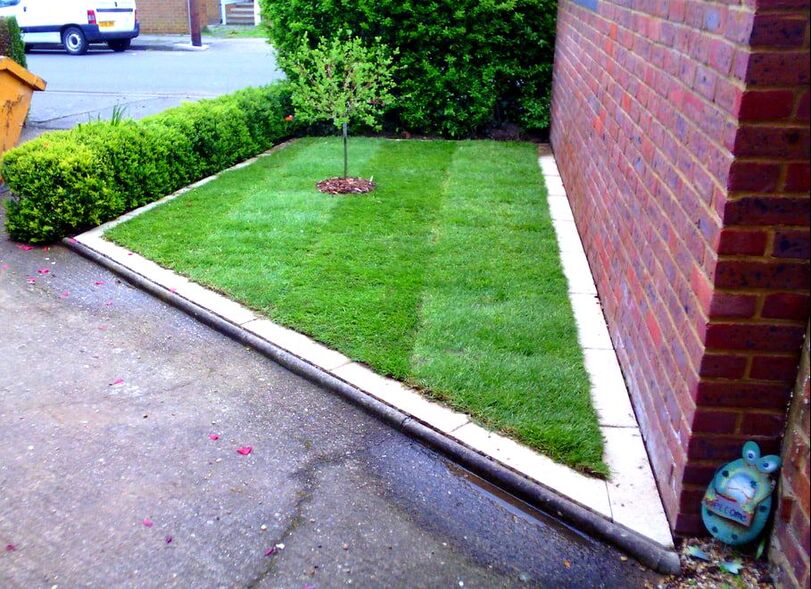
When your concrete has set, lay your vertical fillets of paving on edge along the foundation.
Mix up a 1:4 sharp sand and cement mortar mix and then haunch both sides into position. Haunching is applying a triangular fillet of mortar to secure and strengthen edgings and other landscape elements. How to make a mowing edge with paving?
The most common way of making edging with paving is by laying it flush with an adjoining surface. A typical arrangement would be installing paving as a mowing edge to a lawn. Here the paving edging acts as a divider between lawn and flowerbed. To lay paving as a mowing edge simply cut your paving into consistent strips. A good width for this is about 100mm! 
If your lawn has many curves and organic shapes you could even cut the paving into squares.
This is a lot of cutting but creates an effective sett effect edging. Excavate a trench around the outside of your lawn to a depth of 120mm. 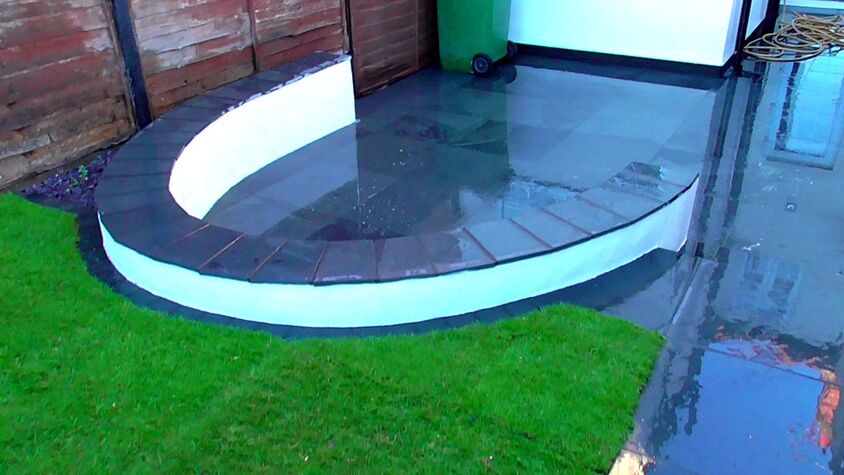
Supply and spread a 70mm layer of compactable sub-base like mot type 1 to the excavation. Compact the sub-base well and mix up a 1:4 cement and sharp sand mortar mix.
Set up a tight string line along the path and level you want your edgings. Using a bricklaying trowel lay your paving edging strips to the string line. What is the best paving for edging?
The best paving for edging really is paving which already matches your existing garden. However it is always best to use a natural stone paving where colours will not fade. It is also beneficial to use dense, natural, stone which does not absorb much water. Some examples of these include; sandstone, granite, slate and porcelain.
'As an Amazon associate I earn from qualifying purchases'
This article contains affiliate links
Outdoor log burners and fire pits have become a every popular garden feature. Many have adopted the idea of implementing fire as a central feature to patios and seating areas.
However, this provokes a typical and functional question; what is the best paving for log burners and fire pits? There is actually much more to this question than meets the eye! The best paving for log burners and fire pits will not only be heat resistant it will be practical. Such seating areas will also be vulnerable to staining from charcoal, food and drink. Therefore, in this article I will discuss some of the best paving for log burners and fire pits. Travertine Paving
Travertine is a sedimentary, limestone rock which is durable but light in weight. It has a high porosity level which gives it excellent thermal regulation properties. This makes it ideal for areas with variations in temperature. Travertine paving comes in a wide range of finishes and colours. However its high porosity may not make it the best paving for log burner and fire pit areas. Travertine paving can absorb staining substances such as coffee, red wine and oil. 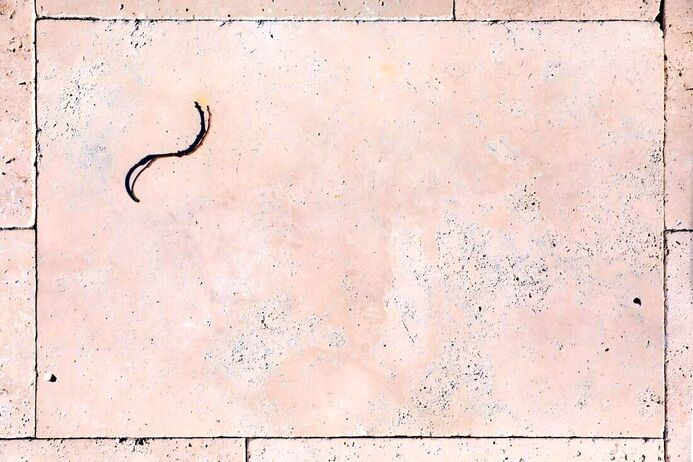
Porcelain paving
Porcelain paving is becoming one of the most popular paving materials for modern gardens. As porcelain is fired at extremely high temperatures it naturally has good heat tolerance. The main advantage with porcelain is it is impervious and difficult to stain. This makes it a good contender for fire pits and log burning areas. However as porcelain typically comes in very light colours it may be generally challenging to keep clean. 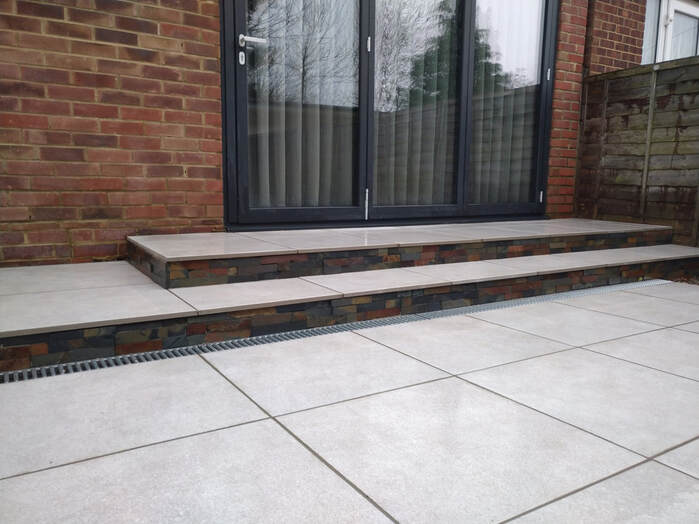
Granite paving
Granite is a naturally dense and hardwearing stone with good resistance to heat. This paving material is famous for its typical black, grey and white speckling which provides a pleasing visual texture. Even better, the colours of granite are very similar to the colours of charcoal and ash. As granite is the same colour as ash it could be the perfect paving around a well used fire pit. 
Slate
Slate is a well known building material and has good resistance to heat. Its dark colours and impervious surface means it is one of the best stain proof paving materials. Slate has a clean, modern look which makes it a perfect material around fire pits and log burners. 
Limestone
Limestone in general is well known for its clean aesthetics and general heat resistance. However, due to its absorbent nature and light tones it may not be best for around fire pits. The light colours could become stained from food, drink and soot. Acid rain could also slowly degrade the surface over time. 
Sandstone
Sandstone is a very popular paving material which comes in a variety of colours and textures. The best thing about sandstone is it comes in a wide range of warm and vibrant colours. This naturally lends itself to areas with log burners and fire pits. Sandstone naturally has very good thermo-insulation properties. This means it can withstand a wide spectrum of temperatures making it effective paving for around fire pits. However, like limestone sandstone does absorb some water. This can leave it vulnerable to staining from food and drink. Therefore it is advised to seal sandstone when installing around fire pits and log burning areas. 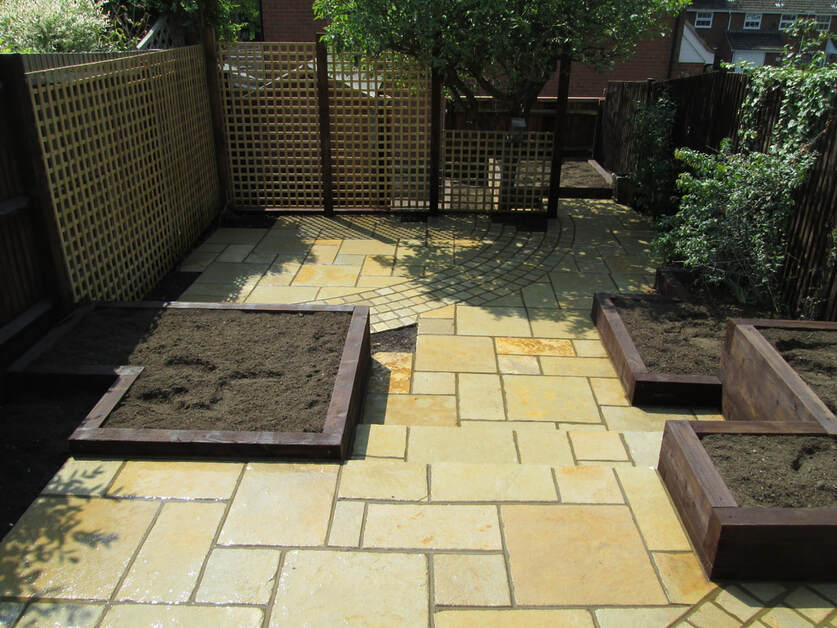
Conclusion
Consequently, I conclude, the very best paving for fire pits and log burning areas is Granite, In second place, Slate followed by Porcelain then Sandstone, Travertine, and limestone. Best paving for around fire pits and log burner areas in order:Granite Slate Porcelain Sandstone Travertine Limestone Thank you for reading our article on the best paving for fire pits and log burners. Below we have included some other articles you may find useful.
'As an Amazon Associate I earn from qualifying purchases'
This article contains affiliate links
Getting a new patio installed can be both exciting and stressful at the same time.
A new aesthetically pleasing and functional seating area can provide the perfect stage for family gatherings and relaxing weekends. At the same time, hiring a professional contractor can be a new experience for many people. It can also be difficult to formulate an accurate idea of what to expect. Therefore one of the most common questions people ask is how long does it take to lay a patio? In this article I will break down all of the construction stages of a patio with timings. I will explain these based on an average sized patio of 50 square metres for one and for two tradesmen. Understanding the variables
Laying patios and any outdoor work in general is extremely difficult to time gauge. Site and weather conditions can make it extremely difficult to run any project perfectly on time. Building sites with numerous different contractors can also be very challenging to work to a set schedule. 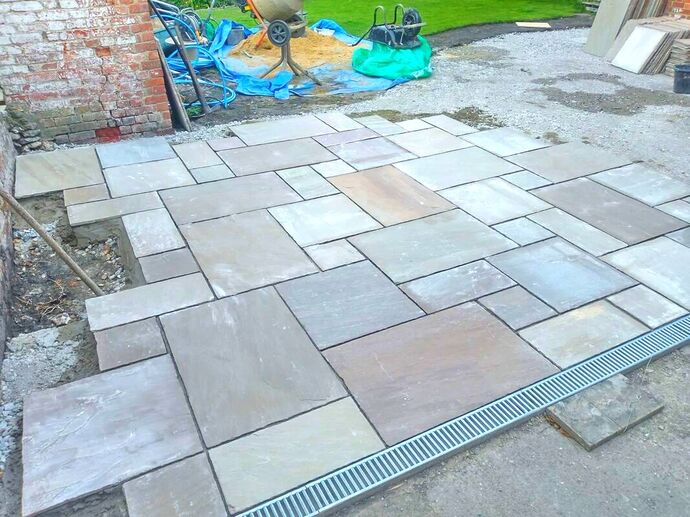
Access
One of the most important factors of any landscaping project is access. If a project has very poor access the chances are your project will take much longer. Most contractors will factor this into their quotation and works schedule. Poor access typically includes; no parking, no driveway, narrow sideways, through home access, and back alley access. Excavation
Excavating out for patios is faster with a digger but the truth is access is not always possible. Furthermore, even with a digger, a certain amount of hand digging will still be necessary. Therefore I will work out my digging times based on hand digging to a depth of 150 millimetres. The average landscaper can dig out around 12 square metres of soil per day and load it into a skip. For two men this will be around 24 square metres. This means for a 50 meter patio digging out will take about 5 days for 1 man and 2.5 days for 2 men. 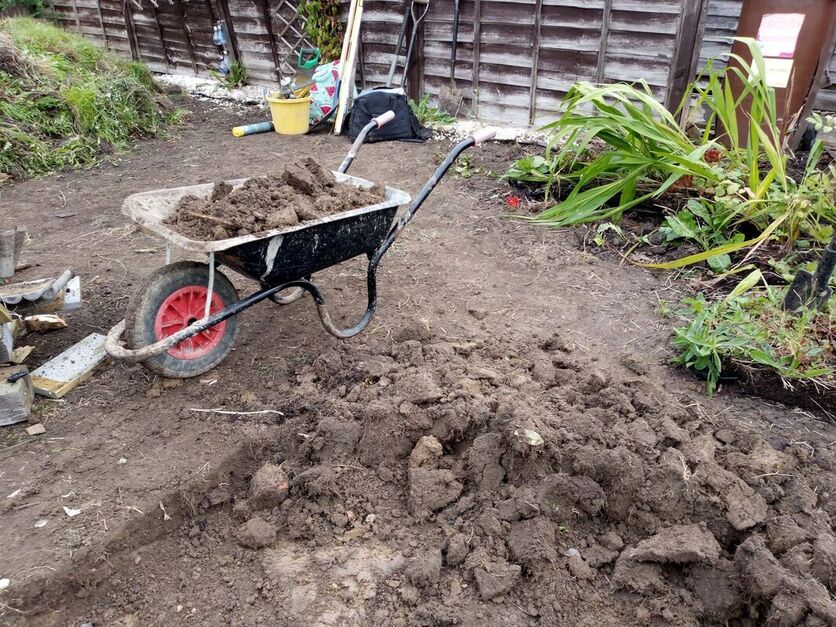
Laying the sub base a preparation
The next stage of the patio will include laying the sub-base, compacting the base and setting materials ready to lay. For one man on a 50 meter patio this will involve shovelling and spreading 8 tone of type 1 level. It will also include shifting 5 tonne of sand, 25 bags of cement and about 3 packs of paving to the patio. This will normally take around 3 days for 1 man and 1.5 days for two men. 
Laying the paving
How long it takes to actually lay the paving will depend on the skill and fitness of the contractor. However, for one man on his own mixing and laying he should be able to lay about 10 square metres. With two competent contractors this should be around 16 square metres a day. Therefore a 50 meter patio should take 5 days for a single man to lay. This will become about 3 days for a two man team! 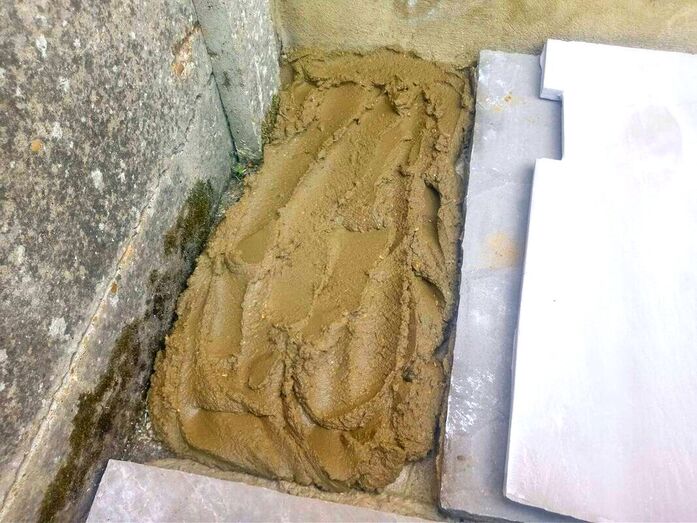
Cutting
Cutting in around a 50 meter patio and bedding is should take about a day for one man. 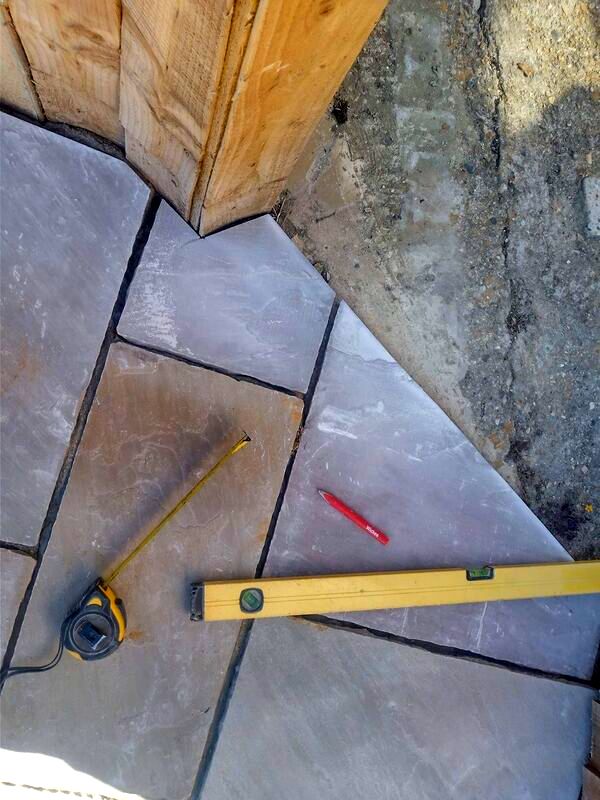
Jointing
Grouting a 50 meter patio should also take about a day for one man. 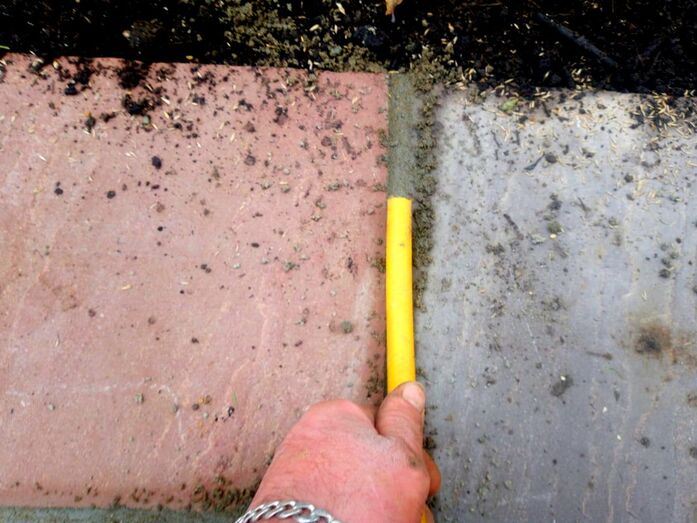
Therefore, the average 50 meter patio should take around 15 days (three weeks) for one man. For a two man team a 50 metre patio should take about 9 days (1.5 weeks)
'As an Amazon associate I earn from qualifying purchases'
This article contains affiliate links
Paving large areas can be a big commitment both mentally and financially. The problem is a paving slab which looks close up may not look as effective over a huge area.
For this reason choosing the best paving for large areas can be tricky. In this article I will suggest some good paving choices and things to think about when paving large areas. 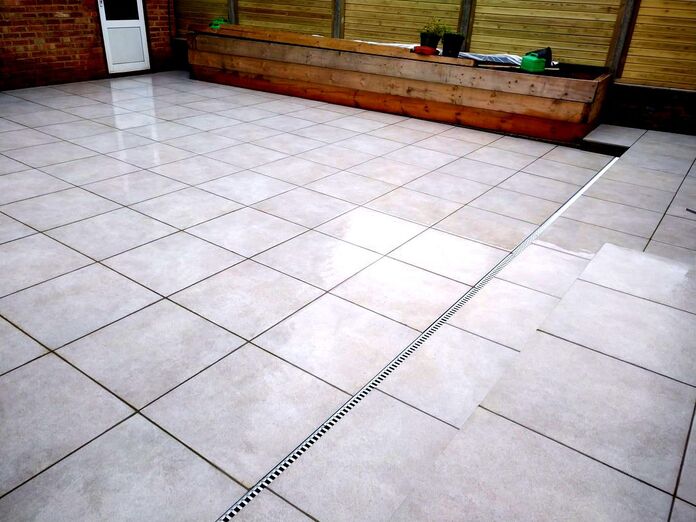
Tips for paving large areasVisual balance
The trick to paving large areas effectively is creating visual balance. The best way to do this is to provide some visual interest and variation. The worst thing you can do when paving large areas is to use bland paving. Therefore the best paving for large areas should have colour variations and visual textures. This will prevent your patio looking boring at a distance. Borders
Borders can be used to frame patio areas and create visual contrast. For example strips of black slate can be cut to border lighter paving like porcelain. Light sandstones can also be bordered with darker red bricks like in the example below This will make paving expansive areas much more visually interesting and exciting. 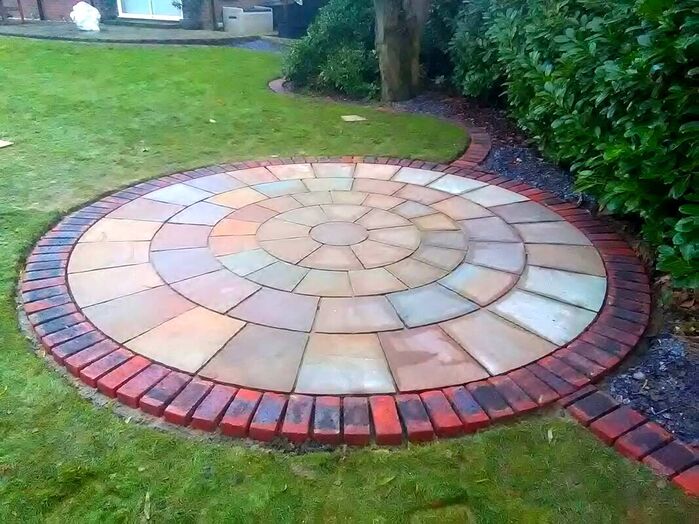
Patterns
Just as borders around large patios can help frame paving, patterns can add even more interest. Bold lines and shapes can break up large areas and bring drama to the design. Central features
Central features can bring plenty of excitement and help break up large areas of paving. These can be simple water features, ornaments or even raised beds. What is the best paving for large areas?
The best paving for large areas will come in a variety of sizes and have varying colours and textures. This will provide as much visual interest as possible over a large area. 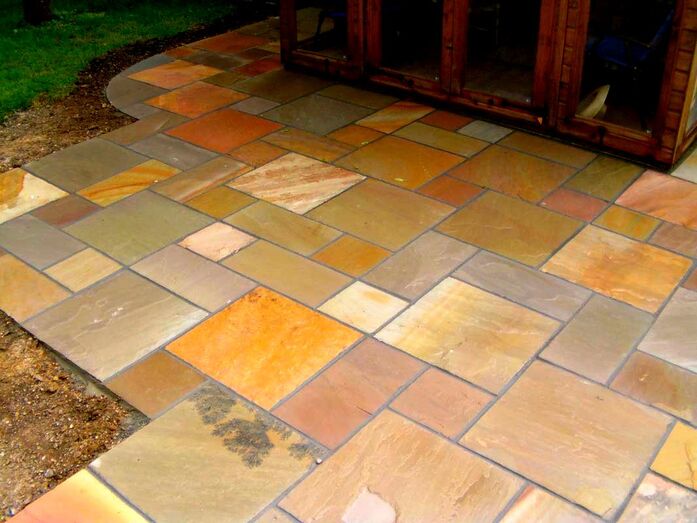
The best paving should also be relatively affordable as not to break the budget.
Consequently, Indian sandstone in a 4 size pattern with colour variation would be the best paving for large areas. You will also have the option to add contrasting borders and patterns to the paving to add interest.
'As an Amazon Associate I earn from qualifying purchases'
|
The Author
|


Serving the landscapes of Buckinghamshire, Amersham, Aylesbury & High Wycombe
Hyde Heath, Amersham, Buckinghamshire
|
|