
This article contains affiliate links
Woodland gardens can provide outdoor spaces where man and nature comes closer together. The combination of woodland plants, shrubs and small trees create a dense hideaway where one can escape into nature.
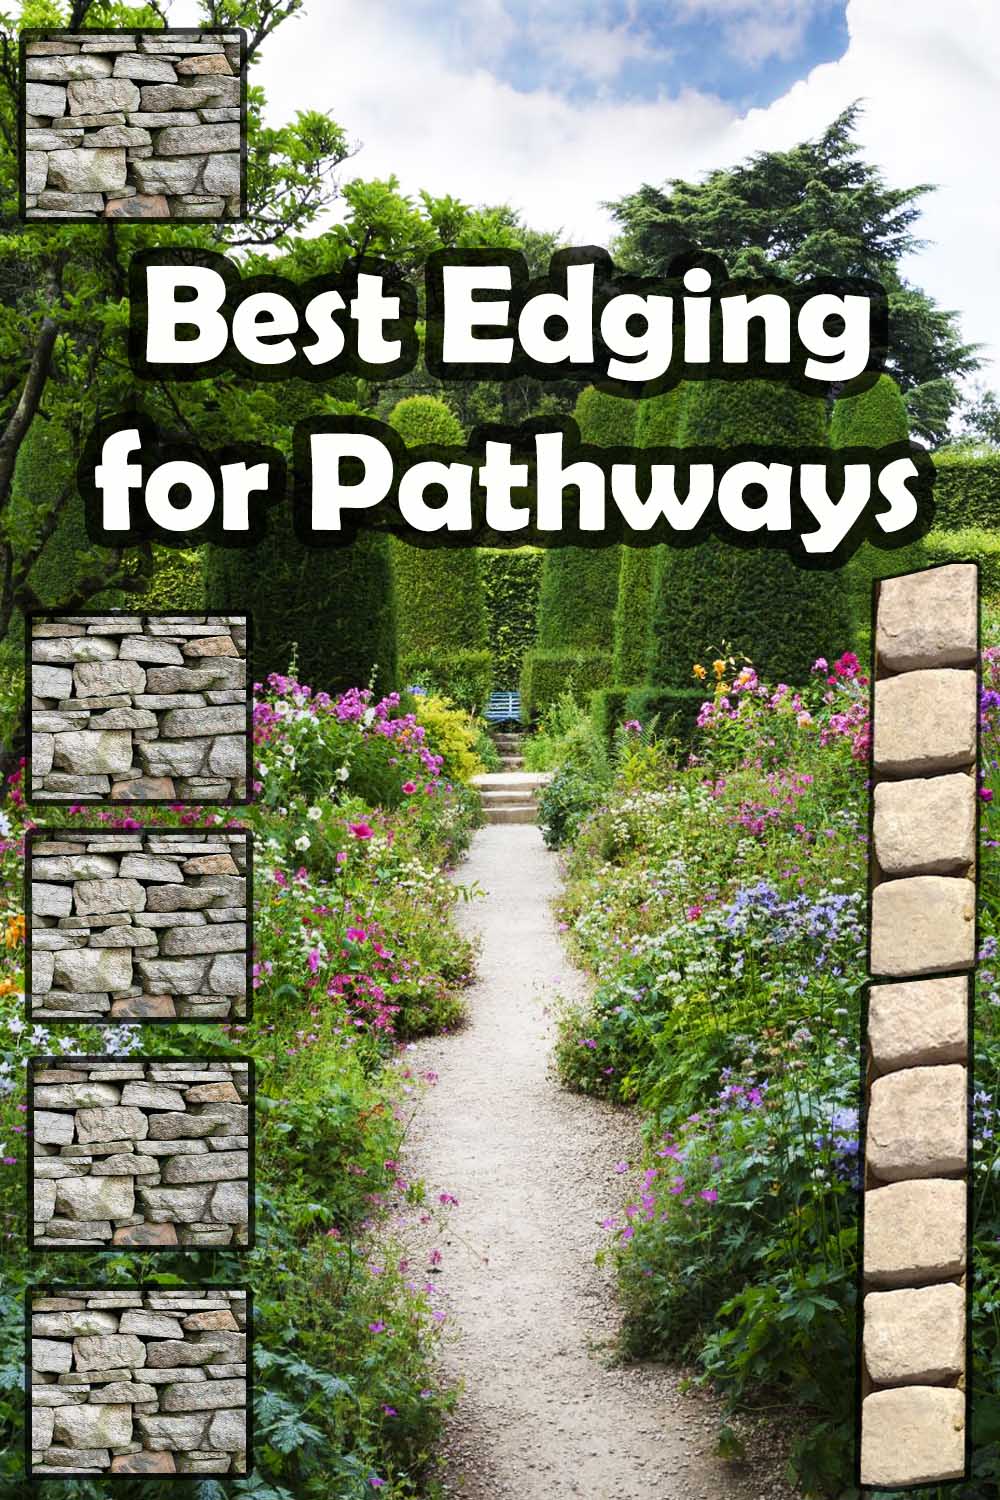
However, most people do not have acres of land to create extensive forests. Therefore woodland gardens require careful planning and meticulous planting. The layout of woodland gardens must be well defined with ridged boundaries to prevent overcrowding. This makes planning and installing woodland edging correctly essential. In this article I will list and summarise 8 woodland garden edging materials perfect for well defined borders. Log roll edging
Log roll edging is a widely available timber, edging perfect for creating raised borders to flower beds. This edging consists of semi circular timber rounds fixed to a wire bracing. The log roll provides the perfect woodland feel to woodland planting areas. Log roll edging can also be fixed to existing edging and stained for a bespoke effect. 
Dry stone walling
Dry stone walling is a traditional form of construction typical of rural communities within rocky areas. Flat rocks are stacked methodically together to form robust natural stone barriers and boundaries. Natural stone walling blocks can be purchased and laid as decorative garden edging. These can add a feeling of wonder and mystique to enchanting woodland garden designs. 
Willow edging
Willow edging is a great way to add a contextual appeal to your woodland paradise. This natural edging is made from natural and sustainable willow stems. The stems are fixed together with metal wire and come in either panels or rolls. Willow edging is effective for creating border edging to woodland borders and pathways. Sleepers
When it comes to woodland gardens sleepers can provide a multitude of edging options. These large and robust sections of timber were originally produced to base railway lines. Sleepers can be laid lengthways to create straight and rigid borders to paths and borders. They can also be cut into 400mm sections and set in vertically to form organic shaped borders. 
Timber boards
Timber boards come in a wide range of sizes and specifications which are perfect for woodland garden edging. You will need to buy treated timber for external applications which are typically available from fencing specialists. Gravel boards are a popular choice, perfect for forming curvy edging to paths and planting zones. 
Flexible metal edging
Flexible metal edging is now a very popular landscape edging product for a variety of outdoor applications. This edging is favoured for its contemporary feel and extremely fine profile within the landscape. This edging is very effective at edging gravel surfaces and forming modern edges to borders. 
Woven hazel edging
Woven hazel edging is a garden border constructed from intricately weaved hazel stems. This edging typically comes in small panels which can be linked together to form continuous boundaries. It has a natural and rustic appearance which makes it perfect for wildlife and woodland gardens. This edging comes with tapping spikes which allow it to be tapped down securely into position. Kerb edgings
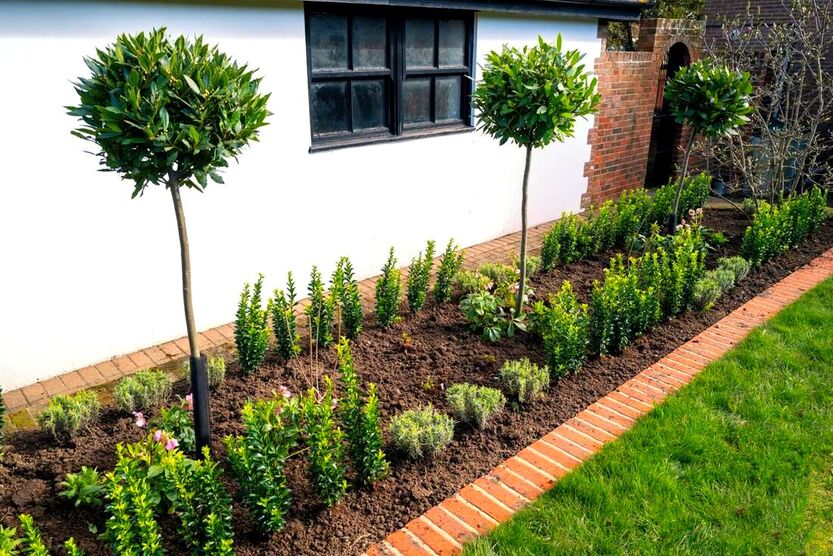
Kerb edgings are bulky, pre-cast concrete edgings designed for use alongside paving. These kerbs come in a wide variety of styles, sizes and colours. Kerb edgings are perfect for forming robust retaining edgings to slopes, borders, steps and pathways. Their often rustic aesthetic makes them a perfect choice for woodland garden landscaping. 
Thank you for reading our article on the best edgings for woodland gardens! I you require woodland garden landscaping services do not hesitate to contact us!
Below I will link to some other articles you may find interesting.
'As an Amazon Affiliate I earn from qualifying purchases'
0 Comments

This article contains affiliate links
Creating a tropical looking garden in cooler climates may seem like a difficult task. There can be a fine line between which plants thrive, just survive or die. This could not be truer when it comes to trees for topical gardens.
Trees take much longer to establish the larger they become and more challenging to keep sheltered from extreme weather events. However, many cooler regions of the world successfully manage to establish exotic trees. This is especially so in well designed microclimates particularly within urban areas. Consequently, here I will list 10 trees suitable for tropical gardens within cooler regions. Some of these are much more resilient to cold than others but can thrive in cold countries. I will provide some idea of their hardiness in each paragraph below. Indian bean tree
Also know by its Latin name ‘Catalpa Bignonioides’ the Indian bean tree is extremely cold hardy. It is deceivingly not from India at all, but the southern United States! This tree can amazingly take winter temperatures as low as minus 20 degrees! It is well known for it’s large, heart shaped leaves and clusters of scented white flowers. During summer it produces long bean ponds making it look very exotic. This tree looks its best when coppiced or pollarded. When pruned this way its branches become straighter and leave even larger and tropical looking. 
Fig
Originating from the Middle East ‘Ficus Carica’ is a small tree with exotic looking lobed leaves. These trees are also highly sought after for their delicious fruit and ability to train or prune into any shape. Although figs desire a warm climate they are completely happy growing in cold regions. I have fig trees in my UK garden which recently survived a night at minus 14 degrees. When grown around patios their tropical leaves really make you feel you are in another country. Figs also give off an interesting smell which gives the garden an exotic feel. 
Chinese windmill palm
Chinese windmill palms (Trachycarpus fortunei) is the king when it comes to tropical looking trees in cold climates. This large fan palm can reach impressive sizes in countries you simply would not think possible. Hardy to minus 15 degrees this palm is more than happy growing in a sheltered sunny position. Originally from Central China and India it can really add a dramatic impact to any tropical garden. Its large, fan shaped leaves rustle in the breeze and can create impressive silhouettes against bright blue skies. 
Japanese banana
Scientifically known as Musa Basjoo the Japanese Banana can add a real novelty to tropical gardens. As the hardiest of all Banana palms it really can have a dramatic effect in cooler climates. The art to being successful growing this palm is by getting it established within the ground. You will really need a south facing wall in a sheltered and sunny area. This Banana will require some winter protection to protect its stems in the winter. This is best done using wooden pallets and a dense packing of straw. The top of the protective structure can then be lined with plastic. 
Tree fern
Tree ferns really give a prehistoric look to tropical gardens and for good reason! Many of the tree ferns around today descended from an ancestor which grew 400 million years ago. Most ferns on the market today originate from the cool forests New Zealand. This means they are used to cold temperatures and hardy down to around minus 5. Like the Japanese Banana it is recommended to give them winter protection. Tree ferns are very slow growing making them rather expensive to risk losing. 
New Zealand cabbage tree
New Zealand Cabbage Tree or ‘Cordyline australis’ is a tall, Yucca like, tree which really brings excitement to tropical garden planting. These palm like trees have long sword like leaves which rustle in the wind.
During hot summers they will produce clusters of spray like white blooms. Their architectural form is really perfect for creating a jungle like feel. This tree is generally hardy to minus 5 degrees so try to plant it a sheltered sunny spot. 
Foxglove tree
Also known by its Latin name ‘Paulownia tomentosa’ the Foxglove tree can provide some real novelty for tropical gardens. One of its best attributes is its large, heart shaped leaves which really provide an exotic feel. During early summer it produces masses of purple trumpet shaped flowers. Although this tree is hardy to minus 10, you may find in colder climates it may not flower. However like the bean tree it is more valued for its large leaves in tropical gardens. Foxglove tree will also grow larger leaves if an established tree is cut back well or coppiced. 
MagnoliaMagnolias are exceptionally beautiful trees with large glossy leaves and a compact growing habit. These trees are at their most splendid during flowering when they erupt in large tropical looking flowers. They are more than capable of thriving in the more colder climates of the UK and North America. Magnolias can inject some much needed seasonal change to tropical gardens in cooler climates. They do lose their leaves in autumn however their seasonal drama deserves them a place within cool weather jungles! 
Canary island date palmThe Canary Island Date Palm or ‘Phoenix canariensis’ really can give a taste of the tropics to cooler climates. This remarkable palm has a broad triangular shaped truck and large feather like foliage. These trees can eventually achieve a height of 18 metres tall. However they are unlikely to achieve this in cold climates. The date palm is hardy down to minus 5 and must have a sheltered and sunny site. I have personally seen huge specimens growing in the front gardens of Exeter road, Rayners lane, Harrow, London, UK. 
Gingko
‘Gingko Biloba’ are beautiful trees with fan shaped leaves which turn bright yellow in autumn. This tree can be traced back to prehistoric times and can add season drama to tropical gardens. Although Gingko is not normally associated with tropical planting their unusual foliage provide them an 'exotic look. This tree is hardy and capable of growing well in most temperate climates. This unique tree will certainly add some additional interest and seasonal colour to cold weather tropical gardens. 
Thank you for reading our article on trees for tropical gardens in cold climates. I will link to some of our other tropical garden articles you may like below.
'As an Amazon associate I earn from qualifying purchases'
This article contains affiliate links
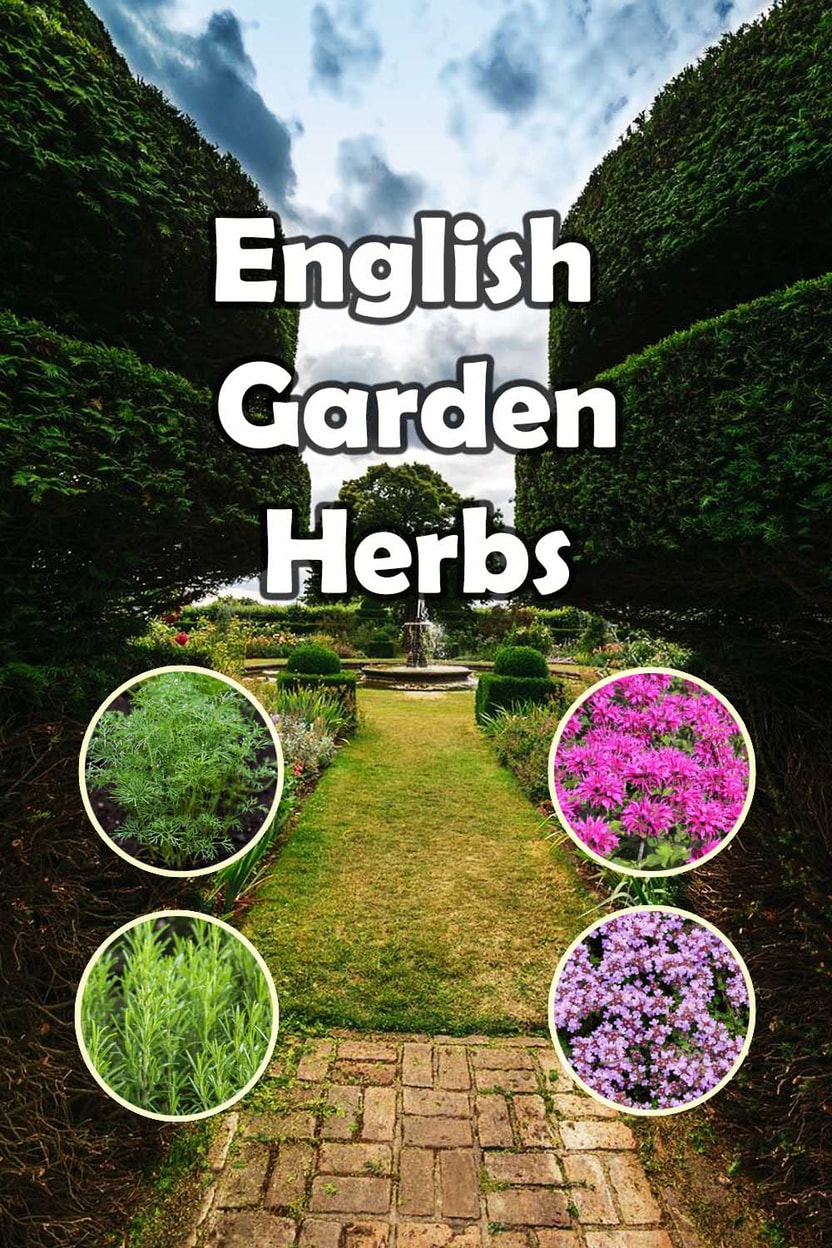
Historically English gardens have had a strong connection between home and garden. Some of the earliest English gardens would have growing areas dedicated to both culinary and medicinal herbs.
There were even specific herb borders dedicated to producing home fragrances and teas. English gardens however did not only utilised herbs for their conventional uses, many gardens also recognised herbs for their ornamental value. Thyme would be utilised as a ground cover while lavender would be planted along paths and walkways. In this article I identify and summarise 10 of the most perfect herbs for English gardens. Lavender
Lavender is a Mediterranean herb often planted within English gardens for its aromatic foliage. Historically Lavender was used as a disinfectant, deodorant and household fragrance. In English gardens it was planted for its blue grey foliage and purple blue flowers. It was very often planted along pathways and at the front of borders. 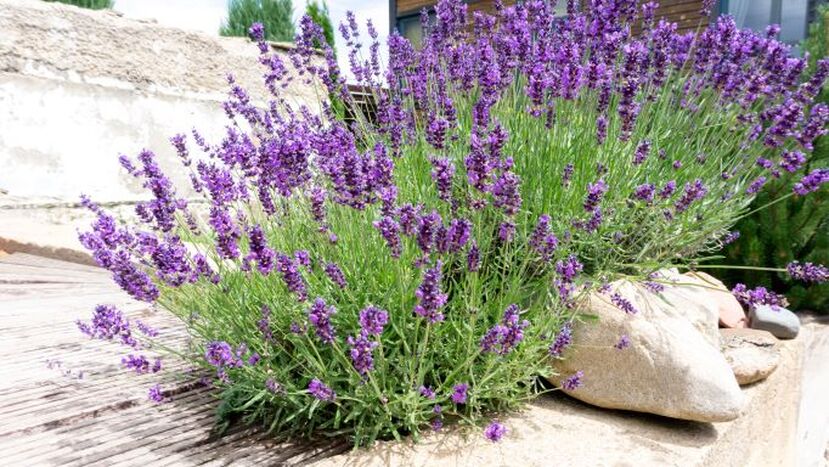
Thyme
Thyme is a classic herb much loved within English cooking and home recipes. Its aroma is much favoured added to roasted meats, stews and sauces.
In English gardens thyme was a stable within herb gardens but also had other uses. This herb can be grown as an effective groundcover and also works very well within dry rock gardens. 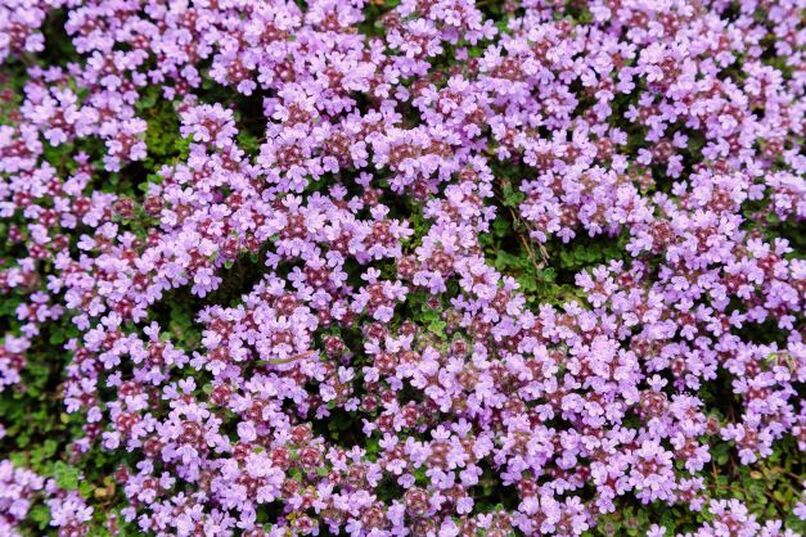
Bergamot
Also known as ‘Bee Balm’ Bergamot is an attractive perennial herb and apart of the mint family. In English gardens it is especially grown for its ornamental value and favoured in cottage borders. During summer it produces large, exotic looking, red flowers which are extremely striking. This plant was also traditionally grown in English gardens as a delicious herbal tea. 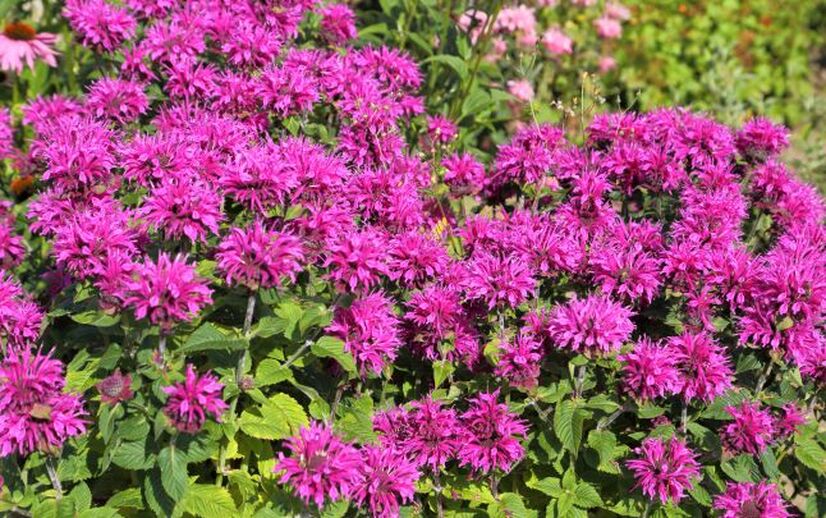
Rosemary
Rosemary is a versatile and good looking herb which has long been planted within English gardens. The powerful aroma of Rosemary is perfect for rich pasta sauces and meat preparations especially lamb. However, being a small evergreen shrub with fine foliage it is also perfect for low hedging. The trailing variety of rosemary also makes a really effective groundcover plant. 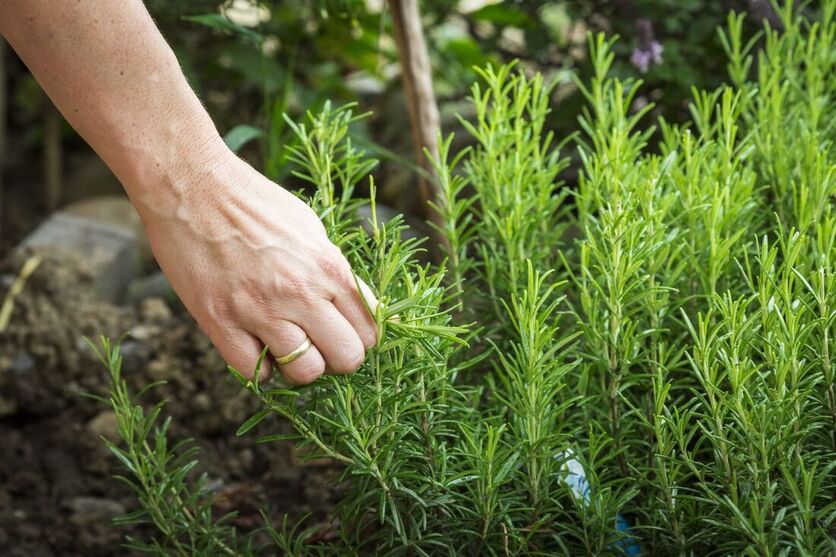
Dill
Dill is a very popular herb with attractive, feather like, aromatic, foliage and small yellow flowers. This herb is traditionally cooked with fish and also used to flavour pickles. In English gardens this herb was grown both for its culinary and ornamental value. During warm summers its unusual aroma can help to scent English kitchen garden borders. 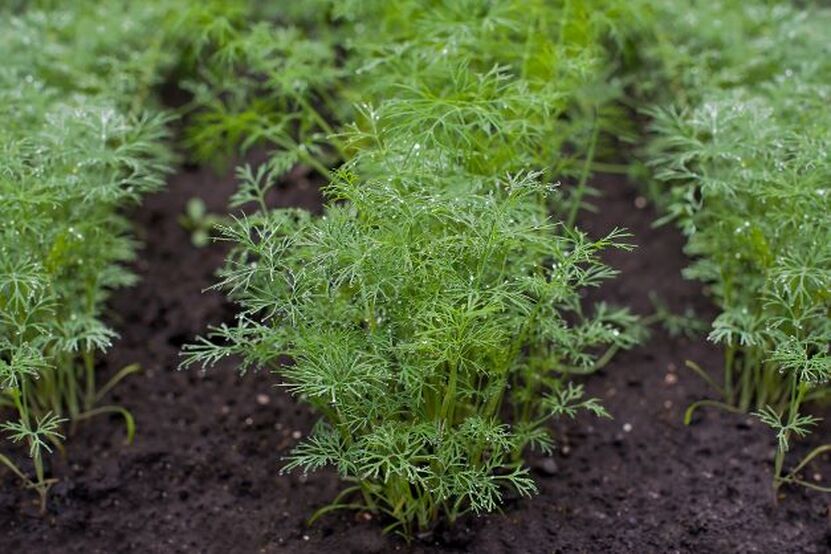
Sage
Sage is a multifunctional herb planted and harvested within English gardens for centuries. This herb is well known for its excellent earthy aroma popular within meat dishes and stuffing. Sage also has many qualities as a landscape plant including attractive flowers which bloom in summer. It also has very decorative foliage which comes in shades of silver, green and purple. 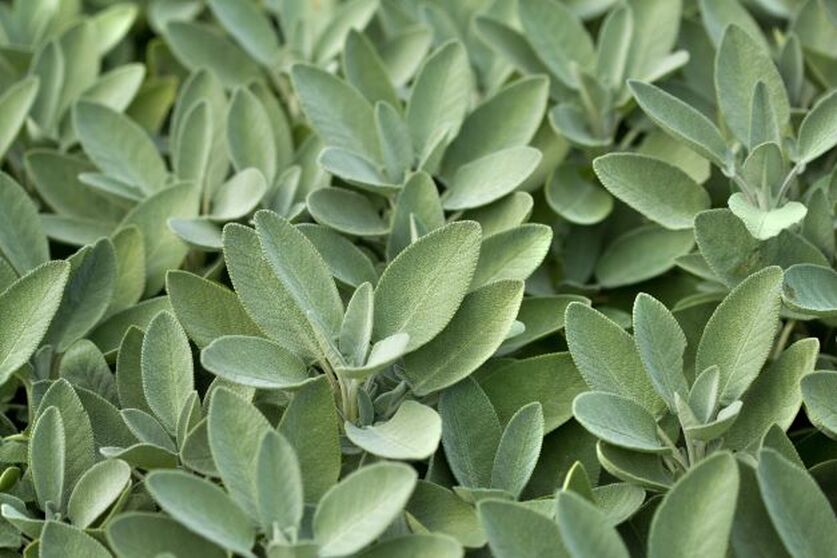
Tarragon
Tarragon is an unusual herb, very well known for its liquorice or anise-like taste. In English cuisine this herb is often used with poultry or more historically rabbit. Consequently it has been a popular herb in English gardens for generations. It also has some ornamental value with lance like foliage and delicate flowers. 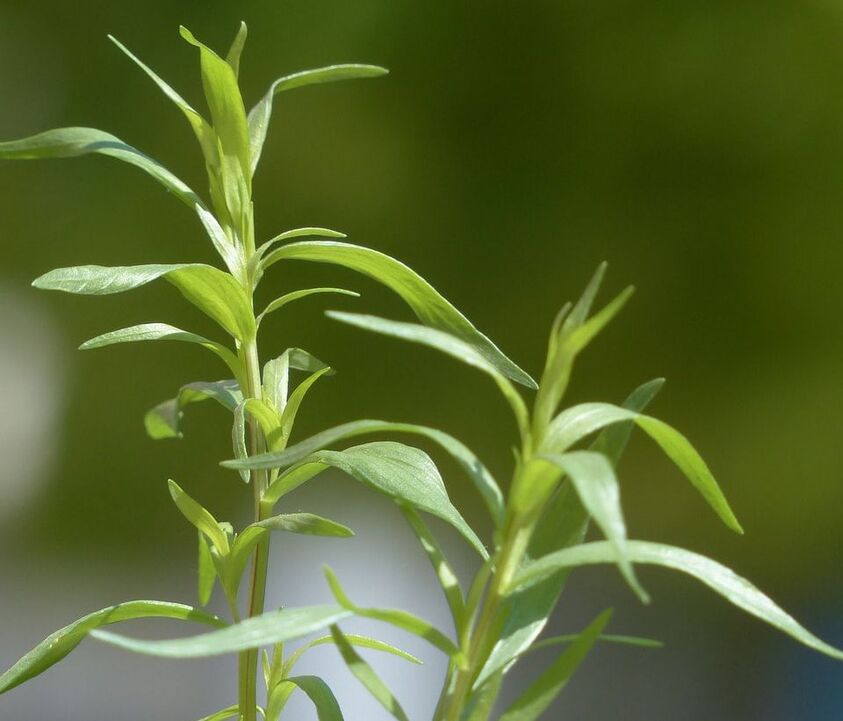
Parsley
Parsley is one of the most popular herbs cultivated worldwide and no less the case within English gardens. Parsley can be used in cooking, as a garnish or as a salad crop! In English gardens this herb has been planted for many generations. In was particularly useful in the making of stews, pies and fish dishes. 
Chives
English herb gardens have long been blessed with this small ornamental herb with vibrant flowers. Closely related to the onion, it has a mild onion flavour which brings a taste to numerous dishes. In the border it can also add ornamental value with its tall erect leaves and purple flowers. 
Mint
If there is one herb an English herb garden cannot do without its mint. Mint is one of the most popular herbs on the planet due to its powerful aroma, and versatility. This herb has many medicinal and culinary uses and even in cocktails. In English gardens variegated varieties can also add some visual interest. Thank you for reading our article on the best herbs for English gardens. If you would like to read more of our English garden articles I will link some down below. 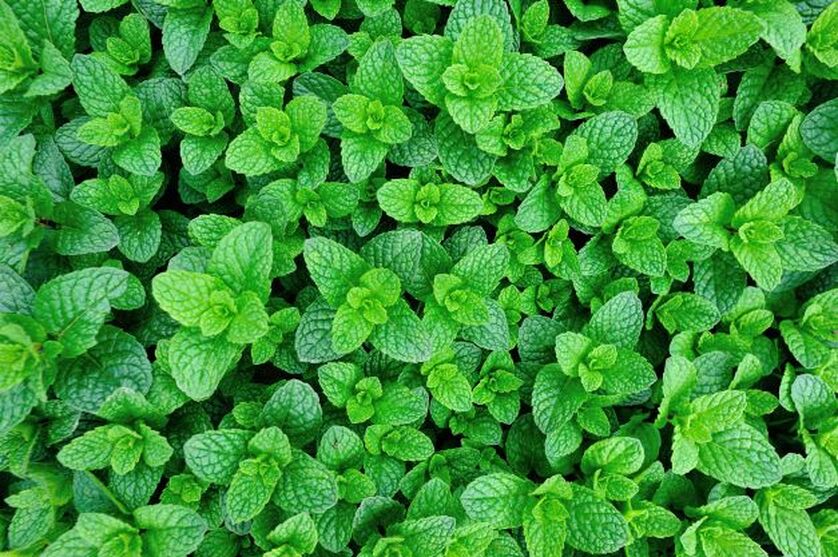
'As an Amazon associate I earn from qualifying purchases'

This article contains affiliate links
Sustainability has never been such an important element of how we live our lives and interact with the environment.
When many contemplate drainage they think of engineered concrete channels and underground pipes. In nature however, hydrology is an intricate part of how the landscape functions. Surface water hydrates soil which slowly releases into streams, rivers and water basins. This natural process is of vital importance to habitats, ecosystems and soil health. These elements are also extremely important for our own health. Water in our gardens is no different from the water within the wider landscape. 
Collectively urban areas and gardens make up a vast area of catchment where surface water flows from.
These areas are also where the most polluted and accelerated surface water leaches from. Consequently urban drainage and sustainable drainage for gardens is of upmost ecological importance. In this article I will explain the importance sustainable garden drainage and how it can be implemented. What is sustainable drainage?
Sustainable drainage is the mitigation of accelerated and polluted surface water flows from manmade environments.
Sustainable drainage aims to slow down storm water from hard surfaces to prevent flash flooding and water pollution. It is also the containment of urban runoff via naturalistic landscaped wetlands to prevent the pollution of watercourses. Although the aim of sustainable drainage is simple, there are numerous installations and methods for its implementation. These come in many forms and will be summarised and described below. 
Hazards of incorrect landscape drainage
For many years surface water from gardens and paved surfaces were channelled into drainage networks. During times of heavy rain these networks would become overwhelmed and breach into natural watercourses. As urban development increased so did vast areas of impermeable surfacing which accelerated surface run-off. 
This led to extensive flash flooding causing damage to homes and other property. Furthermore, fast flowing water from our urban surfaces carried a number of undesirable substances.
Animal faeces, heavy metals, oils, salts, fertilisers, and chemical spills all found their way into fresh water habitats. This led to the destruction of wildlife habitats and the toxification of the hydraulic cycle. The pollution of fresh water systems we rely upon for our own survival is deeply concerning. In some cases certain pollutants can stay within the hydraulic cycle for many years. This raises grave concerns for the future health of all living organisms including humans and the planet. 
Consequently the sustainable urban drainage of our local landscapes and gardens is of uppermost importance! Sustainable landscape and garden drainage is not always granted the attention that it deserved.
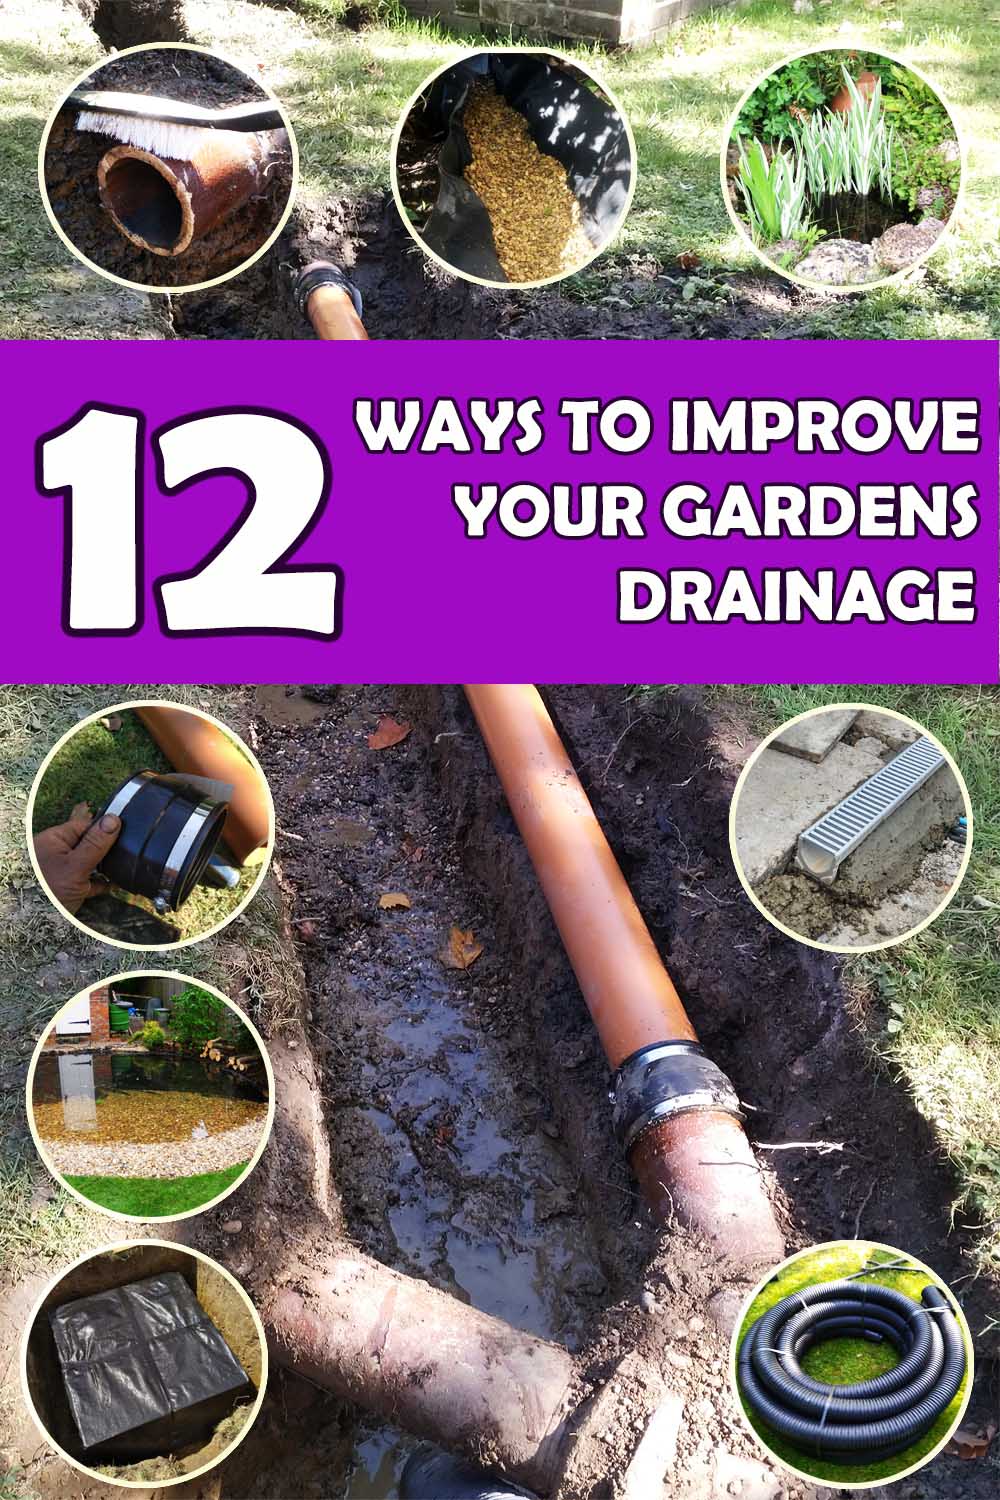
Below are some sustainable garden drainage installations which can help mitigate these problems. Green roofs
Greening roofs is not a new idea however many developers have been slow to implement them. This is probably due to the extra cost of installation and ongoing maintenance. However, it has been shown that green roofs can extend the life of a roofs water proofing many times over. Such systems can also improve the insulation of a roof against heat loss, saving on energy costs. 
Many green roof systems are simply shallow build up systems laid with sedum mats. These can slowly absorb heavy rain and discharge it slowly dramatically reducing the risk of flash flooding.
Green roofs can also be installed around gardens on Garages, sheds, log stores and bike sheds. Permeable paving
Permeable paving is paving and surfacing that lets water pass through its surface. Such surfaces are extremely good at preventing surface water pollution and flash flooding. There are now a broad range of permeable paving and surfacing products on the market. Some of these include; permeable block paving, open textured asphalt, resin bound surfacing and gravelled grid systems. It is important to remember these surfaces will require permeable sub-bases like Mot type 3 to be effective. 
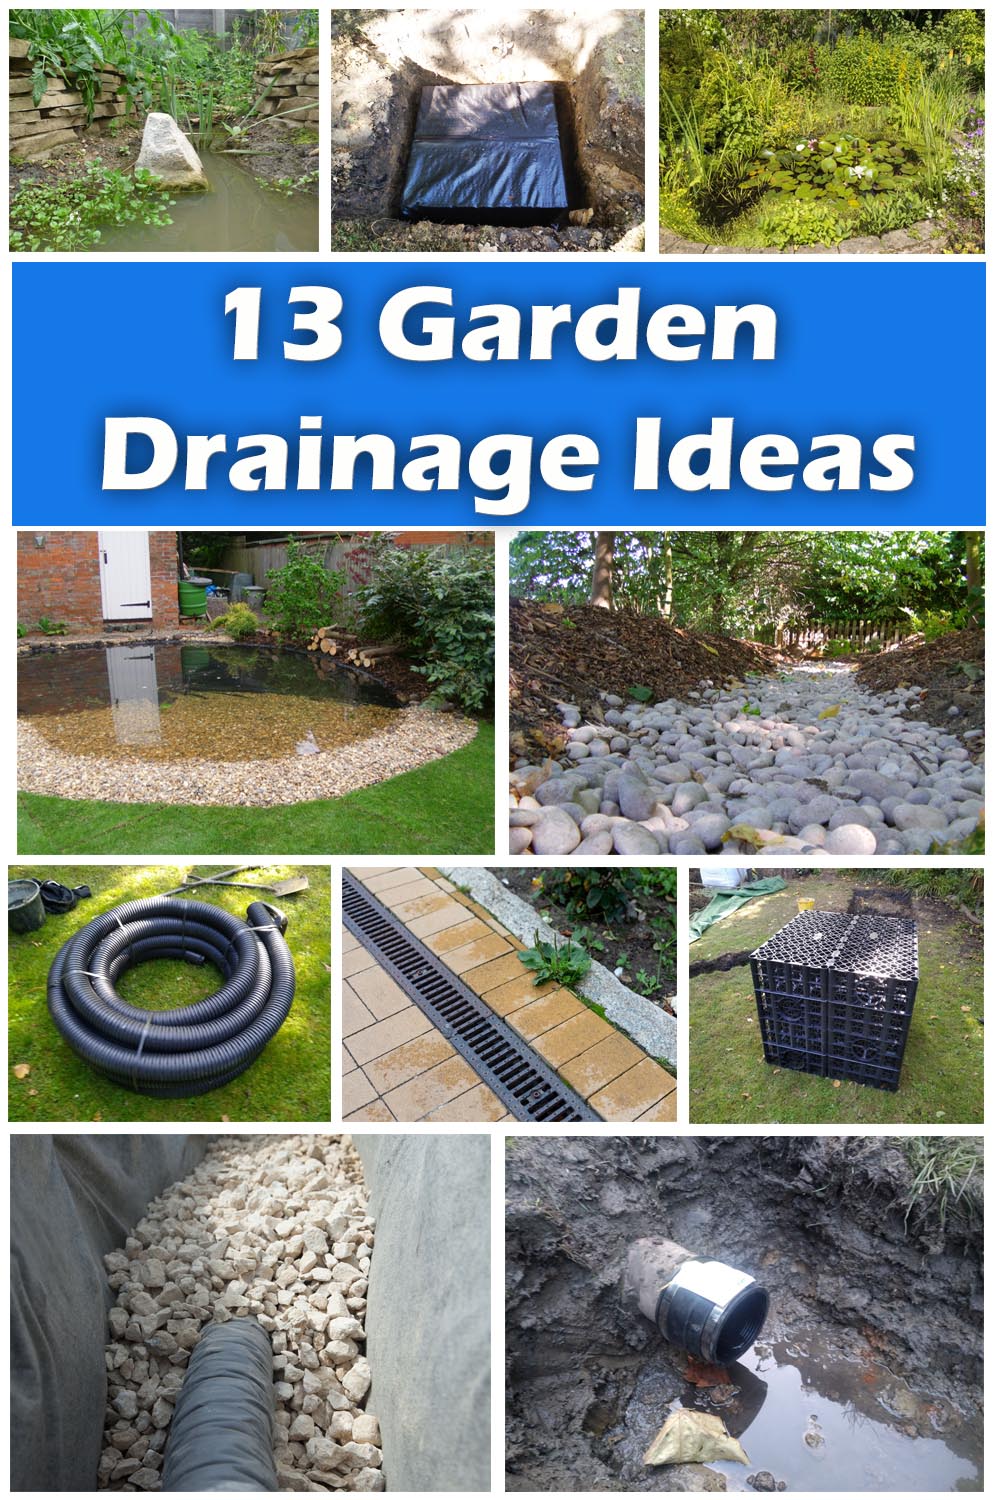
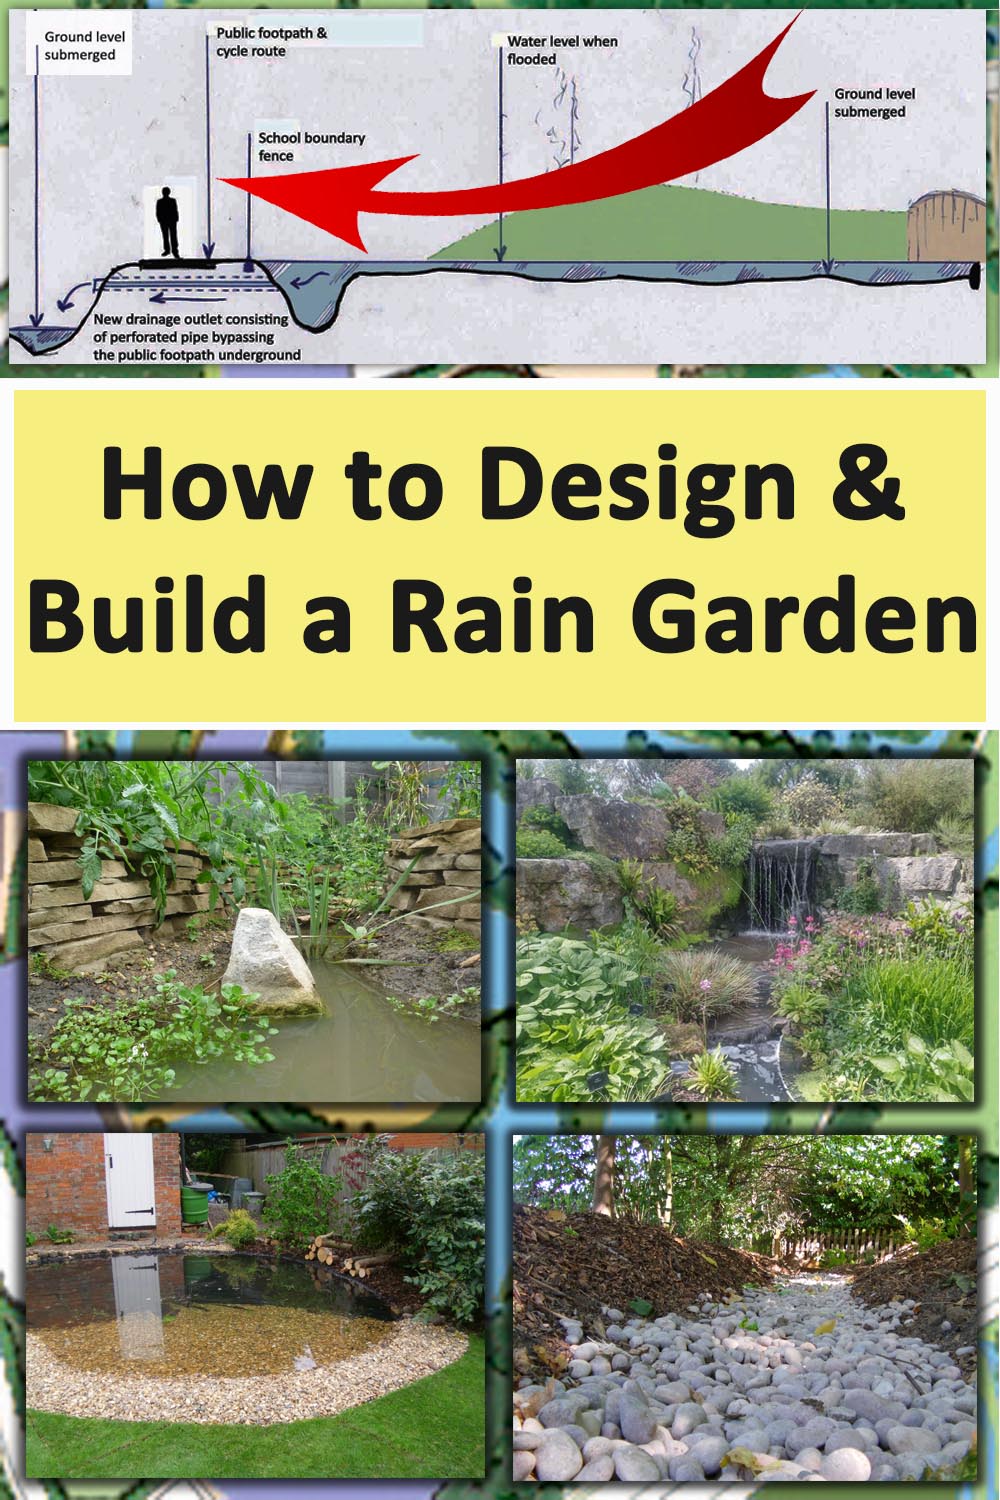
Rain gardens
Rain gardens are gardens specifically designed and landscaped to accept and channel urban run-off. This typically involves channelling rainwater from roof gutters and patios into beautifully landscaped wetlands. Rain gardens typically make a feature of flowing water as it slowly absorbs into the garden. Typical rain garden examples include pebbles, gravels, boulders and bridges. Why not visit our article on how to make a rain garden here. 
Rainwater harvesting
Rain water harvesting is the collection and storage of rainwater from impermeable roofs and paving. The most common example of rainwater harvesting is water butts plumbed into roof gutters. However, there are many other ways of implementing such storage techniques. One of which is storing rainwater in large underground tanks with in-built pumps. During hot summers this water can be tapped into for landscape irrigation. The collection and storage of urban surface water in this way aligns perfectly with sustainable drainage principles. 
Soakaways
Soakaways have always been utilised to allow surface water to drain back into the landscape. Traditionally soak-aways were simply large cubic metre excavations filled with builder’s rubble. During times of heavy rain these would fill with water slowly being slowly reabsorbed over time. However, today, soak-aways are typically installed using a much more efficient crate system. 
These consist of a series of reinforced plastic crates clipped together. When connected, they form a robust void under the ground where water can drain away freely.
For more information on how to install a garden drainage soak-away visit our article here. Retention ponds
Retention ponds have a similar function to soak-aways but in a more naturalistic sense. Retention ponds are designed to store water as more of a naturalised wildlife pond. This allows retention ponds to store water for later use whilst providing valuable habitat for wildlife. Retention ponds can also be designed to allow excess surface water to absorb back into the landscape. 
This can be achieved by creating a wildlife pond within a low spot inside the landscape. As the pond fills up past the liner the landscape retains a higher water level until the water reabsorbs into the ground.
Bioswales
Bioswales are linear depressions within the landscape that channel water through biological cleaning systems. Water is cleaned by flowing it through the roots of wetland plants. A bioswale may simply look like a long ditch however there is much that goes into bioswale design. Bioswales must be designed to accept the correct volume of water for their associated catchment area. 
They must also be planted with the correct wetland plants for their region. Many bioswales will also consist of other hard and soft landscaping helping them to integrate into the surrounding landscape.
They may also have raised overflows which fill retention vessels in times of very heavy rainfall. Seasonally flooding wetlands
Seasonally flooding wetlands are specific landscape types and habitats vital for specialised species of wildlife. These wetlands are typically dry during summer and flooded during the winter. Seasonally flooding wetlands are a great way to create sustainable landscape drainage systems. These can be realised by excavating a series of interlinked dry ponds. Roof guttering and drainage systems can then be plumbed into these naturalistic wetlands systems. During winter and times of heavy rainfall these wetlands can slowly fill accepting excess, surface run-off. 
Thank you for reading our article about sustainable landscape drainage for gardens. If you require sustainable drainage services do not hesitate to contact us.
We provide a whole range of sustainable and garden drainage services tailored to fit your specific site. Based in Amersham, our landscaping services include drainage, paving, fencing, ponds, pathways and garden makeovers. We service most of Buckinghamshire including neighbouring counties; We have also just opened a new office in Norfolk.
'As an Amazon Associate I earn from qualifying purchases'
This article contains affiliate links
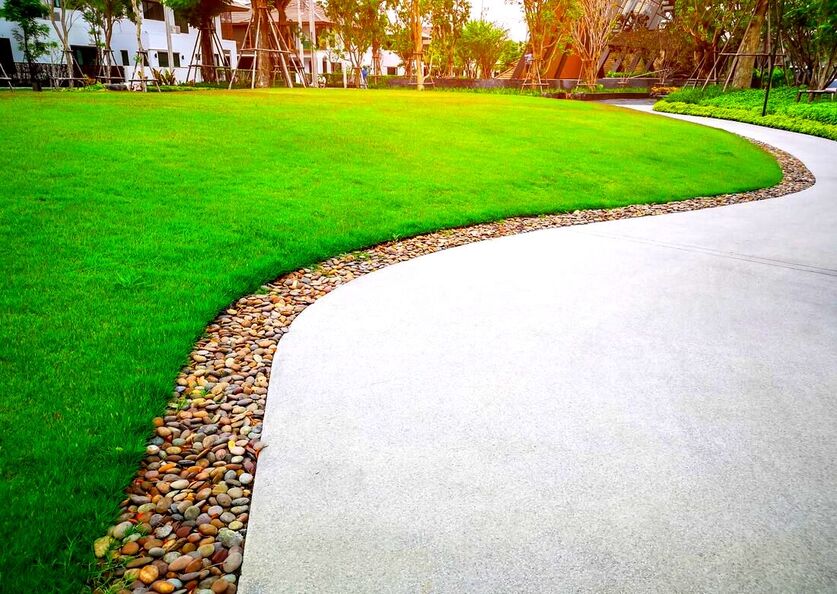
Landscape edging is a fundamental component of garden landscaping with its importance often being overlooked! There is no other landscaping element that has so many uses including both functional and aesthetic.
Well executed landscape edging has the ability to tie a garden design together defining spaces and adding structure. As well as allowing for seamless design flair, garden edging has many critical functions. Some of these range from aiding maintenance tasks to adding structural integrity. In this landscape edging guide I investigate the various functions and applications of garden edging. I also explore the many different landscape edging materials, styles and products available. I will provide an overview of edging options and how they can be utilised and installed within your project. Why is landscaping edging important?
Creating definition and structure
Landscape edging helps to define various garden elements including; lawns, pathways, borders, focal points and features. It can create clear boundaries enabling you to provide structure and fluidity to your design.
Aesthetic enhancement
Edging can add much appeal to landscaped spaces creating clean curves and perfect symmetry. They can also highlight features of interest bringing a sense of order and refinement. Masonry edgings in particular are good for forming visual textures and rustic appeal.
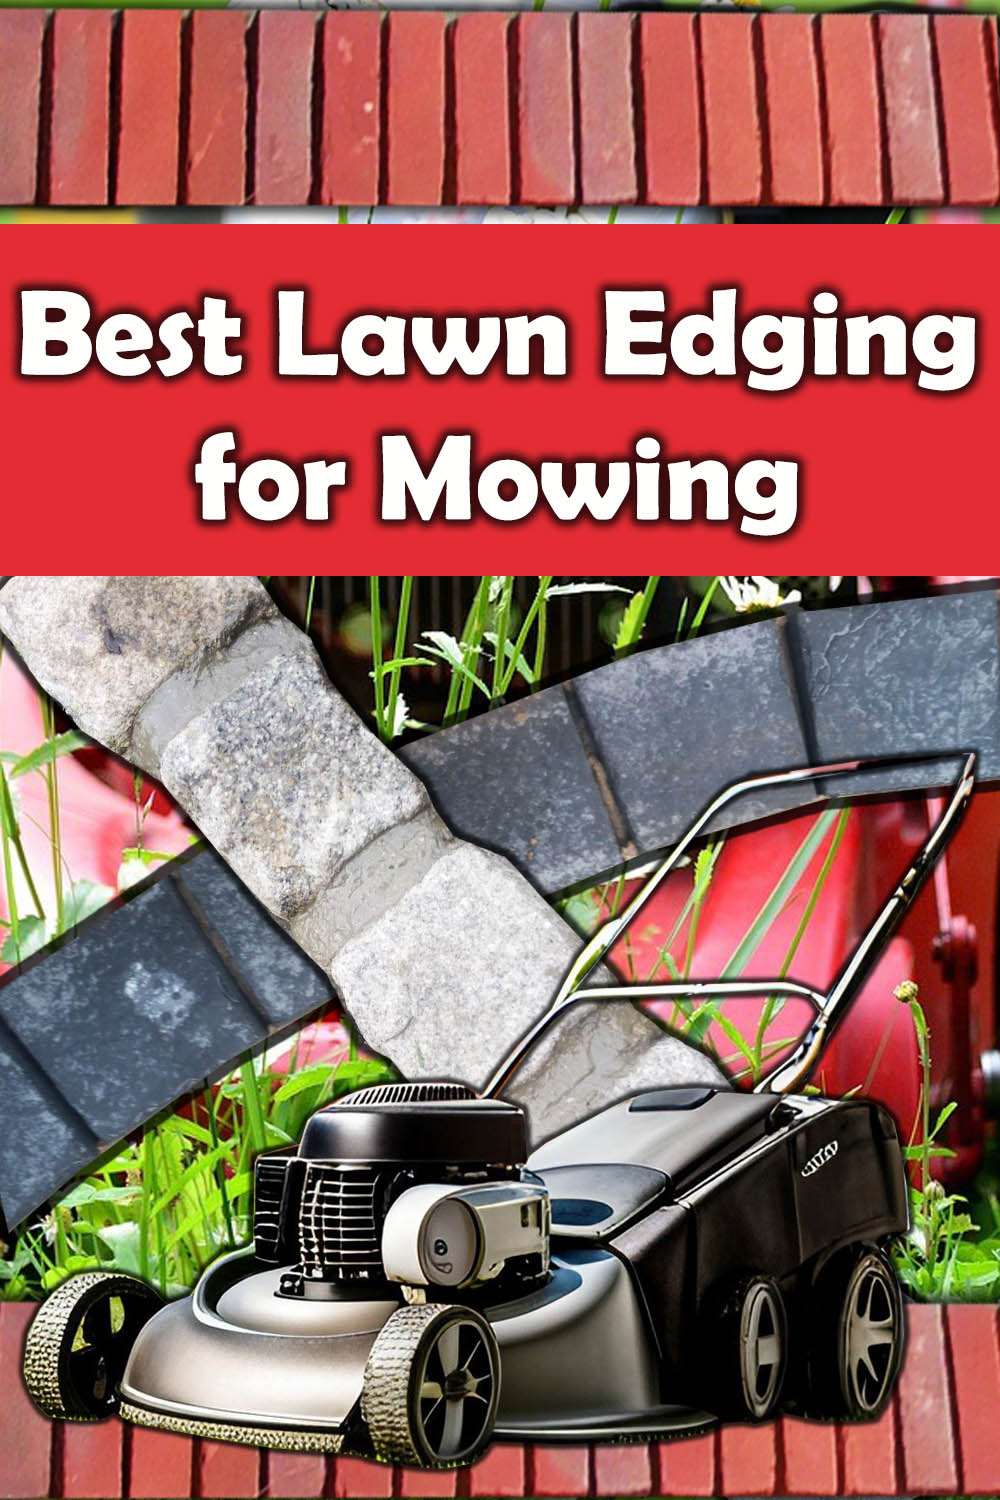
Grass & weed control
Landscape edging can create a defined barrier between flower borders and other surfaces. This can help prevent the encroachment of weeds and unwanted vegetation into other areas. By providing a broad separation between lawns and other surfaces enables easier maintenance and an effortless mowing regime.
Why not visit our article on the best edgings for mowing here. 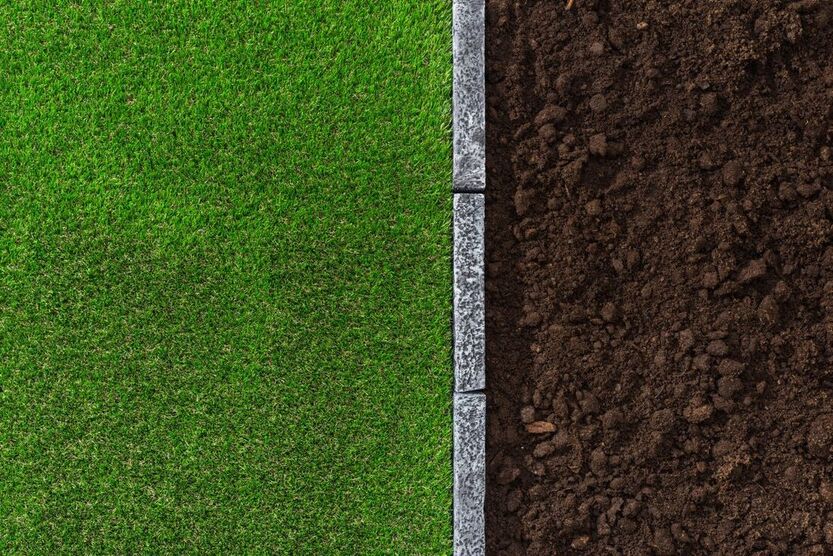
Soil retention & erosion control
Landscape edging installed correctly will help to retain ground and create a rigid boundary between soils. Particularly in the case of retaining edgings, robust edgings can help to level gradients and retain raised borders. Heavy masonry materials such as bricks and blocks are especially efficient at stabilising soil and preventing erosion.
Safety & accessibility
Edgings can play a vital role in providing clear and accessible routes through the landscape. This is especially important in larger gardens where some spaces may be out of bounds. Well installed edging can reduce the risk of trips and improve access to all areas of the design.
Water management
Edging can assist and dictate water flows around a landscape by setting surface levels and collecting water. They can be installed to help water flow away from unwanted areas such building foundations and living areas. Well levelled border edging to gardens can make levelling lawns and paving for water runoff much easier.
Why not visit our article about the best edgings for drainage here. 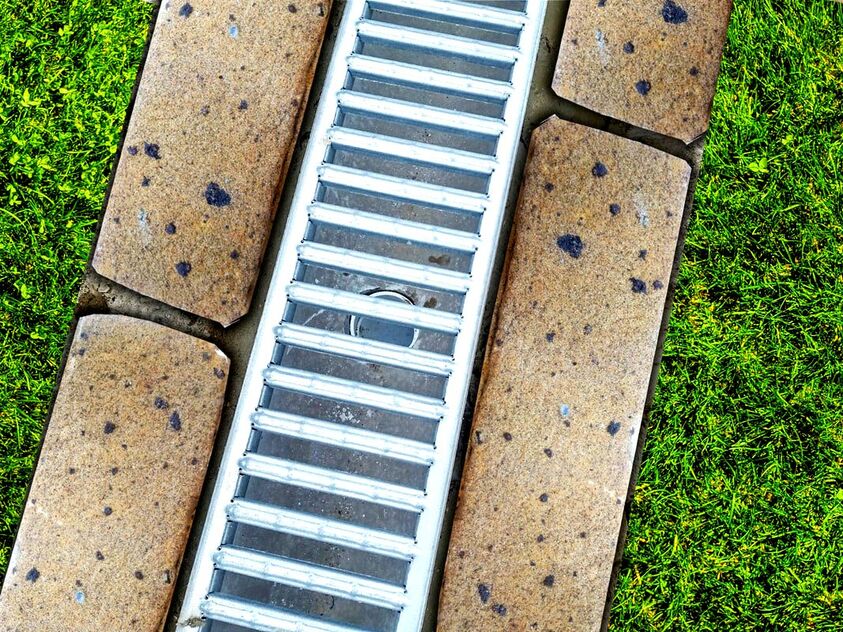
Plant growth
Garden edging helps to create defined growing spaces separated from compacted aggregates and lawns. This enables gardeners to isolate growing areas and ameliorating them for optimum plant growth. Well installed landscape edgings can help to retain mulches and prevent the encroachment of weeds.
Design uses for landscaping edging
Defining borders
One of the most crucial uses of landscape edging is creating defined borders. These clear boundaries can create clean junctions between paving, pathways flower beds and lawns. Defined borders allow you to add clarity and order to the design with a freedom to portray various shapes.
Creating visual interest
Landscape edging comes in a wide variety of products and is able to create numerous decorative effects. Whether it’s a row of bricks, vertical sleepers or curved steel, edging can enhance a gardens aesthetic appeal. Well designed and installed edging can greatly increase a landscapes visual interest.
Adding structure & form
Most landscape schemes have various zones and transitional spaces worked into their design. Landscape edging allows the opportunity to clearly define and realise these structures. Edging enables the landscaper to form geometric shapes and patterns establishing a rhythm to a design.
Accentuating landscape features
Landscaping edging has the ability to add spatial hierarchy to specific elements within a garden space. Edging can accentuate key features and focal points such as water features, trees and sculpture. Laying edging in squares and circles around such features can help to frame focal points and make them stand out
Softening harsh transitions
Broader landscape edgings have the ability to soften harsh transitions between different surfaces and level changes. For example installing a row of granite setts where a gravel surface meets paving. This can be applied to steps where different coloured or textured edging draws attention to level changes.
Creating contrast & texture
One of the most powerful impacts landscape edging can produce is creating bold contrasts. This especially so where bold, colour contrasts are involved! For example, black slate setts can make a dramatic edging border to light coloured aggregates. Consistent mortar joints in such edgings also create more course and exciting visual textures.

Promoting unity & cohesion
The great thing about landscape edging is it gives you the opportunity to form consistency throughout a design. Very often an outside space will have a broad range of varying landscape spaces. By using a consisting edging running throughout your can form more unity and cohesion within the garden.
Different types of landscaping edging
Brick
Bricks are a fantastic material for creating garden edging! Not only are they durable they come in a wide variety of colours, materials and textures. Created as a structural building material they also provide the opportunity to create raised and retaining edging. These can be used to build up steps, level changes and raised borders. Bricks also make fantastic flush edgings such aslawn mow strips and borders to gravel surfaces.
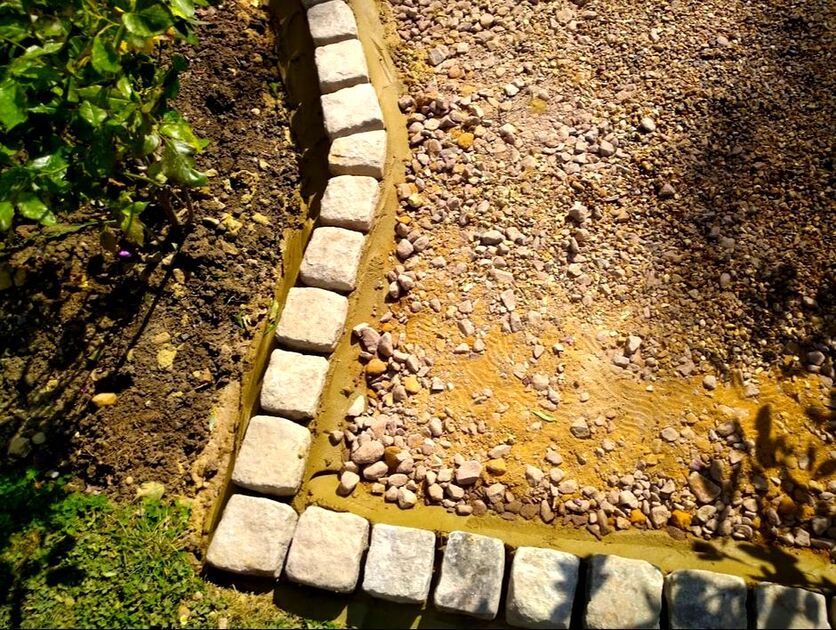
Natural stone setts
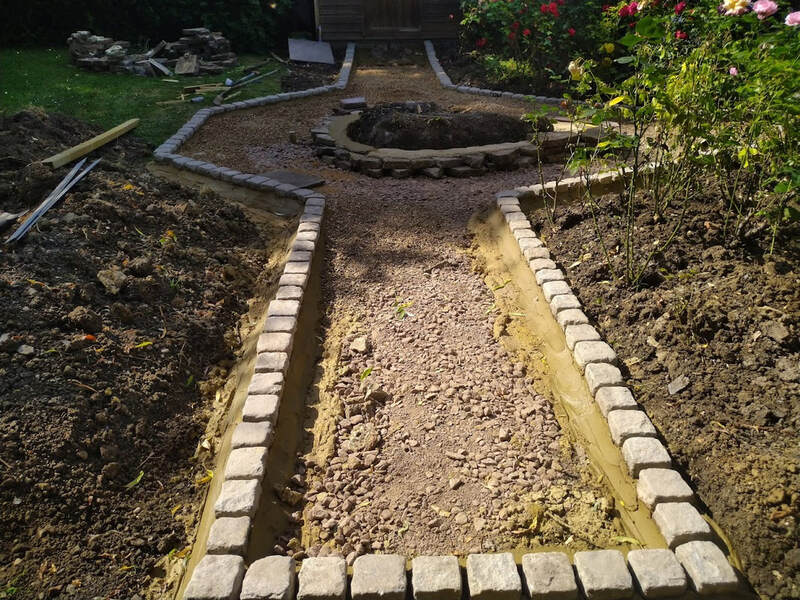
Natural stone setts are rough cubes of natural stone normally about 100mm cubed. These robust stone units can form strong retaining edgings to borders and gravel surfaces. Setts are particularly great at forming decorative borders to paved surfaces and transitions between different materials. The most familiar example of these is granite setts which have been used for centuries. When laid together setts have many mortar joints which create satisfyingly, coarse, visual textures.
Natural stone paving
Natural stone paving covers a wide range of edging products and paving on the market. Some materials such as Indian sandstone and slate have their own specific edging and coping products. However making landscape edgings from natural stone paving is relatively straight forward. You will need to cut down your paving into whatever shape or specification you desire. Paving can then be laid as flush edgings to lawns, flower borders or pathways. The benefit with this method is you can easily match edgings to existing patios and pathways.
Concrete edging
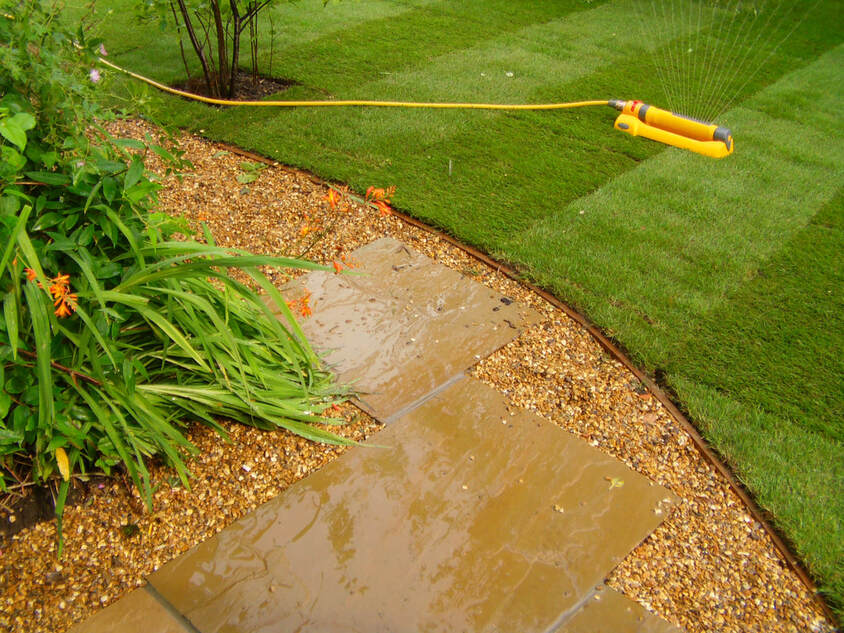
Concrete edging comes in a number of forms and products with varying construction methods. One of the most common concrete edgings is linear PC edgings or path edgings. These come in 1 metre long sections and around 150mm wide. Concrete edging can also be built using dense concrete blocks laid with mortar. These can then be capped, rendered, painted or clad with tiles or external cladding. There are many concrete blocks or pavers on the market such as block paving which makes effective landscape border edging.
Kerb edging
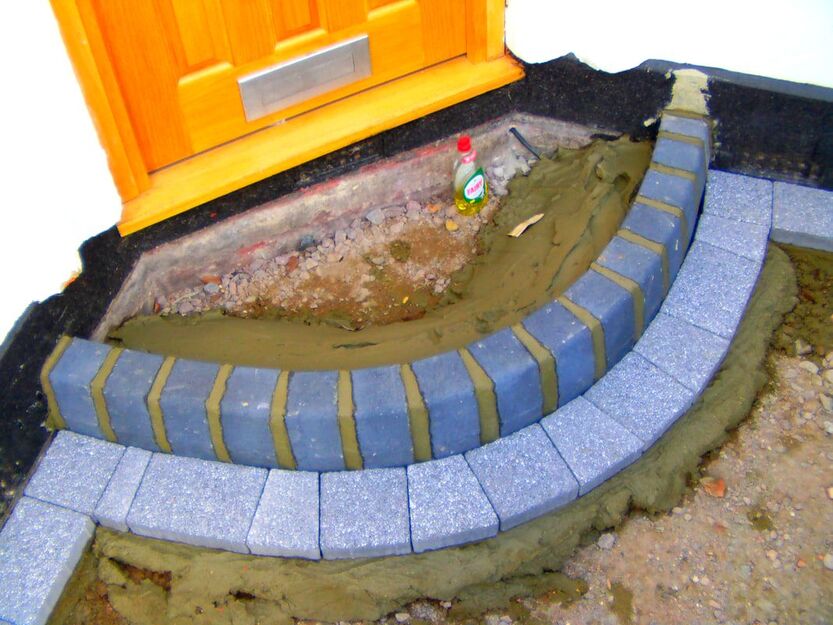
Kerb edgings are pre-cast concrete blocks specifically designed for landscaping and driveway projects. These bulky edgings are usually laid in long sections to form robust retaining features such as steps and borders. Due to their bulk these kerbs are particularly effective at creating level changes and retaining volumes of soil. Kerb edging blocks come in a wide range of colours textures and styles. Some common styles are chambered, bull nose and half battered edging kerbs. Many kerbs come in both rustic and contemporary styles making them suited for a broad range of landscaping projects.
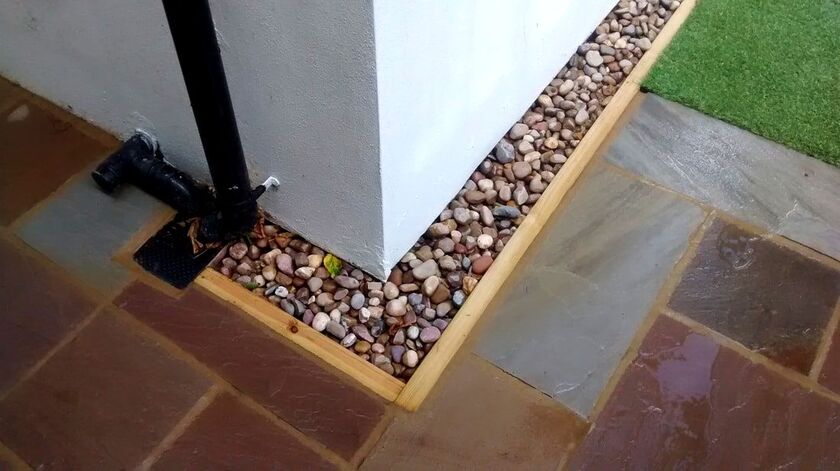
Timber edging
Timber is a popular material for landscape edging due to its natural tones and flexibility. However, timber is rarely a permanent solution due to its tendency to rot in outdoor conditions. However there are three common timber products successfully utilised for garden edging; sleepers, 6x2, gravel boards and log roll edging.
Sleepers
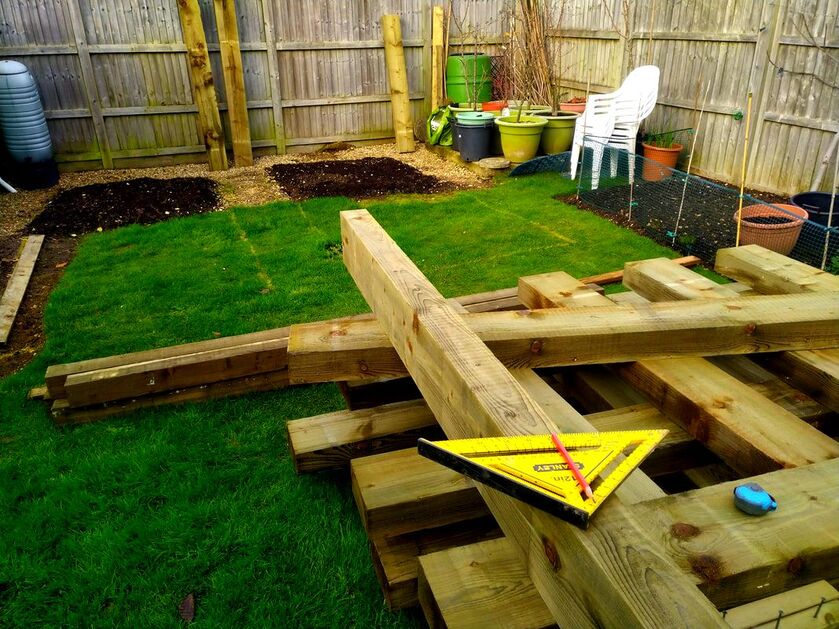
Sleepers are large, bulky sections of timber typically 3 metres long, 200mm wide and 100mm deep. Originally these robust cuts of timber where produced to base railway lines. However they have since become a popular building material within landscaping. Sleepers can make effective retaining edging and be set either vertically or horizontally. Horizontal sections are perfect for straight edging while vertical sections can be used for curves.
Gravel boards
Gravel boards are long, treated, timber board’s manufactured for installing under fence panels. Gravel boards lift panels up off of the ground to prevent contact with soil subsequently leading to decay. However these versatile boards have a number of other uses including landscape edging. As these are flexible they are perfect for forming curved or straight edging to paths and lawns. Boards are usually fixed to 50x50mm pegs driven into the ground with external grade screws.
6x2 timbers
6X2 Timber is traditionally used in construction for roofing and flooring joists. However external grade treated 6x2 timbers are perfect for creating straight landscaping edging. Traditionally used for joisting decking this timber can make fantastic flush edging to lawns and pathways. 6x2 can also be utilised for raised edging to borders and vegetable beds. Although treated in damp soils this edging may degrade after around 10 years.
Log roll edging
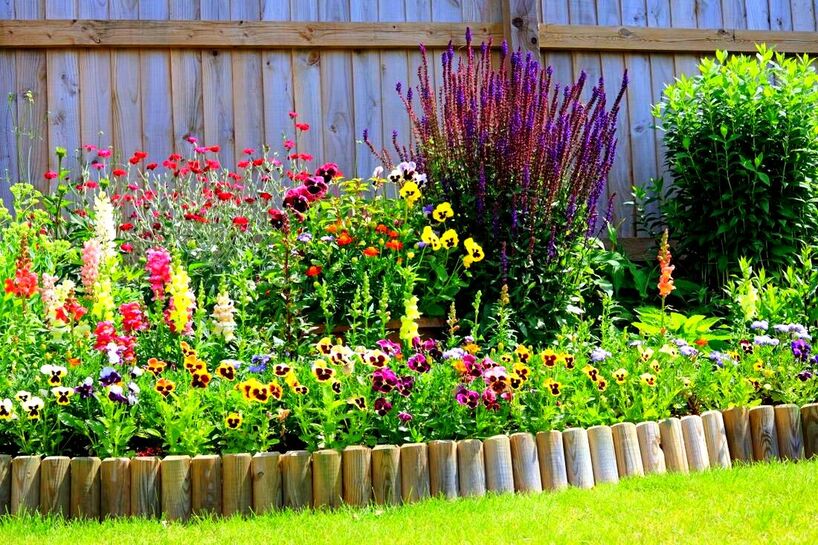
Log roll edging is a popular garden edging consisting of semi circular log style timbers connected by metal wires. The wire gives this edging an ability to flex into almost any shape or curve imaginable. It is typically used to form a slight raised edging to flower borders to help retain excess soil. This edging is highly decorative and comes in a range of different heights and lengths.
Metal garden edging
Metal garden hedging is a relatively new type of garden edging often loved for its contemporary look. Metal edging is often robust, flexible and decorative making it very versatile and suitable for many applications. Due to its thin profile it has become perfect for scenarios with a need for inconspicuous edges. For example modern lawns and surfacing such as concrete and resin bound aggregate.
How to install garden edging
Although most landscape edgings come in a broad variety of materials and products their instillation is often similar. Below I have listed the most common steps needed to install garden or landscape edging.
Marking out your edging
Marking out where your edging is to be situated is a crucial first step of landscape edging installation. Marking out allows you to set out perfect straight lines or the gentle curves of your projects design. Marking out can be achieved with string lines, pegs or marker spray.

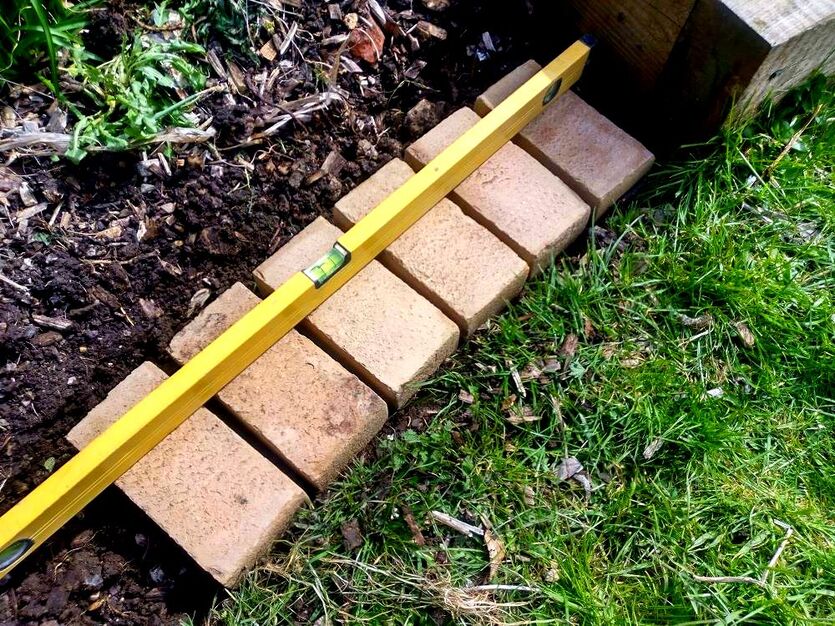
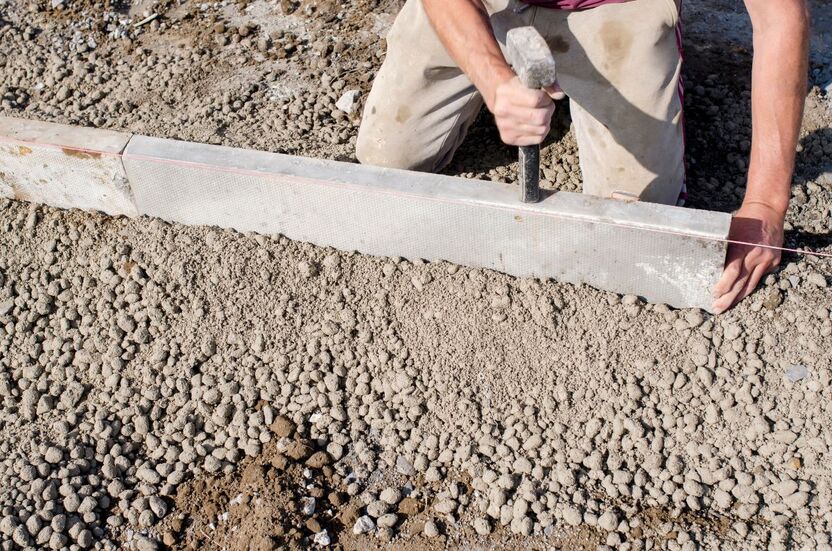
Checking your levels
Landscape edgings either have to be installed level or to and even gradient. Therefore it is a good idea to mark out your completed height as well as position. This is best done with a tight string line or can be marked with pegs. These market heights will determine the depth of your excavation to set in your edging.
Excavating your edging channel
Your depth and breadth of landscape edging excavation will depend upon the type of edgings you are installing. If you are installing stone or brick you will require a broad and deep excavation to accommodate sub-base. Narrow and thin edgings will require a much thinner excavation to set in the edging.
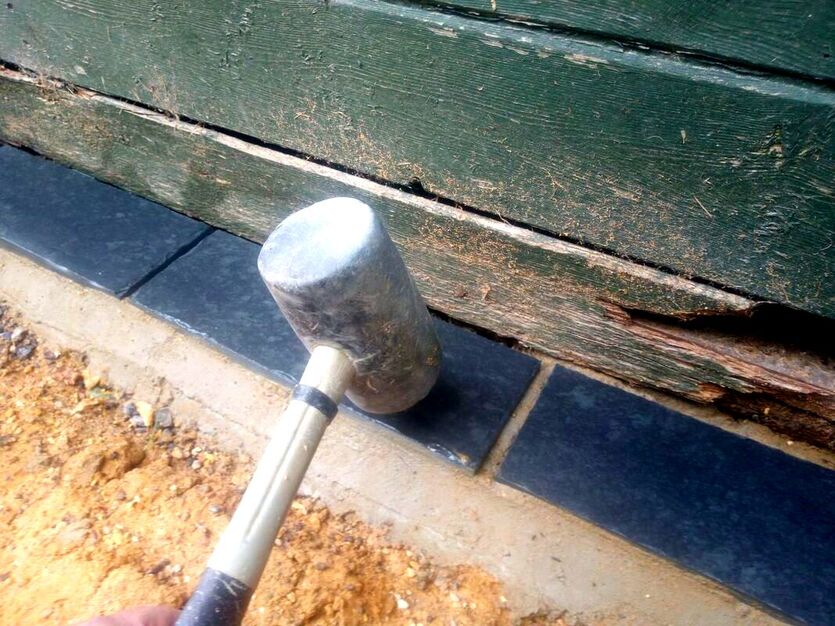
Fixing and bedding down your edging
The method of fixing landscape edging will also depend on the type of your edging product. Masonry materials will be bedded down upon mortar or concrete on top of a sub-base. Whereas timber edging is normally fixed to timber pegs using external grade screws.
Why not visit our article which explains how to lay concrete block edging on mortar here. 
Backfilling around your edging
Once your edgings are installed you can backfill any excavated soil back around your edgings. You may have installed higher edgings than your existing level to raise your gardens soil. If so you can bring in new soil and spread it to build up new levels.
Thank you for reading our article on the ultimate guide to garden edging. If you require garden edging services why not contact Buckinghamshire landscape gardeners today?
Based in Amersham we undertake a wide range of landscaping services including; brickwork, paving, pathways, edging installation, fencing, drainage systems, garden walls, landscape design, garden clearances, new lawns garden re-levelling, ponds, wildlife gardens and gravel installation. We cover most of Buckinghamshire including Hertfordshire, Oxfordshire and the local regions of Amersham, Aylesbury, Beaconsfield, Chesham, Chalfont Great Missenden, Gerrards cross, High Wycombe & Tring
'As an Amazon Associate I earn from qualifying purchases'

This article contains affiliate links
There is no better way to create an outside space for seating and entertaining than a new patio.
Patios provide a level and robust surface perfect for bringing the inside, outside. Laying your own patio can also dramatically enhance the spatial transition between home and garden. If you want to know how to lay a patio as a beginner you have come to the right place! In this article I have broken down all of the steps and considerations you will need to lay a patio yourself successfully. 
In principle laying a patio correctly is not difficult, however it is easy to get it wrong if you have little experience. The most important part of laying a patio well is good preparation.
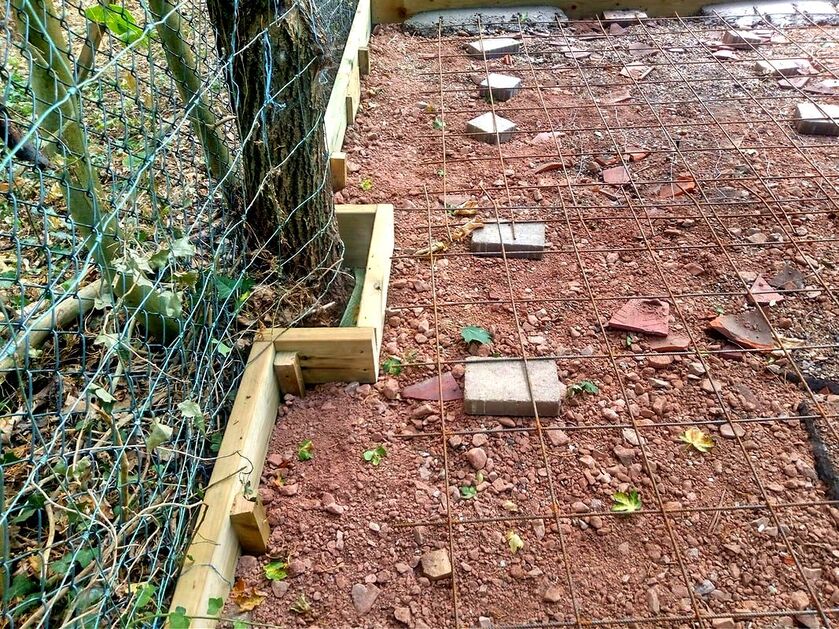
If your levels have been meticulously planned and your sub-base installed correctly it will be much easier. In this article I will explain how to lay a patio correctly on a solid mortar bed step by step. I will include step by step images taken from personal patio projects I have laid over the past 20 years. Feel free to email me any specific questions you have after reading this patio laying guide. Tools for laying a patio
Materials list
Paving selection
The type of patio paving you choose does ultimately come down to your personal choice. However, from experience there are some things you should consider. What style are you trying to achieve? Is your garden style modern, traditional or does it have a particular theme? It is often wise to choose materials which are in keeping with your surrounding home or garden theme. For example if you live in a rural cottage you may wish to use sandstone slabs. 
If you have a very modern taste then perhaps porcelain or a tile like slate paver may be more suitable.
Remember that outdoor patios are exposed to many more staining threats than indoors. Bright white or cream paving ay look great in magazines but may not be practical for your patio. Bird poop, leaf tannins, mud and spillages can stain very light coloured white and cream paving. Marking out
A very important part of planning your new patio is marking out. Deciding what shape and size patio can become a tricky endeavour. Sometimes it is a good idea to create a scaled drawing of your patio area to resolve a design proposal. If you are not a natural designer mark out various shapes and outlines until you are happy with the layout. Once you have decided on a scheme this can be marked out with spray paint or pegs. 
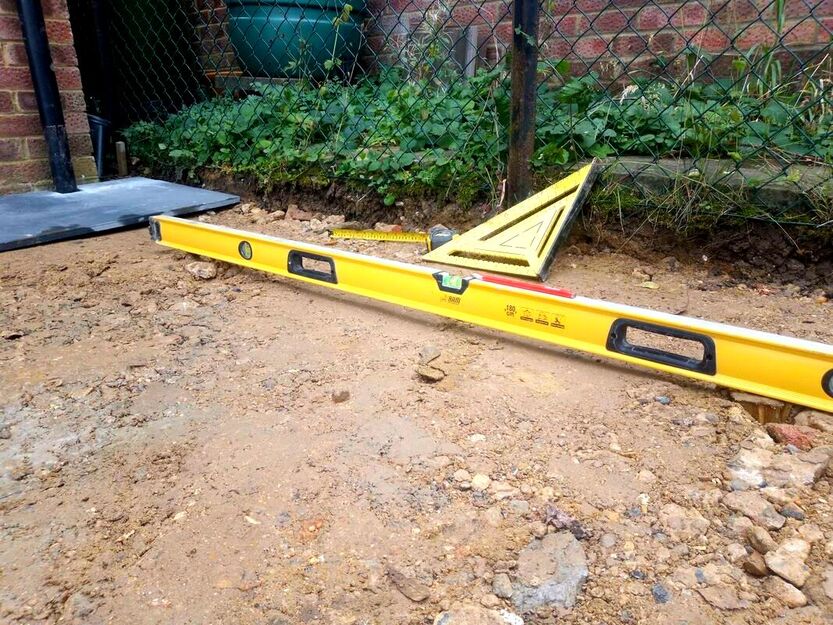
Working out levels
Working out your patios levels is one of the most important parts of patio installation. You will need to mark out your finished level across your patios surface area. This can normally be achieved using a long spirit level and tapping in timber pegs. Identifying the completed level will enable you to locate any necessary retaining features to the paving. This is often necessary if you are building a patio upon sloping ground. 
When working out your levels ask yourself; where does surface water runoff need to be directed to? You will subsequently then need to level your paving with a ‘very slight’ fall or slope in that direction.
This will also help you to identify the necessary height of any surrounding steps or retaining features. Retaining walls and steps
If you require a retaining wall or step these are best installed before you lay the patio itself. This is so the structure can retain the sub-base for a suitable and thorough compaction. Retaining walls and steps are typically based upon a robust concrete foundation excavated into the ground. The size of the concrete foundation will depend upon the size of the retaining feature installed. 
Excavation
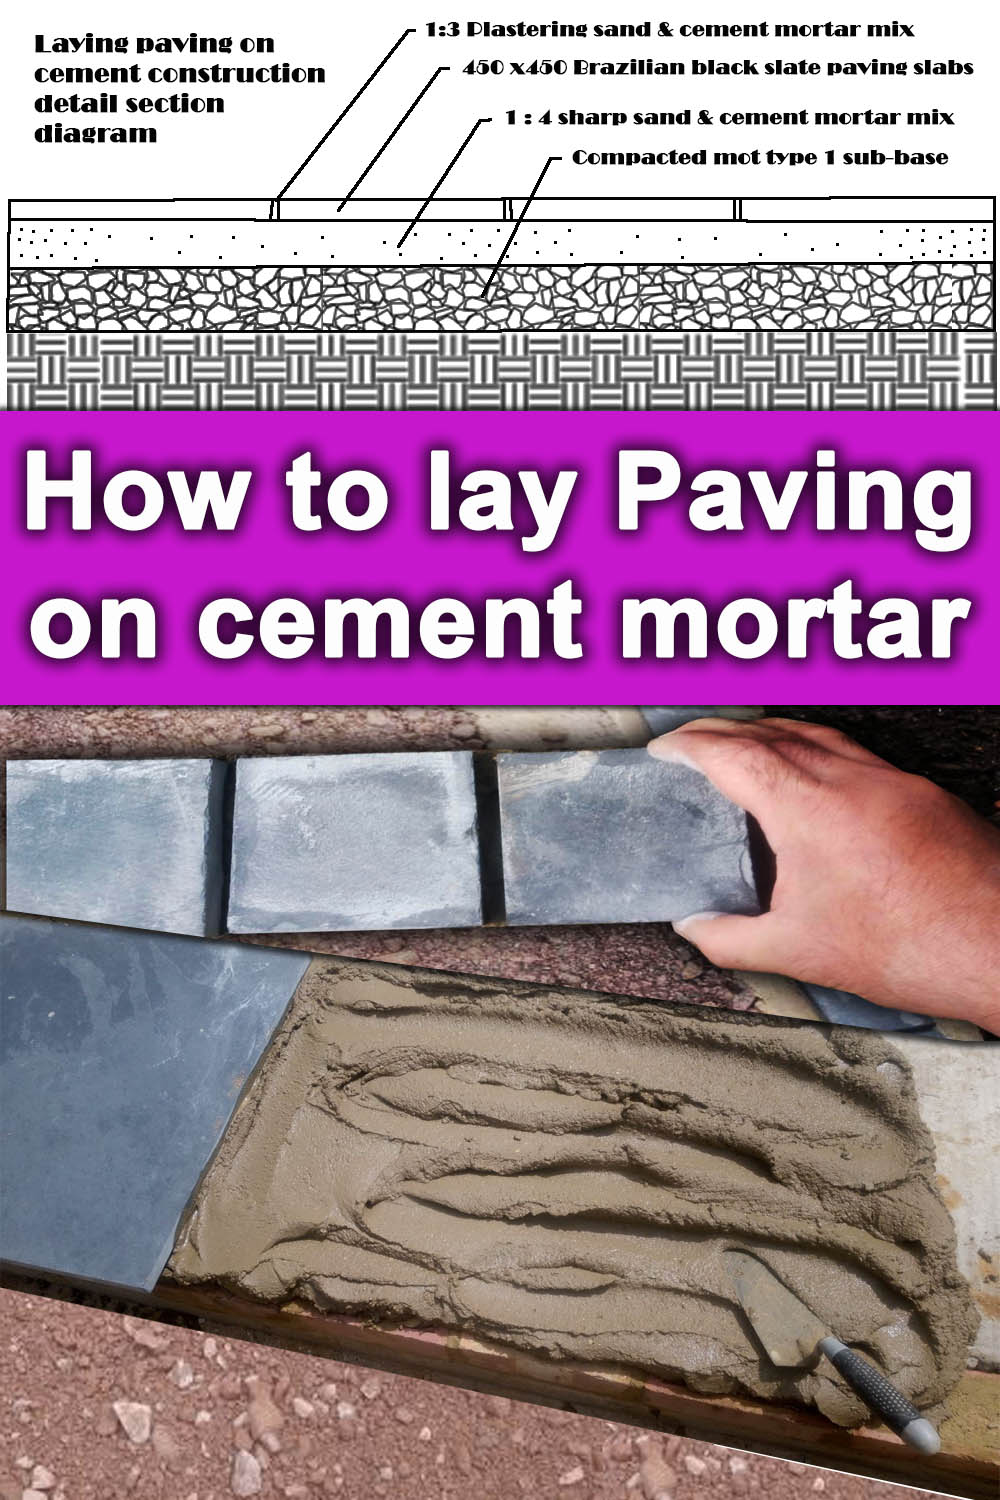
Once you have identified your completed level and installed any retaining features you can excavate your patio. Generally you will need to excavate to a depth of around 165mm. This will allow around 25mm for paving, 40mm for mortar and 100mm of compactable sub-base. 
Excavate the patio area as neatly and squarely as possible with all loose soil removed from the base. The base of the excavation should be solid and firm with not soft ground or movement underfoot.
The best way to remove the soil from site is in a skip. Why not visit our article on how to fill a skip with soil here. Laying the sub-base
Once you have excavated your patio you must now spread your sub-base. The best material for this is compactable mot type 1. This dense stone aggregate has angular particles which lock tightly together when compacted. I find at this stage it effective to peg out your sub-base aggregate level with pegs. This does two things! Firstly, it makes it easier to spread your aggregate to a preferred level and makes the paving easier to lay. A sub-base spread and compacted evenly will allow for a consistent and even mortar bed. 
Once your aggregate has been spread evenly to the top of the pegs it can be compacted. This is best achieved with a vibro-compaction machine or whacker plate.
A good tip is to spread your aggregate slightly higher than the top of the pegs. This will help the aggregate to settle to top of the peg during compaction. 
I have also learnt that if mot sub-base is slightly wet it compacts much better making a stronger base. Make sure you travel over the base with a whacker at least 5 times!
Setting up your laying area
When mixing and laying you’re paving I find it important to have everything to hand! This involves setting up a good laying area with all your materials and tools. I like to place my mixer, sand and cement just slightly back from my laying area. This will prevent splashes from the cement mixer staining the paving. It is good practice to lay your materials down onto plastic sheets to collect any mess. Once you’re mixing and laying area is set up you can commence with mixing mortar. 
Mixing your mortar
To begin mixing your mortar, turn on your mixer and empty 2 gallons of water into the drum. (2/3 of a builders bucket) Now add a cap full of mortar plasticiser and let it spin for a couple of seconds. Now add half a 25 kg bay of cement into the mixer and allow it to hydrate fully. You are aiming for a 1:4 ratio, if you are unsure, each mix can be measured out in buckets. I find half a bag of cement and 12 shovels typically works well. 
Keep adding sand gradually until it reaches a stiff but workable brick laying mortar. Slab laying mortar must be wet enough to stick but not so wet the paving floats.
However too dry and powdery and your paving will not stick and form a vacuum seal with the pavers. Make sure your mortar is well mixed, stiff but workable. Laying your first pavers
One of the most critical stages of laying your patio will be the first few pavers. This is especially so if you have never laid paving before! Your first paving slabs will set your level and line for your whole patio. Before you start laying, use a long spirit level to get an idea of your sub-base level. If you have a slight gradient you know you will need to lay to that fall. It is always best to start laying your paving along a straight feature such as a wall. Try to plan your cuts so they are positioned in a less prominent and noticeable location. 
Dob some mortar mix onto your sub-base and make peaks and valleys into the mortar. Place your first slab onto the mortar and start to tamp it level.
You want a consistent mortar bed underneath each slab with no gaps or voids. This does take some practice initially but you will soon get a feel for it! Take time levelling your first few pavers with a level so they are consistent and flush. Keep going trying to keep your mortar bed to the same consistent thickness as you lay. Keeping your lines square
As you lay further out from your first few slabs keep a close eye on the edges of your paving. When you look up the length of your patio you do not want to see any wavy lines. Consequently you should check your joints are consistent as you lay. This can be done with a string line or long straight edge as you lay. Using joint spacers between your individual slabs can also help to keep lines consistent. 
Laying your paving to falls
As you lay, make sure your falls are directing surface water to where you want it to travel. This could be a channel drain plumbed into a drainage system or simply a lower part of your garden. Laying your paving to a consistent fall can be very tricky and can take some skill. However, it is possible as a beginner if you take your time and keep your paving flush. Just make sure the bubble on your spirit level has a slight fall so water gently seeps away. You do not want a visible slope or low spots within the surface or you will get puddles. 
Ensuring good patio drainageThe level of patio drainage you will need to install to a new patio will depend upon the circumstances. If you are replacing soil or lawn with paving the excess surface run off will need to be mitigated. This will typically involve collecting surface water within a channel and diverting it to a soak away. If your area of paving is very small however this may not be necessary. To find out more about the right drainage for your patio visit our patio drainage article here. If you want to install drainage soak-aways or channel drains visit our step by step guides below. How to install a channel drain How to install a drainage soakaway 
Laying around drains and manholes
When laying a patio it is very common for your paving to fall on top of existing inspection covers. It is never ideal for these features to spoil your project or dictate its level. Consequently it is always best to raise these or lower them depending upon your new level. This is not as difficult as it always seems! you will either need to reduce or raise the chamber. For narrow chambers this could be simply cutting down or extending a plastic pipe. 
However larger chambers brickwork may need to be lowered or added too. To make sure your patio looks amazing it is best to install recessed covers to inspection chambers.
These recess covers allow you to lay paving inside the lid of the cover so the surface isn’t spoiled. Why not visit my step by step guide on how to lay a patio recess manhole cover here. Cutting in pavers neatly
As you lay pavers down you will need to cut in edges and around any obstacles. This is typically executed with an abrasive wheel such as a diamond blade and grinder. This is not particularly difficult but will require some skill and careful measuring. For extra safety always wear safety goggles, safety boots and a dust mask. Never put too much pressure on the grinder and let the cutting blade do the work. 
Haunching & pointing
Haunching and pointing is the infilling, sealing and smoothing down of mortar around the edge of pavers. Typically a triangular fillet of mortar is rendered to the edge of paving to add extra strength. Such pointing also seals the paving preventing water seeping under the paver. Larger haunching can be applied to retaining edgings and pavers on slopes or exposed patio edges. Pointing a smooth mortar fillet is not difficult but may take some practice to master. 
Grouting your paving
Grouting a patio should be a simple endeavour, however more often than not it is the most problematic. Grouting is a key element of completing your patio sealing it and finishing it neatly. There are many products on the market claiming to make pointing and grouting ‘easy’ However, I personally find the finish poor quality and prefer to grout the old fashioned way. It takes much longer but looks far superior in my opinion but products like Easy joint do work perfectly well. I mix 3 parts plastering sand to 1 part cement and mix dry until a consistent colour. I then add some weather sealant mixtures to some water and very gradually add it to the mix. If you add too much water you will spoil the mix and stain the patio. 
The mix should be granular and have the consistency of brown sugar. You should be able to form a ball in your hand with no seeping water from the mix.
This will enable you to achieve a sealed finish without staining your paving. Make sure grouting is done when your paving is bone dry with not threat of rain for 24 hours. Ram the mix into your gaps and joint them neatly with a pointing iron or old hose pipe. Gently brush off the any excess grouting mix as you go to reduce the threat of staining. Why not visit my full step by step patio grouting guide with pictures here.
Thank you for reading my article on how to lay a patio. If you have any questions regarding your own project feel free to email me via the contact page.
If you require patio laying services in Buckinghamshire please get in touch! Based in Amersham I serve most of Buckinghamshire as west as, Hertfordshire, Oxfordshire, and North West London. We also have also opened a Norfolk office. Our patio laying services typically cover: Amersham, Aylesbury, Bovingdon, Chalfont, Chesham, Hyde Heath, Great Missenden, Princes Risborough, High Wycombe, Penn, Beaconsfield, Tring, Gerrard's Cross and Denham. Contact us Below I will link some of my other articles you may also find relevant. Happy laying!
'As an Amazon associate I earn from qualifying purchases'

This article contains affiliate links
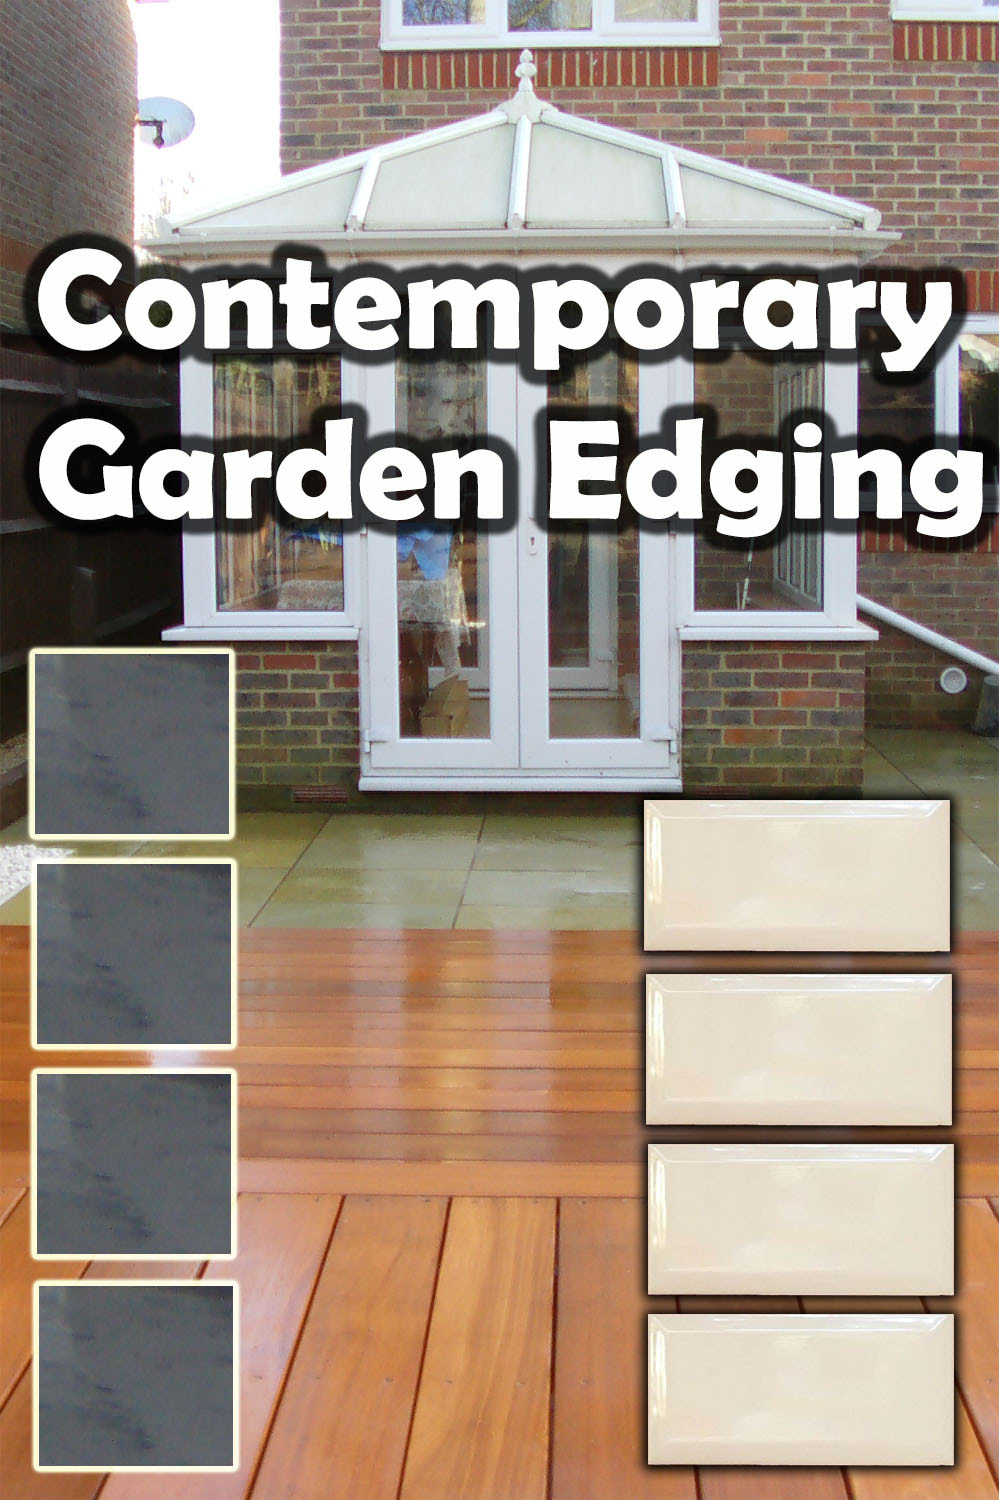
When it comes to modern and contemporary landscaping, definition and structure is everything. That’s why choosing the best modern garden edging for your contemporary project is essential.
Such edgings do not just serve aesthetic purposes but also have many functional qualities. Edging materials help to retain aggregates, define paving and help to direct circulation of a space. 
At the same time modern edging should be bold forming unique shapes and contrasts to the overall design. From the crisp look of stainless steel to the granular textures of granite there is plenty to choose from.
In this article I list 9 modern garden edgings perfect for any contemporary landscaping project. 1. Rendered concreteCement based renders upon concrete block can create the perfect smooth surface for a clean, modern feel. In modern gardens rendering can be painted pretty much any colour to compliment any design. A typical choice is to paint renders light tones of cream and white to contrast with darker paving. A good example of this would be white render with black slate. Low retaining edging walls can be built to line paths and walkways and capped with natural stone. 
2. Glazed bricksGlazed bricks present a fabulous opportunity for creating unique, modern, edging which has impact. Particularly white glazed bricks provide purity and gloss which really adds a sparkle to contemporary landscaping. These bricks are perfect for edging lawns and flower borders as well as raised borders. They have a natural water and weather resistance which make them a durable and suitable choice. 
3. Modern block paving
Block paving is a very common paving material normally utilised for driveways. However, block paving’s popularity has led to a great variation of colour tones and styles. There are now plenty of block pavers which lend themselves to contemporary landscaping projects. These can easily be laid as flush modern garden edging to lawns, pathways and flower beds. Pavers such as Marshalls Argent and Driveline metro are good examples of these. 
4. Granite setts
Granite has been used as a building and paving material for thousands of years. Granite setts have always been a popular paving material for public spaces and streetscapes. Due to its igneous formation granite is extremely dense and weather resistant making it perfect for external edging. Its light colours and speckled texture works extremely well for contemporary style gardens. 
5. Cut paving
Cut paving is an underrated landscape edging perfect for flush border edging and mow strips. Paving slabs can be cut into strips, blocks and even setts to create a broad range of garden edging. This approach works really well for modern edgings especially using contemporary style paving. Black slate, porcelain and granite paving work particularly well as flush contemporary edging. 
6. Kerb edgingsKerb edging come in a broad variety of varying edging products and specifications. Most kerb edgings are retaining edgings manufactured using concrete and colour dyes. These kerbs are traditionally made to work alongside block paving and patio landscaping projects. Kerb edgings are generally bulky and robust, perfect for retaining edging to steps and raised flower beds. 
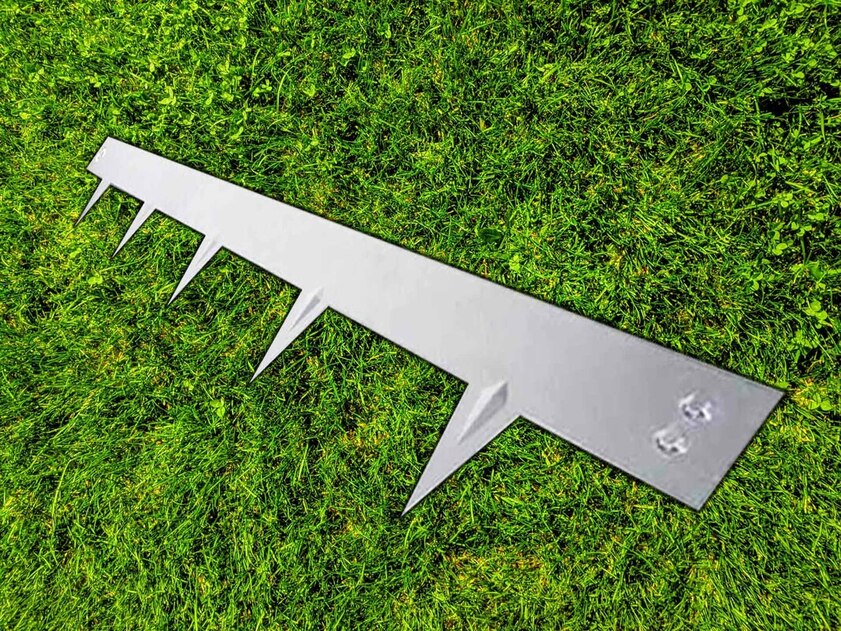
7. Flexible metal edging
Flexible metal edging has become an increasingly popular choice within current landscaping trends. The interest in clean lines and minimalist styles has made this metal edging desirable for many external applications. This edging is perfect for defining new lawns and pathways as well as retaining gravels. Leading brands have a minimum thickness of 2.5mm and come in arange of styles like ‘Core Edge’. 
8. Engineering brick
Engineering bricks are well known, commonly used bricks within the construction industry. These bricks are well favoured for their dense structure and impervious nature. Kiln fired twice at extremely high temperatures the external surface becomes glazed. This gives the bricks an attractively uniform colour and enhanced durability. Blue engineering’s make particularly effective, modern, garden edgings to lawns and patios. 
9. Contemporary stack cladding
Stack cladding has become particularly popular for its unique texture and contemporary style. Although not technically an edging this cladding can be used to clad retaining edging and low wall borders. This can create a real modern look to functional landscape edging. For flush edgings, stack cladding can be set into strong mortar or attached to in-situ concrete installations. 
Thank you for visiting our article on modern garden edging for contemporary gardens. Below I will link to some other articles you may find relevant.
If you require modern or contemporary landscaping services do not hesitate to contact us. Based in Amersham, Buckinghamshire, we serve all of Buckinghamshire and the neighbouring counties of Oxfordshire and Hertfordshire. We have also just opened our Norfolk office.
'As an Amazon associate I earn from qualifying purchases'

This article contains affiliate links
The best way to achieve a clean looking garden is to have well defined lawns and borders. However, unless you have well installed and robust edging this can be a challenge.
Grass has a remarkable ability to spread to neighbouring areas and colonise inhospitable ground. This typically results in grass creeping onto beds and flower borders blurring the boundaries between the two. In this article I will explain how to stop grass growing and escaping onto flower beds. I will also list and summarise six lawn edgings to stop grass escaping onto borders. Landscaping membrane
One of the best ways to stop grass growing inside flower borders is to surface them with landscaping membrane.
Not only will this membrane stop grass from growing, it will also prevent other weeds from establishing themselves. The membrane can be cut around existing plants and planting pockets created for new planting. However landscaping membrane should be covered by another medium such as gravel or bark chippings. 
Gravel
Gravel upon membrane can be a very effective way of suppressing grass and other weeds on borders.
Not only can the gravel suppress weeds it can also add interesting colours and textures within your landscaping. As gravel is a natural stone aggregate it can help to reflect sunlight and boost warm microclimates. This is particularly beneficial if you are trying to grow a greater range of plants or more exotic species. 
Mulching
Mulching typically involves spreading organic materials such as composted leaves and wood chip on planting beds. Not only can this help fertilise soil and retain moisture but also prevent weed establishment. Mulch is usually spread directly on top of the soil to help condition the soil and boost soil life. However more decorative mulches such as pine bark and bark chippings can be spread on top of landscape membrane. This prevents the mulch from degrading too quickly and provides an extra barrier to weeds. 
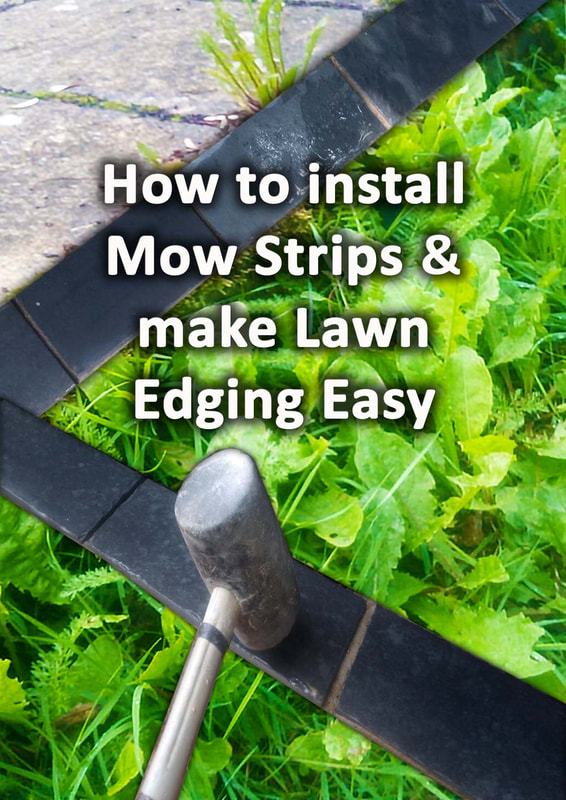
5 Edgings to stop grass growing in flower beds
If you want to stop grass growing onto flower beds from lawns the best way is with garden edging. Some landscape edgings however are better than others at retaining grass and stopping it from spreading. Below I have listed five of the best edging materials to stop grass growing onto flowerbeds. 1. Brick edging
Brick edging has been one of the most favourite garden edgings over the decades. This is because bricks come in a wide variety of shapes, textures and colour tones.
Bricks can be laid in a variety of different arrangements and patterns making them very versatile. A very popular method of laying bricks as edging is to lay them in a soldier course. This creates a robust and broad edging perfect for edging lawns and borders. The extra thick edging acts as a wide barrier to stop grass growing onto flower beds. 
2. Block paving
Block paving is a common paving material traditionally used to surface driveways and car ports. Due to block paving’s popularity it has become available in a broad variety of styles, sizes and colour tones.
This has consequently led to its adoption in other outdoor projects such as garden landscaping. Block paving has now become a popular edging materials for lawns and pathways. Like brick it is typically laid on cement mortar upon a compacted sub-base. This makes it a formidable barrier to grass attempting to grow from lawns to flower beds. 
3. Paving edging
Just as brick and block paving can be installed as garden edging so can conventional paving. The added benefit here is you can make your edging match your patio paving perfectly.
You can cut paving into linear slithers, brick shapes or even square setts. This gives you complete control over what design or affect you wish to create. It is advised to score some grip lines to the underside of your edgings with a grinder. This will enable your edgings to bond well to your mortar base. Paving prepared in this way will create robust edgings which prevent grass from growing on flower beds. 
4. Granite setts
Granite setts have been a reliable building and surfacing material for millennia. Made from dense granite these cubes of stone are extremely weather resistant and durable.
Granite setts can easily be laid to form straight lines or curves making them very versatile. Their light colour tones make them an effective contrast for lawns and flower borders. Granite setts have an ability to work well with any garden design or style. This makes them an effective choice for garden edgings to lawns and flower borders. 
5. Metal garden edging
Flexible metal edging has become an extremely popular garden product for both straight and curved edgings.
These edgings are highly prized for their versatility and contemporary feel. Metal garden edgings are extremely effective for cleanly defining the edges of lawns borders and gravel surfaces. When used to edge lawns, their metal edge prevents grass from creeping onto borders and flower beds. 
Thank you for reading our article on how to stop grass growing on flower borders. If you require garden edging services please do not hesitate to contact us.
Based In Amersham, Buckinghamshire we undertake a wide range of garden landscaping services. Below I will link to some other articles you may find useful.
'As an Amazon Associate I earn from qualifying purchases'

This article contains affiliate links
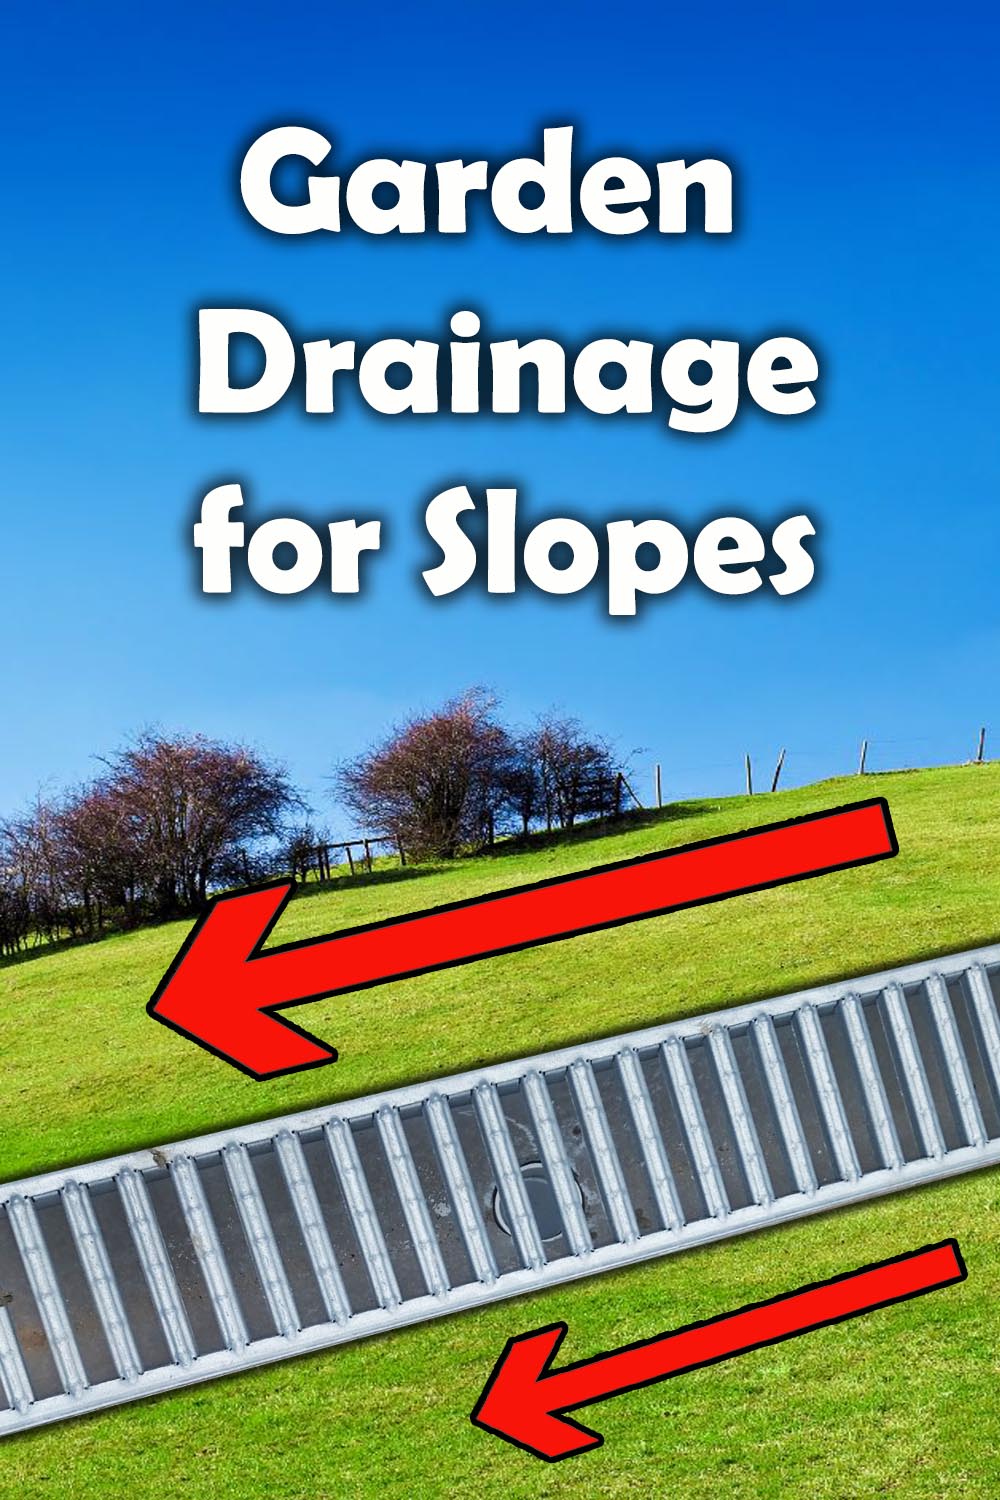
When it comes to solving garden drainage problems many instantly think of expensive drainage systems and pump installations.
However in my 20 years experience of resolving landscape drainage issues the solution is often something much simpler. Most garden drainage problems occur due to a sites surface levels. This could be the levels and gradients of the garden itself or surrounding properties. A gardens ground level should allow excess water to naturally flow from your highest boundary to your lowest boundary. This is how landscapes have naturally drained for millennia. The problem arises when manmade interferences and installations block and trap water. Here I will summarise the importance of levels and how they can be improved for efficient garden drainage. Assessing existing levels
If you are encountering garden drainage problems one of the best things you can do is assess your surface levels. Ask yourself the question; is standing water or boggy areas in low spots? Are surrounding properties higher than yours causing water to run to the lowest point? Are nearby installations increasing surface run off or trapping water within your property? Most of the time answers to these problems will probably be met with a ‘yes’. Consequently you will need to assess your surface levels. Mark out all of the worst effected boggy and saturated areas in the garden. 
Then analyse your site from multiple directions try to work out the lie of the land. You can use tight string lines and laser levels to get a picture of your sites high and low spots.
The best way to solve garden drainage with levels is to realise a flat and level ground plain. If your garden is on a natural slope, a flat and flush soil level should be laid to that gradient. You want your new flush and levelled garden to fall to your lowest garden boundary. Below I will list and explain the individual processes involved in garden levelling for drainage. Alleviating compaction
A very typical characteristic of boggy gardens is excessive compaction. This is especially so in low spots that collect water in times of heavy rain. Moist soil compacts extremely well underfoot leading to more compaction and more water pooling. The result is a continued cycle of compaction and standing water. Therefore before levelling your site you will need to de-compact your subsoil. 
This is best achieved with an excavation machine and a ripping hook. This strong metal attachment rips deeply into the ground breaking up compacted subsoil.
Such action will allow surface water to percolate your underlying ground once again. Alternatively, you can dig your soil over deeply with a digger bucket or by hand on smaller areas. Amelioration for better drainage
Soil amelioration is often known as improving a soils structure and fertility for plants. However, soil can also be ameliorated for the sole purpose of improving drainage. In most cases this involves adding sharp sand and organic matter to help break apart soil particles. This creates tiny air spaces within the soil allowing it to drain easily. 
After digging a compacted area deeply sharp sand and organic matter such as compost can be added. For best results add a 70mm layer of each and spread them evenly over the soil.
Then you can Rotovate the soil well with a tiller machine to mix the soil well. When the ground has been worked to a fine texture it can be re-levelled. Spreading high areas into low areas
One of the most effective ways to level your soil is identify both high areas and low areas. This can take a keen eye but you can use a tight string line to help you. You can level your soil with a landscaping rake, long handled shovel and wheelbarrow. Pull the high areas into low areas until you reach a level and even surface. 
Installing level retaining edging
One of the best ways to create perfectly level soil is by installing retaining edging. Edging such as bricks, blocks and metal edging can be installed perfectly level around a new lawn or gardens perimeter. These are particularly useful if you want to raise your soils level for improved drainage. Once such edging has been installed topsoil can be spread flush and evenly to the top of the edgings. This will provide a new even level to your garden with no low spots to collect water. 
Spreading free draining layers
Free draining layers are layers of sharp sand under the surface which draw excess water from the surface. These are typically spread under new lawns to prevent them from becoming boggy. They are particularly useful on lawns with an underlying clay soil. Once underlying clay is ameliorated and spread level a 30mm layer of sharp sand is spread on top. 
This acts as a base for a further 30mm layer of topsoil on top to lay the new lawn. As well as improving drainage the dense sand layer prevents the clay seeping up and saturating the topsoil.
This creates a new level lawn that is not susceptible to flooding and bogginess.
Thank you for reading our article on levelling for improved garden drainage.
If you require garden re-levelling or garden drainage services do not hesitate to contact us. Based in Amersham, Buckinghamshire we undertake a whole range of garden landscape services. Contact us here. If you would like to read more of our garden drainage articles I will link some relevant topics below.
'As an Amazon Associate I earn from qualifying purchases'

This article contains affiliate links
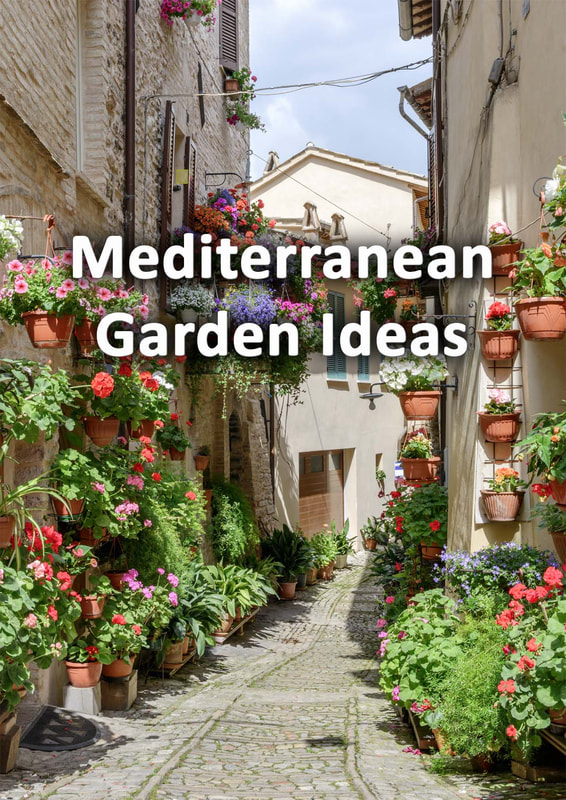
Mediterranean gardens are spaces which most landscapes would want to aspire too. These gardens absorb the history and cultural diversity of North Africa, Southern Europe and the Middle East.
Their warm feel and rustic aesthetic make them the poster child for outside living and recreation. Mediterranean gardens can be the perfect garden theme for those that like low maintenance and simplicity. Such garden styles however rely upon thoughtful planning and robust hard landscaping. Mediterranean garden edging should be bold and functional as well as tie all elements of the landscape together. In this article I will list and summarise 8 effective edging materials for Mediterranean gardens. 1. Rocks
One familiar aspect of Mediterranean gardens is their use of natural stone and rocks. The Mediterranean region is famous for its mountainous terrain and arid rocky, landscapes. Consequently rocks can make an effective addition to such gardens in numerous ways. Rocks and boulders can create very effective informal edging to patios, borders and other surfaces. 
2. Natural stone blocks
When visiting Mediterranean regions of the world you will notice the extensive use of natural stone blocks. These contextual building materials have been utilised for thousands of years. Natural stone walling blocks are a great way to create retaining edgings and borders in landscaping. These can add an authentic look to Mediterranean gardens and arid landscaping designs. 
3. Rendered block
It is very common to build homes and structures with reinforced concrete in the Mediterranean. This is due to the fact the region is rich in the raw materials for concrete construction. It means rendered and painted concrete is a very common surface within the region. This makes rendered block an ideal edging material for gardens with a Mediterranean feel. 
4. Flexible metal edging
Flexible metal edging is an increasingly popular type of garden edging available in a number of styles and colours. Although marketed as a contemporary landscape edging metal edging integrates well into most garden themes. As Mediterranean gardens integrate well with modern landscaping this edging is suitable for a number of uses. Flexible metal edging can be used to retain gravels and create junctions between different surfaces. 
5. Dry stone walling
Dry stone walling is a typical construction of rural landscapes with rocky soil. This is particularly so in mountainous, Mediterranean, regions. This makes dry stone walls perfect for Mediterranean garden walls, steps and landscape edging. Low stone walls can laid to form border edgings to seating areas and planting schemes. 
6. Cut paving
The great thing about using cut paving for edging is you can seamlessly match paving surfaces. This can add a consistent uniformity to any garden landscaping design. As Mediterranean gardens mix well with varying materials and styles this creates extra choice. Natural stone paving can be cut into strips, blocks and sett shapes to create effective and affordable landscape edging. 
7. Rustic bricks
One of the most charming aspects of Mediterranean gardens is their rusticity. Aging terracotta, crumbling paving and messy mortar joints visually work where they would not otherwise. Consequently rustic bricks can work well as garden edging within Mediterranean gardens. These can be laid in a variety of ways from raised retaining edging to flush borders for gravels. Good examples of rustic bricks include Ashdowns, Chaileys, Old stocks and Thames yellows. 
8. Natural stone setts
Setts have been used to surface roads and streets for hundreds of years. This is especially so in Europe and Mediterranean regions where natural stone is accessible. Historically granite setts have been used the most, however there are other great choices. A great example is sandstone setts which have a warmer, more Mediterranean feel. These setts can make an excellent and versatile edging material for Mediterranean gardens. 
Thank you for visiting our article on Mediterranean garden edging materials! If you require Mediterranean garden landscaping services or edging installation do not hesitate to contact us.
Based in Amersham, we cover most of Buckinghamshire including; Aylesbury, High Wycombe, Beaconsfield, Chesham, Chalfont and Great Missenden. Below I will link to some of our other Mediterranean garden articles you may find useful.
'As an Amazon Associate I earn from qualifying purchases'
|
The Author
|


Serving the landscapes of Buckinghamshire, Amersham, Aylesbury & High Wycombe
Hyde Heath, Amersham, Buckinghamshire
|
|