This article contains affiliate links
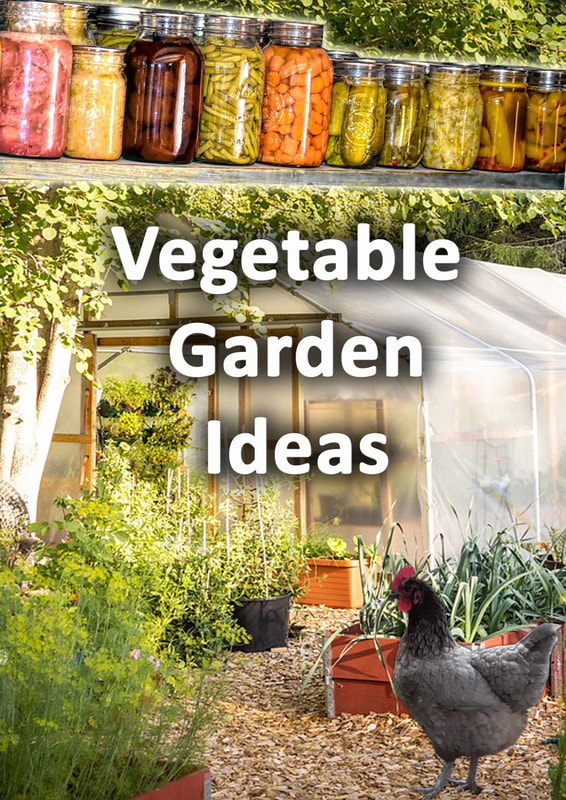
Not only can vegetable gardens be a great way to grow fresh vegetables they can also be fun.
The process of building and developing your own growing areas is all a part of the excitement! The robust, physical exercise, involved in working the ground can be extremely good exercise. The endorphins from physical labour, fresh air and organic produce can be a life changing combination! Consequently, so many people become completely hooked on vegetable gardening. As vegetable gardens are always evolving and improving it is always productive to seek new innovations. This is why I have listed 18 exciting vegetable garden ideas for you this growing season. 1. Grow over pergolas
The most productive vegetable gardens make use of as much sunlight as possible. A great way to do this is with a pergola structure. These can come in a wide variety of styles, materials and are readily available from garden suppliers. However, garden pergolas are also relatively easy to build with some basic DIY skill. Timber pergolas can be very effective for supporting rambling vegetables such as beans and squash. 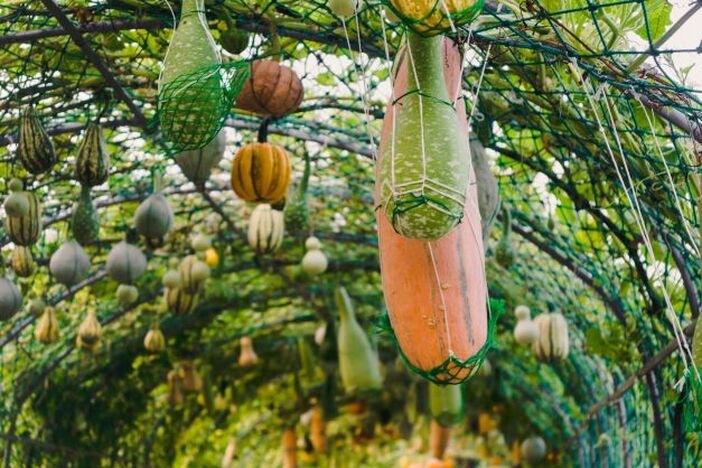
2. Embrace perennial vegetables
When many think of perennial vegetables they instantly visualise crops like rhubarb and asparagus. However, there are actually many less well known perennial vegetables which can also be planted. Increasingly popular varieties such as Sorrel, Perennial leeks, Wild celery, Sea kale and Oca are just some of these. To see a full comprehensive list of 26 perennial vegetables visit an informative article here. 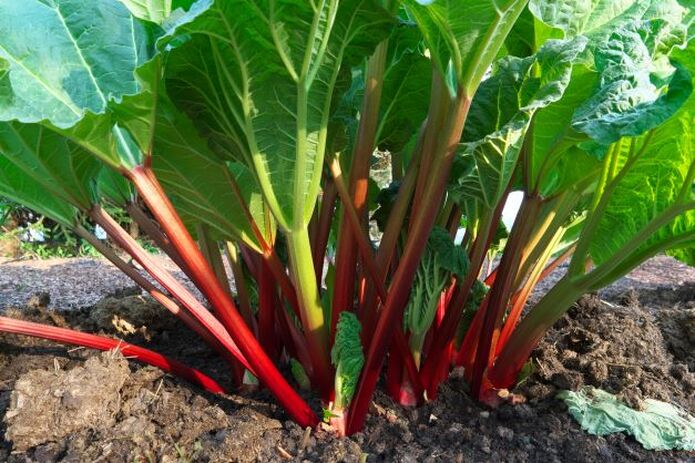
3. Grow mushrooms in shade
Shady areas are normally seen as having no opportunity for producing food crops. However, damp shady environments are perfect for growing many different types of mushrooms. Some great examples of these are chestnut, oyster and shiitake mushrooms. These can either be grown on inoculated logs, woodchips or cardboard. To start your mushroom growing journey why not visit an online mushroom growing supplier. 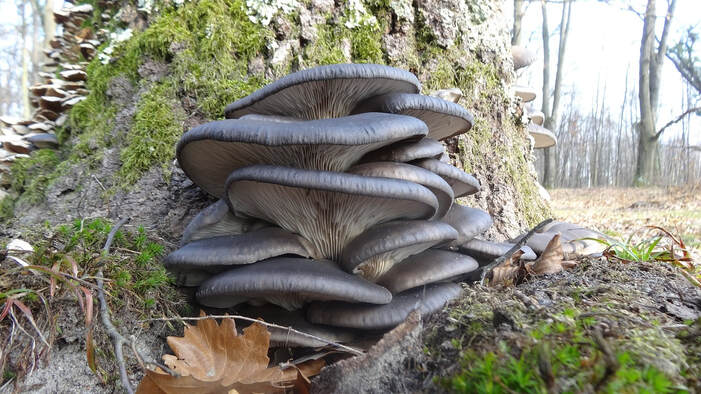
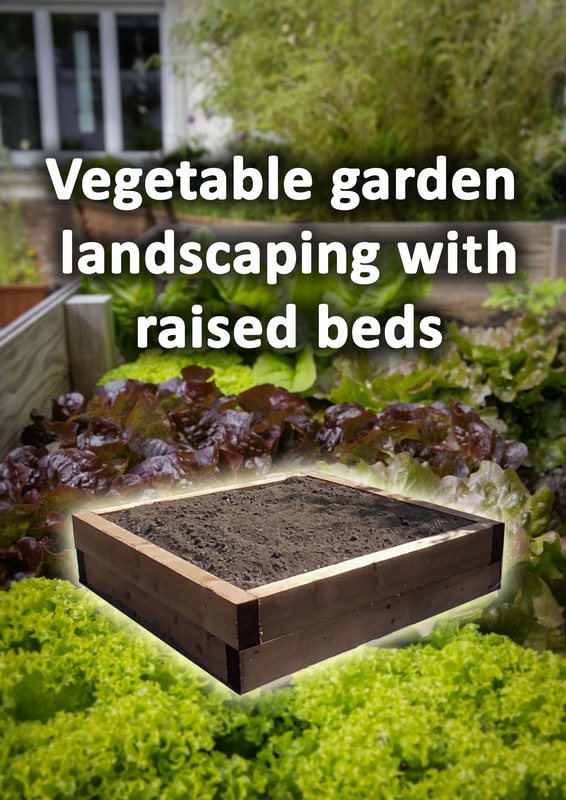
4. Raised growing bedsOne of the most effective ideas for a new vegetable garden is building raised beds. Raised beds allow you to provide a good quality and deep growing medium. This enables vegetables to grow large and healthy. Raised growing beds are also very well drained which prevents soil from becoming boggy and stagnant. Raising growing areas up will allow your vegetables to access more sunlight in the mornings and afternoons. 
5. Utilise fences
Fences are typically a missed opportunity when it comes to growing extra vegetables. These vertical structures can actually be perfect for climbing fruit and vegetables. This is especially so if your fence line is in full sunlight during the day. Trellis and simple cable systems can easily be attached to fence posts and panels. These make the perfect climbing frames for peas, beans and squash. 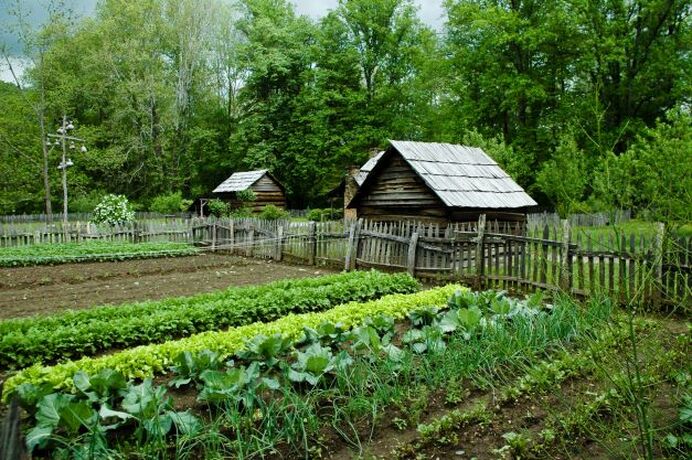
6. Dining areasA vegetable garden designed around an outside growing area is actually a very practical idea. There is nothing quite like a late afternoon meal by your vegetable plot in summer. Looking over your growing vegetables will create a pleasant, relevant and contextual backdrop. Why not create a simple seating area with a table and chairs in your vegetable garden? 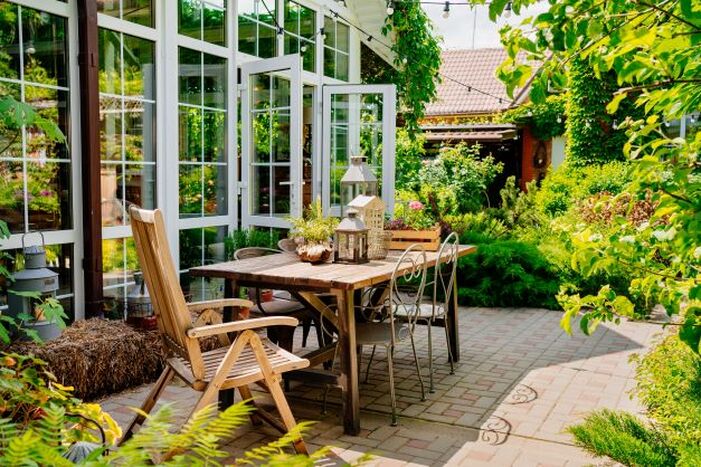
7. Wildlife ponds
Wildlife ponds are not typically associated with vegetables gardens but are actually a very good idea. Not only are these ponds good for wildlife they can actually help vegetables to stay pest free. Wildlife ponds can encourage a whole range of beneficial creatures to your garden and vegetable plot. Some of these will consume large quantities of vegetable garden pests such as slugs, caterpillars and aphids. 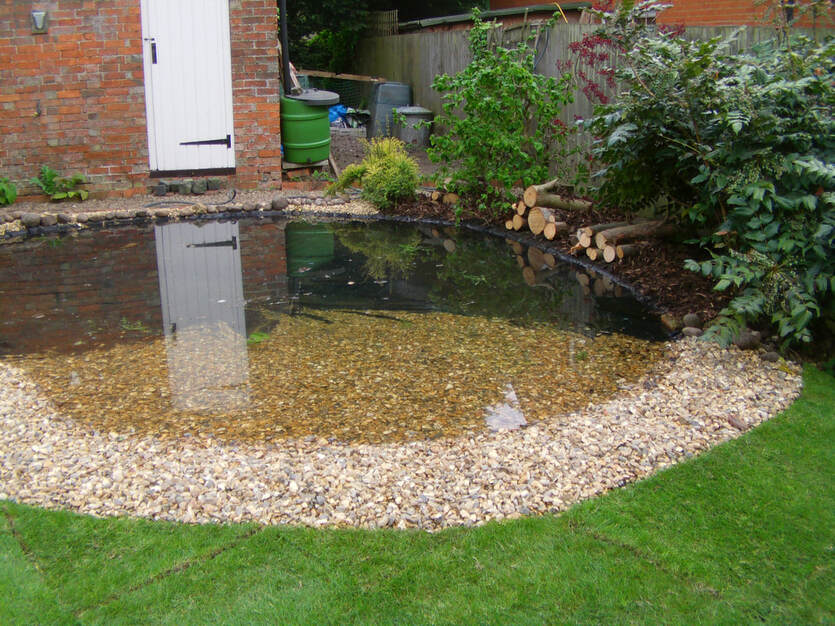
8. Summer houses
A typical mistake many make is hiding their vegetable gardens at the bottom of the garden. You will get the very most out of your growing beds if they become a central feature. An effective way to do this is to install a summer house next to your vegetable garden. This will become a great place to hang out and look over your masterpiece. On sunny mornings you will gravitate towards your eco retreat for that first coffee of the day. 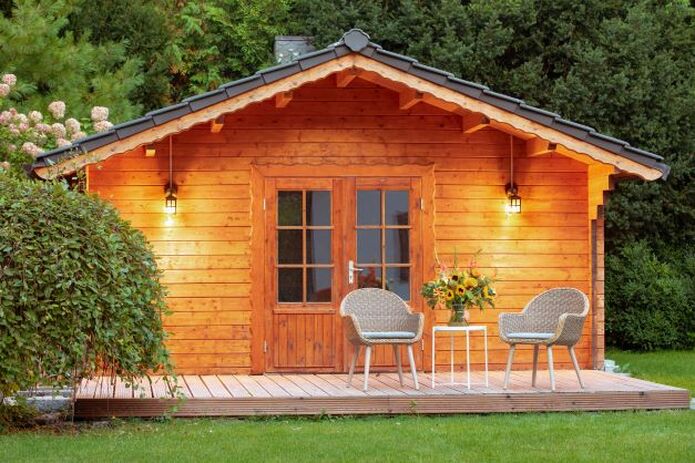
9. Mulch
Some typical issues for vegetable gardens are weeds, fertility and drying out during the summer months. Mulching your vegetable areas soil is an effective way to reduce all three of these problems. Mulch will help to lock in moisture, feed the soil and prevent weed seedlings from germinating. Consequently, mulching your crop growing areas is a very good vegetable garden idea. 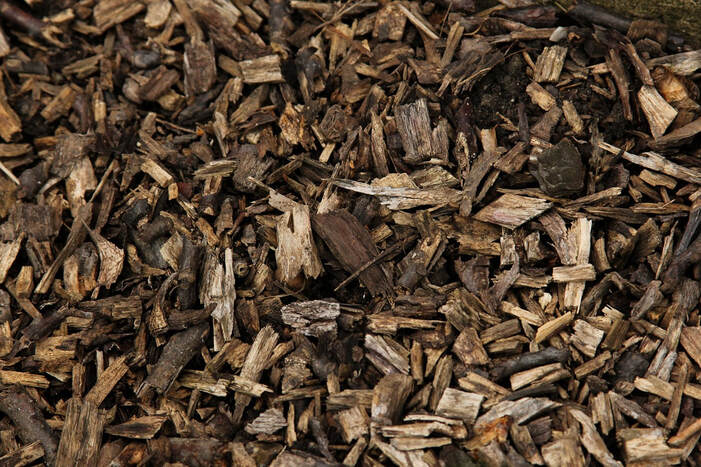
10. Storage sheds
A main problem when growing vegetables is producing too much of a harvest glut at once. This can be mitigated by sowing vegetables in succession and staggering cropping times. However a great way to maximise your cropping is by installing a storage shed. Providing a cool and dark place to store harvested vegetables is perfect for maximising your produce. 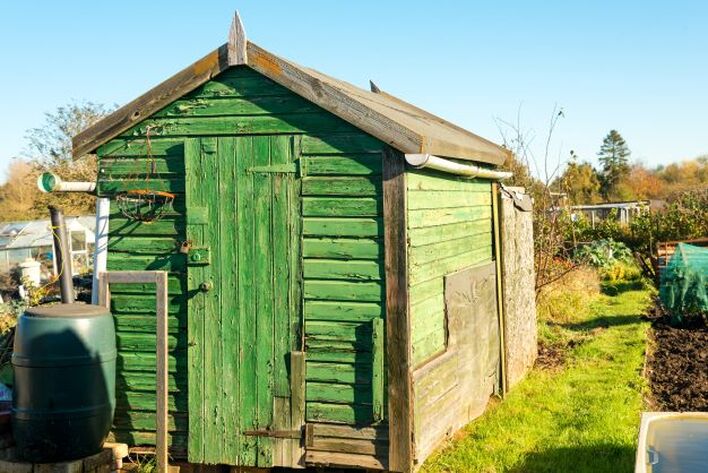
11. Polytunnels
If there is one thing that can really boost your vegetable gardens output it’s a polytunnel. Polytunnels can provide a much longer growing season by locking in warmth from the sun. This makes them perfect for growing exotic crops such as chillies, melons and aubergines. There is now a wide range of plastic tunnels now on the market. To avoid them being broken apart by strong winds invest in products with a screw together metal frame. Also make sure you have a robust method of anchoring them well to the ground. 
12. Companion plantingCompanion planting is a system of planting which combines various plant species for mutual benefit. This can be particularly effective within vegetable gardens to confuse and ward off pests. Some pests can actually be repelled by the smell of other herbs, flowers and vegetables. Consequently, companion rows or groupings of mutually beneficial species are grown together. This can enable you to grow vegetables pest free without the need for chemicals. 
13. Green walls
Green walls now come in a wide variety of products and systems. The basic idea of green walls is to stack growing areas vertically to maximise cropping. This allows for an efficient use of space and maximises sunlight. However, you may not need to invest in an expensive modular green wall system. Vegetables can be grown in a series of vertically stacked window box and hanging basket systems. This is a great vegetable garden idea if you have a sunny wall in a small garden space. 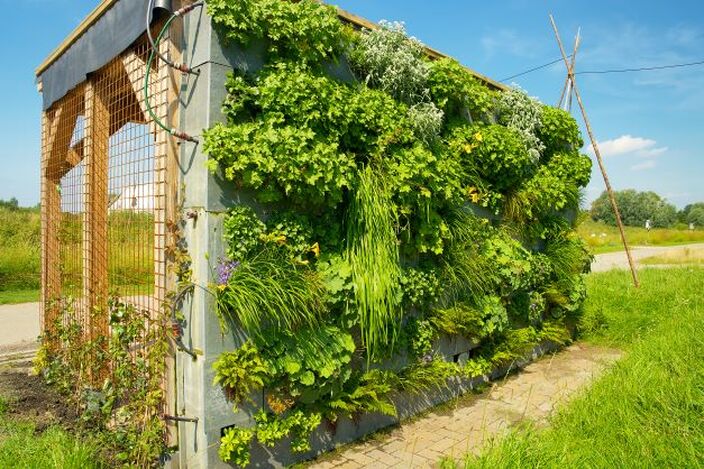
14. An outside kitchen
If you really want to make your vegetable garden a true kitchen garden why not bring the kitchen outside? Outside kitchens have become increasingly popular over the past decade. Custom built units can include expansive work surfaces and even outdoor ovens. In reality all you need is a clean and impervious surface to chop and prepare your favourite vegetables. This can make your vegetable garden truly interactive and entertaining! 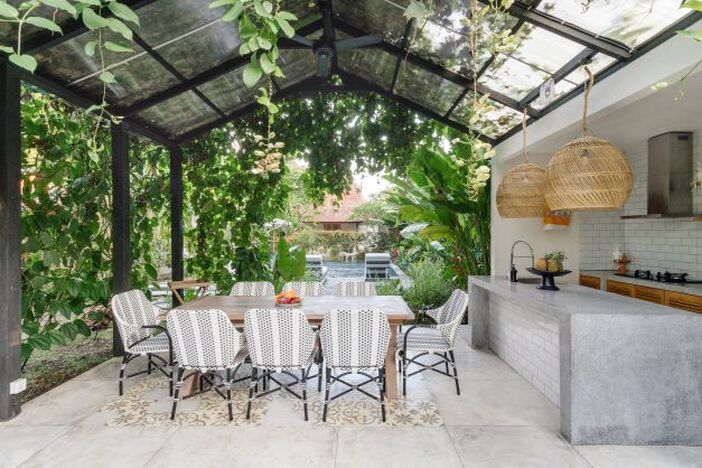
15. Boundary fencing
As blessed as you may feel for having wildlife in your garden not all wildlife is welcome. Rabbits and deer can be beautiful to look at but they can make short work of your vegetables. Once they know you have tender vegetables there it is very difficult to keep them out. If you have such wildlife locally it is a good idea to erect boundary fencing with an access gate. 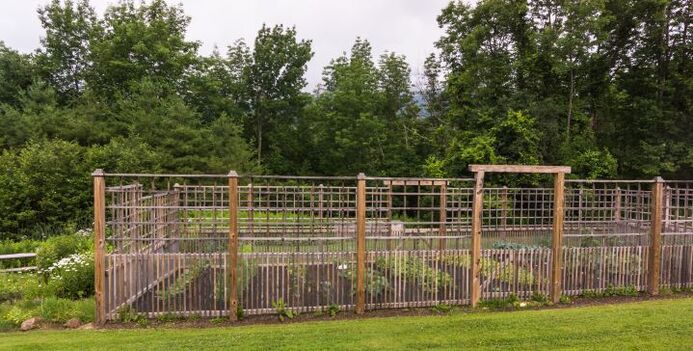
16. Compost heaps
It is very common for vegetable gardeners to have compost heaps but rare to combine the two. Small, secondary, compost heaps can be integrated into vegetable gardens for a couple of reasons. Firstly, compost heaps can act as miniature hibernacula’s which provide shelter for beneficial wildlife. This can encourage natural pest control reducing the need for pesticides. Composting material can also make the perfect growing medium for crops like summer and winter squash. 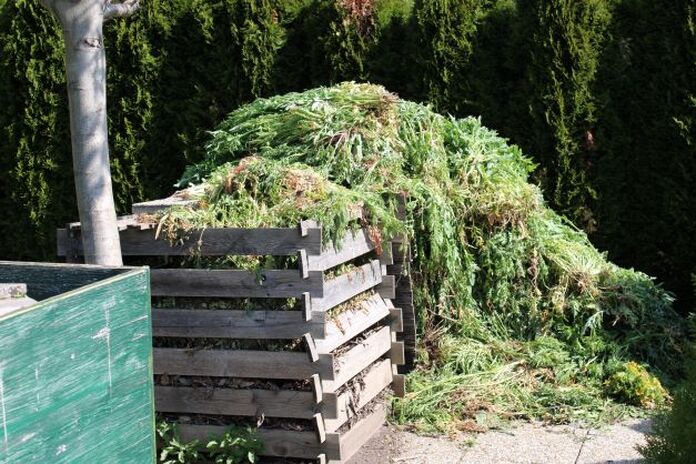
17. Solar drier
Sometimes the most important part of a vegetable garden is making use of what you grow. There is no point of going to all the effort of caring for your vegetables if you do not utilise them all. One of the most eco friendly and useful ways to preserve garden vegetables is by drying them. Dried vegetables can then be jarred and rehydrated when needed during cooking. The best way to dry your vegetables is by slicing them thinly and using a solar dryer. This uses the heat of the sun and air convection currents to dry vegetables naturally. 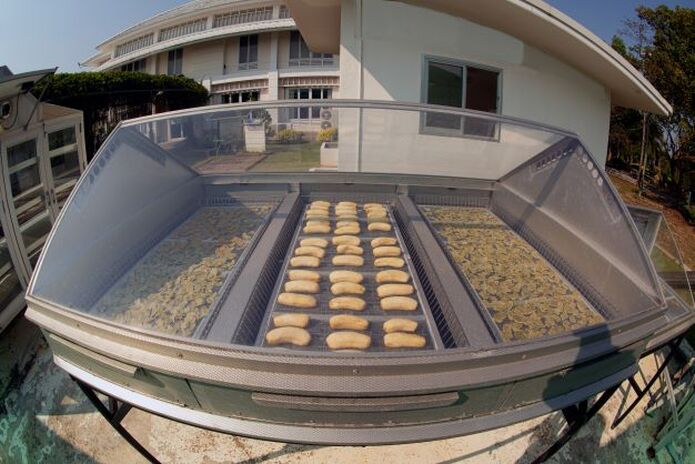
18. Cold frames
The most challenging part of any vegetable gardens season is the early spring. During this time young seedlings are vulnerable to frost, hail and multiple pests. Warm spring days can lure any vegetable gardener into a false sense of security. Consequently every vegetable garden should have a cold frame. Not only do these robust, miniature, greenhouses protect from pests they also shelter from bad weather. Cold frames can become one of the most vital parts of a productive vegetable garden. 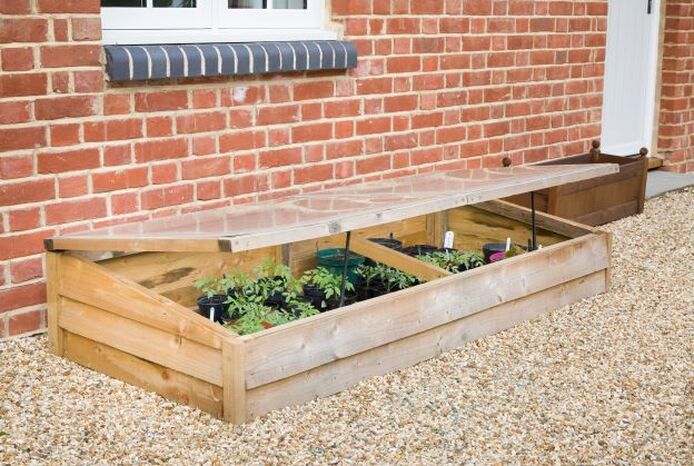
Thank you for reading our article on 18 vegetable garden ideas. If you require a vegetable garden designer or builder do not hesitate to contact us.
Below I will link to some other useful vegetable garden articles you may find relevant.
'As an Amazon Associate I earn from qualifying purchases'
0 Comments
This article contains affiliate links
There is something so satisfying about growing your very own fresh fruit and vegetables.
Vegetables grown in your own yard always taste far superior to any supermarket produce. However, growing vegetables in virgin soil can be very challenging for some. This is because your existing soil may lack the nutrients, texture or depth for optimum for vegetable cultivation. Furthermore, shallow or boggy soil can be detrimental to successful vegetable growing. This is why building raised vegetable beds is always a favourable option. Not only do they create more defined growing beds they also allow you to add better quality topsoil. In this article I will provide a topical overview of installing vegetable raised beds into your garden. Vegetable garden landscapingVegetable garden landscaping is a topic which does not get much discussion generally. This subject includes the design, planning and building of raised vegetable gardens. Successful vegetable garden landscaping involves knowing what you want to cultivate and developing your site to accommodate such. If you have very boggy soil you may wish to build raised vegetable beds to provide a better growing medium. You may love growing carrots so will require vegetable beds with a free draining and loamy, soil. Below I will continue to highlight some of the primary considerations of building productive vegetable gardens. 
Why make raised beds for vegetables?Good quality soil
One of the main advantages of building raised is filling them with generous depths of quality topsoil. This makes for easy sowing, transplanting, digging and weeding. A good quality topsoil enables vegetable roots to grow deeply. This provides them easy access to nutrients leading to healthy crops.
Organisation
Installing raised beds allow you to organise your growing areas neatly. This is particularly useful if you are implementing seasonal crop rotations.

Easy access
A great benefit of raising your vegetable growing areas up is much easier access. This results in less bending and awkward digging which is easier on your lower back. Raising beds up can also allow your vegetables to access more sunlight.
Containment
Some crops require a suitable amount of containment to prevent spreading. This is because they may have a robust running habit. Some good examples of these include mint and Jerusalem artichoke.
Positioning your raised vegetable beds
Positioning your raised vegetable beds is actually very important for success. Too often, vegetable gardens are located at the very end of your yard and out of view. This can lead to a gradual neglect of your growing areas. It is beneficial to position your raised vegetable beds somewhere in full sun within full view of the home. You should not be able to visit your patio without being drawn over to your vegetables. 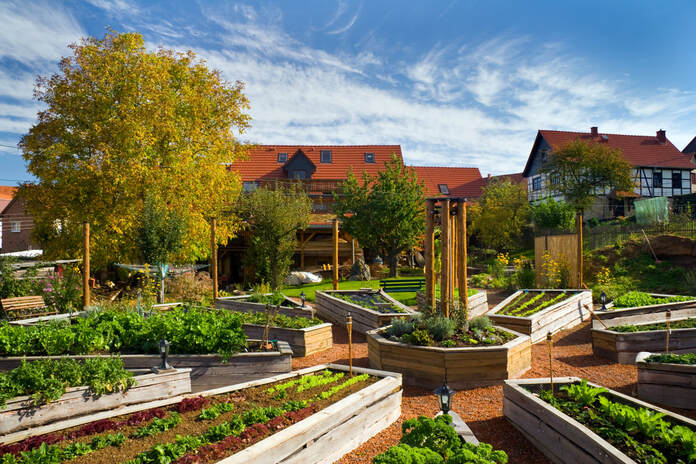
This enables you to always keep an eye on your crops throughout the season. There will be times when you will need to water more, weed more and harvest more.
Raised vegetable beds require daily attention during the summer so make them very accessible. Ideally your vegetable garden will also receive at least 7 hours of direct sunlight a day. How do you make a raised bed for vegetables?
When it comes to building raised vegetable beds you have a few options. Some of these are more labour intensive and costly than others. However, on the whole, the more costly the installation the longer beds will last the test of time. Below I have listed the most typical methods of building raised vegetable beds. Wooden planks
Wooden planks can make reasonable raised beds but they are never completely permanent. The most typical example of plank raised beds are 6x2 timber boards fixed to posts. These do make effective vegetable beds but will generally degrade after 10 years. Many people go down the route of lining these raised beds with plastic to extend their life. Plastic will reduce the rate at which timber decays but not by that much. I have found that plastic actually forces water to sit idle around joins and fixings. This can actually accelerate corrosion of fixing brackets and screws. 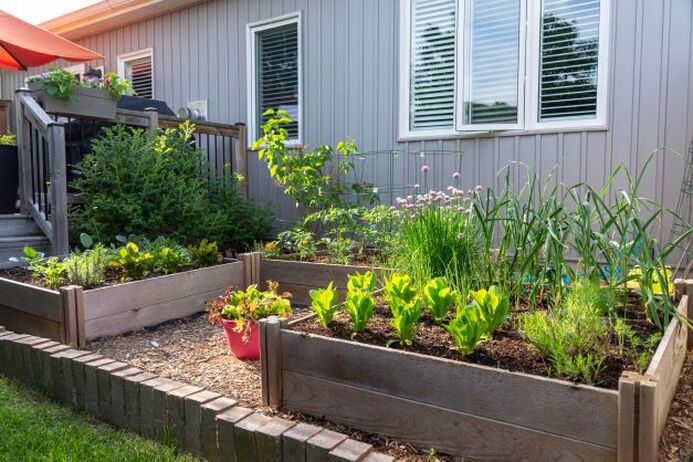
Timber sleepers
Probably the best timber option for building raised beds is sleepers. These thick and robust sections of timber were originally made to base railway lines. Timber sleepers have now become a very popular way of building raised vegetable beds. The best way to build vegetable beds with sleepers is to fix them to 4x4 timber posts. These can then be concreted into the ground for extra stability. Below I have included some examples of the raised vegetable beds I have built using sleepers. 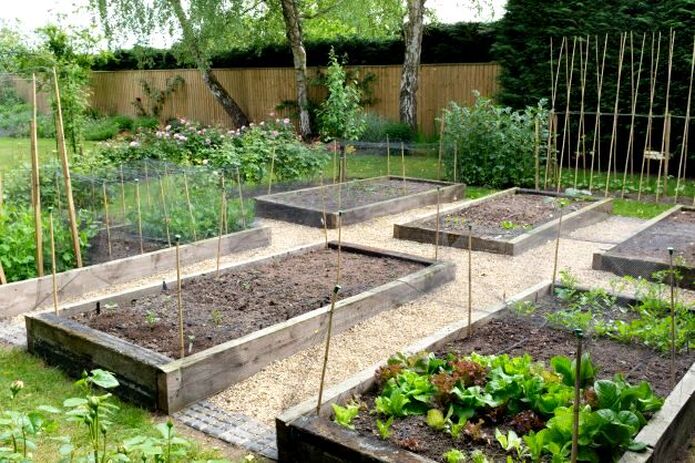
Concrete blocks
Raised vegetable beds built with concrete blocks are sure to last the test of time. Unlike timber sleepers, concrete will not degrade in damp conditions. However, raised beds built with concrete will require a robust concrete foundation. This means a fair amount of excavation will need to take place for the footings. Building raised beds in such a way will be more labour intensive and costly. For beds which will last beyond 15 years concrete is a more durable choice than timber. 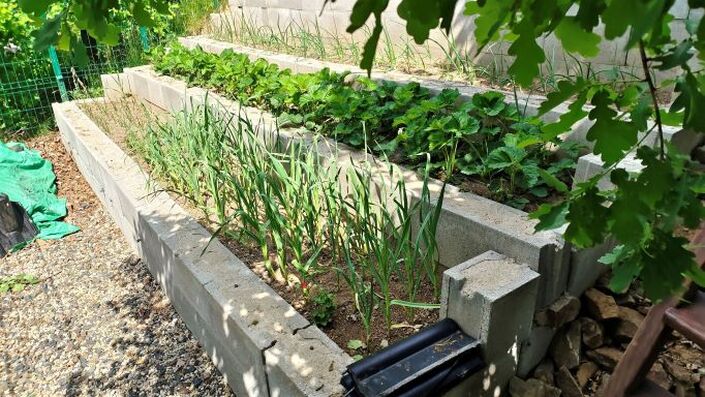
Bricks
Like concrete, brick raised beds will last much longer than timber beds provided they are built correctly. Bricks are more expensive to buy than concrete and require skilled labour to lay. This makes brick vegetable beds one of the most expensive options. However, unlike concrete, bricks look much more attractive than concrete blocks. As bricks are also made from fired clay their colours will not fade over time. Bricks can become vulnerable to freeze and thaw action if continuously wet in sub zero temperatures. It’s a good idea to apply weather proof sealants to your beds and ensure there is adequate drainage. 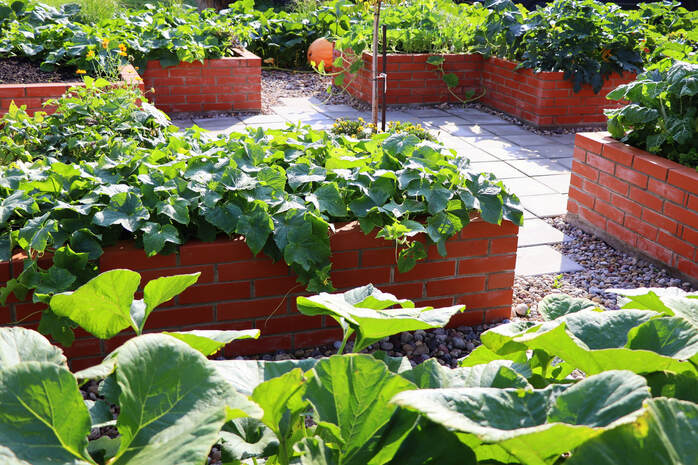
Old pipes
Old pipes with a diameter of 500mm and above can make very easy and cost effective raised beds. These are easy to cut to suitable depths and then set into the ground vertically. The 600mm plastic sewer pipes below are also available to buy new online. 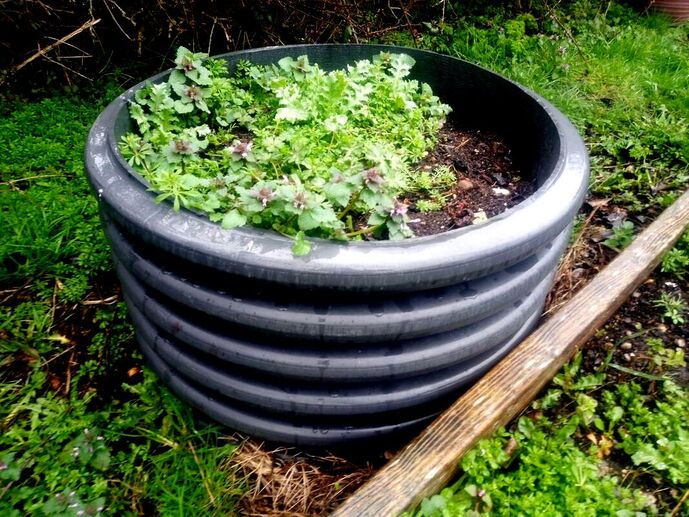
What is the best material for building raised beds?
The best materials for building raised vegetable beds are those which do not degrade. Any structure that retains large quantities of moist soil needs to be extremely robust. Both timber and sheet metal will tend to degrade over time. Therefore, the best materials for building raised beds are masonry materials based upon a concrete foundation. These include brick, concrete and natural stone. Such construction is more expensive and labour intensive that other materials but will last the test of time. What is the best material surface for around raised beds?
The best surfacing materials around raised beds are durable, sealed, hard wearing surfaces. These include; concrete and paving. Loose gravels and open textured, permeable surfaces will succumb to a build up of dirt. This will lead to moss, weeds and a slippery sludge in winter. Raised vegetable beds are continuously being worked year after year. This leads to surrounding surfaces accumulating a continuous dusting of loose soil. This can eventually turn loose gravels into a carpet of weeds. 
Drainage for raised beds
It is important that all raised beds have adequate amounts of drainage. This is so the soil does not become waterlogged and stagnant. Typically drainage is added to raised beds by installing weep holes at the base. The amount of drainage your raised beds need will depend on their height and local soil type. If your garden naturally has boggy soil, consider installing a landscape drainage system first. How deep should raised vegetable beds be?
There is no perfect depth for all raised beds to be. The perfect depth for a raised bed will depend upon your existing site conditions and soil type. As a general rule of thumb 400mm is a good height for a raised bed. This will provide a generous growing depth without the bed being so high it easily dries out. 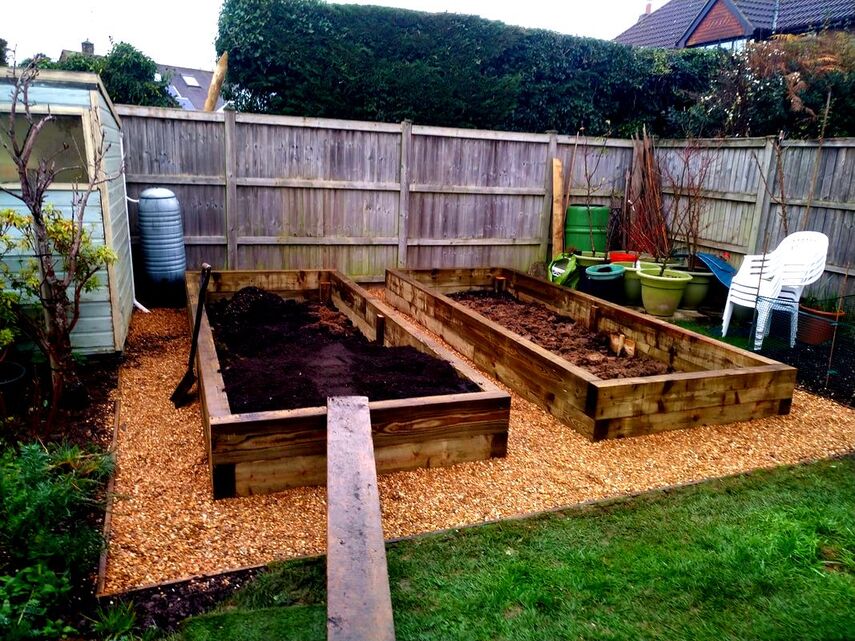
What vegetables can you grow in raised beds?
You can pretty much grow any type of vegetable within a raised bed. All you need to remember is, the higher your bed is, the greater chance of it drying out. Some vegetables can tolerate dryer, well drained conditions more than others. However, most crops will require a reasonable amount of moisture during the summer to successfully crop. Therefore to grow a wide spectrum of vegetables you will need to irrigate raised beds during the growing season. 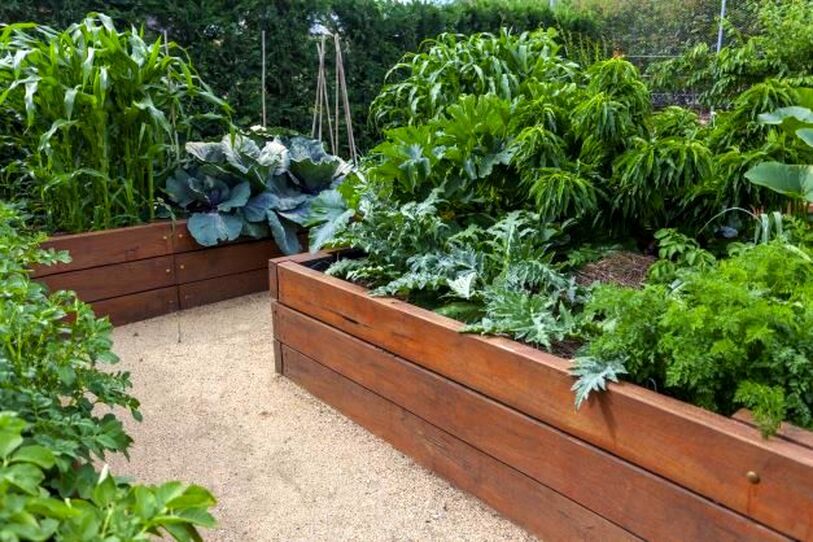
Vegetable garden landscapers and builders
Buckinghamshire landscape gardeners are expert vegetable garden designers and builders. From edible planting schemes to building raised vegetable beds, we provide it all. Our vegetable garden construction services cover Buckinghamshire and surrounding counties. 
Our typical and local service areas include:
'As an Amazon associate i earn from qualifying purchases'
This article contains affiliate links
Many people naturally relate to the idea of sowing and planting vegetables during the spring.
Springtime is blessed with long days and warm sunshine. However spring is also commonly tormented by cold nights and frosty mornings. Such conditions can be the kiss of death to young vegetable seedlings and young plants. During spring the soil has not yet warmed up making it very challenging to get vegetables established. This causes the famous hungry gap for crop growers. This period which typically lasts from April to June is a torment for self sufficient growers. 
During this time, stored vegetables from last season have run out while young crops are too premature to provide sustenance.
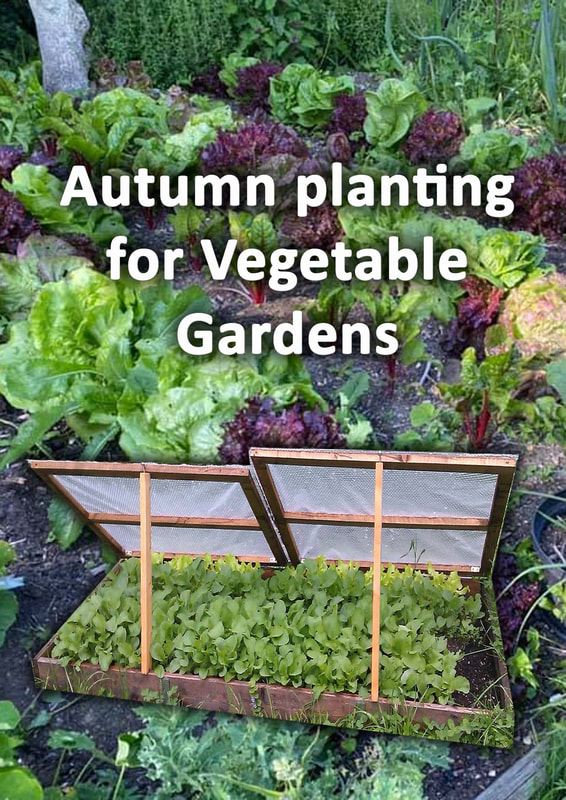
This is where autumn planting for vegetables can become your saviour. Autumn, unlike spring has warm soil and relatively mild conditions. This can allow a fresh crop of young, hardy, vegetables to establish before winter. The result is a fast and maturing crop early in the season before other crops are hardened off. In this article I will explain the different elements and considerations of planting vegetables in autumn. Can you plant vegetables in autumn?
Yes you can plant certain varieties of hardy vegetable in autumn. By sowing specific vegetables in late September you can have young plants by October. These can then be planted out giving them a little time to establish before the first frosts. These young vegetables will then go through a dormancy phase during the colder months. As they become accustomed to the extremities of winter they are quick to respond to better conditions in early spring. This results in fast growth and cropping much earlier in the season. This particularly lends itself to long season and biennial vegetables such as Brassicas and Chards. Planting vegetables during the autumn can be even more productive under cover. 
What vegetables can you plant in autumn?
The top 20 vegetables to plant in autumn and fall are:
Making room for autumn vegetable planting
Most of the time the amount of space gardeners allocate to growing vegetables is limited. Therefore, making room for autumn and overwintering vegetables can be challenging. It is good to be forward thinking about how you will utilise your beds during the season. Plant shorter season crops like lettuce where you want to plant autumn crops later in the year. Alternatively, you can plant autumn vegetables amongst crops which rapidly die off in autumn such as squash. 
Sowing vegetables in autumn
Sowing vegetables during late September and early October is perfect for planting before winter. You will want your young vegetable plants to be robust enough to take the cold conditions. For extra protection while establishing you can place a cloche over your young vegetables. As the soil is warm at this time of year try to germinate seeds in sterilised compost. This way, your seedlings will not have to compete with weed seedlings. 
Fertilising autumn vegetables
As autumn vegetables are planted at the end of the season you may wish to top up fertility. This can be tricky as adding manure at this time of year can burn young vegetables. I find chicken manure pellets are effective at mitigating this issue. The pellets can be left to dissolve on the plots surface gradually. This will fertilise young vegetables without negatively affecting them. 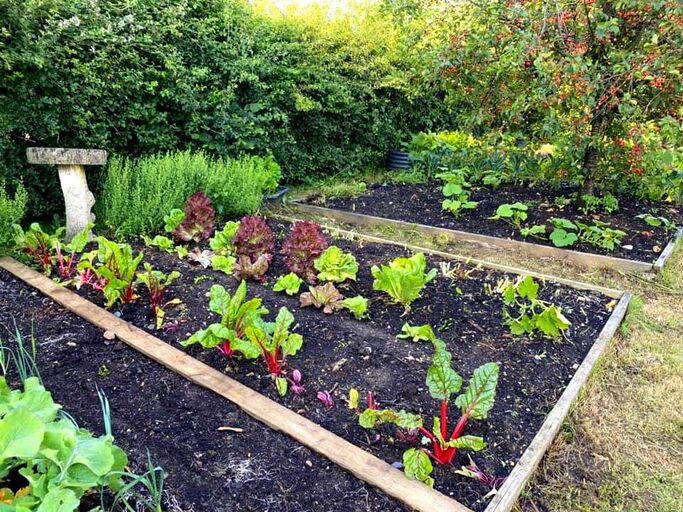
Mulching autumn vegetables
When planting autumn vegetables it is always a good idea to mulch them well. The mulch could be wood chippings, bark mulch, rough compost or leaf mould. Mulch will slowly decompose feeding the young vegetables. It will also provide an extra thick layer of protection for the young plants against ground frost. As the weather warms up in spring the mulch will also prevent competing weeds to establish. 
Protecting autumn vegetables
Autumn planted vegetables can actually be quite vulnerable to pests during the winter months. Instead of summer pests such as slugs and caterpillars in the winter birds and rabbits will be main culprits. If you have deer which visit your garden you will really have to be on your guard! Consequently it is important to protect your vegetables as much as you can. Seeing you are also protecting crops from the cold it makes sense to cover them with sealed cloches. 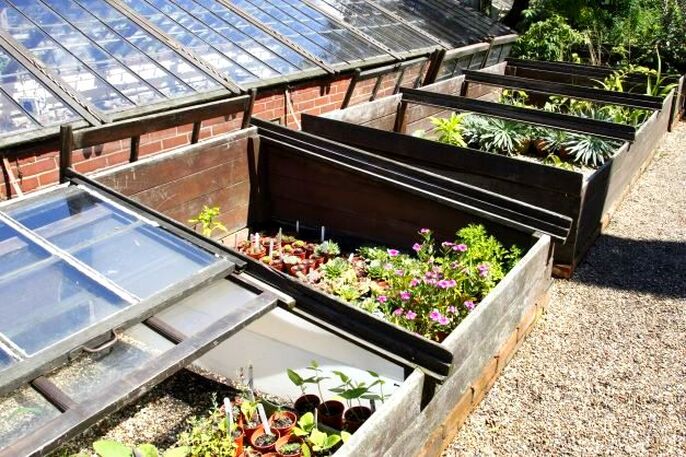
Growing winter vegetables in a greenhouse
Ultimately for great results by planting vegetables during autumn you are best growing undercover. The two best options here are greenhouses and polytunnels. Polytunnels are typically larger and easier to incorporate large volumes of soil. However they generally do not hold in as much heat as greenhouses. Either way, growing undercover can just keep temperatures elevated enough for some winter veggies and early season delights. 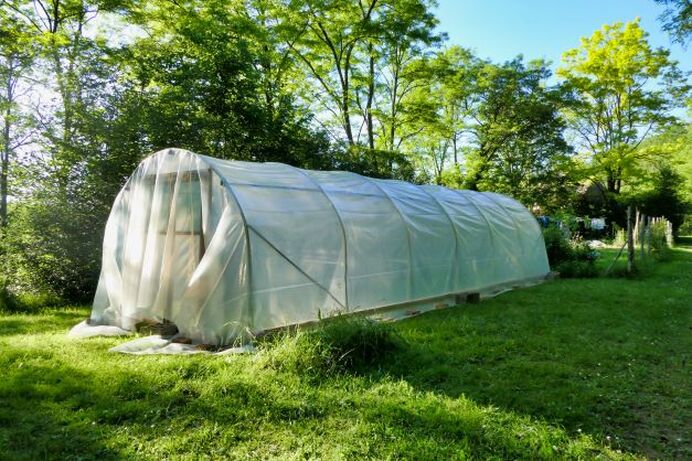
Thank you for reading our article on autumn and fall planting for vegetable gardens. If you need any help planning or building a vegetable garden feel free to contact us.
Below we will include some other, relevant articles you may find interesting.
'As an Amazon associate I earn from qualifying purchases'
This article contains affiliate links
Building a vegetable garden can be a very exciting project for gardeners old and new. Designing your vegetable garden correctly from the start is vital for successful vegetable cultivation
Growing vegetables well requires much continuous care, irrigation and sunlight. Positioning a vegetable garden in the wrong location will cause problems. There is more to designing a vegetable garden than just good looks! Effective vegetable garden layout and design has to combine many contributing elements and factors In this article I will list and describe all the design considerations of building a productive vegetable garden. Site survey
A site survey sounds a little over the top and in depth. However this involves conducting a site feasibility study for crop growing. The reason why many vegetable garden projects fail is the incorrect site is allocated. A site survey will scrutinise your sites suitability for effective vegetable gardening. The most important thing above all is sunlight! Your vegetable garden will really need at least 7 hours of daily sunshine during the growing season. 
This is so vegetables can photosynthesise properly and grow into strong and healthy specimens. If you have many overhanging trees this will not be ideal for a vegetable garden.
Not only do trees block out sunlight have their roots drain the surrounding soil of water and nutrients. Collect as much data about your site as possible listing strengths and weaknesses. Below we break down the individual elements and considerations of vegetable garden design. Drainage
Drainage will always be a major consideration when planning a new vegetable garden. Normally there is a ground saturation sweet spot when it comes to vegetable garden drainage. Most vegetables like soil have to be moist but free draining. If your soil becomes too wet and boggy it could become compacted and stagnant. Therefore, before you design your vegetable garden get an idea of its existing moisture content. Standing water during periods of heavy rainfall is an indication of saturated ground. 
It is a good idea to dig a test hole in your soil around 400mm deep. If your hole is at least half full in the winter you have saturated ground.
In this scenario it will be a good idea to raise up your growing areas. Raised beds can then be filled with fertile and free draining topsoil. If your site on the whole is very boggy you may want to install drainage. Why not visit our article on how to drain your gardener here. Alternatively, you may want to read our article on vegetable garden drainage here. Soil type
One of the most fundamental elements when creating a vegetable garden is soil. Your soil should be have a deep, well drained and loamy texture with a high fertility. Most vegetable gardens start out with poor quality topsoil but improve over time. What your existing soil is like will completely depend upon your local geology. Some gardens have shallow, rocky soil while some are blessed with deep crumbly soil. The best soil for a vegetable garden will be a clay based loam. 
Such a soil will retain moisture and nutrients while being well drained. Whatever your existing soil type with some work and investment it can be dramatically improved.
Why not read our article on how to improve your garden soil here. However, you always have the opportunity to build raised beds and buy in new topsoil in bulk. Sunlight
Without a doubt one of the most important design considerations of a vegetable garden is sunlight. Sunlight will provide your crops with the energy they need to grow large and healthy. When designing a vegetable garden try to plan so rows run from North to south. This will provide good sunshine coverage to all of your vegetables. Make sure your plots get at least 7 hours of sunshine during the growing season. You may be surprised just how much site boundaries and trees can shade out your borders. In such cases prune surrounding vegetation and try raising up your growing beds. 
Shelter
The role shelter has to play in growing crops cannot be underestimated. Even though vegetables like open and sunny sites they do not like exposure to strong winds. This is particularly relevant if you have a large garden in a rural area. Try to study your regions prevailing wind direction. In the UK warm trade winds blow from the southwest and cold winds come from the east. Make sure your vegetable garden is located on a sunny but well sheltered site. 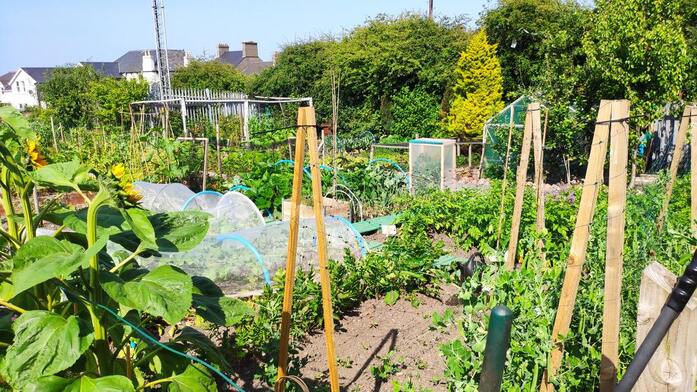
Microclimate
Micro climates are where physical features such as structures and landform alter local temperature and climate. The most typical example of this would be a south facing patio next to a house. During sunny days the hard surfaces reflect the suns radiation and heat up. This leads to warm air circulating creating a warm microclimate. When designing vegetable gardens microclimate can allow you to grow more exotic vegetables and extend your growing season. Try to look for opportunities to create sheltered sun traps within your vegetable garden. 
Access
A big trap many fall into is not making their vegetable garden accessible enough. The old saying ‘out of sight, out of mind is very relevant here! Ideally your vegetable garden should be in full view of your home and accessible. This will provide you the convenience and constant reminder to keep your vegetable beds well maintained. Vegetables need daily assessment and attention to keep them growing at their best. You will have to water them daily during dry spells and weed them regularly. This is why it is so important to have close and convenient access to your vegetable plots. 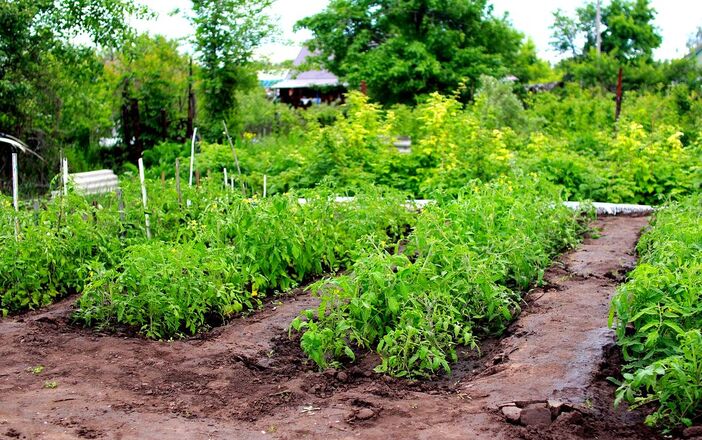
Search for precedent
When designing vegetable gardens it is beneficial to get some outside inspiration. One of the best ways to do this is search for precedent images. In the age of the internet there has never been a better time to search for great ideas. Some of the best ways to find vegetable garden ideas is Pinterest and Google images. 
Plan your layout
It is very common for vegetable gardeners to prefer neat and orderly growing spaces. This adds a level of organisation and uniformity to growing beds. Very rarely do many talk about the beauty of a well kept vegetable plot. Vegetable gardens can become a real focal point and central feature within a garden. Planning your layout can be a fun and creative exercise. At this point it is worth creating a scaled drawing to design your space. 
Plan for pests
Planning to minimise the impact of garden pests in a vegetable gardens design is important. This is normally a complete after thought for many new plots. It can be remarkable just how much damage pests can do to a vegetable garden. This is even more so the case when deer and rabbits can access your garden. Pigeons can also be very damaging to crops and of course our old friend’s slugs. 
If you have a particular problem with slugs why not visit ourarticle on how to get rid of them.
Generally, vegetable gardens with a perimeter fence, raised beds and paved paths have much fewer pests. The closer your beds are to the home will also put off unwanted visitors. Raised beds?
Raised beds are one of the most popular ways of creating vegetable gardens. They can allow you to add good quality soil and to work at a comfortable height. Raised beds have to be robust and well built to retain large quantities of soil. These are typically constructed using concrete, brick or timber sleepers. Raised beds also allow you to increase levels of drainage if you have a boggy site. If you require a competent raised bed builder why not contact us here. 
Growing under cover
Growing under cover can provide so many advantages to a new vegetable garden. When designing your vegetable garden it is highly recommended to include a polytunnel or greenhouse. Not only will this extend your growing season its perfect for raising seedlings early. Growing undercover can also allow you to grow exotic species during the long summer months. In winter covered areas can also be used to grow hardier crops such as Cabbage, lettuce and Pack Choi. There are so many products on the market today of varying shapes and sizes. 
Surfacing
Surfacing around your vegetable borders can improve access, reduce maintenance and reduce pests. Generally the best surfacing for around vegetable plots is paving or concrete. This reduces any need for ongoing maintenance and prevents weed establishment. It is very common for people to surface around their vegetable beds with bark and gravel. The problem with this is soil spillages can mount up over time and lead to weed establishment. These surfaces are also awkward for wheeled carriages such as wheelchairs and wheelbarrows. 
Recycling nutrients
When planning a vegetable garden you should think about how you will recycle nutrients. Fertility is very important for a vegetable gardens soil, the best way to do this is with composting. Try to implement a composting area into your design plan. This will allow you fast and easy access to fresh fertiliser and organic mulch. It is amazing how much organic matter is generated from harvesting, weeding and general garden maintenance. Designing a vegetable garden with recycling and composting in mind is very beneficial. 
Irrigation
Large and expensive irrigation systems are very rarely needed for most vegetable gardens. However, a common problem during the summer months is vegetable beds getting too dry. Once soil has dried out it is very difficult to rehydrate it deeply. Normally the surface becomes dry and cracked which results in water running straight off the surface. Therefore the best option is to keep your vegetable beds well irrigated during warm and dry periods. It’s beneficial to design a vegetable garden in close proximity to a water source for this reason. 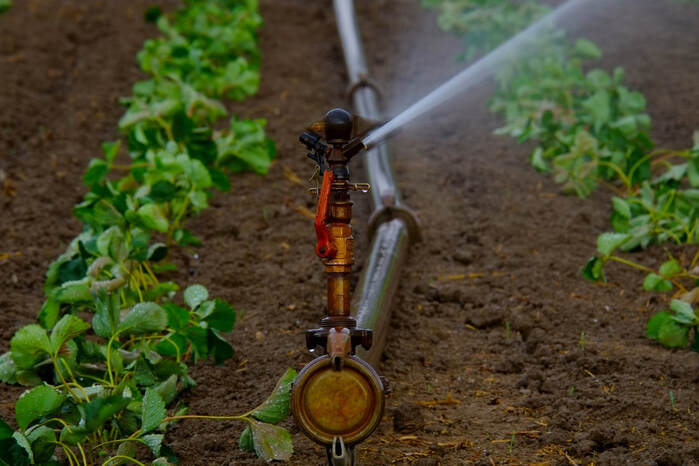
Storage
Storage is something very few vegetable garden designers think about to their detriment. A storage shed at your allotment can become an essential necessity! This is especially so for storing vegetables for the leaner months. Very often, vegetable gardens produce a glut of produce all at once. It is good to provide a cool, dry and dark place to hang and store your vegetables. Small storage sheds can also provide the perfect place to store tools and accessories. 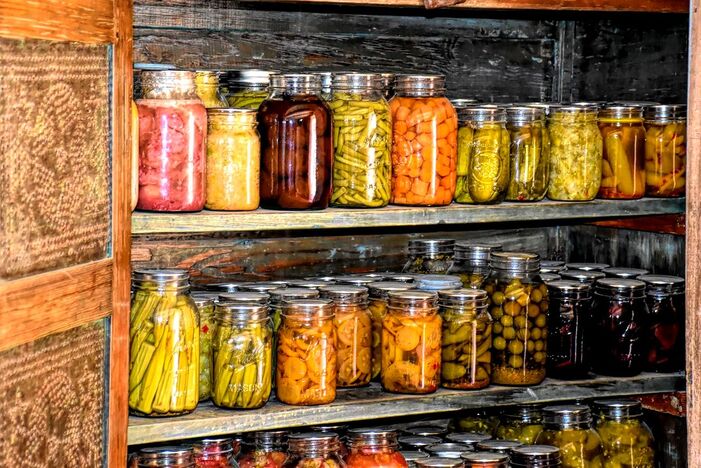
Thank you for reading our article on how to design and vegetable garden. If you require a vegetable garden designer or builder do not hesitate to contact us here.
Below we have linked to more of our vegetable garden articles you may find useful.
'As an Amazon associate I earn from qualifying purchases'
This article contains affiliate links
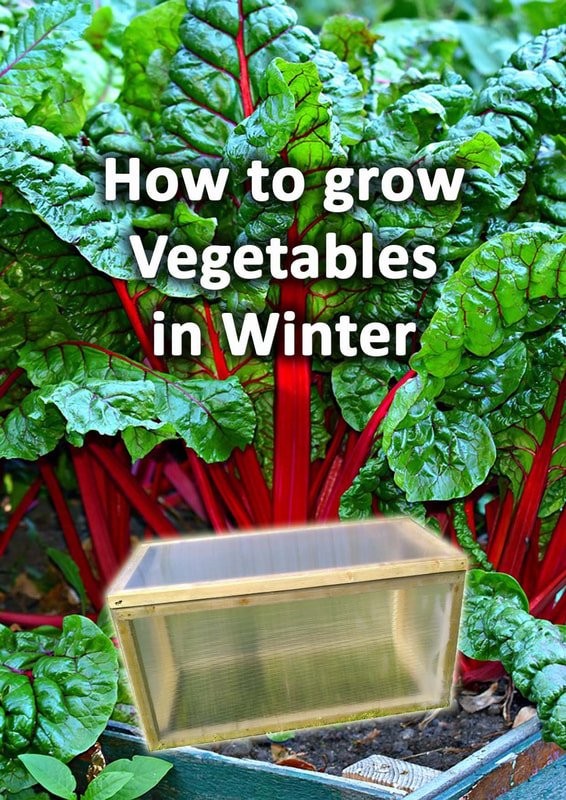
It is a common misconception that you cannot grow vegetables during the winter months.
It is important to remember however that you will not reach summer levels of production during winter. This is because the suns light is much less powerful during the winter season. All vegetables rely upon sunlight and photosynthesis to produce energy and grow. Therefore the shorter days and colder conditions will create some challenges. However, by utilising cold tolerant vegetable varieties, cover and timing you can grow delicious vegetables all winter long. Here I will break down all the elements of how to grow vegetables in winter. 
Grow the correct vegetables
Amongst all our favourite vegetable species there is a broad range of optimum growing conditions. Some vegetables like it cool and moist while others like hot sun during the growing season. There are many vegetable varieties which tolerate very cold temperatures once seedlings have become hardy young plants. Most of the time growing vegetables in winter relies upon knowing when to sow and plant your crops. Below we have listed the top 20 vegetables for growing through the winter:
Know when to sow
Knowing when to sow and plant out your young plants is vital for successful vegetable growing in winter. In reality, the months around the shortest day vary rarely see any real growth. This is because of cold temperatures and restricted photosynthesis. During this time most vegetables will go into a state of dormancy. Therefore, the trick is to grow quick crops up until Christmas and establish cold hardy, early croppers for overwintering. 
Fast autumn & fall croppers
Generally things like spinach, radish and pack choi can be planted in autumn for cropping in November. This will of course depend upon where you live and what your specific region will allow. By growing under cover cropping can very much be pushed up until Christmas. 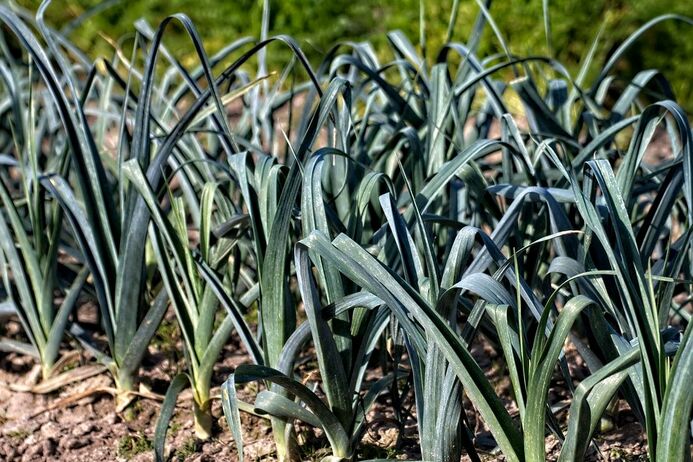
Overwintering & early season croppers
These crops are more tough and hardy varieties which will stay in the ground all winter long. Crops such as chard, cabbage, kale and broccoli can be hardened off and planted outside in autumn. These vegetables will be quick to put on growth and crop quickly in spring. All these crops can be lightly cropped in late winter as they put on growth. This whole process can be exacerbated if grown in greenhouses and polytunnels. 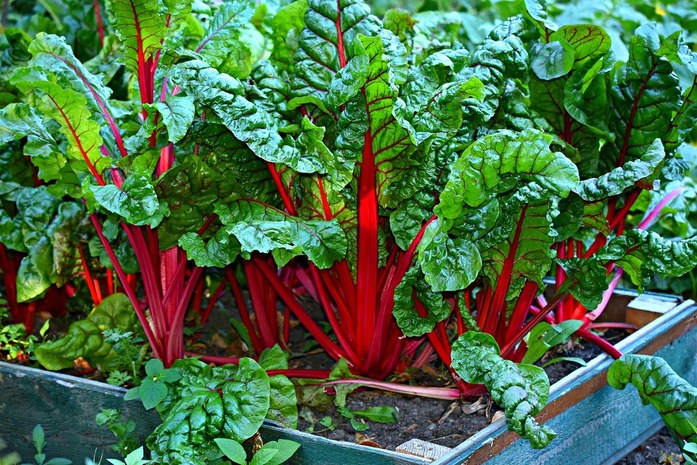
Understand your climateUnderstanding your climate is vital for growing vegetables successfully in winter. If you live in the southern United States you will have much more flexibility than the north of Scotland. Not only will your distance from the equator dictate temperatures it will also dictate the strength of sunlight. The only way to work out for sure what will grow well is with experimentation. As with primary growing season you can have great weather and sometimes its not so favourable. If you do live within a particularly cold region the more protection you can provide the better. It can help to find out what climatic zone you fall within to get an idea of an individual vegetables suitability. 
Create shelter
Vegetables like relatively sheltered environments with no strong winds to grow well. If you live in a particularly exposed location you may wish to consider adding some shelter. Shelter belts come in many different forms but the best are those which filter strong winds. Solid walls can create violent turbulence in exposed regions. The best shelter belts are hedgerows which absorb the winds energy slowly. If you live within a suburban setting it is likely surrounding buildings, boundaries and fencing will already provide effective shelter. Enhance microclimates
Microclimate is a topic not always discussed when it comes to growing winter vegetables. It can be surprising just how much temperatures can vary around your backyard. This is particularly so when the sun is shining. For example, a south facing wall with a patio will be much warmer than a north facing shady area. Warm air rises so the top of a south facing gradient can generate substantially more warmth than surrounding areas. When planning for winter vegetables try to evaluate your sites potential to leverage microclimate. 
Avoid frost pockets
Frost pockets are low areas within the landscape where freezing air can congregate. These frosty zones are typically found at the base of hills or along low boundaries. Frost pockets can be quite detrimental to growing vegetables during the winter. Try to plan for vegetable plots to avoid low areas within the landscape. A good way to avoid frost pockets would be to grow in raised beds within a sunny aspect. Improve drainage
During the winter month’s; cold temperatures, low transpiration rates and changeable weather result in moist soil conditions. Even if a plant can tolerate extreme cold most do not enjoy being both cold and wet. If your garden regularly becomes boggy during the winter you may want to improve your plots drainage. Why not visit our article on how to drain your garden and vegetable garden drainage here. If you have very boggy soil building raised vegetable beds could be a good strategy for better drainage. 
Growing undercover
If you really are serious about successfully growing vegetables in winter planting undercover is a great strategy. Growing vegetables in polytunnels and greenhouses can really give you the edge in the winter months. The sealed environment captures heat energy from the sun greatly extending your season. Growing in such structures also provides the perfect protection from snow, frost and hail stones. There are now a whole range of polytunnel and greenhouse products on the market. Some of these require no heavy concrete foundations or permanent anchor installations. 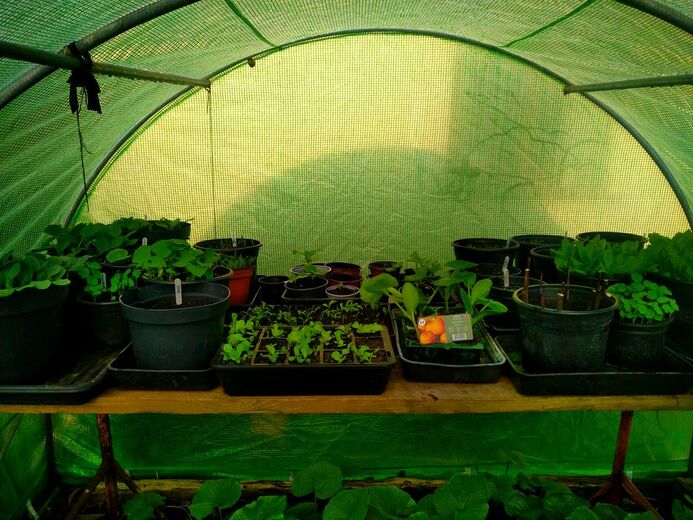
Install heating
If you do install a greenhouse for growing winter vegetables you can take things a little further. Installing a heating system inside your greenhouse can prevent crops from getting too cold. This can really boost your production over the colder months. Greenhouse heaters can also enable you to sow outside earlier and even grow more exotic varieties of vegetable. Below I have linked to a popular greenhouse fan heater.  Build a hotbed
Hot beds were a method of greenhouse heating which was very popular with Victorian gardeners. These hotbeds utilised heat produced from microorganisms breaking down organic materials. Very much in the same way composting gives off heat, hot beds were formed to heat greenhouses. Layers of manure, straw and kitchen waste was heaped up to create a continuous source of heat. Hotbeds are a truly sustainable way to provide ecological heating and fertiliser for greenhouses. 
Mulch
Mulching your vegetable plots is a great way to retain moisture, improve your soil and suppress weeds. During winter it also has the added benefit of protecting crops from ground frost. A generous layer of organic matter can help insulate vegetables roots from freezing. This can lead to better growth leading to stronger and healthier vegetable harvests. 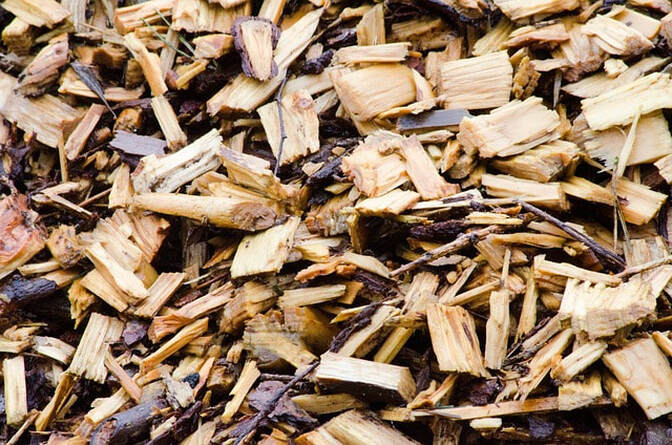
Protect crops with cloches
If you are growing your winter vegetables outside in the ground, cloches can provide excellent protection. These miniature greenhouses can help young plants establish while they are resisting extreme winter weather. Cloches can warm up very quickly in spring leading to fast cropping. These mobile growing tunnels can also offer effective protection from foraging birds and larger mammals. 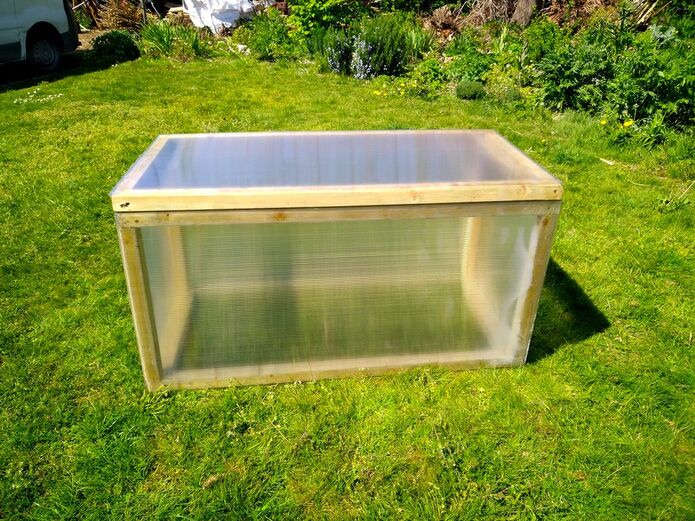
Thank you for reading our article on how to grow vegetables in winter. If you require a vegetable garden builder or designer do not hesitate to contact us.
I will link to some other vegetable garden articles you may also find useful.
'As an Amazon associate I earn from qualifying purchases'
This article contains affiliate link
Vegetable gardens really can become the busiest and most productive part of your backyard. However, vegetable gardens generally do become a place of function over form and aesthetics.
Most vegetable plots end up nothing more than back garden allotments. Vegetable plots can become a lattice of old wooden structures, re-used materials and collapsing raised beds. However, with some proper planning and investment, this can be completely turned around! Vegetable gardens do not have to be uniform rectangles held together with waste materials. By breaking down conventional norms and some imagination vegetable gardens can become a thing of beauty! In this article I will list and describe 10 ways to make your vegetable garden look nice! Uniform raised beds
A common problem with raised vegetable beds is they are random and boring. If raised beds are planned with uniformity they can form aesthetically pleasing lines and shapes within the landscape. Raised beds do not always have to be positioned in grids! They can also be positioned in interesting shapes and angles with central seating areas. For example, individual raised beds can form a hexagonal border encasing an outside kitchen area. Also, raised beds which are built using the same materials and a consistent size will always look much nicer. 
Install surfacing
One of the main contributors to vegetable gardens looking scruffy is a lack of robust surfacing. Very often lawn is simply left to grow between raised vegetable beds. This becomes awkward to maintain, boggy and muddy during wet weather. Occasionally, vegetable gardeners will lay down landscaping membrane and spread either gravel or bark chippings. As there is no sub-base installed these surfaces normally become uneven and full of weeds. Investing in robust and aesthetically pleasing surfacing around vegetable beds will save extra work and look amazing! Block planting
Block planting is a concept traditionally applied to flower borders and annual bedding displays. The idea is to mass plant a single species to create a visual block. These can be planted alongside blocks of contrasting foliage for a dramatic effect! An example of this for vegetables would be planting blocks of light green salad crops next to purple crops. This juxtaposition could also be utilised by implementing varying foliage heights and textures. 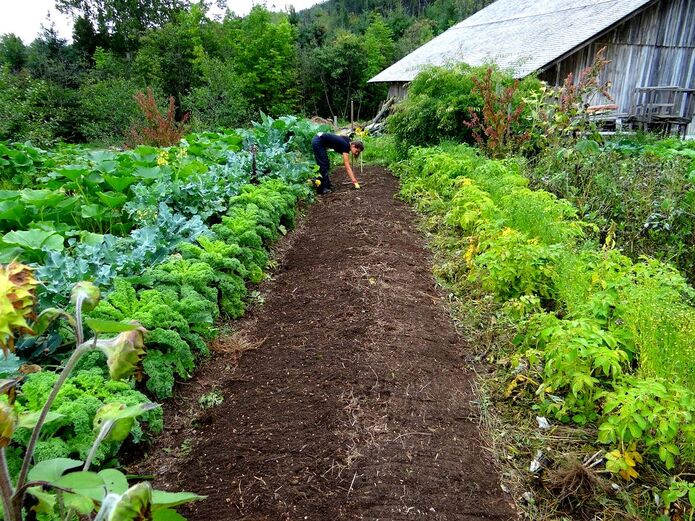
Plant for contrast
Not all vegetables are the same in form, colour and texture. When planning your vegetable garden try to plant to create as much contrast as possible. You may wish to paint your raised beds with vegetables with different colours to create as much visual interest as possible. Perhaps you may also want to implement companion planting which can reduce pests. Companion planting can also form exciting contrasts throughout your raised vegetable beds. Designer raised beds
The problem with many vegetable gardens is they implement raised beds as solely functional structures The truth is treating raised beds as a part of a garden design is a much better concept. This will enable your vegetable garden to become integrated into the your gardens design Why not consider investing more into concrete raised beds. These can be rendered, tiled or clad in any material or texture you choose. 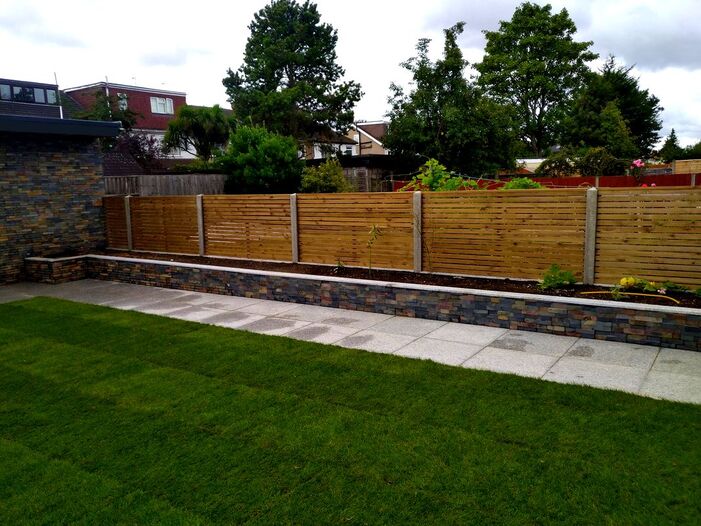
Mix vegetables and flowers
There seems to be many unofficial rules and norms which burden the vegetable grower. There is actually no need not to mix vegetables with other pants. In fact, such practices can actually benefit your vegetable growing. Mixing up crops with flowers can confuse garden pests leading to less crop damage. Flowers can also need much needed colour to vegetable gardens and encourage beneficial insects. Not to mention some flowers can be grown for their edible leaves and flowers such as nasturtiums. 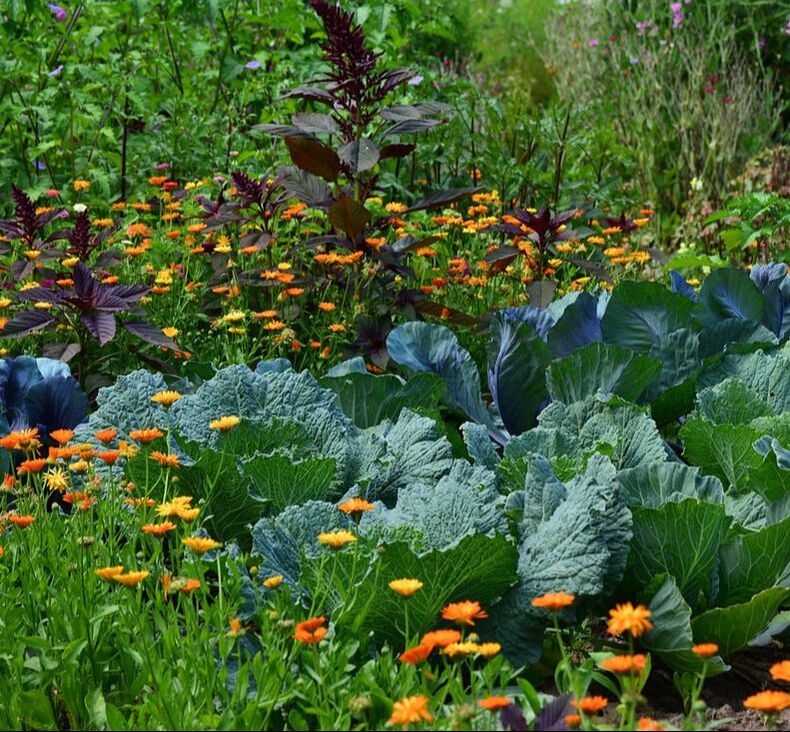
Plant vegetable borders
Vegetables do not necessarily have to be planted in neatly defined vegetable beds. There is absolutely no reason why vegetables cannot be grown in conventional borders. Vegetables can be cultivated in very much the same ways conventional plants are. Tall vegetables like corn can be grown at the back and ground covers like lettuce at the front. Most vegetables are actually very attractive with interesting foliage and colourful flowers. 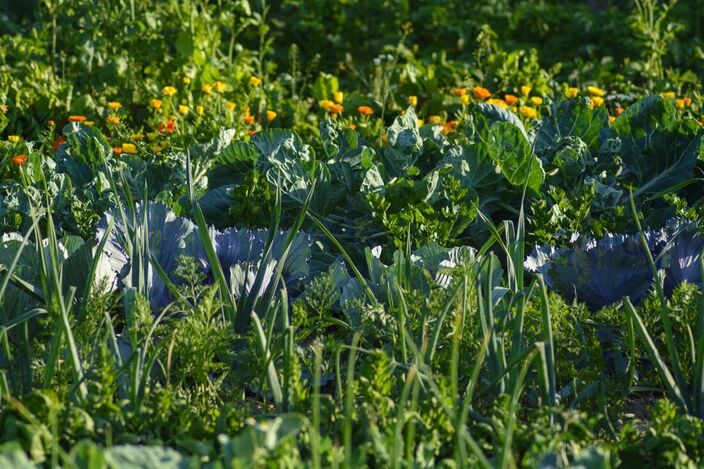
Climbing vegetables for screening
If you still wish to make your vegetable garden look nicer you could consider screening it from view. The best way to do this is actually using crops to do the screening! Trellises and cables can be set up as growing supports around your crop growing areas. These can then be planted with climbing vegetables such as peas, beans and squash. If you can’t afford to build new structures, consider growing tall crops such as sunflowers and corn. 
Grow Attractive vegetables
Contrary to conventional thinking vegetables are not all boring or unattractive. In fact, many vegetables can look better than specimen plants within the correct context. Rhubarb is an amazing plant with large, decorative foliage and lots of seasonal variation. Globe artichokes are one of the most beautiful plants of all in my opinion. There architectural foliage and bright grey tones make them a real eye catcher! There are also many attractive looking vegetables you can grow including Rainbow chard, Ornamental cabbage, Squash, Runner beans and onions. 
Use organic lines
The main problem with traditional vegetable gardens is they stick to square shapes and straight lines. This can make them seem rigid and boring! This format also enhances the idea that vegetable gardens are places of work instead of places of enjoyment. Some of the best looking vegetable gardens break up this traditional norm. There is no reason why vegetable beds can’t be curved with more organic shapes. Vegetables can also be planted in curvy drills and undulating drifts within borders. 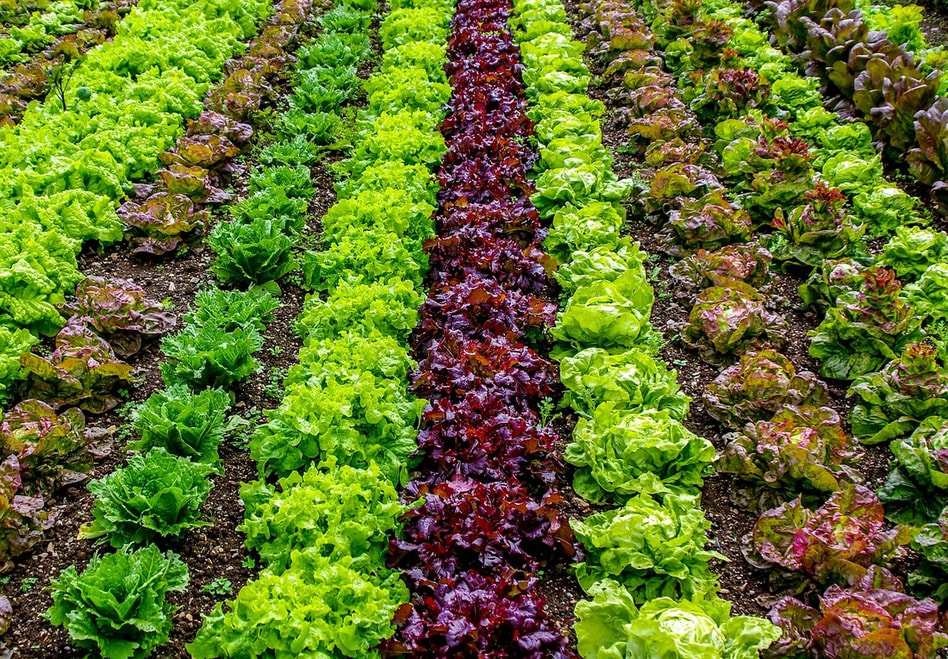
Thank you for reading our article on 10 ways to make your vegetable garden look nice.
If you require a quotation for building a new vegetable garden please contact us. Below we will link to some other vegetable garden articles you may find useful.
'As an Amazon associate I earn from qualifying purchases'
This article contains affiliate links
There is nothing quite like starting your very own vegetable garden. Vigorous, outdoor exercise combined with nurturing young plants is extremely good for the soul.
When it comes to harvesting the satisfaction of consuming your own produce is immense. The taste is always far superior to anything you can buy at the grocery store! However, getting a vegetable garden productive is not always easy. The soil will need to be conditioned to accept more fertility and reach a fine, crumbly texture. 
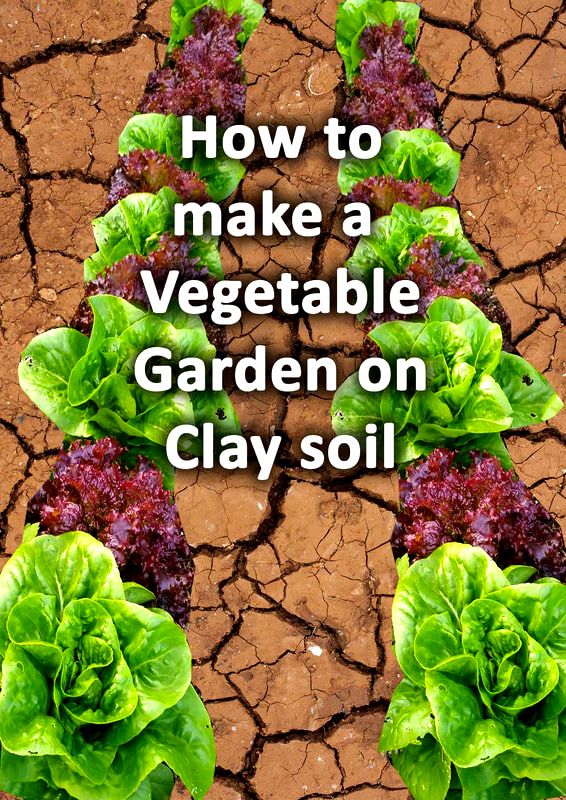
This can be rather challenging if you have heavy clay soil. It can be challenging to create a vegetable garden on clay soil because clay particles stick together and compact easily.
This can make it difficult to work and reach a good texture for vegetable growing. However, clay soil is not a deal breaker when it comes to growing vegetables. In fact, if treated correctly clay can actually benefit your new vegetable garden. In this article I will explain how to make a vegetable garden on clay soil. Problems with clay soil in vegetable gardens
The main problem with clay soil is its particles are very fine and heavy. This means they can become very sticky and compacted when wet. With significant moisture, content, fluctuations throughout the year clay can become difficult to work. Clay soil can be boggy and sticky in winter and dry and cracked during the summer months. This can lead to very challenging growing conditions for vegetables roots. 
Benefits of clay soil for vegetable gardensBelieve it or not there can be some advantages of having clay soil in vegetable gardens. Clay soil has a good ability to retain nutrients within its particles. This means, once ameliorated, clay soil can become very fertile for hungry crops. Clay soil also has the ability to retain moisture well under the surface. This can be extremely beneficial during the summer months when vegetables need extra water. 
Moisture content
One of the first steps to making clay more palatable is reaching a more consistent moisture content. Having a consistent moisture content throughout the season can make clay soil far less volatile. How this is achieved will depend upon the specifics of your site. However, in general, adding free draining particles such as grit and organic matter will help. If your site is naturally very boggy then raising growing areas up and installing drainage can help. 
Adding drainage
Clay soil which is continuously wet is always a recipe for problems in vegetable gardens. If you have a naturally boggy site you may wish to install some sort of drainage system. Firstly your site will need to be assessed by a professional to see why your ground is so boggy. You could have a naturally high water table or a more manmade drainage issue. Typical drainage solutions for clay soil include; re-levelling, free draining layers, drainage channels and soakaways. If you need to install drainage for a vegetable garden and local to Buckinghamshire why not contact us? 
Mixing in free draining material
One of the most crucial elements of making clay soil better for vegetable growing is permeability. The roots of vegetables need to reach down deeply to access nutrients and anchor themselves. One of the most effective ways of doing this is mixing in free draining material. These typically include coarse or sharp sand and grit. When these are well mixed in they can stop clay particles sticking together. This can help to open up the soils structure and improve drainage. 
Invigorating soil ecosystems
The importance of soil life has been underestimated for many years. The Billions of soil bacteria, fungi, insects and invertebrates continuously work to keep soil healthy and productive. If you want to make clay soil better for growing vegetables you will need to boost soil ecology. The best ways of doing this is to not use chemicals and apply organic matter to the soil. 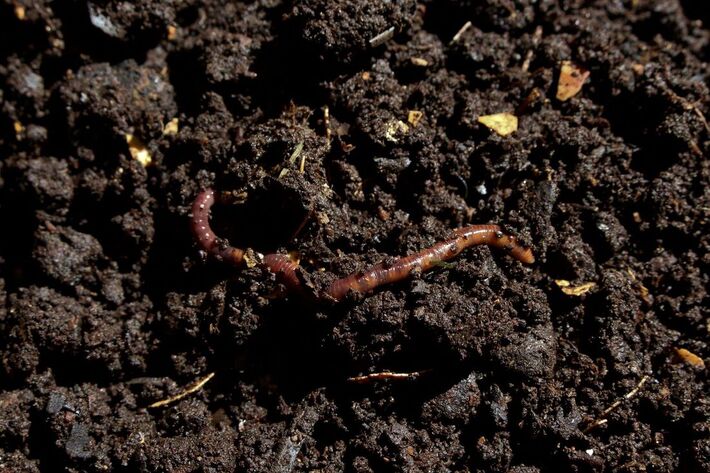
Mycorrhizal fungi
Taking the concept of boosting soil life step further mycorrhizal fungi is extremely important for healthy soil. These fungi can form symbiotic relationships with plants which are mutually beneficial. The fungi can aid plants to absorb nutrients easily and help to spread those nutrients around. It has been speculated that this process helps to break up heavy clay soils. Mycorrhizal fungi can now be purchased in dry form and added to your soil. Products likeRootgrow contain many different varieties of beneficial fungi which can benefit your soil.  Digging in Organic matter
One of the best things you can do for a vegetable garden on clay soil is adding organic matter. Organic matter adds nutrients and improves the structure of the soil. Clay soil with plenty of organic material mixed in rarely becomes sticky and compacted. This is because the organic material stops the clays particles from sticking together. The organic material feeds microorganisms within the soil adding oxygen and air pockets. This leads to a more fertile clay soil which is easier to work. Organic matter includes well rotten manure, compost, composted leaves or even wood chippings. 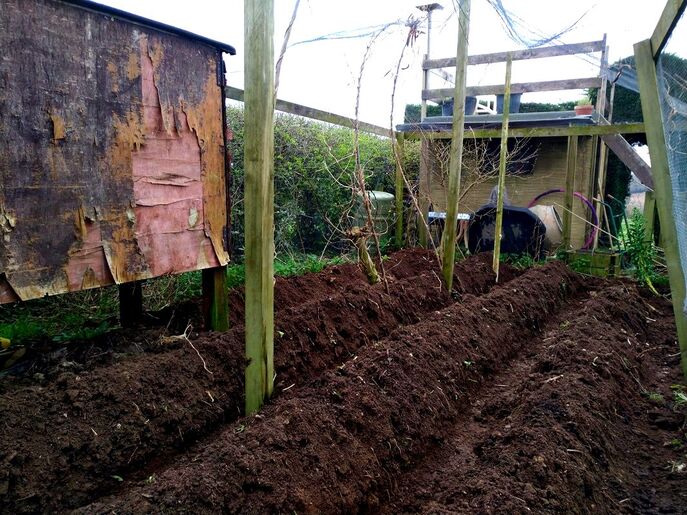
Mulching
Quite a big problem with clay soil is it can become baked solid during the summer months. This is because the sun dries out the top layer causing it to shrink and compact.
One of the best ways to mitigate this is with mulching. Mulching protects the soils surface from direct sunlight during the summer months. This helps to keep the soils temperature and moisture content stable. As the mulch breaks down it will slowly feed soil ecology below. Mulching vegetable gardens on clay soil will also stop weeds from establishing. 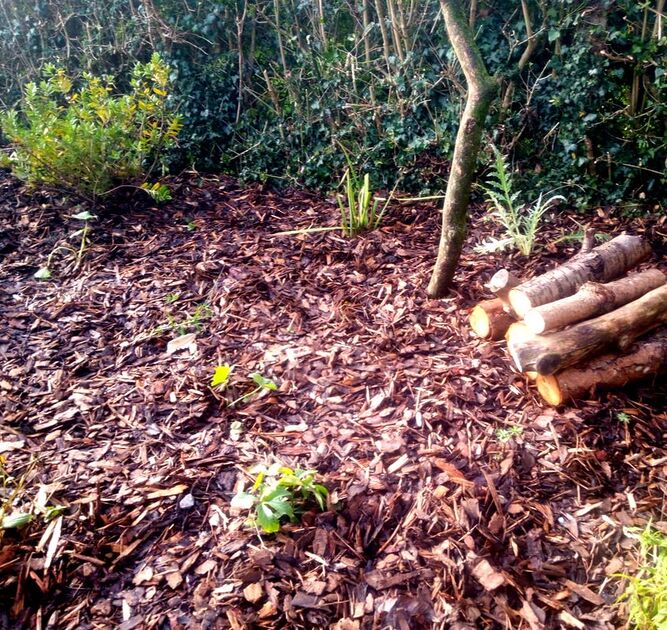
Double digging
Very often with clay soils it is not just the top soil layer which can be an issue. Heavy soils form a compacted layer called a hardpan which typically sits around 1 metre deep. This hardpan layer can be impervious to both water and nutrients. Consequently in vegetable gardens on clay soils it is beneficial to break through this layer. The best way to do this is with double digging! Double digging involves excavating the soil down deeply until you reach a compacted hard layer. This is then broken up and mixed with a generous heap of well rotten manure. This will encourage plants to set their roots down deeply to reach water and nutrients. This will make your vegetable garden much more productive! Build raised beds
By far the most effective way to create a vegetable garden on clay soil is by building raised beds. This allows the underlying clay to retain moisture and nutrients for the plot. Filling the bed with compost rich soil will provide plenty of fertility and a deep root run for vegetables to grow large and healthy. Building raised vegetable beds will also allow for plenty of drainage on heavy clay soils. Raided beds can be built using, concrete, brick or thick timber such as sleepers. 
Which vegetables like clay soil?
There are plenty of vegetables which do actually like clay soil as long as the soil is fertile. Some of these include:
Thank you for reading our article on how to make a vegetable garden on clay soil. If you would like help planning and installing a vegetable garden why not contact us here.
Below we have included some other relevant articles you may find useful.
'As an Amazon associate I earn from qualifying purchases'
This article contains affiliate links
Vegetable gardens can become a labour of love and all out passion. Many who dedicate their time to vegetable gardening are not just in it for the vegetables.
Vegetable gardeners have a love for interacting with nature and working with the soil. Very often however, vegetable gardens are rarely planned and landscaped well. Most vegetable garden landscaping is a combination of degrading planks filled with soil, upturned carpets and lawn. Such set ups are completely acceptable and affordable. 
However, they do have their drawbacks and problems. Poor vegetable garden landscaping can lead to challenging maintenance and more pests.
By planning and landscaping your vegetable garden you can save money & many problems in the long run. Robust raised beds, hard wearing surfaces and a defined boundary can give you less work and more control. In this article I will list and summarise typical vegetable garden landscaping elements. What is the best vegetable garden layout?
The best vegetable garden layout will make perfect use of available sunlight and space while providing easy access, maintenance and harvesting. Typically the best layout will consist of rectangular beds easily reached from pathways without compacting soil. Pathways should be wide enough to enable easy access for wheelbarrows and other tools. Preferably beds will facilitate long, linear rows running from north to south. This will enable good sunlight coverage for your crops. Raised beds of varying heights can be implemented with the highest further away from the sun. This will help maximise light and exacerbate warm microclimates. 
When is the best month to build a vegetable garden?If you are planning on building a new vegetable garden the best time is late summer or autumn. If you leave it until spring you may miss out on valuable sowing and planting time. In Late summer you can landscape your new vegetable garden ready for the next season. If you try to do this in winter your site could turn into a boggy mess. 
Groundwork’s and levelsAn important consideration of a new vegetable garden is the ground levels. If your vegetable beds are on sloping ground you may find moisture and nutrients run to lower areas. This can lead to vegetables growing at inconsistent rates and at different sizes. In such circumstances vegetables at the top of slopes can become dry and bolt prematurely. 
Therefore it is always advised to landscape vegetable gardens as level as possible. This is particularly the case with raised beds which may also be very well drained.
Consequently, it is advantageous to re-grade the whole surface of a new vegetable garden level. This will keep soil moisture levels consistent and make access easier. Drainage
Drainage is always a consideration when landscaping a new vegetable garden. Very often, there will be no need to install any drainage at all. However, if your locality has a high water table you may have a very boggy site. Such conditions can lead to compacted and stagnant soil which is challenging to work. In such cases you may wish to install a landscape drainage system. These traditionally consist of drainage channels with perforated pipes and free draining gravels. For more information on vegetable garden drainage read our comprehensive article here. Most of the time however, installing raised vegetable beds with free draining soil will solve this problem. 
Soil amelioration
There is probably nothing quite as fundamental for vegetables as having quality soil. Soil amelioration is typically an ongoing process which takes a number of years to perfect. If you are landscaping a new vegetable garden you will need a head start. Vegetable garden soil needs two main things; fertility and workability. If your soil is easy to work it will also be easy to weed, plant and harvest crops. 
Therefore new vegetable beds will need to be turned over, tilled and worked to a friable texture.
The best way to stop soil particles sticking is by adding plenty of organic matter and grit. It is beneficial to mix in some well rotted manure 6 months before planting for added fertility. When landscaping a new vegetable garden it is good to buy in some compost rich topsoil in bulk. Raised beds
There are very few landscaped vegetable gardens that do not implement raised beds. Raised planters provide a deep and good quality growing medium for vegetables. This makes them a great choice especially for new vegetable gardens. Generally raised vegetable beds are built using, timber sleepers, concrete or bricks. As these structures must retain large volumes of heavy soil they must be robust. This is why I feel concrete and brick raised beds are always best as they last the longest. Timber sleepers are a more affordable option but will eventually degrade over time. Brick and concrete beds are more permanent but also more costly to install. 
Surfacing
Very often little attention is paid to surfacing around vegetable gardens. Access paths and working areas always benefit from a practical and robust wearing surface. These are best created out of solid materials instead of bark and loose gravels. Both the latter can become clogged with soil spillages over time. Therefore, it is best to install concrete or paved surfaces laid on a solid bed of mortar and pointed. Light colours will help to deter pests and reflect sunlight enhancing the local microclimate. 
Fencing
Conventional, boundary fencing is not always the best option for vegetable gardens. This is because it can shade out valuable sunlight from your growing areas. However, fencing off your vegetable garden from pests can be very beneficial. This can be particularly important if deer and rabbits can access your garden. If you have chickens you will also benefit from fencing as they will gladly nibble your greens. I find the best fencing is a 4 foot tall (1.2 metre) timber picket fencing with a gate. Alternatively agricultural stock fencing can also be very effective and doesn’t block out any light. 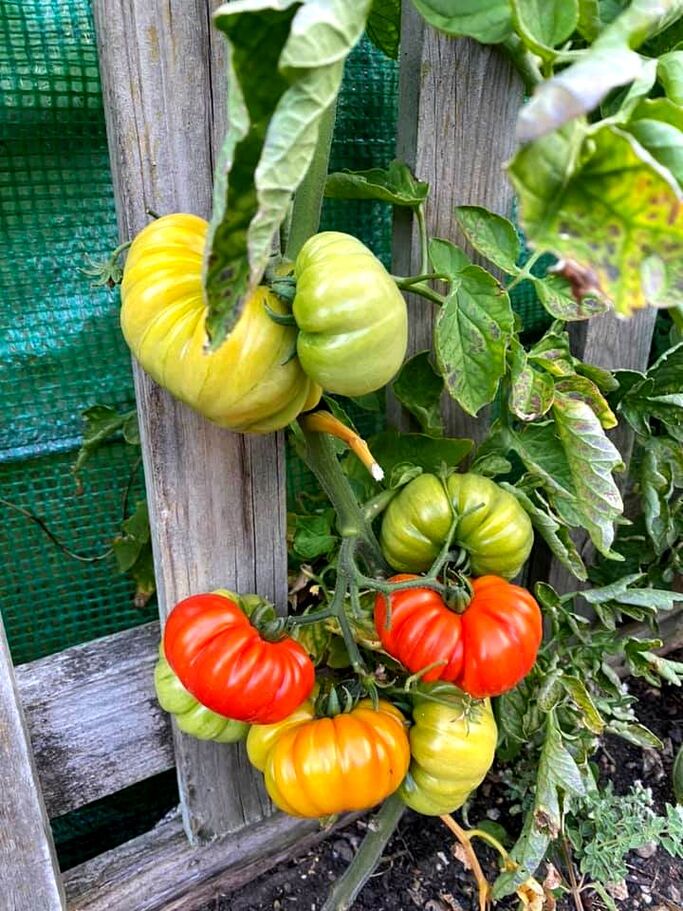
Structures
Structures are a great way to make use of some extra sunlight on your site. Vegetables such as beans peas and trailing squash will happily make use of vertical support systems. Some of the best are trellis systems, arches and pergolas. If you are landscaping a vegetable garden such structures are an efficient use of space. Pergolas can be very effective at providing shady areas and look really good with hanging squash in autumn. If tall structures are positioned at the rear of your beds they will not shade out other crops. 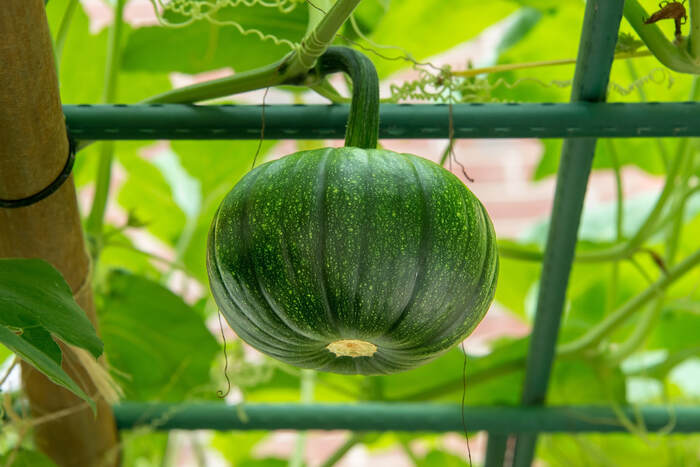
Greenhouse bases
If you are really serious about growing vegetables installing a greenhouse is a must. A greenhouse will enable you to start seeds early and harden off young plants gradually. Greenhouses and polytunnels can also be a fantastic way to grow more exotic fruits and vegetables. Greenhouses will typically need a solid concrete base to build upon. Therefore it is a good idea to plan its location before you start landscaping a vegetable garden. 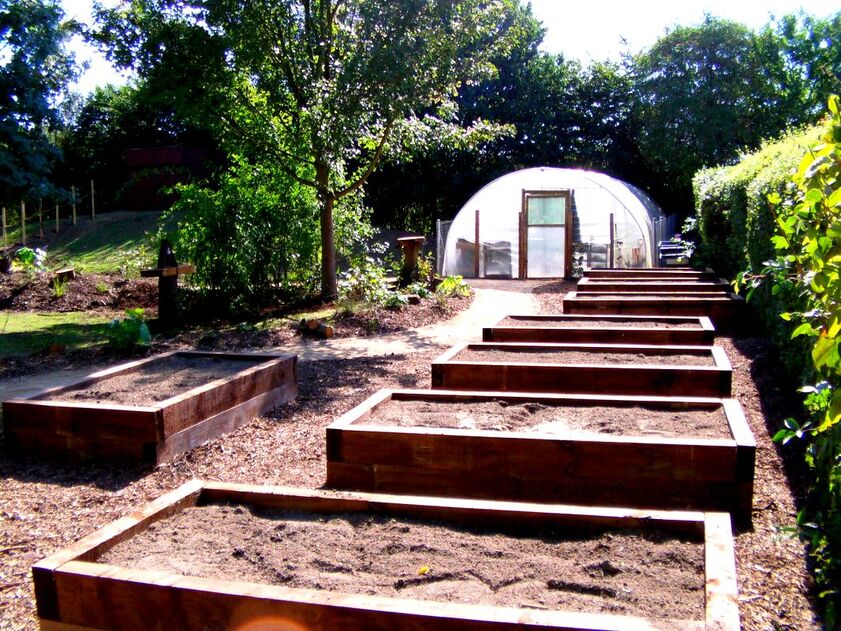
Compost systems
Composting and recycling nutrients is an important part of vegetable gardening. Vegetables will simply not reach their full potential without good soil nutrition and fertility. The best way to implement this is by building large composting bays. Many flimsy composters on the market only have capacity for organic kitchen waste. If you are landscaping a vegetable garden, larger composting bays have a much better capacity. The best scenario is to have three adjacent bays next to each other. Every year these can be shovelled from one bay to the other oxygenating the compost. Large composting bays can be easily installed using timber sleepers or concrete blocks. 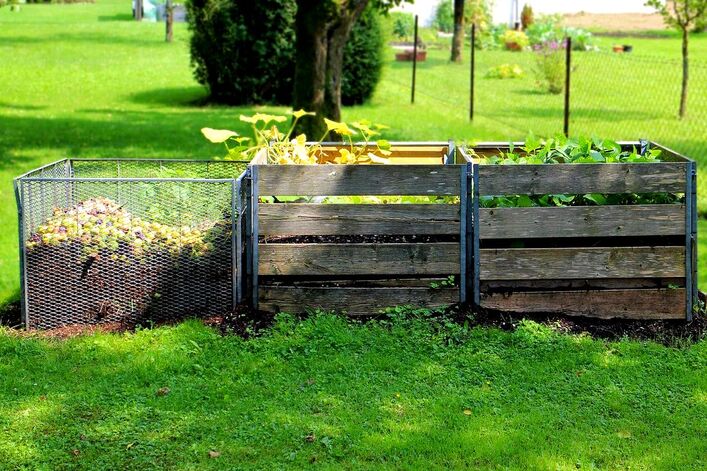
Ecology
Ecology may not be a typical consideration when landscaping a vegetable garden. However, ecological balance is recognised as being an effective strategy for pest control for crop growers. Small wildlife habitats can attract beneficial species to your growing areas and feed upon your pests. Unfortunately it is normally the most beneficial wildlife species which are most persecuted in gardens. 
Some of these include spiders, wasps, hedgehogs, frogs, bats, reptiles and beneficial insects. The good news is these are easy to encourage back into our gardens with some simple installations.
Some of these include; ponds, meadows, deadwood, nesting boxes, hibernacula’s, native plants and rock piles. For more intensive information on how to make a garden wildlife area visit our full guide here.
'As an Amazon associate I earn from qualifying purchases'
This article contains affiliate links
Vegetable gardens can become one of the most entertaining and productive parts of your garden.
Most of the time, vegetable gardeners are more concerned with building healthy soil and general maintenance. However, many vegetable gardeners do not pay much attention to surfacing their plots. Effective surfacing within a vegetable garden can reduce maintenance, provide easy access and keep pests at bay. The best surfacing for vegetable gardens will be a solid and impermeable surface free of cracks. It will also enhance your growing areas visually and provide easy mobility to wheelbarrows and other forms of carriage. I will examine the top 6 surfacing options for vegetable gardens and discuss the effectiveness of each. LawnIn reality, most vegetable gardens are merely rectangular borders cut out of lawn. This results in grid like pathways of grass in between your growing areas. This can form quite a satisfactory pathway surface for between vegetable borders. It is especially so if your vegetable garden is already adjacent to a lawn. These green pathways are easy to maintain and regenerate easily. The only drawback with lawn is it can become messy in times of heavy rain. Edging the grass can become an extra chore and pests like slugs find it easy to travel across and hide. 
Bark
Wood chippings and bark mulch can provide an organic and naturalistic aesthetic for vegetable gardens. However as a pathway or surfacing material it has some serious flaws. Firstly, bark will eventually rot down leading to the continuous need for re-spreading. Not only can this be laborious it can also be expensive. One of the biggest threats with surfacing vegetable garden paths with bark is weeds. The inevitable spillage of soil means there is a continuous threat of weed establishment and eventual domination. 
Gravel
It is interesting that gravel is the most common surfacing material for vegetable garden areas and pathways. Gravel does have some advantages including looking good and allowing water to pass through. However, if you are considering laying gravel I would recommend basing it correctly. This means not simply laying membrane and spreading it over soil. Make sure you excavate to at least 100mm spread 60mm of compactable sub-base and 40mm of gravel. 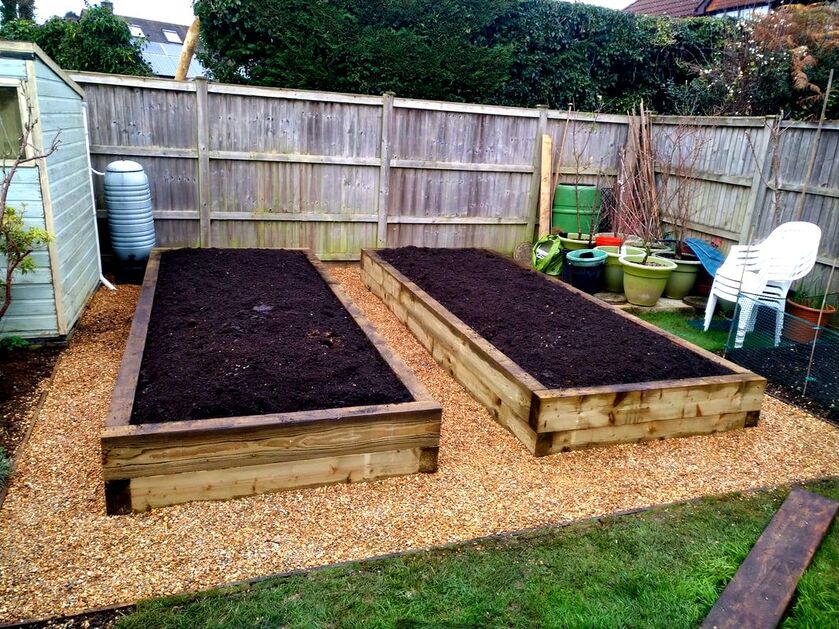
This will give the surface extra stability and reduce the threat of weed establishment. Bear in mind that gravel is not ideal for surfacing around vegetable gardens.
The aggregate will eventually become clogged with soil and organic matter. This will lead to weed establishment and a generally unsightly look. This is not to mention the inconvenience of displacement when wheeling barrows and other tools. Concrete
Concrete is a surfacing material which has really fallen out of favour in the past 30 years. However, the truth is concrete is a very practical surfacing material. Concrete is fast and easy to lay and is one of the most affordable methods of hard surfacing. The great thing about concrete is it can always be re-surfaced later with other pavers and other surfaces. A well installed concrete path will provide easy access with no threat of weed establishment. 
Block pavingBlock paving is a popular surfacing material and now comes in a wide range of products and styles. Conventionally used for driveways these concrete blocks are aesthetically pleasing and hard wearing. If you want to surface between raised vegetable beds block paving is a reasonable option. This is especially so if you have a specific look and design in mind. 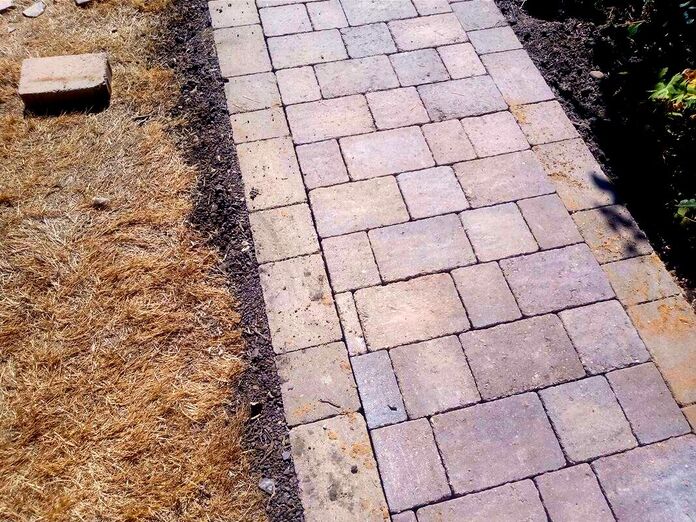
However, the only drawback with block paving in vegetable gardens is the sanded joins.
Continuous, digging, planting and harvesting will lead to continuous soil spillages. Over time this will lead to an infiltration of dirt, debris and eventually lead to weed establishment. Paving slabs
The term paving slabs covers a very broad range of paving materials on the market. Paving slabs can be anything from concrete aggregate pavers to natural stone paving. However, the thing which makes paving slabs consistent is normally the way they are laid. Slabs, if installed correctly, are laid upon a solid and consistent mortar bed with a compacted sub-base. This means they are very unlikely to move or crack. 
When jointed properly with a strong mortar mix there is almost no risk at all of cracking.
This makes paving slabs ultimately the best surfacing material for vegetable garden pathways and other surfaces. Paving will provide study accesses for wheeled carriages such as wheelbarrows and wheelchairs. It will also provide a robust surface which will last the test of time and prevent weed establishment. Conclusion
Therefore, the best surfacing material for vegetable gardens is paving slabs laid to a correct specification. However, like most things in life, this is also the most expensive option! If you don’t want a messy looking vegetable garden I would at least recommend concreting between vegetable beds. Thank you for reading our article on the best surfacing for vegetable gardens. If you require a vegetable garden builder please do not hesitate to contact us. We can design vegetable gardens and install self sufficient and sustainable garden systems. For more information we have linked to some of our other vegetable garden articles below.
'As an Amazon associate I earn from qualifying purchases'
This article contains affiliate links
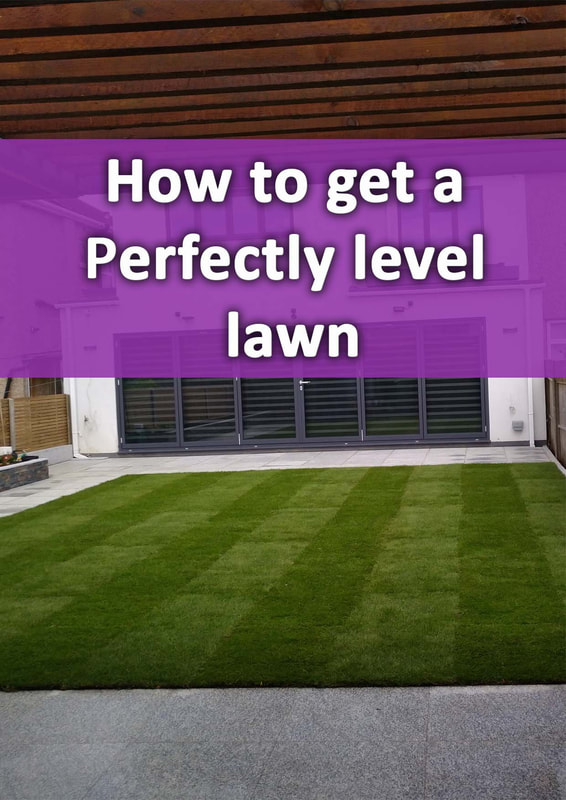
A perfectly level lawn can be a thing of beauty within a gardens landscape. Excellent quality and perfectly level, lawns can even be difficult to differentiate from artificial lawns
However, the reality is, most lawns do not even come close to this condition. There are many reasons why a lawn will become uneven and bumpy over time. The truth is, most lawns never start out perfectly level to begin with. Consequently, in this article I will explain how to get a perfectly level lawn from scratch. Why is my lawn bumpy?
There are a number of reasons why your existing lawn may be bumpy. Some of these are poor drainage, burrowing animals, tree roots, ground movement and ants. If you have ant hills in your lawn why not read our article on how to get rid of ants from your garden. Your lawn may even be the original ground the house was built upon. This means no significant landscaping or levelling would have taken place. 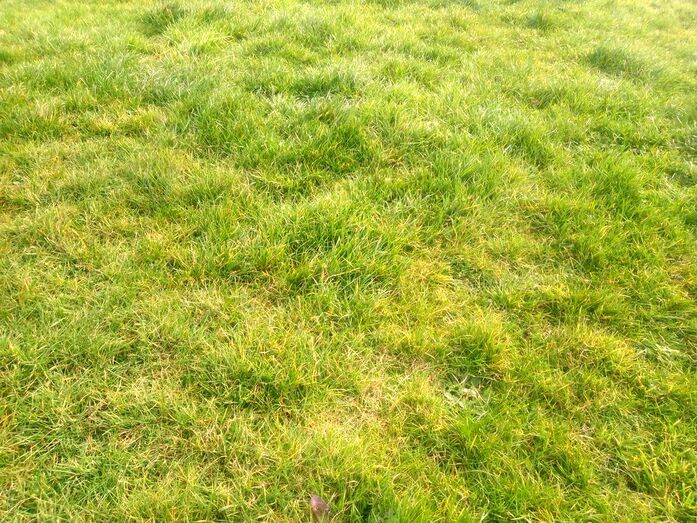
How to level a bumpy lawn?
There is no escaping the fact that levelling a bumpy lawn will take some digging. Ideally you will need to chip off existing grass with its roots and dispose of it. The compacted and uneven subsoil should then be levelled. High areas should be broken up and spread into low areas and graded level. When your subsoil is relatively even the ground can be tilled or rotavated. This will alleviate compaction and improve the lawns drainage. 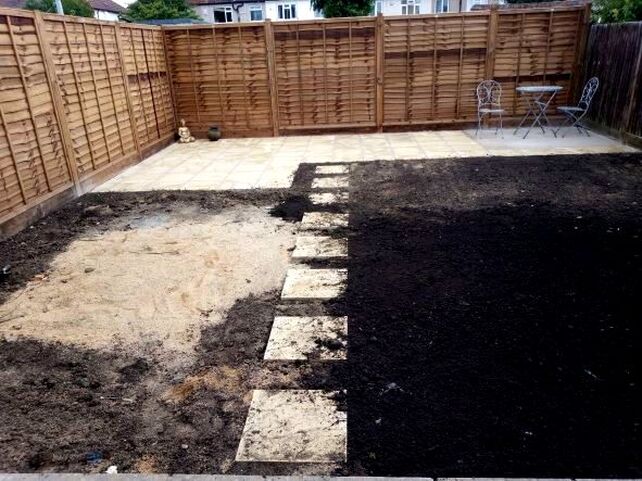
It will also give your soil a fragmented and loose texture making it easier to re-level. However, tilling is not essential or even possible on some, tougher, subsoil’s.
Therefore it is best to supply, spread and level a layer of new, humus, rich, topsoil. This will be very easy to spread perfectly level and provide the best start for a new lawn. How to level a bumpy lawn without new grass?
If you do not want to re-level and replace the existing lawn you could try top dressing. Top dressing can be effective to smooth out less extreme bumps and low points. This involves gradually building up low areas over time. A mixture of topsoil and sand is spread gradually in low layers until a new layer of grass establishes. Over time, your lawn can become more even and level. However, it is very difficult to reach a perfectly level lawn using this method. 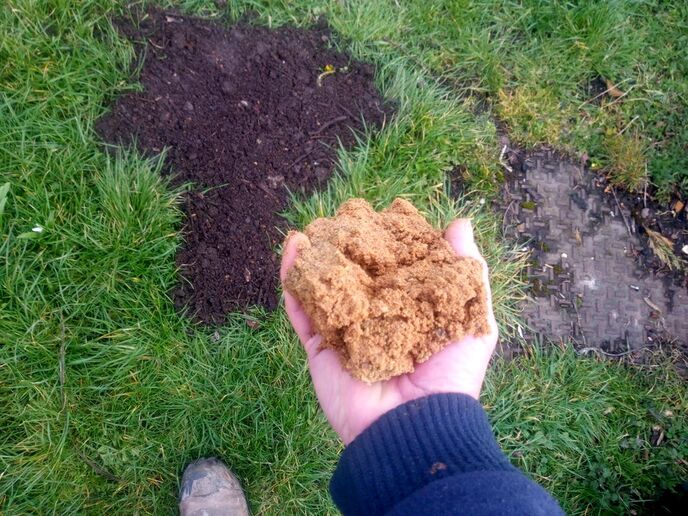
Very often, dressed areas form miniature domes and bumps within the low spot itself. This can lead to even more rippling within the lawns surface.
Furthermore, spreading fresh topsoil encourages much greener and healthier grass within the low spots. This can lead to a visually patchy lawn which grows at an inconsistent rate. Consequently, I always advise clients if they are serious about levelling their lawn they should replace it. 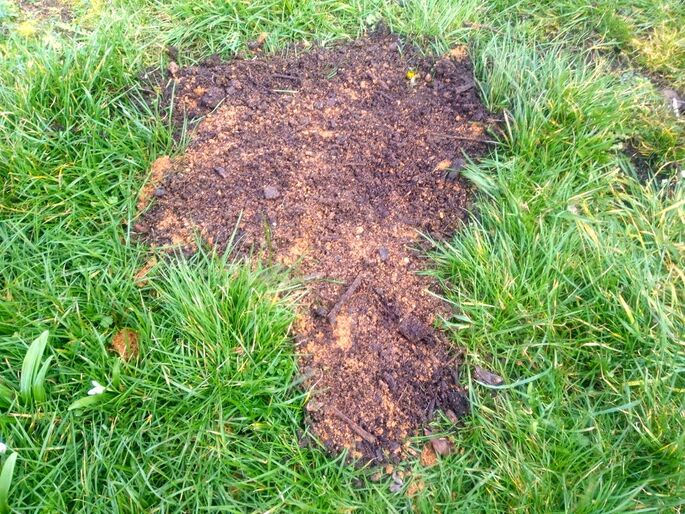
How to get rid of ant hills in my lawnIf your lawns mounds are ant hills it is best to excavate these out completely and remove them from site. Remember you will have to try to remove the queen to destroy the colony. I recommend excavating out a 500mm x 500mm cube of soil from the centre of the mound. This should destroy the ant colony. The ant colonies can then be disposed from site in a skip. This may seem like a lot of work but other methods like boiling water rarely kill the queen. 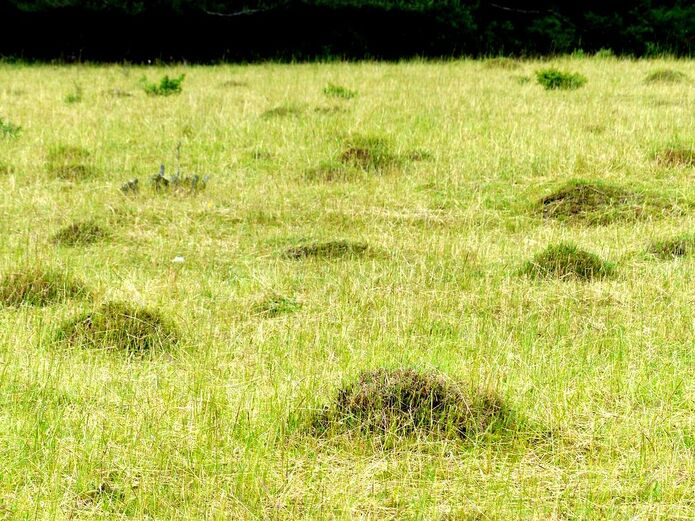
Queen ants live in protected chambers deeper under the soil. The remaining square pits can then be monitored for ant activity over the coming week.
When there is no longer signs of ants these can be filled and consolidated well with subsoil. How to create a perfectly level lawn from scratch
Step 1
Survey your existing lawn levels to identify which areas are too low and which areas are too high. This can be achieved by ‘assessing existing surrounding level references’. These are normally the base of fences, patio levels and outbuildings. 
Step 2
You must then identify your optimum or perfect lawn level. This can be achieved by running a tight string line across your garden from your existing reference levels. This level, once identified, can be marked out by tapping in timber pegs. Ideally the new level of your lawn will meet your surrounding paths, edgings and patios seamlessly. This will result is easy mow over edgings around the perimeter of your lawn. 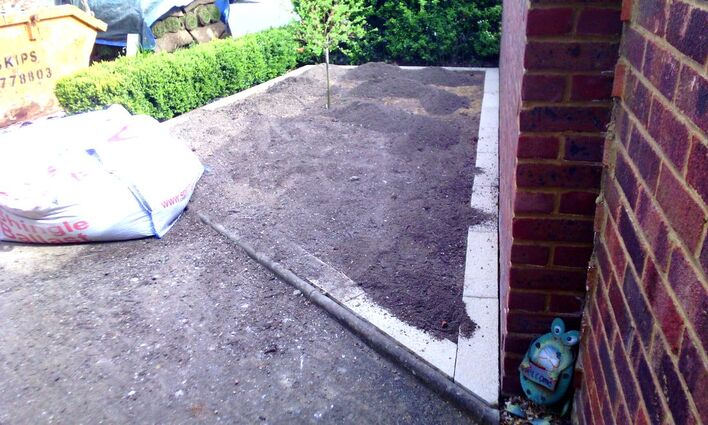
Step 3
The only way to get a perfectly level lawn is to install perfectly level retaining or mow over edgings. This will enable you to screed the topsoil level perfectly to the top of the edgings. Lawn edgings can be constructed with a range of materials but the best are those which do not degrade. The best retaining edgings for a lawn are made of brick, paving, natural stone sets or blocks. These can be installed perfectly level all the way around your grass. This will allow for a perfectly level lawn and seamless mowing. 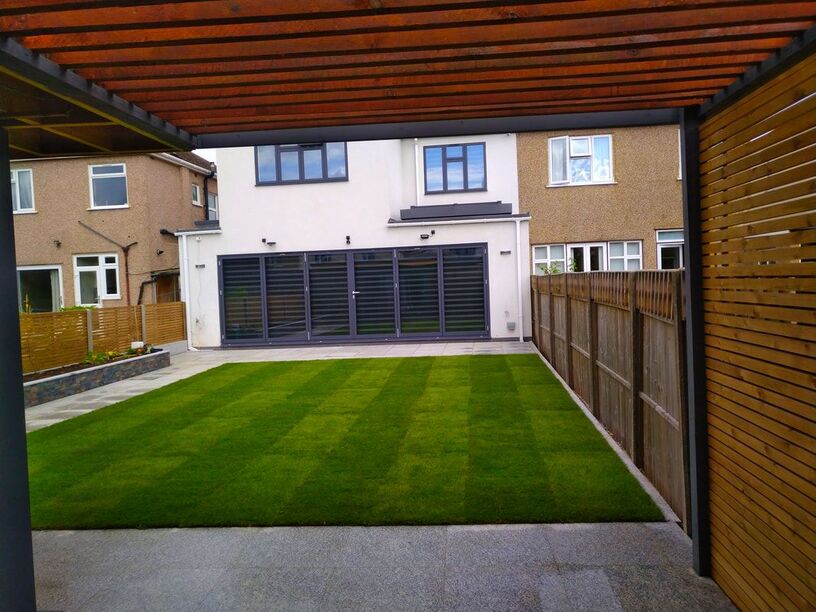
Step 4
Excavate a channel for your retaining lawn edgings. The channel should be at least wide enough to allow for your lawns edges. For example, if you are installing a brick on edge your excavation will need to be a full brick width thick. Dig out a perfectly square excavation to a depth of 125mm or 5 inches. Make sure all excavated soil is removed with no soft soil left within the excavation. 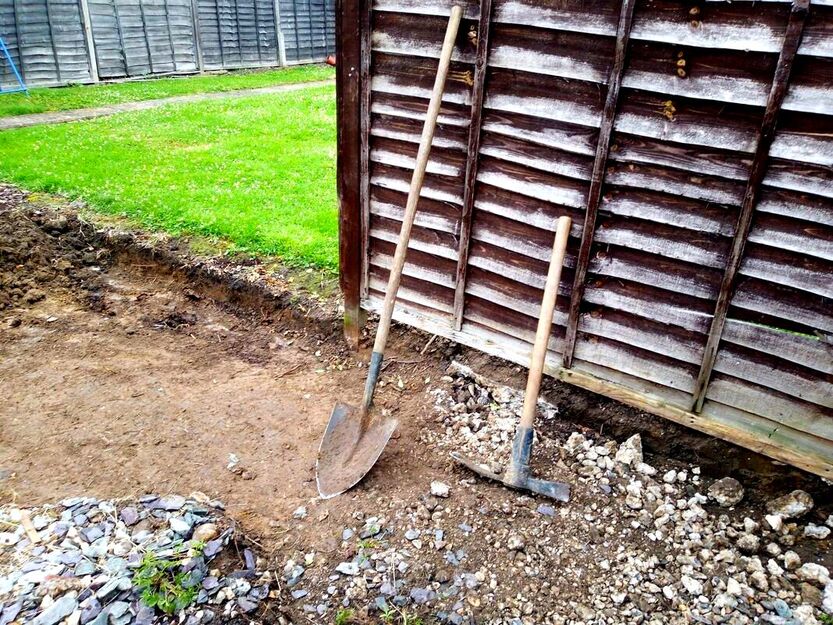
Step 5
If you are laying masonry edgings like paving or brick you will need to spread a sub-base. Fill the excavation with enough compactable sub-base to allow you to reach your desired height, For example, paving is normally around 20mm thick and bedded onto a 40mm mortar layer. Therefore your 125mm excavation will need 65mm sub-base which will leave 60mm for the paving and mortar. 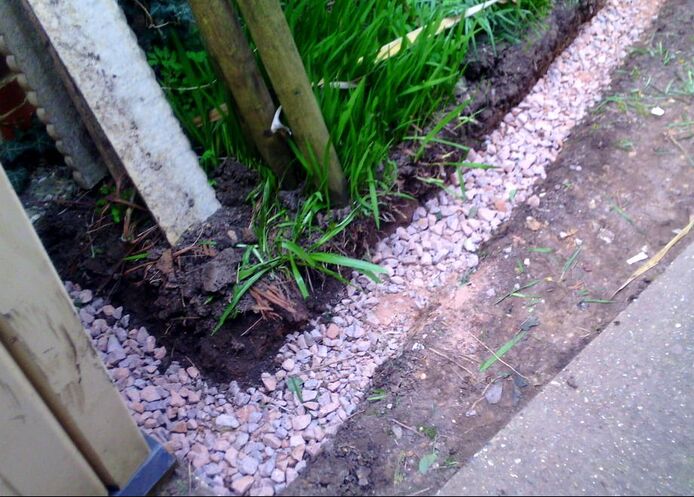
Step 6
Install your edgings, if you are laying masonry edgings make sure they are laid upon a consistent mortar bed. Also make sure your edgings are well pointed and haunched securely into position. If you are laying timber or metal edging make sure they are secured well at a consistent level. You do not want your edgings to fail under the weight of soil. 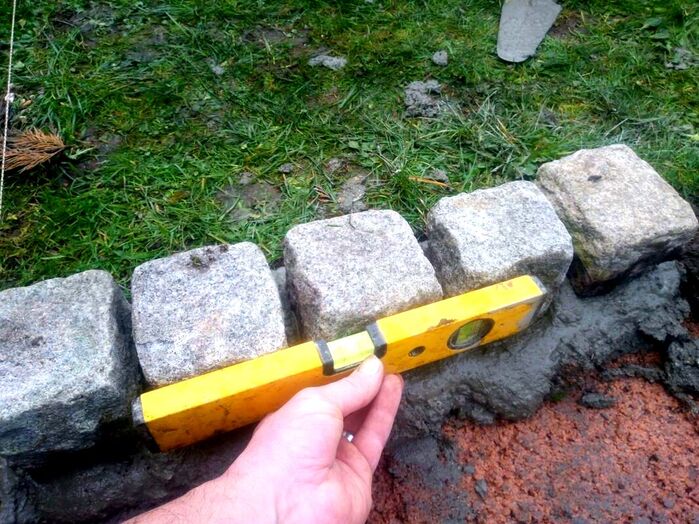
Step 7
You should now have you perfectly level or consistently flush lawn edging. Now you need to prepare your soil for laying lawn turf. Remove any existing grass or weeds and make sure you remove all roots. If you have any high areas this is now your opportunity to level them out. If you do not have a good eye for levels run a tight string line across your edgings. Break up high areas of soil and spread them into low areas. 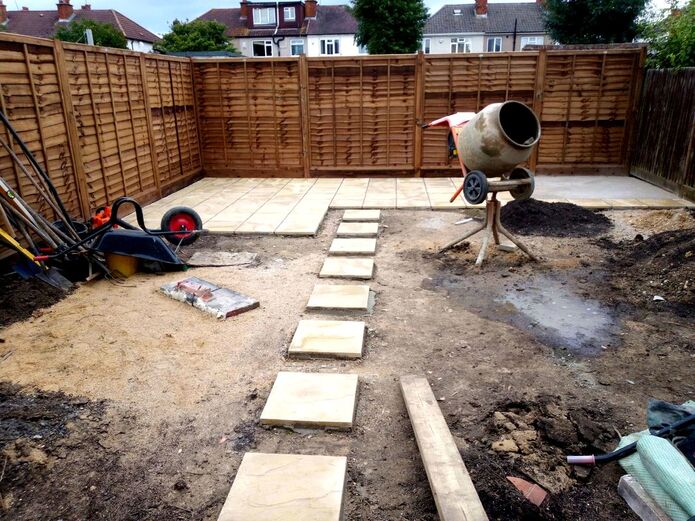
Step 8
Alleviate any compaction or poor drainage by turning over the existing soil. The easiest way to do this is with a mechanical tiller machine. This will work the soil to a fine texture. If you have particularly claggy and sticky soil like clay add plenty of grit and organic matter. Once your new lawns topsoil layer is loose and crumbly rake it as level as possible within your edgings. 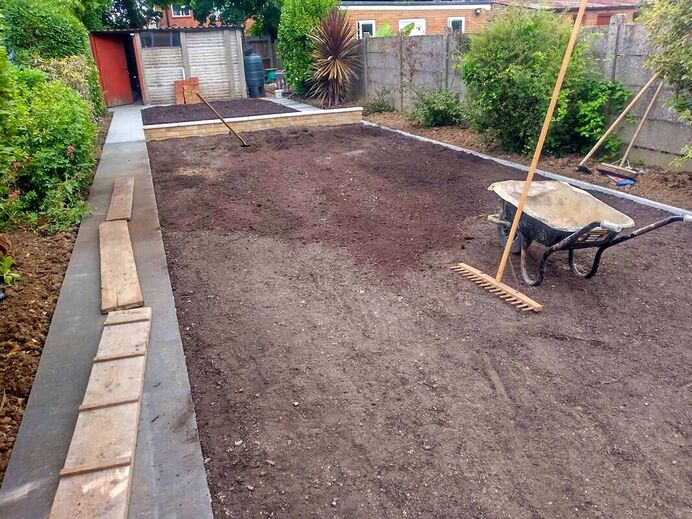
Step 9
During the digging and tilling process you may have noticed your soil is much higher than what it was. This is because you have added plenty of oxygen and air spaces to the topsoil. Eventually this level will sink as the ground settles. You do not want your lawn to eventually sink below the perimeter edgings! Consequently you should consolidate the topsoil by rolling the ground or treading down the soil with your feet.
Step 10
Supply and spread a layer of good quality compost rich topsoil to the new lawn area. Depending upon what level your edgings are at you may need more than usual or very little. I always work my levels to allow for at least 1 cm of rich topsoil to the soils surface. 
Step 11
Level your soil so it is perfectly flush and level to the top of your edgings. Typically this is accomplished using a landscaping rake by professional landscapers. However, you may find this challenging if you have never levelled soil before. If your lawn is a conventional size you can screed it with a straight edge. Using a long and straight piece of timber you can scrape the soil level by resting it upon your edgings. Using a sawing action you can achieve a perfect level base for your turf. There is knack to levelling topsoil but with some patience and perseverance its completely achievable! 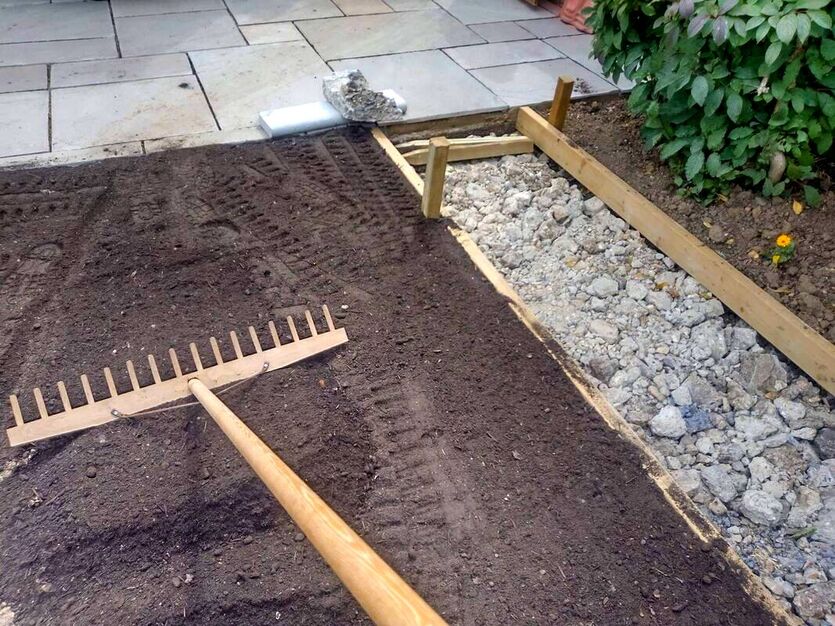
Step 12
Roll out your lawn turf starting along a straight edge. Make sure you use timber boards to walk across the project to spread your weight and not create ruts. Stagger the turf rolls like brickwork so it knits together tightly. Make sure you bunch up the turf as much as possible while still laying it level. This is because turf shrinks as it dries out. When you have laid a section, put boards over the grass and walk it flat. This ‘boarding in’ process makes sure the turf has made good contact with the soil beneath. 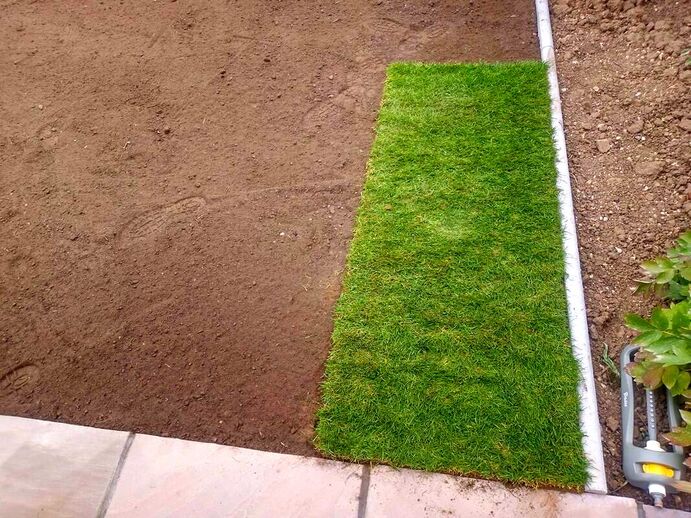
Step 13
Water your newly laid lawn with a sprinkler very well! Do not underestimate how much water it will need especially during warm weather. A test is to gently lift a corner of the turf to see if it’s saturated. You want to make sure both the turf and the soil beneath have become completely absorbed. 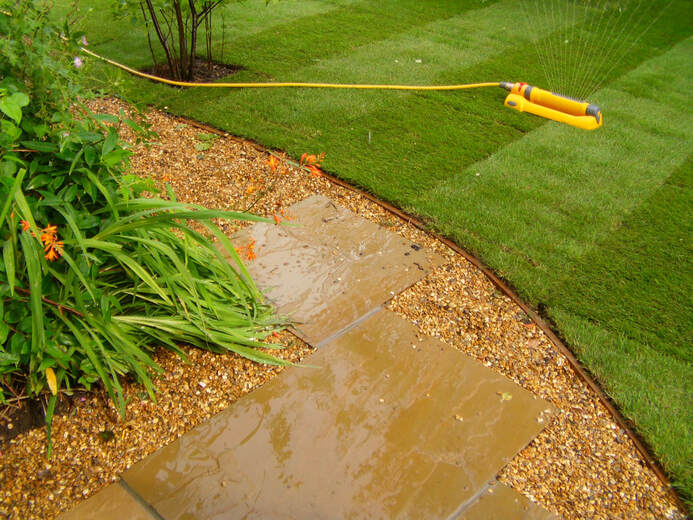
Step 14
Give your new, perfectly level lawn and final board in and leave it to establish. If you are expecting hot and dry weather keep an eye on the turf for the next couple of weeks. Make sure it is well watered and looked after during this establishment period. After two weeks your lawn should be established enough to take care of its self and to be walked upon. 
Thank you for reading our article on how to create a perfectly level lawn. If you require the installation of a new and level lawn please do not hesitate tocontact us. We provide lawn and garden edging installation services. We also provide lawn drainage as well as other conventional landscaping services such as paving, fencing and garden makeovers.
'As an Amazon associate I earn from qualifying purchases'
|
The Author
|


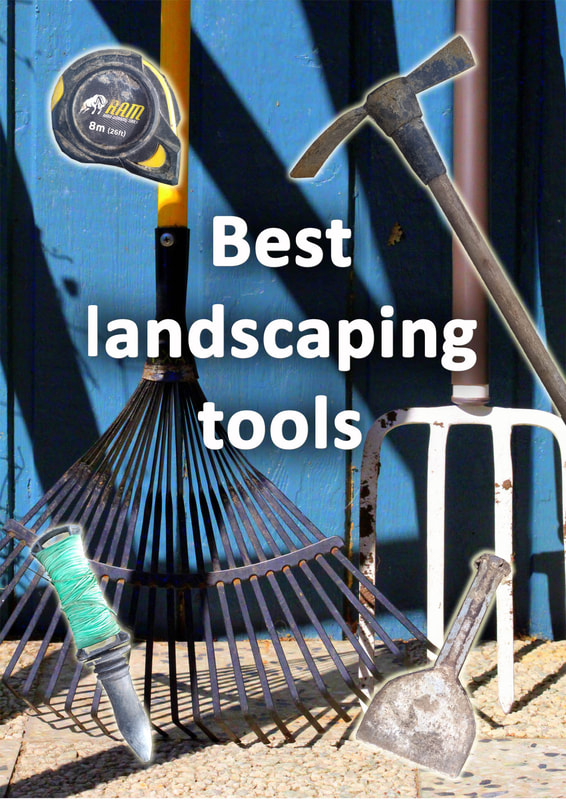


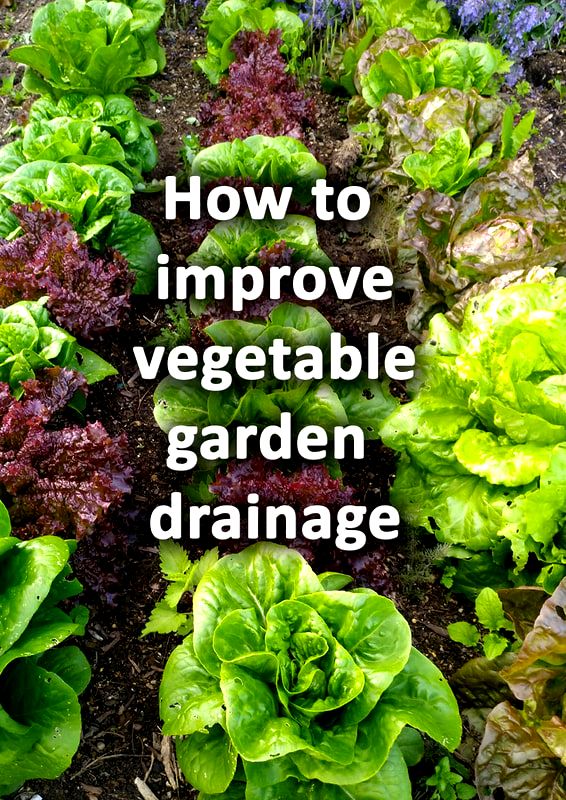
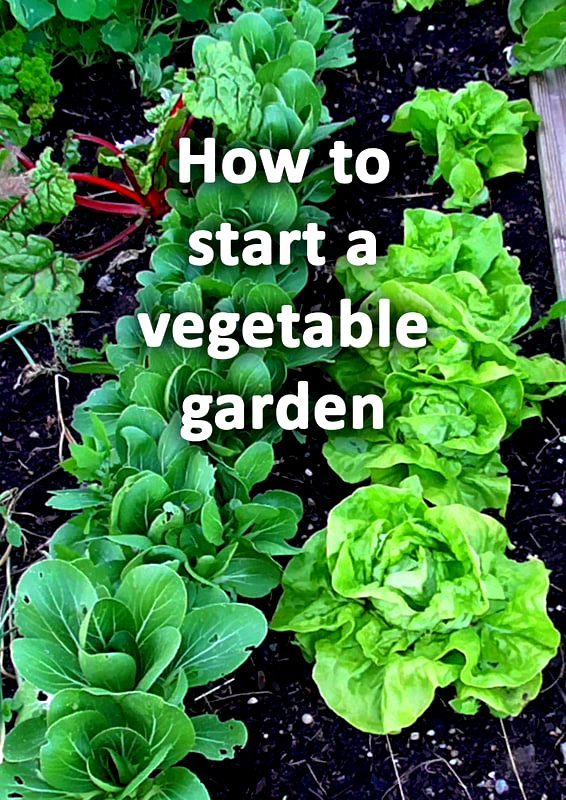


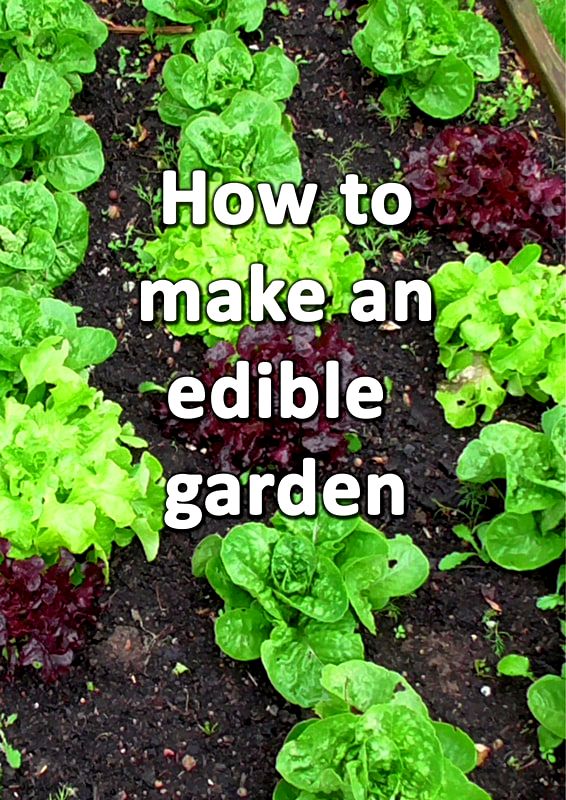


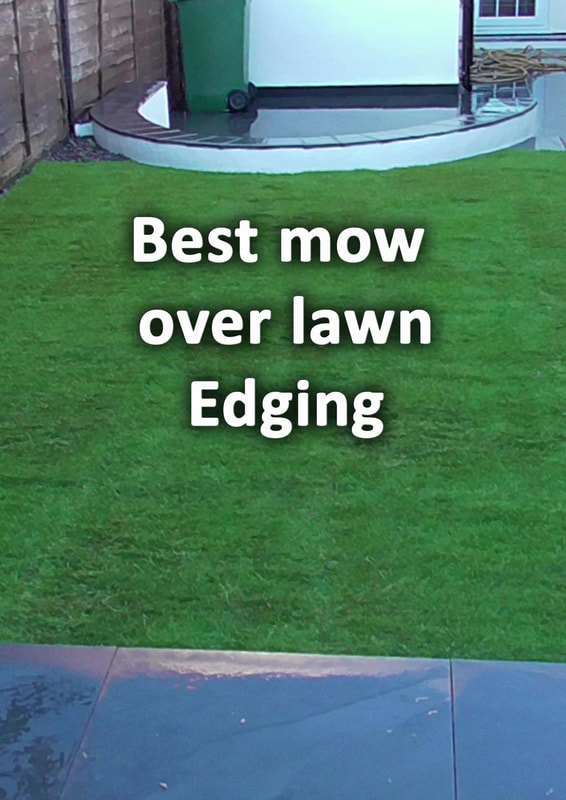
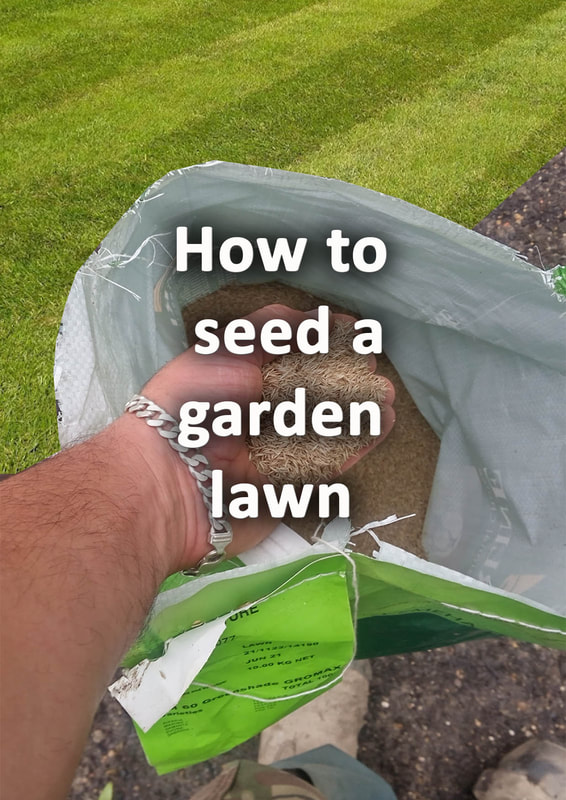

Serving the landscapes of Buckinghamshire, Amersham, Aylesbury & High Wycombe
Hyde Heath, Amersham, Buckinghamshire
|
|