Buckinghamshire Landscape Gardeners
  • Home
  • Landscaping
    • Decking
    • Driveways
    • Patios
    • Fencing
    • Turfing
    • Planting
  • Design
    • Landscaping Ideas
  • Resources
    • Garden products
  • News
  • Contact
    • landscaping apprenticeship jobs buckinghamshire
    • landscaping labourer jobs buckinghamshire

How to make garden edging with bricks

4/10/2022

3 Comments

 
How to make garden edging with bricks
This article contains affiliate links


Bricks have been one of the most popular building materials throughout history. These decorative, masonry blocks are easy to handle and look great in a variety of different projects.

Being made from natural materials means their colours do not fade over time. Natural impurities and rock particles within the fired clay gives them varying tones and colour shades.

​Their functional aesthetics are no less appreciated within the garden! 
​
brick mow strip edging
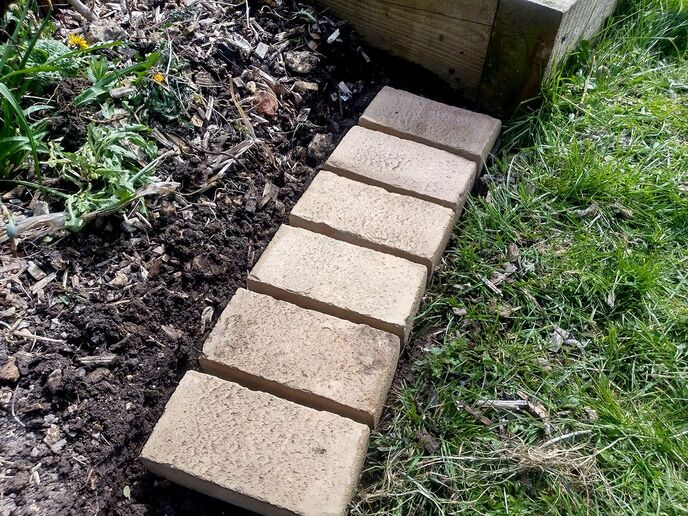
Here they can be utilised for retaining walls, paving or border edging. One of the most popular uses for bricks is to make garden edging!

This is especially so for lawn edging where they can form the perfect mowing edge strip. Such brick edgings level with the lawn create a seamless mowing experience where there is no need to either strim or trim the lawns edges.

​If a lawn is laid to a perfectly, level, brick perimeter, you will consequently have a perfectly level lawn!

Therefore in this article I will explain how to make garden edging with bricks including brick mow strip edging. 

 How to install garden edging bricks. 

Step 1

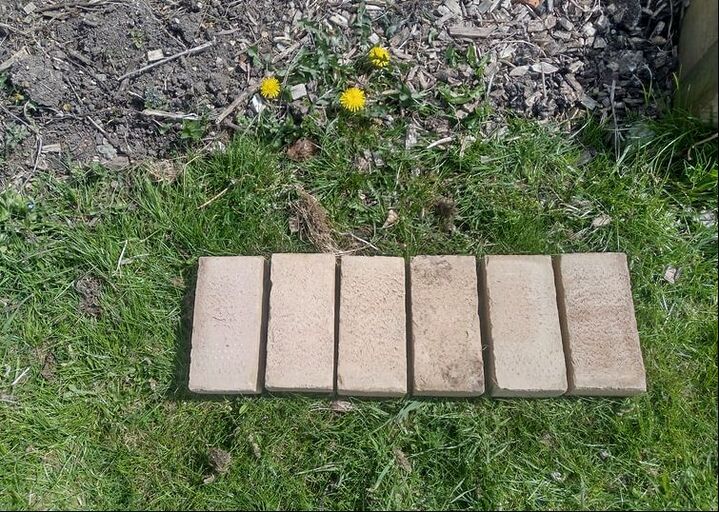
​Plan where you would like your brick edging to be laid and if you want to lay them long ways or sideways. If you prefer sideways (215mm) bear in mind you will need twice as many bricks which will cost more. A wider brick edging will also require more excavation, hardcore and mortar to lay. 
​
Brick edging

Step 2

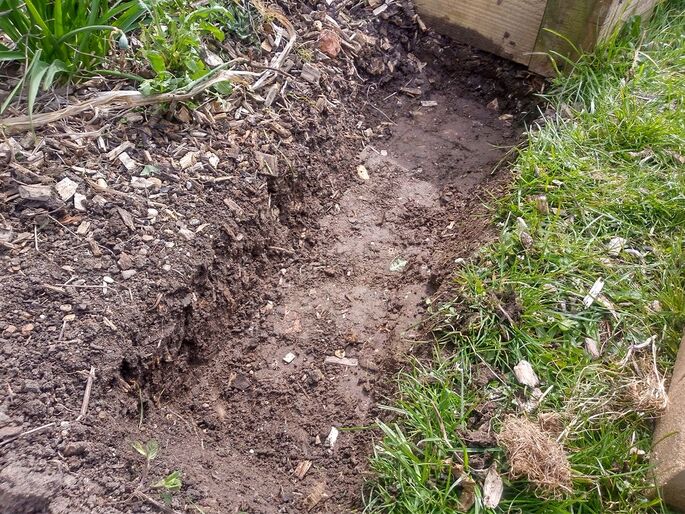
Excavate a channel 150mm deep for the whole length of your proposed brick edging. Dig your base trench about 20mm wider than you need to so you have some play when laying. Make sure your foundation has square sides with no loose soil at the base. 
​

brick edging excavation

Step 3

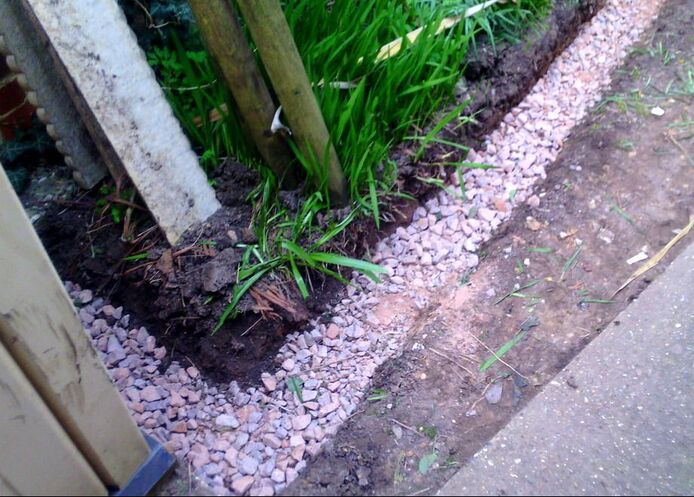
​Fill the bottom of your edging foundation with 60mm of compactable sub base. (mot type 1) Spread the sub-base to as even a level as possible and  compact with a sledge hammer or tamper. 
​
Garden edging base

Step 4

Lay a 1 metre long bed of the mortar over the sub base and ripple the surface to provide some workable play.

Try to make the laying bed a consistent thickness as possible. This will make it easy for the bricks to be tapped level. Gently tap the bricks down evenly one at a time levelling with a spirit level as you go.

If you wish to joint between the bricks, this can be done afterwards using patio, jointing mix. Keep going until all the bricks are laid how you want them and leave for 24 hours to set.
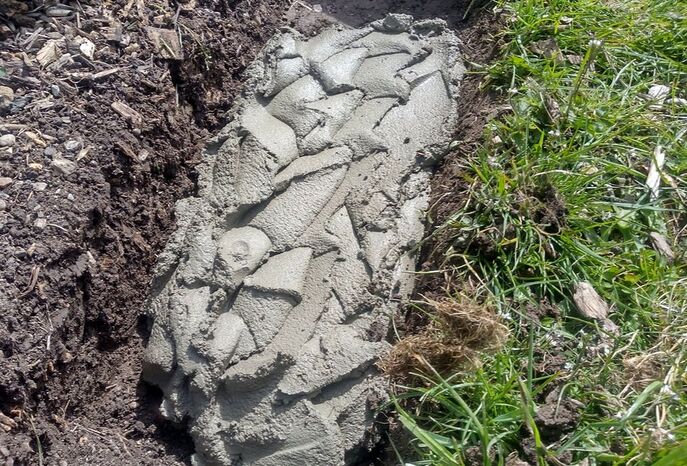
​ 
Garden edging mortar

Step 5

When the bricks are set wait for a dry period when the bricks and gaps are dry. Mix a jointing mix 1 part cement and 3 parts plastering sand.

Mix up the mix dry until it reaches a uniform colour and powdery consistency. Using water with some plasticiser ‘very gently’ add water to the mix. You do not want this mix to be too wet and stain the bricks!

The mix should be just damp enough to form a ball under pressure in your hand, that’s it! If the mix seeps moisture it will stain the bricks! 
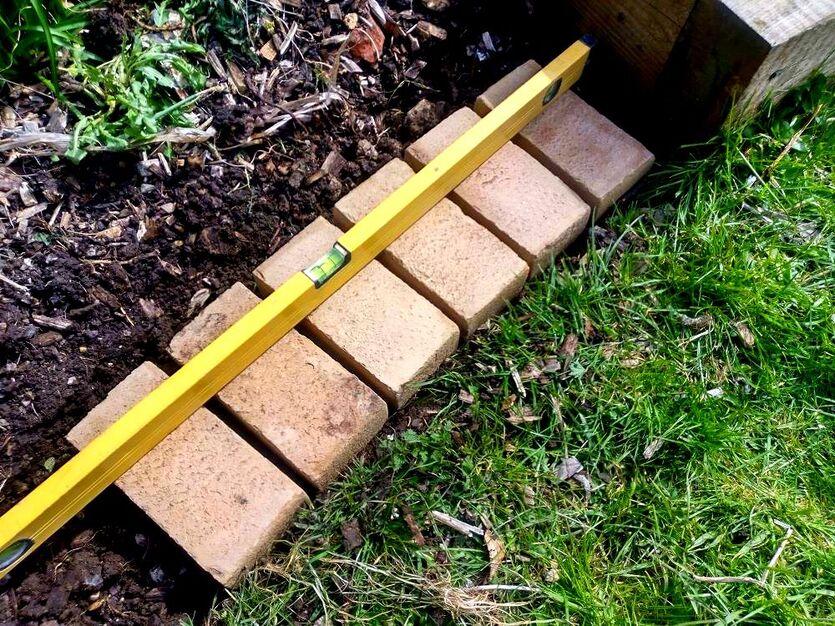
​
Picture

Step 6

​When the jointing has gone off in 24 hours you can fill in any gaps around the edging with topsoil. If the edgings are bordering a lawn the gaps can be dressed with grass seed. 
​

Brick lawn edging
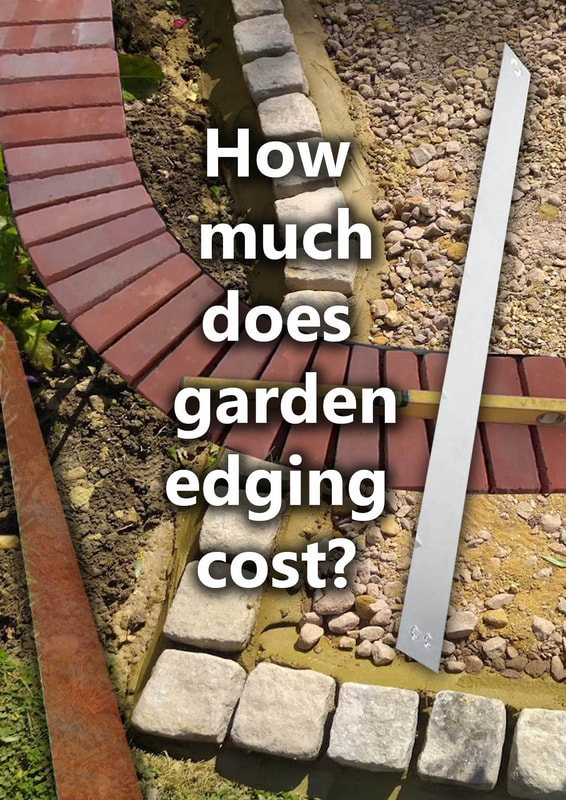
Thank you for reading our article on how to make garden edging with bricks. If you are wondering how much brick garden edging is to install read our pricing article here.

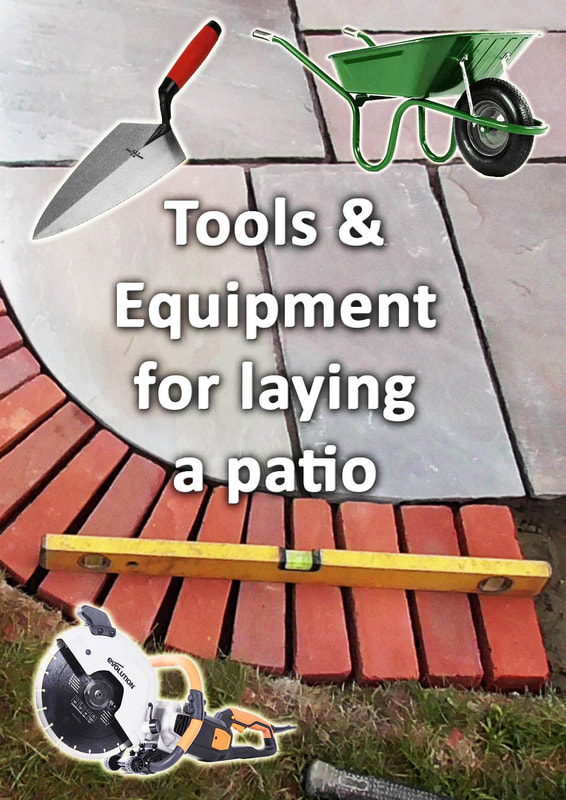
We discuss how much garden brick mow strip edging costs to both by and install.

If you are planning on laying the edging yourself, visit our recommended tools for paving article below. 
Tools for laying a patio
Picture
Picture
Picture
Picture
Picture


'As an Amazon associate I earn from qualifying  purchases' 
3 Comments
Afton Jackson link
8/2/2022 12:37:19 am

Being able to customize your details extremely well sounds like something I'd definitely enjoy. With how large our landscape is, making every inch of it as presentable as possible could help us feel satisfied with the end result. If I can find a landscape expert that can help us use materials like bricks and other masonry fixtures, I'm sure we'll all like how it will turn out.

Reply
John Carston link
9/14/2022 10:51:27 pm

I'm glad that you talked that a perfect level of a lawn is the accurate measurement of brick perimeter. The other day, my spouse informed me that she wanted to have a concrete landscape edging for our patio border, and she asked if I had any idea what would be the best option to do for safety purposes. I like this helpful article, I'll consult trusted concrete landscape edging services as they can provide explanation for their services.

Reply
Jessie Holloway link
9/30/2022 08:39:02 am

Thanks for the step-by-step guide on how to lay bricks for a garden. my sister wants to add a garden to her backyard and has been looking into paving the surrounding area with bricks and some designing. We've been looking into hiring some professionals to help her lay the bricks. Knowing how the process works will help her understand how long it will take.

Reply


Leave a Reply.

    Picture

    The
    ​Author 

    Paul Nicolaides 
    BA (Hons) Dip

    Paul Nicolaides has over 30 years of recreational gardening and 20 years of professional landscaping experience. He has worked for landscape contractors including design and build practices across London and the South East. In 2006 he qualified with a BA Hons degree and post graduate diploma in Landscape Architecture. In 2009 he founded Ecospaces an ecological landscaping practice which aims to improve social cohesion and reduce climate change through landscaping. In 2016 he founded Buckinghamshire Landscape Gardeners which designs and builds gardens across Buckinghamshire and the South East. This blog aims to provide easy problem solving information to its audience and encourage others to take up the joy of landscaping and gardening. 
Proudly powered by Weebly
Photos used under Creative Commons from graibeard, UK Prime Minister, Maggie Hoffman, Aaron Volkening, Darlene Roelofsen, David Paul Ohmer, denis.zabin, Permaculture Association, Bill Selak, The fixed factor, The Garden Smallholder, Tauralbus, nan palmero, Lee Cannon, Monkeystyle3000, Darlene Roelofsen, nicolas.boullosa, Bryn Pinzgauer, cattan2011, Center for Neighborhood Technology, Matthew Paul Argall, tdlucas5000, Acabashi, Ronald (Ron) Douglas Frazier, Gilles Gonthier, Martin Hesketh, Owen P, alljengi, steve p2008, romana klee, Bennilover, *_*, blumenbiene, Julianna, Daryll90ca, Wendell Smith, Acabashi, Decorative Concrete Kingdom, Permaculture Association, MizGingerSnaps, Tjflex2, wuestenigel, travel oriented, Aaron Volkening, shixart1985, SupportPDX, pete. #hwcp, MostlyDross, Local Food Initiative, Ronald Douglas Frazier, Torquay Palms, Oregon State University, perfectgrassltd, aarongunnar, Acabashi, Actual Brian Crawford, jeans_Photos, alh1, Darlene Roelofsen, Rromani from Romania, docoverachiever, tawalker, markfountain52, Maria Eklind, treegrow, deckerme, Kevan, richardghawley, Ivan Radic, Mark Wordy, garryknight, Matt Lavin, greger.ravik, Capt' Gorgeous, LWT Gunnersbury Triangle, Wonderlane, Rudi1976, stonescape, Dinesh Valke, troutcolor, Acabashi, Juhele_CZ, Darlene Roelofsen, pikkuanna, tdlucas5000, Jocey K, Acabashi, focusonmore.com, BethinAZ, zoetnet, kurt.stocker, Monkeystyle3000, ell brown, Bryn Pinzgauer, Mark Wordy, infomatique, Linda N., Armcon Precast, Tinkers Moon, AnnSophieQ, mikecogh, Bob Klannukarn, Aiko, Thomas & Juliette+Isaac, ChrisHamby, Alessandro_Corsoni, Stiller Beobachter, GLVF, denisbin, MizGingerSnaps, garryknight, goforchris, Dick Thompson Sandian, Paul Comstock, Kelowna09, Decorative Concrete Kingdom, Kanesue, BlossomPDX, Wonderlane, alh1, PAUL (Van de Velde) -Fotografie, Paul and Jill, Gilles Gonthier, katunchik, thinkactlove, gidlark, jugreen_de, Henry Hemming, Ivan Radic, tompagenet, corsi photo, www.to-tuscany.com, Mark Wordy, UC Davis Arboretum & Public Garden, Aaron Volkening, Mark AC Photos, Peter O'Connor aka anemoneprojectors, arripay, denisbin, alans1948, wallygrom, Frank.Vassen, alh1, Scottb211, LenkinDesign, wallygrom, Mike Bonitz, Aaron Volkening, juliamaudlin, dwblakey, Jocelyn777 Love Europe, HerryLawford, mikecogh, jeans_Photos, Corey Leopold, Jeremy Levine Design, Kaibab National Forest Photography, Ciarán Mooney, onnola, 35mmMan, longlabcomms, nc.hort, Jamiecat *, pom'., Puddin Tain, Acabashi, tompagenet, Loz Flowers, Alan Stanton, Darlene Roelofsen, denisbin, Darlene Roelofsen, zakzak7, Center for Neighborhood Technology, wht_wolf9653, LenkinDesign, HerryLawford, FoodCraftLab, Miranda J Wood, Key West Wedding Photography, Montgomery County Planning Commission, bienen-nachrichten.de, zaphad1, SupportPDX, Ronald (Ron) Douglas Frazier, itmpa, Judy Gallagher, SteveR-, kylehase, simonmgc, treegrow, garryknight, Peter O'Connor aka anemoneprojectors, el cajon yacht club, cattan2011, Ed Bierman, mikecogh, Mike Prince, photofarmer, M. Martin Vicente, Darlene Roelofsen, La Citta Vita, Mary Gillham Archive Project, Puddin Tain, sustainablejill, mikecogh, ScotGov Rural, Macleay Grass Man, Andesine, denisbin, *_*, samsaundersleeds, onnola, James St. John, Pixelteufel, www.twin-loc.fr, The359, F. D. Richards, berniedup, Monkeystyle3000, Mark AC Photos, Mark Wordy, Swallowtail Garden Seeds